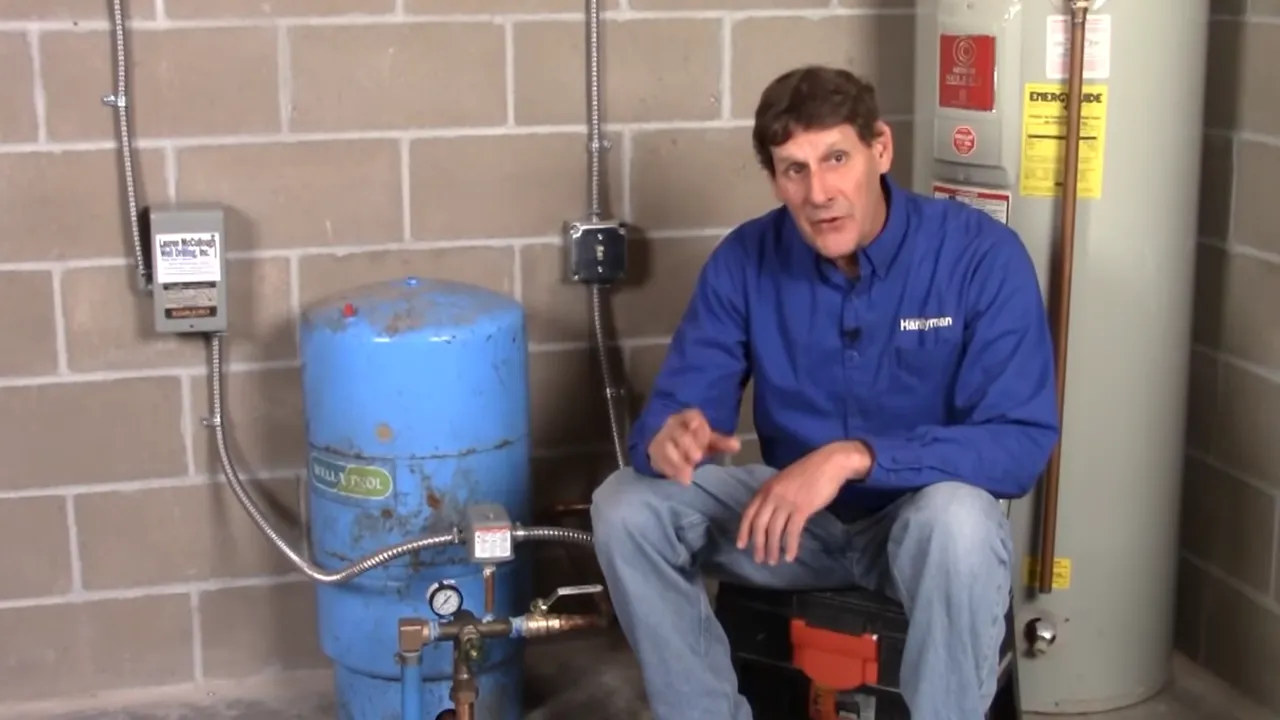
To install a well pressure tank, turn off the power supply, drain the old tank, remove it, connect the new tank to the pump, and test the system. Installing a well pressure tank involves a few simple steps to ensure smooth functioning of your water supply system.
This guide will walk you through the process to install a well pressure tank in your home. By following these steps, you will have a well pressure tank up and running in no time, ensuring a reliable water supply for your household needs.
So, let’s dive in and get started with the installation process.
Importance Of A Well Pressure Tank
A well pressure tank is an essential component of a well water system. It plays a crucial role in ensuring consistent water pressure throughout your home by maintaining a steady supply of water. Not only does it ensure that you have a reliable water source for your daily activities, but it also serves to protect the well pump from frequent cycling, which can lead to premature wear and tear.
Ensures consistent water pressure
One of the primary benefits of a well pressure tank is that it helps maintain consistent water pressure in your home. When water is pumped from the well into the pressure tank, it is stored under pressure. This stored water can then be readily distributed to various faucets and fixtures throughout your home, ensuring a steady and consistent water flow.
With a well pressure tank in place, you won’t have to worry about sudden fluctuations in water pressure while taking a shower or using other appliances that rely on water. Instead, you can enjoy a consistent and reliable water supply, making daily tasks more convenient and efficient.
Protects the well pump from frequent cycling
Another crucial role of a well pressure tank is to protect the well pump from frequent cycling. Frequent on/off cycling of the well pump can lead to excessive wear and tear, reducing its lifespan and increasing the likelihood of breakdowns.
When you have a well pressure tank, the water is stored and pressurized in the tank before being distributed to your home. This means that the well pump doesn’t have to turn on and off as frequently to meet the demand for water. As a result, the well pump experiences less strain, reducing the risk of premature failure and the need for costly repairs or replacements.
By providing a buffer between the well pump and the water supply, the well pressure tank helps to regulate the water pressure and reduce the number of cycles the pump has to go through. This not only extends the lifespan of the well pump but also helps save energy and reduce overall maintenance costs.
In conclusion, a well pressure tank is an essential component of a well water system. It ensures consistent water pressure throughout your home and protects the well pump from frequent cycling, prolonging its lifespan. By investing in a high-quality well pressure tank and ensuring proper installation, you can enjoy a reliable water supply and avoid unnecessary repairs or replacements in the future.

Signs You Need A New Well Pressure Tank
Having a well pressure tank is essential for maintaining a steady and reliable water supply in your home. Over time, however, these tanks can deteriorate and fail, leading to a range of issues that can disrupt your water system. Recognizing the signs of a failing well pressure tank is crucial so you can address the problem promptly. In this article, we will discuss the most common signs indicating that you may need a new well pressure tank.
1. Decreased Water Pressure
One of the telltale signs that your well pressure tank might need replacing is a noticeable decrease in water pressure. If you find that your faucets and showers are not producing the same forceful flow as before, it could be due to a failing tank. This decrease in pressure may happen gradually over time or become sudden, impacting your daily activities such as showering, cooking, and washing dishes.
When the well pressure tank is functioning correctly, it stores water under pressure, ensuring a consistent and steady flow throughout your home’s plumbing system. However, as the tank ages or becomes clogged with debris, it may no longer maintain the necessary pressure, leading to a decrease in water pressure.
If you suspect that your well pressure tank is responsible for the reduced water pressure, it is important to address the issue promptly. Ignoring it can lead to more severe problems, including damage to appliances and an overall decline in the system’s efficiency.
2. Frequent Pump Cycling
Another sign that your well pressure tank may need replacing is frequent pump cycling. Pump cycling refers to the pump turning on and off more frequently than usual. Normally, the well pump only kicks in when the pressure in the tank drops below a certain level and shuts off once the tank is filled up. However, if the tank is faulty, it may cause the pump to cycle on and off frequently, even when there is no water demand.
This constant cycling can put excessive strain on your well pump, leading to premature wear and tear and potential pump failure. Moreover, frequent cycling can result in higher energy consumption and increased utility bills, as the pump uses energy every time it starts up.
Identifying this issue requires monitoring the pump’s behavior and taking note if you hear it turning on and off more frequently than usual. If you suspect frequent pump cycling, it is wise to have your well pressure tank inspected by a professional to determine if replacement is necessary.
Determining The Required Tank Size
When it comes to installing a well pressure tank, it is crucial to determine the appropriate tank size to ensure an efficient water supply for your household. Evaluating your household water demand and calculating the drawdown capacity are key steps in determining the required tank size.
Evaluating Household Water Demand
Evaluating your household water demand involves assessing the amount of water you typically use on a daily basis. By understanding your usage patterns, you can better determine the appropriate size of the pressure tank for your needs.
Consider the number of people living in your home and their typical water usage habits. Do you have a large family with multiple bathrooms and frequent water activities, or are you a single individual with modest water requirements? Evaluating your household’s water demand will help you make an informed decision regarding the tank size.
Calculating Drawdown Capacity
Calculating the drawdown capacity of a pressure tank is crucial in determining its size. Drawdown refers to the amount of water a pressure tank can deliver before the pump kicks in to refill it. This capacity is an important factor in maintaining a consistent and uninterrupted water supply.
To calculate the drawdown capacity, you need to consider your well’s pump flow rate and the desired length of time between pump cycles. The formula for calculating the drawdown capacity is:
Drawdown Capacity = Pump Flow Rate (in gallons per minute) x Time Interval (in minutes)
For example, if your well pump has a flow rate of 10 gallons per minute and you want it to run for 2 minutes between cycles, the drawdown capacity would be 10 x 2 = 20 gallons.
Calculating the drawdown capacity ensures that the pressure tank can meet your household’s water demands without placing excessive strain on the pump, effectively managing water supply fluctuations.
It is important to remember that these calculations are a general guideline and it is recommended to consult with a professional to determine the most suitable tank size for your specific needs. A professional will take into account other factors such as peak water usage times and any additional water-intensive activities in your household.
By evaluating your household water demand and calculating the drawdown capacity, you will be well-equipped to determine the required tank size for your well pressure system. This careful consideration will help optimize your water supply and ensure a smooth installation process.
Understanding Different Types Of Well Pressure Tanks
Before you install a well pressure tank, it’s crucial to understand the different types that are available. Each type has its own unique features and benefits, so it’s important to choose the right one for your specific needs. In this section, we’ll explore three common types of well pressure tanks: diaphragm tanks, bladder tanks, and galvanized tanks.
Diaphragm Tanks
Diaphragm tanks are one of the most popular types of well pressure tanks due to their durability and efficiency. They are designed with a rubber diaphragm that separates the water and air inside the tank. As water enters the tank, it compresses the air on the other side of the diaphragm, creating pressure. This pressure forces the water out of the tank when a faucet is opened, providing a steady and consistent water flow.
There are several advantages to using diaphragm tanks in your well system. First, they have a larger drawdown capacity, which means they can hold a greater amount of water before the pressure drops. This allows for longer intervals between pump cycles, reducing energy consumption and extending the lifespan of your pump.
Another benefit of diaphragm tanks is their ability to prevent waterlogging. Waterlogging occurs when the tank fills with water instead of air, reducing its effectiveness. The rubber diaphragm in diaphragm tanks prevents water from entering the air chamber, ensuring optimal performance and efficiency.
Bladder Tanks
Bladder tanks, also known as captive air tanks, are similar to diaphragm tanks in that they use a rubber bladder to separate the water and air. However, unlike diaphragm tanks, bladder tanks have a removable bladder that can be replaced if necessary.
Bladder tanks offer several advantages over other types of well pressure tanks. One key advantage is their flexibility in installation options. Bladder tanks can be installed horizontally or vertically, making them suitable for various well system setups. Additionally, their removable bladder makes maintenance and repair easier, as you can simply replace the bladder instead of the entire tank.
Furthermore, bladder tanks are known for their high-quality construction, ensuring long-lasting performance. They are often constructed with materials that resist corrosion and are lightweight, making them easier to handle during installation.
Galvanized Tanks
Galvanized tanks are a traditional type of well pressure tank that has been used for decades. These tanks are typically made of steel and coated with a layer of zinc to protect against corrosion.
One of the main advantages of galvanized tanks is their affordability. They tend to be less expensive compared to diaphragm and bladder tanks, making them a cost-effective option for budget-conscious individuals.
Galvanized tanks are also known for their durability and longevity. The zinc coating provides protection against rust and corrosion, ensuring that the tank lasts for many years.
However, it’s important to note that galvanized tanks are not as efficient as diaphragm or bladder tanks. They have a smaller drawdown capacity and are more susceptible to waterlogging. Despite these limitations, galvanized tanks can still be a suitable option for smaller well systems with lower water demands.
Now that you have a better understanding of the different types of well pressure tanks available, you can make an informed decision about which one is best suited for your needs. Consider factors such as drawdown capacity, installation options, and budget when making your choice. Remember, selecting the right well pressure tank is essential for maintaining a reliable and efficient well system.
Gathering The Required Tools And Materials
Before you can begin installing a well pressure tank, you need to make sure you have all the necessary tools and materials on hand. This will not only ensure a smooth and efficient installation process but also save you from any unnecessary trips to the hardware store in the middle of the project. Here are the essential tools and materials you’ll need:
Wrenches
One of the most crucial tools you’ll need for installing a well pressure tank is a set of wrenches. These wrenches will help you tighten and loosen various connections throughout the installation process. Make sure to have both adjustable and pipe wrenches on hand to cover different types and sizes of fittings and connections.
Pipe Fittings
To properly connect the well pressure tank to your plumbing system, you’ll need an assortment of pipe fittings. These fittings come in various sizes and types, such as threaded and compression fittings. It’s important to review the specifications of your well pressure tank and plumbing system to determine the exact fittings you’ll need. Ensure you have an ample supply of fittings to accommodate any unexpected adjustments or replacements.
Teflon Tape
Teflon tape is an essential material for achieving leak-free connections during the installation of a well pressure tank. This thin, white tape is wrapped around threaded connections to create a tight seal that prevents water from seeping out. Make sure to apply Teflon tape to the male threads of each connection before screwing them together. Having multiple rolls of Teflon tape ensures you won’t run out during the installation process.
By gathering all the necessary tools and materials before you begin installing the well pressure tank, you can save yourself time, effort, and frustration. Now that you know the essential items needed, you’re ready to move on to the next steps of the installation process.
Preparing The Installation Area
Before installing a well pressure tank, it is crucial to ensure that the installation area is properly prepared. This includes creating a stable foundation and clearing the space around the tank.
Ensuring a Stable Foundation
A stable foundation is essential for the proper installation and functioning of a well pressure tank. This can be achieved by following these steps:
- Identify a level area: Start by identifying a level area where the tank will be installed. This will ensure that the tank remains stable and does not tilt or wobble.
- Clear the area: Clear the area of any debris, rocks, or other objects that could interfere with the tank’s stability or hinder proper installation.
- Create a non-slip surface: To ensure the tank stays in place, it is important to create a non-slip surface. This can be done by using a compacted layer of gravel or by installing a concrete pad. Both options provide a sturdy and level surface for the tank.
Clearing the Space Around the Tank
Clearing the space around the tank not only ensures convenient access for installation but also promotes safety and ease of maintenance. Below are steps to follow:
- Identify the required clearance: Review the manufacturer’s recommendations for the required clearance around the tank. This typically includes a certain distance from walls, pipes, and other obstructions.
- Remove any obstacles: Clear away any obstacles within the required clearance. This includes moving furniture, boxes, or any other objects that may impede access to the tank.
- Provide ample working space: Ensure there is enough space around the tank for proper installation and future maintenance. This will make it easier to connect pipes, perform inspections, and replace components when necessary.
By following these guidelines for preparing the installation area, you can ensure a stable foundation and easy access when installing a well pressure tank. The next step in the installation process is connecting the tank to the water supply, which will be covered in the next section.
Connecting The Well Pressure Tank To The Plumbing System
Connecting the Well Pressure Tank to the Plumbing System
Once you’ve installed the well pressure tank in your home, the next step is to connect it to the plumbing system. This is a crucial step as it ensures that water from the well is properly distributed throughout your home’s plumbing network. In this section, we will walk you through the installation process for two key components: the shutoff valve and the pressure relief valve.
<h3>Shutoff valve installation</h3>
Before connecting the well pressure tank to the plumbing system, it’s important to install a shutoff valve. This valve allows you to control the flow of water to and from the tank, making it easy to isolate the tank for maintenance or repairs. Here’s how you can install a shutoff valve:
- Choose the location: Find a suitable location near the tank where you can install the shutoff valve. It should be easily accessible and within reach.
- Prepare the pipes: Cut the pipe that connects to the pressure tank, ensuring a clean and even cut. Remove any burrs or rough edges.
- Attach the valve: Connect the shutoff valve to the pipe, ensuring a tight and secure fit. Use a wrench to tighten the connections, ensuring there are no leaks.
- Test the valve: Turn off the valve and check for any leaks. Turn it on and verify that water flows freely without any issues.
<h3>Pressure relief valve installation</h3>
In addition to the shutoff valve, it’s essential to install a pressure relief valve to ensure the safety of your well pressure tank and plumbing system. The pressure relief valve releases excess pressure from the tank, preventing any potential damage. Here’s how you can install a pressure relief valve:
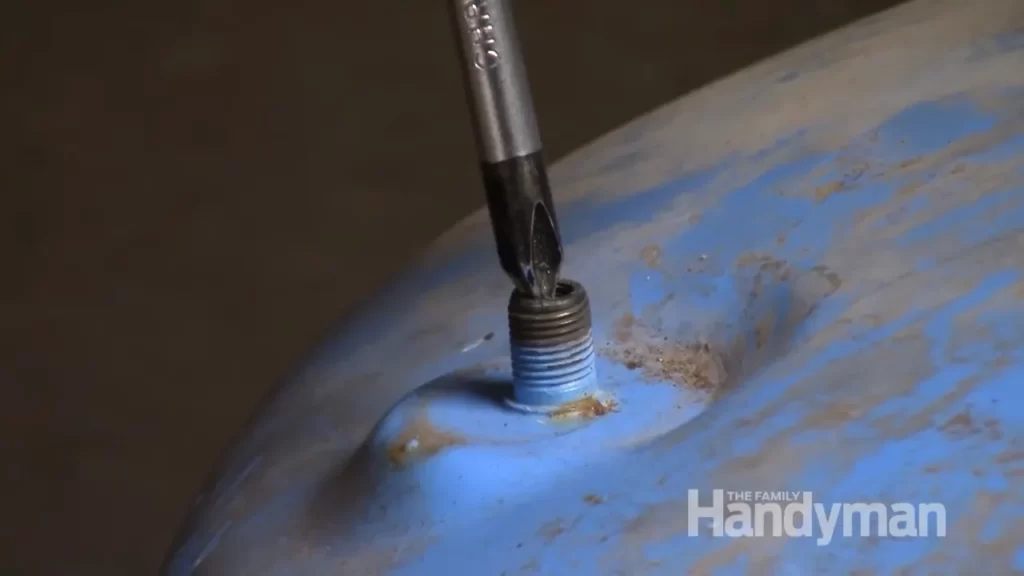
- Choose the location: Locate a suitable spot on the tank where you can install the pressure relief valve. Consult the tank’s manufacturer guidelines for recommended installation spots.
- Prepare the tank: Clean the area where you’ll be attaching the pressure relief valve to ensure a secure connection.
- Install the valve: Attach the pressure relief valve to the tank, ensuring a tight fit. Use a wrench to securely tighten the connections.
- Verify functionality: Once installed, test the pressure relief valve to ensure it works correctly. Apply pressure to the tank and observe if the valve releases excess pressure as intended.
Installing A Pressure Switch
Installing a pressure switch is an important step in setting up a well pressure tank system. The pressure switch is responsible for monitoring the water pressure in the tank and controlling the operation of the pump. In this section, we will guide you through the process of mounting and wiring the pressure switch to ensure optimal performance. Let’s get started!
Mounting the Pressure Switch
Mounting the pressure switch correctly is crucial for its proper functioning. Follow these steps to ensure a secure installation:
- Locate a suitable spot on the pressure tank where you can mount the pressure switch. Ensure that the area is easily accessible for future maintenance.
- Using screws or mounting brackets (depending on the design of your pressure switch), attach the switch firmly to the tank.
- Ensure that the switch is positioned in a way that allows easy access to its adjustment screws and electrical terminals.
- Double-check the tightness of the mounting screws to avoid any movement or vibration that could affect the switch’s accuracy.
By following these steps, you can ensure the pressure switch is securely mounted and ready for the next step of the installation.
Wiring the Pressure Switch
Wiring the pressure switch requires attention to detail to ensure a proper electrical connection. Here’s how you can wire the pressure switch correctly:
- Before starting, make sure to turn off the power supply to the pump to avoid any potential electric shock.
- Identify the terminals on the pressure switch designated for power supply connections and pump connections.
- Strip the ends of the wires that will be connected to the pressure switch.
- Connect the wires from the power supply to their respective terminals on the pressure switch, ensuring a secure and tight connection.
- Connect the wires coming from the pump to their designated terminals on the pressure switch, again ensuring a proper connection.
- After making all the necessary connections, carefully tuck the wires away from any moving parts and secure them using cable ties or clips.
- Turn on the power supply to check if the pressure switch is functioning correctly.
Congratulations! You have successfully mounted and wired your pressure switch. Your well pressure tank system is now ready for use.
Remember, the accurate installation of the pressure switch is essential for maintaining optimal water pressure and protecting your well pump. By following the steps outlined above, you can ensure a reliable and efficient well pressure tank system for years to come.
Connecting The Well Pump To The Pressure Tank
Once you have successfully installed the tee fitting, the next step in installing your well pressure tank is connecting the well pump to the pressure tank. This crucial step ensures that water from the well flows into the tank and allows for efficient water pressure management within your plumbing system. In this section, we will guide you through the process, step by step.
Installing the tee fitting
Before connecting the well pump to the pressure tank, you need to install a tee fitting. The tee fitting serves as a connector between the well pump, pressure tank, and pressure switch. Follow these steps to install the tee fitting:
- Turn off the power to the well pump at the breaker box to ensure safety.
- Locate the discharge pipe from the well pump, which is typically made of PVC or metal.
- If necessary, use a pipe cutter to trim the discharge pipe, ensuring a clean and even cut.
- Apply PVC primer to the end of the discharge pipe and the inside of the tee fitting.
- Apply PVC cement to the primed areas and quickly join the tee fitting to the discharge pipe, making sure it is securely connected.
- Allow the cement to dry according to the manufacturer’s instructions before proceeding.
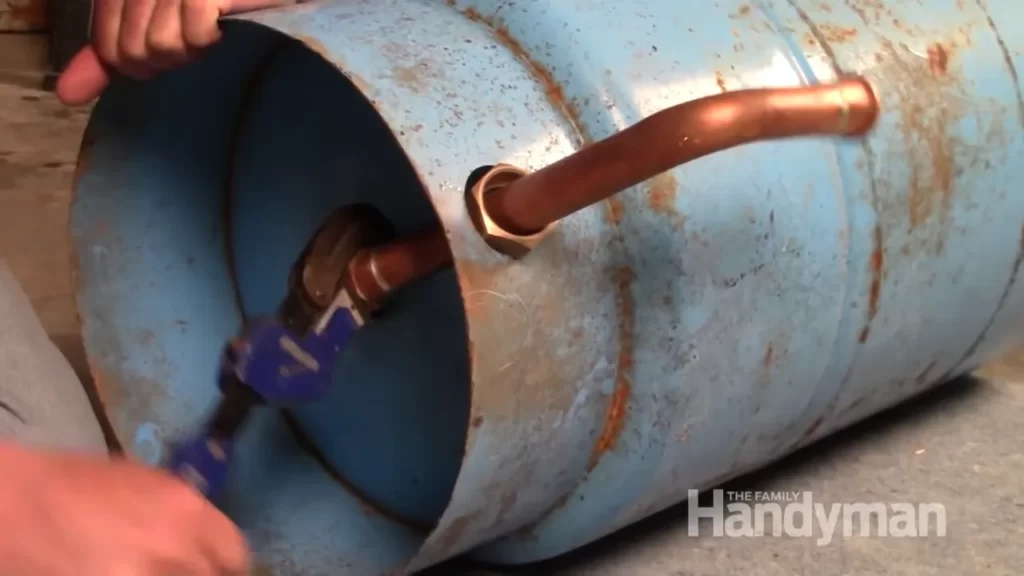
Connecting the pipes
With the tee fitting in place, it’s time to connect the pipes between the well pump and pressure tank. Follow these steps for a proper connection:
- Measure the distance between the tee fitting and the pressure tank.
- Cut a length of pipe to reach the pressure tank, using a pipe cutter if necessary.
- Apply PVC primer to the ends of the cut pipe and the corresponding ends of the tee fitting.
- Apply PVC cement to the primed areas and quickly join the pipe to the tee fitting, ensuring a secure connection.
- If needed, use pipe hangers to support the pipe along its path to the pressure tank.
- Repeat the process for any additional pipes needed to connect the well pump to the pressure tank.
By following these steps, you can connect your well pump to the pressure tank effectively and ensure proper water flow and pressure in your plumbing system.
Pressure Tank System Testing
Pressure Tank System Testing
Once you have installed your well pressure tank, it is crucial to perform thorough testing to ensure optimal functionality. This will help you identify any potential issues early and address them promptly. Pressure tank system testing involves checking for leaks and adjusting pressure settings. Let’s delve into each of these tasks to ensure your pressure tank system is working efficiently.
Checking for Leaks
Before testing the pressure settings, it’s essential to inspect your well pressure tank system for any leaks. Leaks can lead to reduced system efficiency and increased energy consumption. Follow these steps to check for leaks:
- Visually inspect all the connection points, including fittings and pipes, and ensure they are tightly sealed.
- Check the pressure switch and gauge fittings for any signs of leaks, such as water droplets or dampness.
- If you notice any leaks, tighten the connection points or replace faulty parts accordingly.
It is important to emphasize that a leak-free pressure tank system ensures optimal performance and prevents potential damage to your equipment, so make sure to thoroughly check for any leaks.
Adjusting Pressure Settings
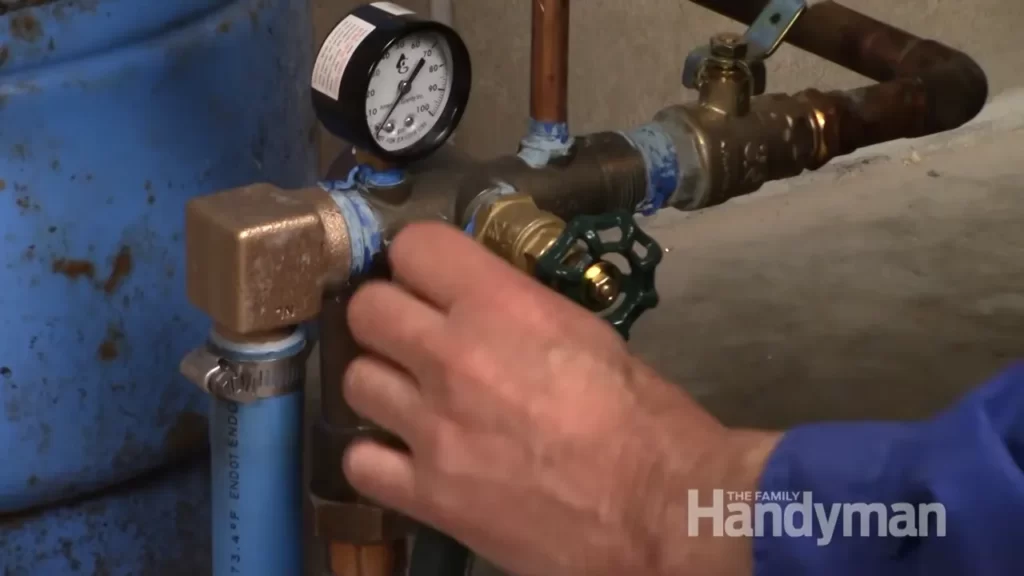
Once you have confirmed that your pressure tank system is leak-free, the next step is to properly adjust the pressure settings. This will ensure that your system operates at the ideal pressure levels for your specific needs. Follow these steps to adjust the pressure settings:
- Locate the pressure switch, typically mounted on top of the pressure tank or nearby.
- Using a screwdriver, adjust the pressure switch settings by turning the adjustment screws. Refer to the manufacturer’s instructions for specific guidance on how much and which direction to turn the screws.
- Monitor the pressure gauge as you make adjustments. The desired pressure range will depend on your water system requirements and the recommendations provided by the manufacturer.
- Ensure the pressure settings are within the appropriate range to prevent over-pressurization or under-pressurization.
By adjusting the pressure settings correctly, you can optimize the performance of your well pressure tank system, allowing it to maintain consistent water pressure for all your household needs.
Finalizing The Installation
After successfully completing the initial steps of installing a well pressure tank, it is time to finalize the installation. This crucial step ensures that your well pressure tank is functioning properly and that all connections are secure.
Checking all connections
Before moving forward, it is essential to double-check all connections to avoid any potential leaks or malfunctions. Start by inspecting the pipes that connect the pressure tank to the pump and pressure switch. Make sure they are tightly fastened and sealed using appropriate fittings.
Next, pay attention to the electrical connections. Ensure that the wires are properly attached to the pressure switch and the power source. It’s crucial to follow the electrical code and safety guidelines to avoid any mishaps.
Additionally, carefully examine the pressure gauge and pressure relief valve. Verify that the gauge is tightly screwed onto the tank and that the relief valve is securely in place.
Securing the pressure tank
Once you have checked all the connections, it’s time to secure the pressure tank in its permanent position.
- Place the tank on a solid and level surface, such as a concrete pad.
- Ensure that there is ample room around the tank for maintenance and inspection purposes.
- Attach the mounting brackets to the tank and secure them firmly to the surface using appropriate screws or bolts.
- Verify that the tank is stable and does not wobble or move when pressure is applied.
Properly securing the pressure tank helps prevent any potential accidents and ensures its longevity.
Finally, fill the tank with water. Open the valve on the water supply line to allow water to flow into the tank. As the tank fills, check for any leaks or drips and address them immediately. Once the tank is filled, close the valve and allow the pressure to build up.
By following these steps, you can finalize the installation of your well pressure tank, ensuring its proper functioning and longevity.
Monitoring Pressure And Water Levels
Regular pressure gauge readings
Regularly monitoring the pressure gauge on your well pressure tank is essential for ensuring optimal performance and identifying any potential issues. By regularly checking the pressure gauge, you can ensure that the tank is maintaining the appropriate pressure levels.
It is recommended to check the pressure gauge at least once a month, or more frequently if you notice any changes in water flow or pressure. To obtain an accurate reading, make sure all water-consuming appliances are turned off.
To check the pressure gauge:
- Locate the pressure gauge, which is typically attached to the top of the well pressure tank.
- Read the pressure indicated on the gauge. The ideal pressure range is usually between 40 and 60 psi for most residential systems.
- If the pressure is below or above the recommended range, you may need to adjust the pressure settings or contact a professional for further assistance.
Checking for waterlogged tanks
Waterlogged tanks can lead to reduced water pressure and overall system inefficiency. To ensure that your well pressure tank is not waterlogged, it is important to perform periodic checks.
To check for a waterlogged tank:
- Turn off power to the pump and drain any water from the tank.
- Using a tire pressure gauge or air compressor, check the air pressure in the tank while ensuring that the tank is empty of water. The air pressure should be set according to the manufacturer’s guidelines, typically around 2 psi below the pressure switch’s cut-in pressure.
- If the air pressure is significantly lower than the recommended level, it may indicate that the tank is waterlogged. In such cases, it is essential to contact a professional to address the issue.
Regular Maintenance Tasks For Longevity
Regular maintenance is essential to ensure the longevity of your well pressure tank. By performing these simple tasks, you can prevent issues and extend the lifespan of your tank. Below, we will discuss two important maintenance tasks: flushing the tank and inspecting/cleaning the tank.
Flushing the Tank
Flushing the tank is an important maintenance task that should be performed at least once a year. Over time, sediment and buildup can accumulate in the tank, affecting its performance and reducing its lifespan. Flushing the tank helps to remove this debris and restore the tank’s efficiency.
To flush the tank, follow these steps:
- First, turn off the power supply to the well pump.
- Next, close the valve that supplies water to the tank.
- Open the drain valve located at the bottom of the tank. Make sure to attach a hose to the valve to direct the water away.
- Allow the water to drain completely from the tank.
- Once the tank is empty, close the drain valve and remove the hose.
- Open the valve that supplies water to the tank and let it fill up.
- Finally, turn the power back on to the well pump.
By flushing the tank regularly, you can prevent sediment buildup and ensure optimal performance.
Inspecting and Cleaning the Tank
In addition to flushing the tank, inspecting and cleaning the tank is another important maintenance task. By doing this regularly, you can identify any potential issues and keep the tank in good condition.
Here are some steps to follow when inspecting and cleaning the tank:
- Start by visually inspecting the tank for any signs of damage or leaks. Check the fittings, connections, and the tank’s exterior for any corrosion or cracks.
- If you notice any issues, contact a professional to assess and repair the tank.
- Next, clean the tank’s exterior using a mild detergent and water. Avoid using abrasive cleaners or harsh chemicals, as they can damage the tank.
- Inspect the pressure switch and pressure gauge, ensuring they are in good working condition.
- Check the air pressure in the tank using a tire pressure gauge. It should be set to the manufacturer’s recommended PSI (pounds per square inch).
- If the tank requires additional air, use an air compressor to add air until the correct pressure is reached.
By regularly inspecting and cleaning the tank, you can identify any potential issues before they escalate and keep your well pressure tank in optimal condition.
Troubleshooting Common Well Pressure Tank Issues
One common problem with well pressure tanks is the loss of pressure. This can be caused by several factors, such as a faulty pressure switch, a leaking pipe, or a failing pump. To troubleshoot this issue, follow these steps:
- Check the pressure switch: Start by checking the pressure switch to ensure it is properly adjusted. If the pressure switch is set too low, it may cause the tank to lose pressure. Use a pressure gauge to measure the tank pressure and compare it to the switch settings.
- Inspect the tank bladder: A faulty bladder can also cause a loss of pressure. If the bladder is damaged or has a hole, it won’t be able to hold air or water properly, resulting in pressure loss. Inspect the bladder for any visible signs of damage or leaks.
- Check for leaks: Leaks in the pipes or fittings can also lead to a loss of pressure. Inspect the system for any signs of leaks, such as water puddles or dripping pipes. Repair any leaks found to restore proper pressure.
- Inspect the pump: If none of the above steps resolve the issue, it’s possible that the pump itself is failing. A worn-out or malfunctioning pump may not be able to generate enough pressure, resulting in a loss of pressure in the tank. Consider contacting a professional to inspect and repair the pump.
Another common issue with well pressure tanks is waterlogging, which occurs when the tank fills with water instead of air. This can cause the pump to continuously cycle, reducing its lifespan and efficiency. To troubleshoot this problem, follow these steps:
- Check the air pre-charge pressure: The air pre-charge pressure in the tank should be set according to the manufacturer’s instructions. Use a tire pressure gauge to measure the air pressure in the tank. If the pressure is too low, it may need to be increased using an air compressor. If it is too high, release some air until it reaches the recommended level.
- Inspect the tank for waterlogged signs: Look for signs of water inside the tank, such as condensation on the tank walls or a waterlogged sound when tapping on the tank. If the tank is waterlogged, it may need to be drained and recharged with air.
- Drain and recharge the tank: To drain the tank, shut off the power to the pump and open the drain valve at the bottom of the tank. Allow all the water to drain out completely. Once drained, close the drain valve and use an air compressor to recharge the tank with the recommended air pressure.
- Check for further issues: If the tank continues to waterlog after recharging, there may be other underlying issues causing the problem. Consider consulting a professional to inspect and diagnose the problem, as it could be related to a faulty check valve or a malfunctioning pump.
When To Seek Professional Help
Installing a well pressure tank can be a DIY project for those with some plumbing experience and the right tools. However, in certain situations, it is best to seek professional help to ensure a successful installation. In this section, we will discuss two scenarios where professional assistance is strongly recommended.
Complex installation requirements
While installing a well pressure tank may seem straightforward, there are instances where the installation requirements can be complex and beyond the scope of a DIY enthusiast. One such situation is when your well system requires additional components or modifications to accommodate the pressure tank.
For example, if you have a shallow well and want to switch to a deeper well, you might need to install a submersible pump along with the pressure tank. This can involve intricate electrical connections and specific knowledge of well system dynamics.
Additionally, in some cases, the existing plumbing may need to be upgraded or reconfigured to ensure compatibility with the pressure tank. This can involve cutting and soldering pipes, installing new valves, or rerouting water lines.
Given the complexity of these tasks, it is recommended to hire a professional plumber who has the expertise and experience in dealing with such installation requirements. They will ensure that your well pressure tank is connected correctly and that your entire well system functions optimally.
Persistent issues despite troubleshooting efforts
Another situation where seeking professional help is advisable is when you have been unable to resolve persistent issues despite your best troubleshooting efforts. Common issues include fluctuating water pressures, frequent pump cycling, or strange noises coming from the tank.
While some troubleshooting steps can be performed by homeowners, such as checking for leaks or adjusting pressure settings, certain problems require specialized knowledge and equipment to diagnose and fix.
A professional plumber will have the necessary tools to conduct a thorough assessment of your well system and identify the underlying cause of the problem. Whether it’s a faulty pressure switch, a failing pump, or a malfunctioning tank, they will be able to pinpoint the issue and provide an appropriate solution.
By seeking professional help in such situations, you can save yourself time, money, and frustration. A trained professional will bring their expertise to the table, ensuring that any persistent issues with your well pressure tank are resolved once and for all.
Frequently Asked Questions
How Big Of A Pressure Tank Do I Need For My Well?
To determine the right size of pressure tank for your well, consider factors like water usage and system capacity. A professional well contractor can assess your needs and recommend the appropriate size. Make sure to consult an expert to ensure optimal performance and efficiency of your well system.
Where Should Pressure Tank Be Located?
Pressure tanks should be located near the water source to reduce pipe lengths. They are typically placed indoors, such as in a garage or basement, to protect them from weather conditions. It’s important to choose a location that provides easy access for maintenance and inspection.
How Long Does It Take To Install A Pressure Tank?
It typically takes a few hours to install a pressure tank. The installation time may vary based on the complexity of the system and the experience of the installer.
Do You Need A Well Pump With A Pressure Tank?
Yes, you need a well pump with a pressure tank. A pressure tank helps regulate the water pressure and maintains a steady flow of water from the well pump to supply your home. It ensures consistent water pressure and reduces the strain on the well pump, extending its lifespan.
Conclusion
Installing a well pressure tank is essential for maintaining a consistent water supply in your home. By following the steps outlined in this guide, you can successfully install a well pressure tank and ensure the efficient functioning of your water system.
Remember to turn off the power and follow all safety precautions during the installation process. With proper installation, your well pressure tank will provide you with a reliable water supply for years to come.