To install a wax ring on a toilet, place the wax ring on the base of the toilet and press it firmly into place before securing the toilet to the floor. Installing a wax ring on a toilet is an essential step in ensuring a proper seal between the toilet base and the waste pipe.
Without a proper seal, you may experience leaks and unpleasant odors. This article will guide you on how to install a wax ring on a toilet, allowing you to complete the task confidently and effectively. By following the simple steps outlined here, you can ensure a watertight seal and enjoy a functioning toilet without any issues.
Benefits Of Using A Wax Ring
Installing a wax ring on your toilet has a multitude of benefits that can save you from potential headaches down the line. From effectively sealing off any leaks to providing stability for your toilet, a wax ring is an essential component in keeping your bathroom functioning smoothly. Not to mention, it’s hassle-free to install and replace, making it a convenient option. Let’s take a closer look at the advantages of using a wax ring:
Seals effectively to prevent leaks
A wax ring creates a watertight seal between the base of your toilet and the sewer pipe, preventing any leaks or odors from escaping. Its pliable nature allows it to conform to the uneven surfaces and contours, ensuring a tight seal that can withstand constant use. With a properly installed wax ring, you can confidently flush without worrying about any unwanted leaks.
Provides stability for the toilet
Another advantage of using a wax ring is that it offers stability to your toilet. Once placed between the toilet flange and the base of the toilet, the wax ring acts as a cushion, absorbing any movement or vibrations. This stability not only enhances the comfort and safety of using the toilet but also prevents any damage that might occur due to unnecessary shifting or rocking.
Easy to install and replace
One of the most significant benefits of using a wax ring is the ease of installation and replacement. With just a few straightforward steps, you can have the wax ring in place, providing an effective seal for your toilet. Additionally, if you ever need to replace the wax ring due to wear and tear or during a toilet replacement, the process is just as simple. This ensures that you can maintain the integrity of your toilet’s sealing system without any hassle or professional assistance.
In conclusion, a wax ring offers numerous benefits that make it an invaluable component when installing or replacing a toilet. From its effective sealing capabilities to the stability it provides, as well as the ease of installation and replacement, using a wax ring ensures a leak-free and secure bathroom experience. So, whether you’re a DIY enthusiast or a homeowner, incorporating a wax ring into your toilet installation process is a wise choice.
Tools And Materials Needed
When it comes to installing or replacing a wax ring on your toilet, having the right tools and materials is key to ensuring a proper and leak-free installation. In this guide, we’ll walk you through the step-by-step process of installing a wax ring on your toilet, highlighting the specific tools and materials you’ll need along the way.
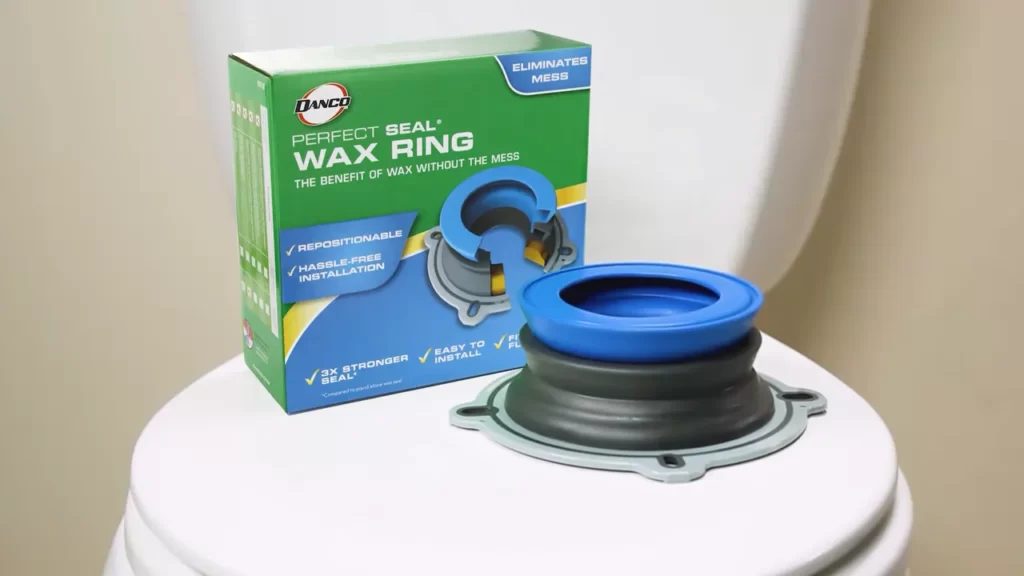
Wax Ring
The wax ring is the primary component of the toilet installation process. It creates a watertight seal between the toilet and the floor drain, preventing any leaks or odors from escaping. Make sure to get a high-quality wax ring that is specifically designed for toilet installations.
Toilet Bolts
Toilet bolts, also known as closet bolts, are used to secure the toilet to the floor. These bolts go through the mounting holes at the base of the toilet and are tightened with nuts and washers. Ensure that you have a set of toilet bolts that are the correct size and length for your specific toilet model.
Wax Ring Installation Kit
A wax ring installation kit typically includes a wax ring, a plastic flange, and some extra accessories that may be necessary for the installation. This kit provides all the essentials you’ll need to properly install the wax ring and secure your toilet.
Adjustable Wrench
An adjustable wrench is a versatile tool that you’ll need to tighten the nuts on the toilet bolts. It allows you to adjust the width of the opening to fit the nuts and gives you a good grip for tightening or loosening them as needed.
Screwdriver
A screwdriver is essential for removing the screws or caps that hold the toilet in place. Depending on the type of toilet you have, you may need a Phillips or flathead screwdriver. Make sure you have the appropriate screwdriver on hand before you begin the installation.
Level
Using a level is crucial to ensure that your toilet is properly aligned and sits evenly on the floor. This tool helps you determine if your toilet is straight and prevents any wobbling or rocking once it is installed. Ensure your level is in good working condition before starting the installation process.
Removing The Old Wax Ring
Removing the old wax ring is an important step in installing a new toilet or replacing a faulty wax ring. This process involves shutting off the water supply, emptying the toilet tank and bowl, removing the toilet bolts, and lifting the toilet. After these initial steps, you will need to scrape off the old wax ring residue to ensure a clean and smooth surface for the new wax ring to be installed.
Shutting off the water supply
Before attempting to remove the old wax ring, it is crucial to shut off the water supply to the toilet. This can typically be done by turning the shut-off valve clockwise until it is fully closed. Shutting off the water supply will prevent any potential leaks or water damage during the removal process.
Emptying the toilet tank and bowl
Next, you will need to empty the toilet tank and bowl. To do this, simply flush the toilet multiple times until both the tank and bowl are completely empty. This step will make it easier to maneuver and remove the toilet without any excess water spilling out.
Removing the toilet bolts and lifting the toilet
Once the tank and bowl are empty, locate the bolts that secure the toilet to the floor. These bolts are typically found at the base of the toilet, near the floor. Use a wrench to loosen and remove these bolts, taking care not to damage the toilet or the floor. Once the bolts are removed, carefully lift the toilet straight up, making sure to support its weight evenly. You may need some assistance with this step, as toilets can be heavy and awkward to lift on your own.
Scraping off the old wax ring residue
With the toilet removed, you will now need to scrape off any old wax ring residue that remains on the floor flange and the toilet base. This residue can often be sticky and stubborn, so using a putty knife or scraper tool can be helpful in removing it. Take your time and ensure that all traces of the old wax ring are removed, as any leftover residue may cause issues with the installation of the new wax ring.
In conclusion, removing the old wax ring involves essential steps such as shutting off the water supply, emptying the toilet tank and bowl, removing the toilet bolts, and lifting the toilet. Additionally, scraping off the old wax ring residue is crucial to provide a clean surface for the installation of the new wax ring. By following these steps carefully, you can ensure a proper and leak-free installation of your new toilet wax ring.
Positioning The New Wax Ring
Inspecting the toilet flange
Before positioning the new wax ring, it’s crucial to inspect the toilet flange to ensure it is in good condition. The flange is the round metal or plastic piece that connects the toilet to the floor and serves as a seal for the waste pipe. A damaged or uneven flange can lead to leaks and improper sealing. Here’s how to inspect the toilet flange:
- Remove the toilet: Start by removing the existing toilet by disconnecting the water supply and unscrewing the bolts securing the toilet to the floor.
- Inspect the flange: Once the toilet is removed, take a close look at the flange. Look for any signs of cracks, corrosion, or damage. Also, ensure that the flange is level and properly secured to the floor.
- Address any issues: If you notice any problems with the flange, such as cracks or looseness, it’s important to address them before installing the new wax ring. You may need to repair or replace the flange to ensure a proper seal.
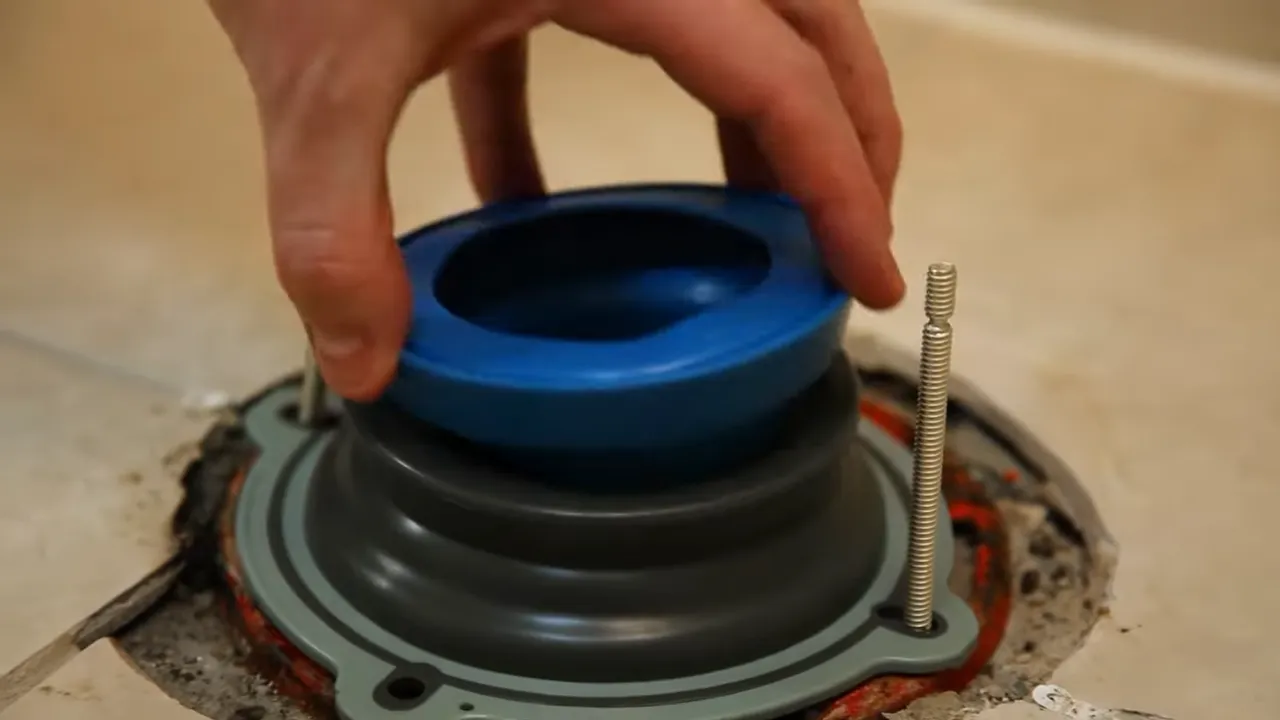
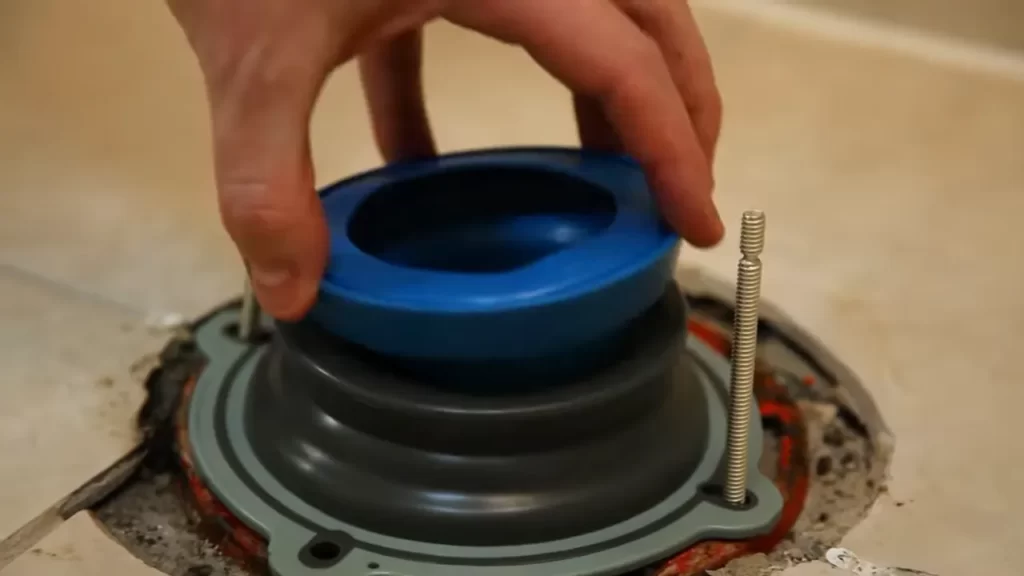
Placing the wax ring on the flange
Now that the toilet flange is in good condition, it’s time to place the wax ring. The wax ring creates a watertight seal between the toilet and the waste pipe. Follow these steps to properly position the wax ring:
- Choose the right type of wax ring: There are various types of wax rings available, so make sure to choose the one that is compatible with your toilet and flange.
- Place the wax ring on the flange: Take the wax ring and position it on the flange, ensuring that the tapered side is facing up. Gently press the wax ring down to create a tight seal.
- Apply even pressure: Once the wax ring is in place, apply even pressure on it to ensure it is properly compressed. This will help to create a solid seal between the toilet and the waste pipe.
Ensuring proper alignment
Proper alignment of the wax ring is crucial to prevent leaks and ensure a secure connection between the toilet and the waste pipe. Here’s how to ensure proper alignment:
- Align the toilet: Carefully lower the toilet onto the flange, making sure the bolts on the flange align with the holes on the toilet base. You may need a helper to assist you in aligning the toilet correctly.
- Tighten the bolts: Once the toilet is aligned, start tightening the bolts to secure it in place. Alternate tightening each bolt to ensure equal pressure on both sides of the toilet.
- Check for proper alignment: After tightening the bolts, check if the toilet is level and stable. Gently rock the toilet back and forth to ensure it sits securely on the wax ring.
By following these steps, you can confidently position the new wax ring on the toilet flange, ensuring a proper seal and preventing any potential leaks. Remember to always inspect the flange before installation, use the right type of wax ring, and align the toilet correctly for a secure and watertight connection.
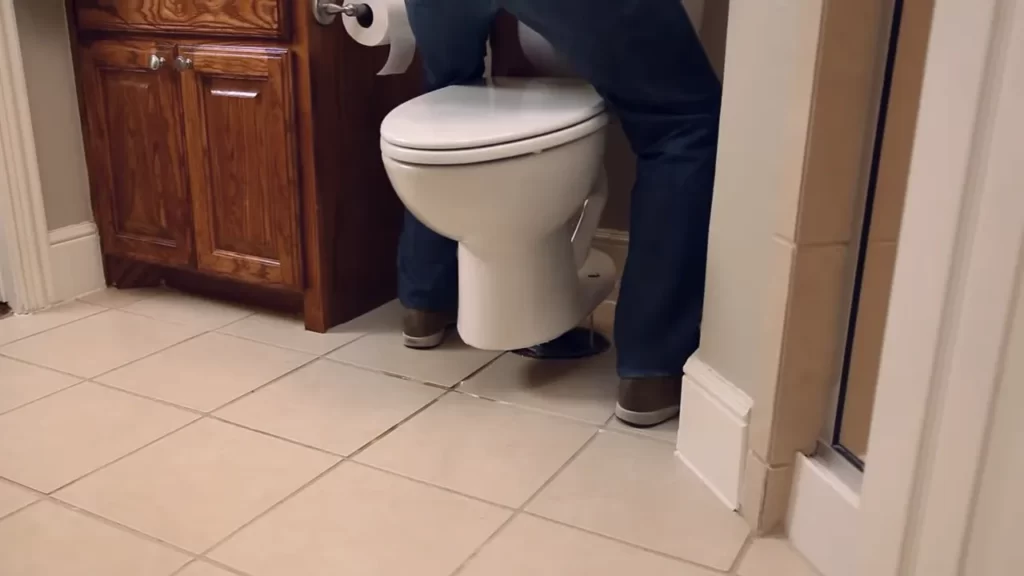
Lowering The Toilet Onto The Wax Ring
Once you’ve properly aligned the toilet with the flange bolts, it’s time to lower it onto the wax ring. This step is crucial to ensure a secure seal and prevent any leaks in the future. In this section, we will guide you through the process of gently lowering the toilet onto the wax ring, applying even pressure to create a tight seal.
Aligning the Toilet with the Flange Bolts
Before you can lower the toilet onto the wax ring, it’s important to align it with the flange bolts. These bolts secure the toilet to the floor and keep it stable. To align the toilet:
- Position yourself behind the toilet bowl and grasp the sides firmly.
- Slowly lower the toilet bowl onto the flange, making sure the flange bolts align with the corresponding holes at the base of the toilet.
- Double-check that the toilet is centered and level. You can use a level tool to ensure accuracy.
Gently Lowering the Toilet onto the Wax Ring
With the toilet properly aligned, you can now proceed to lower it onto the wax ring. This step requires a delicate touch to avoid damaging the wax ring or the floor. Follow these guidelines:
- Stand facing the toilet bowl and place your hands on either side of the toilet seat.
- Lower the toilet bowl gradually, ensuring that it is lowered evenly. Be careful not to lean or exert too much force, as this can cause the wax ring to become misaligned.
- Continue lowering the toilet until it rests firmly on the floor.
Applying Even Pressure to Ensure a Secure Seal
After the toilet is lowered onto the wax ring, it is crucial to apply even pressure to create a tight, secure seal. This will prevent any water leaks or unpleasant odors. Follow these steps:
- Stand over the toilet bowl, placing equal weight on both feet.
- Slowly and evenly squat down on the toilet bowl, applying pressure until you feel it compressing the wax ring.
- Once the toilet feels stable, shift your weight around the bowl, pressing down firmly to further seal the wax ring.
Remember, the goal is to create a watertight seal, so it’s important not to rush through this step. Taking your time and applying even pressure will ensure a secure connection between the toilet and the flange, preventing any potential leaks in the future.
Securing The Toilet In Place
Securing the toilet in place is an important step in the installation process to ensure a leak-free and stable fixture. In this section, we’ll discuss two crucial aspects: tightening the flange bolts and checking for levelness. Additionally, we’ll also cover installing the toilet tank and connecting the water supply.
Tightening the flange bolts
Flange bolts are responsible for securing the toilet to the floor and creating a tight seal. Follow these steps to properly tighten the flange bolts:
- Place the wax ring on the flange, ensuring it is positioned correctly and evenly distributed.
- Lower the toilet bowl onto the wax ring, aligning it with the flange bolts.
- Hand-tighten the nuts onto the flange bolts until they are snug.
- Using a wrench, gradually tighten the nuts in a crisscross pattern, alternating between each nut. This will ensure even pressure on the wax ring and create a secure seal.
- Avoid over-tightening the nuts as it may crack the toilet or damage the wax ring.
Checking for levelness
Ensuring that your toilet is level is essential for its stability and proper functioning. Here are the steps to check for levelness:
- Place a level tool across the back of the toilet tank, checking for any unevenness.
- If the toilet is not level, use shims to adjust the height. Insert the shims between the toilet base and the floor until the toilet is level.
- Recheck the levelness by placing the level tool across the tank again. Make any necessary adjustments until the toilet is perfectly level.
- Once the toilet is level, tighten the flange bolts a little more to secure it in place.
Installing the toilet tank and connecting the water supply
With the toilet bowl securely in place, it’s time to install the tank and connect the water supply. Follow these steps:
- Place the tank onto the bowl, aligning it with the mounting holes.
- Insert and tighten the bolts through the mounting holes, ensuring they are snug.
- Attach the water supply line to the fill valve located at the bottom of the tank.
- Tighten the connection by hand, making sure it is secure to prevent any leaks.
- Turn on the water supply and check for any leaks around the base and connections.
Once you’ve completed these steps, your toilet should be securely in place, level, and ready for use. Remember to double-check for any leaks before using the toilet regularly.
Common Installation Issues And Solutions
When it comes to installing a wax ring on a toilet, there are a few common installation issues that can arise. However, with some simple solutions, you can ensure a successful installation without any hassle. In this segment, we will discuss three key issues that may occur during the installation process: Uneven toilet, Leaking wax ring, and Loose toilet bolts. Let’s dive in and learn how to overcome these challenges.
Uneven toilet
An uneven toilet can cause problems with the wax ring installation, leading to potential leaks and instability. Follow these steps to address this issue:
- Firstly, ensure that the toilet flange is level and securely attached to the floor. If it is loose, use a wrench to tighten the flange bolts.
- Next, double-check if the floor beneath the toilet is level. If it’s not, you need to make some adjustments.
- To level an uneven toilet, place plastic shims under the toilet bowl until it sits firmly on the floor without rocking.
- Once the toilet is level, trim off the excess portion of the shims using a utility knife.
- Finally, tighten the closet bolts evenly on both sides of the toilet bowl to secure it in place.
Leaking wax ring
Dealing with a leaking wax ring can be frustrating. Here’s how you can resolve this issue:
- Start by turning off the water supply to the toilet and flushing it to drain the tank and bowl.
- Wear rubber gloves and carefully remove the toilet by disconnecting the water supply line and loosening the closet bolts.
- Inspect the wax ring for any damages or misalignment. Replace it with a new wax ring if necessary.
- Ensure that the toilet flange is clean and free from any debris.
- Place the new wax ring onto the flange, ensuring it is centered.
- Lower the toilet bowl back onto the wax ring, aligning it with the closet bolts.
- Tighten the bolts evenly, alternating between sides, to secure the toilet in place.
- Turn on the water supply and check for any leaks. If needed, tighten the bolts further.
Loose toilet bolts
Loose toilet bolts can cause wobbling and instability. Follow these steps to fix the issue:
- Start by turning off the water supply and flushing the toilet to empty the tank and bowl.
- Use a wrench to tighten the closet bolts located at the base of the toilet. Ensure they are snug and secure.
- Be careful not to overtighten the bolts, as this can crack the toilet base.
- Check for any wobbling or rocking of the toilet. If there is still movement, tighten the bolts further.
- Turn on the water supply and test the toilet for stability. Make sure there are no leaks or rocking.
By addressing these common installation issues and following the solutions provided, you can ensure that your wax ring installation on the toilet is successful, secure, and leak-free.
Tips For A Successful Installation
Tips for a Successful Installation
Installing a wax ring on a toilet may seem like a straightforward task, but there are several tips and tricks that can help ensure a successful installation. By following these guidelines, you can avoid common pitfalls and ensure a watertight seal that will prevent leaks and potential damage to your bathroom floor. Let’s delve into some of the key tips that will make your wax ring installation a breeze.
Double-checking the flange for damage or cracks
Before beginning the installation process, it is crucial to double-check the condition of the flange. The flange is the collar-like structure that connects the toilet to the floor and holds the wax ring in place. Any damage or cracks in the flange can compromise the integrity of the seal, leading to leaks and potential water damage.
To check the flange, visually inspect it for any signs of damage or cracks. If you notice any issues, it is essential to address them before proceeding with the installation. You can either repair the flange or replace it entirely, depending on the extent of the damage.
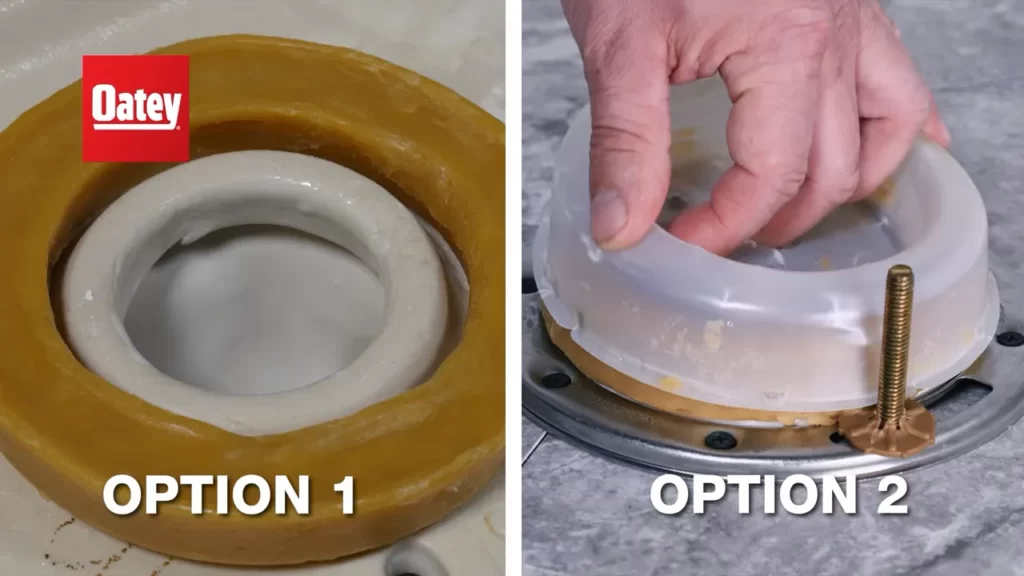
Using a wax ring with an attached plastic horn
When selecting a wax ring for your toilet installation, it is advisable to choose one with an attached plastic horn. The plastic horn serves as a guide to ensure that the wax ring is properly centered on the flange. This can help prevent misalignment and ensure a secure seal.
To use a wax ring with an attached plastic horn, simply place the wax ring on top of the flange with the plastic horn facing up. Align the toilet’s mounting bolts with the holes in the plastic horn to ensure proper positioning.
Applying a small amount of petroleum jelly to the flange bolts
In addition to using a wax ring with an attached plastic horn, applying a small amount of petroleum jelly to the flange bolts can further enhance the installation process. The petroleum jelly acts as a lubricant, making it easier to tighten the bolts and preventing them from corroding over time.
To apply petroleum jelly to the flange bolts, simply dab a small amount onto your finger and rub it onto the threads of each bolt. This will help facilitate the tightening process and ensure that the bolts can be easily removed if necessary in the future.
By following these three tips, you can significantly increase the chances of a successful wax ring installation on your toilet. Remember to double-check the flange for any damage or cracks, use a wax ring with an attached plastic horn for proper alignment, and apply a small amount of petroleum jelly to the flange bolts to facilitate the tightening process. With these precautions in place, you can enjoy a watertight seal and peace of mind in your bathroom.
Frequently Asked Questions
Do I Put The Wax Ring On The Toilet Or The Flange?
The wax ring is placed on the flange when installing a toilet.
How Do You Get A Wax Ring To Stick To The Toilet?
To make a wax ring stick to the toilet, press it firmly onto the bottom of the toilet bowl. Ensure that it is aligned properly with the sewer pipe. Apply even pressure to create a tight seal.
How Should A Wax Ring Sit On A Toilet Flange?
The wax ring should sit directly on top of the toilet flange. Make sure it is centered and aligned properly before placing the toilet on top. This creates a watertight seal to prevent leaks between the toilet and the floor.
Easy installation ensures a secure fit and prevents any additional issues.
Which Way Does The Wax Ring Go On The Bottom Of The Toilet?
The wax ring should be placed on the bottom of the toilet with the thicker side facing down.
Conclusion
To sum up, installing a wax ring on a toilet is a crucial step in ensuring a proper seal and efficient flushing. By following the simple steps outlined in this guide, you can confidently tackle this DIY project without any professional assistance.
Remember to gather the necessary tools, prepare the area, position the wax ring correctly, and secure the toilet firmly in place. With a little patience and attention to detail, you’ll have a leak-free and functioning toilet in no time. Happy plumbing!