To install wall tile with mesh backing, start by cleaning and preparing the surface, then apply a thin layer of adhesive and press the tile onto the wall, making sure to align it properly. Rotate the tile slightly to create a secure bond, and let it dry completely before grouting.
After the adhesive dries, apply grout using a rubber float and remove any excess before it dries. Use a damp sponge to wipe away grout haze, then let it cure for 48 hours before sealing the grout.
Understanding The Benefits And Aesthetic Appeal Of Mesh Backing Tiles
Wall tiles are a great way to add functionality and style to any space. However, traditional tile installation can be a time-consuming and challenging task. This is where mesh backing tiles come in as an innovative solution, making the installation process seamless and efficient. Mesh backing tiles offer several benefits and aesthetic appeal that make them a popular choice among homeowners and professionals alike.
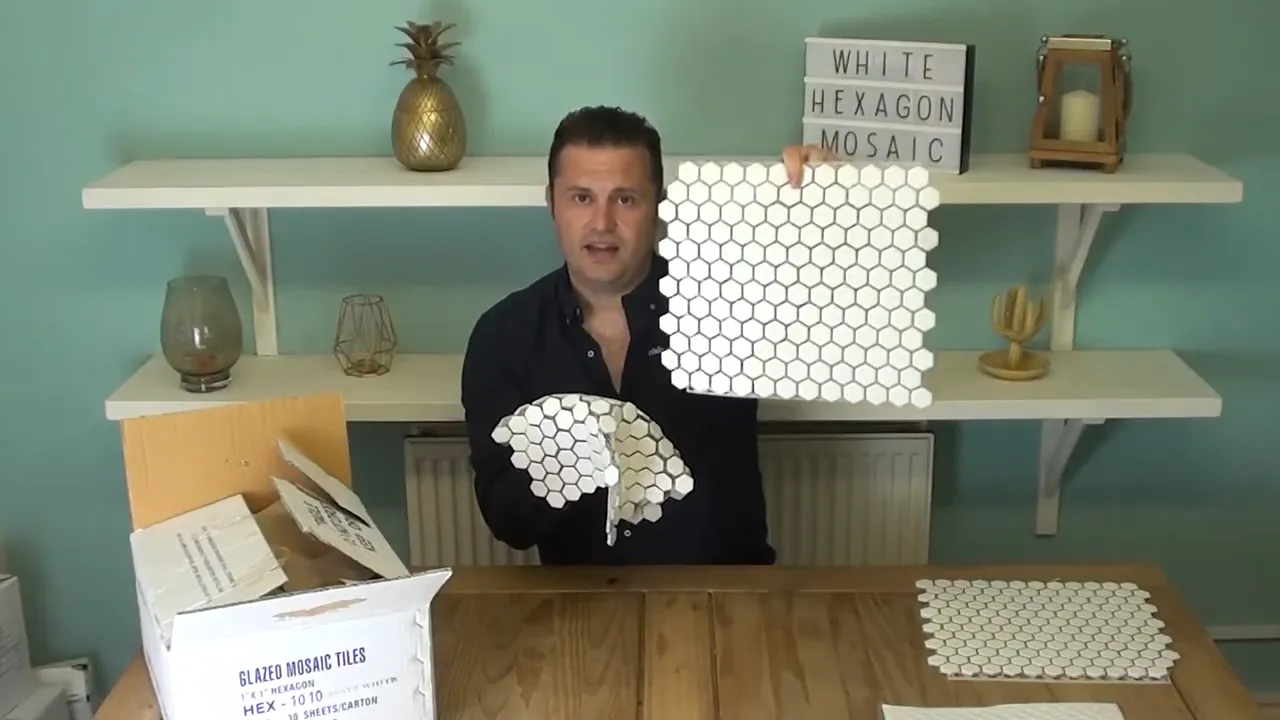
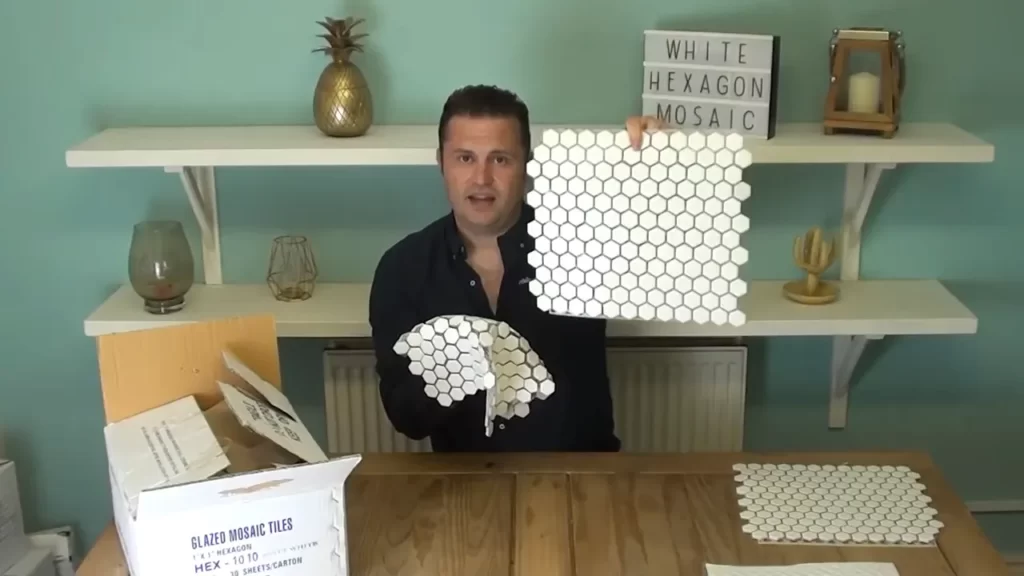
Mesh backing tiles: An innovative solution for seamless installation
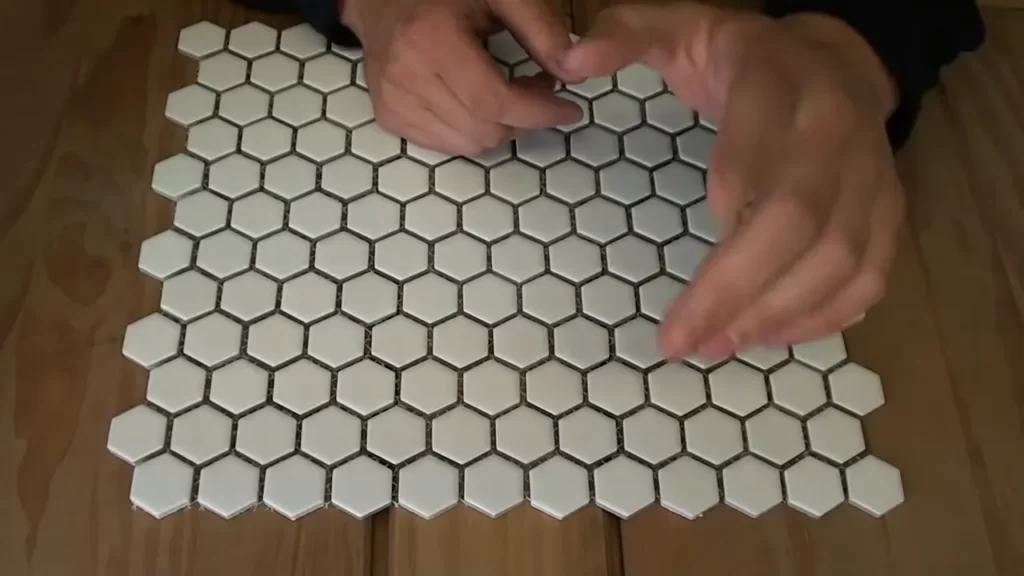
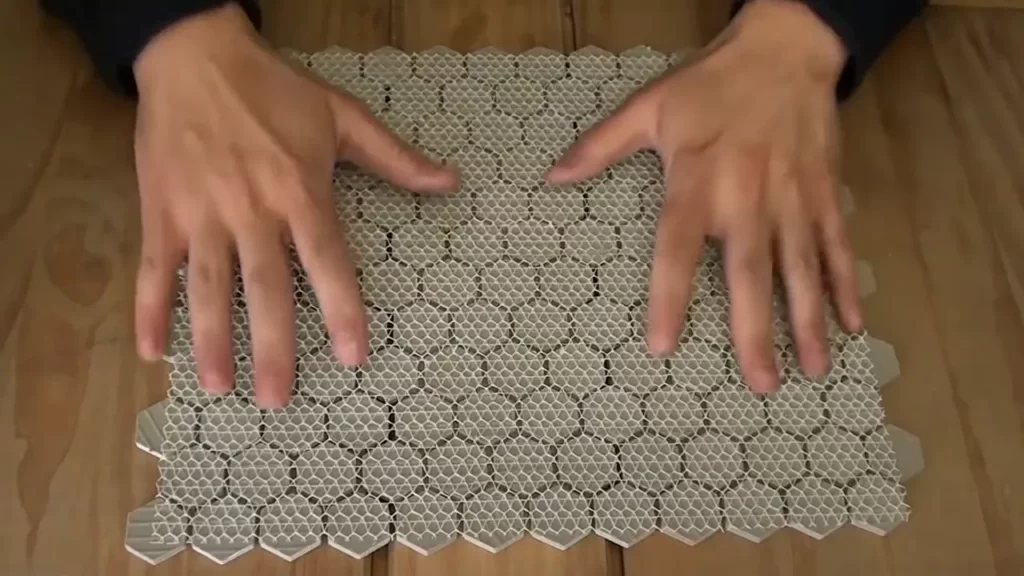
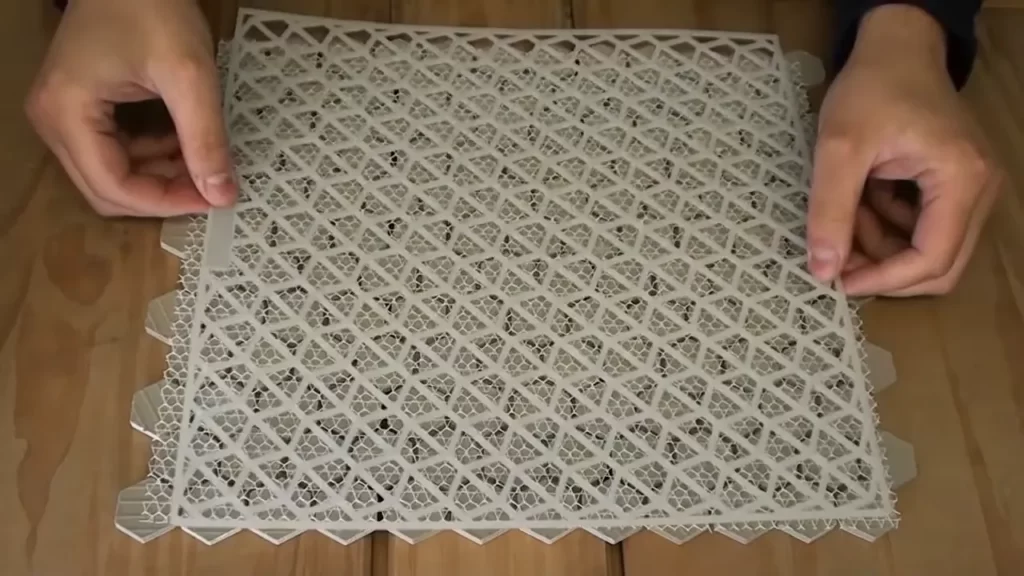
Mesh backing tiles are designed to simplify the installation process by incorporating a mesh layer on the backside of each tile. This mesh layer acts as a foundation that holds the tiles together, making it easier to align and install them on the wall. Unlike traditional tiles that require individual placement and adhesive application, mesh backing tiles come pre-arranged in a sheet format. This not only saves time but also ensures a uniform and professional-looking installation.
The versatility and durability of mesh backing tiles
Mesh backing tiles offer outstanding versatility, allowing you to create various patterns and designs on your walls effortlessly. Whether you prefer a classic subway tile arrangement or a unique mosaic pattern, mesh backing tiles can adapt to your creative vision. With a wide range of colors, sizes, and finishes available, you can easily find mesh backing tiles that complement your existing decor or add a striking focal point to the room.
Not only are mesh backing tiles versatile, but they are also highly durable. The mesh layer provides added strength and stability to the tiles, making them less prone to cracking or breaking. This durability ensures that your wall tiles will withstand the test of time and maintain their aesthetic appeal for years to come.
Necessary Tools And Materials For Installing Wall Tile With Mesh Backing
Before you dive into installing wall tile with mesh backing, it’s important to gather all the necessary tools and materials. Having the right equipment on hand will not only make the installation process smoother, but it will also ensure a successful outcome. In this blog post, we will discuss the essential tools for a successful installation and guide you in choosing the right adhesive and grout for mesh backing tiles.
Essential tools for a successful installation
If you want to achieve a professional-looking tile installation, make sure you have the following essential tools:
- Tape measure – This tool will help you accurately measure the dimensions of the wall and the size of the tiles you’ll be using.
- Level – Ensuring that your tiles are installed straight and even is crucial. A level will help you achieve this.
- Tile cutter – Unless you’re using pre-cut tiles, a tile cutter is necessary for making accurate cuts and achieving a precise fit.
- Margin trowel – A margin trowel is essential for applying adhesive to the wall and spreading it evenly.
- Notched trowel – This tool has grooves that create even ridges in the adhesive, providing a better bond between the wall and the tiles.
- Grout float – After the tiles are installed, a grout float is used to apply grout and ensure it fills the gaps between the tiles evenly.
- Grout sponge – Once the grout is applied, a grout sponge is used to remove excess grout and clean the surface of the tiles.
- Caulking gun – If you’re planning to seal the edges or corners of your tile installation, a caulking gun will help you achieve a clean and precise finish.
- Safety glasses and gloves – It’s important to protect your eyes and hands while working with tiles and tools.
Choosing the right adhesive and grout for mesh backing tiles
When it comes to installing wall tiles with mesh backing, the choice of adhesive and grout plays a significant role in the longevity and appearance of your installation. Here are a few factors to consider:
- Adhesive – There are various types of adhesive available, including thin-set mortar, mastic adhesive, and epoxy adhesive. The type of adhesive you choose will depend on the tile material, the size and weight of the tiles, and the location of the installation (such as a wet or dry area). It’s crucial to select an adhesive that is suitable for mesh backing tiles to ensure a strong bond.
- Grout – Grout not only fills the gaps between the tiles but also enhances the overall look of your tile installation. You can choose from sanded or unsanded grout, depending on the width of the grout lines. It’s important to select a grout color that complements your tiles and desired aesthetic.
Before making your final decision, it’s advisable to consult the manufacturer’s recommendations and seek professional advice if needed. Remember, choosing the right adhesive and grout will contribute to the durability and beauty of your wall tile installation.
Step-By-Step Guide On Installing Wall Tile With Mesh Backing
Are you looking to give your walls a fresh new look? Installing wall tile with mesh backing is a great way to transform any space. Whether you’re a seasoned DIY enthusiast or a beginner, this step-by-step guide will walk you through the process, ensuring a successful installation. Let’s get started!
Preparing the wall surface for tile installation
Before you begin installing wall tile with mesh backing, it’s important to properly prepare the surface to ensure a secure and long-lasting installation. Follow these steps:
- Start by cleaning the wall surface to remove any dust, dirt, or grease. Use a mild detergent and a soft cloth or sponge to gently wash the area.
- Next, inspect the wall surface for any cracks or damage. Fill in any holes or cracks with a suitable patching compound and smooth it out using a putty knife.
- Once the wall surface is clean and smooth, measure and mark the layout of your tiles using a level and a pencil. This will help ensure that your tiles are properly aligned during installation.
- Finally, apply a coat of primer to the wall surface. This will enhance the adhesion of the tile adhesive and promote a strong bond between the tile and the wall.
Applying adhesive onto the wall surface
Now that your wall surface is prepared, it’s time to apply the adhesive. Follow these steps:
- Using a notched trowel, spread a thin layer of tile adhesive onto the wall surface. Apply the adhesive in small sections, starting from the bottom and working your way up.
- Make sure to follow the manufacturer’s instructions for the adhesive, including the recommended drying time and application thickness.
- Hold the trowel at a 45-degree angle and comb through the adhesive, creating ridges. This will help ensure a strong bond between the tile and the wall.
- Once the adhesive is applied, wait for the recommended amount of time for it to partially dry and become tacky. This will vary depending on the adhesive used, so make sure to refer to the product instructions.
Properly aligning and installing mesh backing tiles
With the adhesive in place, it’s now time to align and install the mesh backing tiles. Follow these steps:
- Starting from a corner, gently press the mesh backing tile onto the adhesive, making sure to align it with your marked layout.
- Apply even pressure to the tile, using a grout float or your hands, to ensure proper adhesion. Make sure the tile is level and flush with the neighboring tiles.
- Continue installing the mesh backing tiles, working in small sections at a time. Use tile spacers to maintain consistent spacing between the tiles.
- Once all the tiles are installed, allow the adhesive to fully dry according to the manufacturer’s instructions before moving on to the next step.
Grouting and finishing touches for a polished look
Now that the tiles are securely in place, it’s time to grout and add those finishing touches. Follow these steps:
- Mix the grout according to the manufacturer’s instructions. Use a grout float to spread the grout evenly over the mesh backing tiles, making sure to fill in all the gaps.
- Once the grout is applied, use a damp sponge or cloth to remove any excess grout from the tile surfaces. This will help create clean grout lines and a polished finish.
- Allow the grout to dry for the recommended amount of time before using a grout sealer to protect it from stains and moisture. Apply the sealer using a brush or roller, following the manufacturer’s instructions.
- Finally, clean the tiles with a non-abrasive cleaner to remove any grout residue or haze, and enjoy your beautifully tiled wall!
Congratulations on successfully installing wall tile with mesh backing! With this step-by-step guide, you can confidently tackle any wall tile project, elevating the look of your space and adding a touch of style. Remember to follow each step carefully and refer to the manufacturer’s instructions for your specific tiles and materials. Happy tiling!
Tips And Tricks For A Successful Installation
Installing wall tiles with mesh backing can be a great way to quickly and efficiently update the look of any space. However, to ensure a successful installation, there are a few tips and tricks you should keep in mind. From ensuring proper tile spacing and alignment to dealing with irregularities in the wall surface, and effective cleaning and maintenance of mesh backing tiles, these tips will help you achieve a professional-looking result. Let’s take a closer look at each of these key factors.
Ensuring proper tile spacing and alignment
When installing wall tiles with mesh backing, it’s crucial to pay attention to proper tile spacing and alignment. Here are a few tips to help you achieve optimal results:
- Use tile spacers: Tile spacers are small, plastic tools that help maintain consistent and equal spacing between tiles. This ensures a professional finish and allows for the proper application of grout.
- Check for alignment: It’s important to regularly check the alignment of your tiles as you install them. This will prevent any misalignment or crooked patterns, creating a visually appealing and cohesive look.
- Make use of a level: A level can help you ensure that your tiles are perfectly aligned both vertically and horizontally. This step is especially crucial when working with larger or longer tiles.
Dealing with irregularities in the wall surface
Dealing with irregularities in the wall surface is essential for a smooth and seamless installation. Here’s what you can do:
- Inspect and prepare the wall: Before installing the mesh-backed tiles, closely examine the wall surface for any irregularities, such as bumps, holes, or loose plaster. Make any necessary repairs to ensure a flat and stable base for your tiles.
- Use a quality adhesive: Employing a high-quality adhesive will help compensate for small imperfections in the wall surface. Ensure that you choose an adhesive that is suitable for your particular tile and the conditions of the installation area.
- Apply the right pressure: When applying the tiles to the wall, exert even pressure to ensure proper adhesion. This will help minimize any gaps or unevenness caused by irregularities in the wall surface.
Effective cleaning and maintenance of mesh backing tiles
Proper cleaning and maintenance are crucial for preserving the beauty and longevity of mesh backing tiles. Here are a few tips to keep in mind:
- Regular cleaning: Regularly clean your mesh backing tiles using a non-abrasive tile cleaner and a soft sponge or cloth. This will help remove any dirt or grime buildup without damaging the mesh backing.
- Preventive measures: To avoid the accumulation of dirt and stains, consider applying a sealant or grout sealer to your tiles. This will make them more resistant to stains and easier to clean in the long run.
- Avoid harsh chemicals: When cleaning mesh backing tiles, steer clear of harsh chemicals that may damage the mesh or the adhesive. Stick to gentle, tile-safe cleaners for the best results.
By following these tips and tricks, you can achieve a successful installation of wall tiles with mesh backing. Ensure proper tile spacing and alignment, deal with any irregularities in the wall surface, and effectively clean and maintain the tiles. With these guidelines in mind, you’ll be on your way to a professional-looking and long-lasting tile installation.
Troubleshooting And Common Mistakes To Avoid
Installing wall tile with mesh backing can be a great DIY project to give your space a fresh new look. However, like any home improvement task, it’s important to be aware of potential issues and pitfalls that may arise. In this section, we’ll cover some common mistakes to avoid and provide troubleshooting tips to ensure a successful tile installation.
Addressing tile adhesion issues
One of the most frustrating problems during wall tile installation is when tiles don’t adhere properly to the surface. This can lead to tiles falling off, creating an uneven and unsightly result. To prevent this, it’s crucial to ensure proper tile adhesion. Here are some tips:
- Make sure the surface is clean and free of any dust, grease, or debris.
- Apply the thinset mortar evenly on the wall using a notched trowel, ensuring full coverage.
- Press the mesh-backed tile firmly into the mortar, ensuring it is properly embedded.
- Use a grout float to gently press on the tile surface, ensuring a strong bond with the mortar.
If you encounter issues with tiles not adhering properly, it’s essential to address the problem promptly. Here are some troubleshooting steps:
- Inspect the substrate for any damage or moisture issues that may affect adhesive performance.
- Remove any loose or poorly adhered tiles and reapply thinset mortar to the surface.
- Consider using a tile adhesive enhancer or primer to improve adhesion, following the manufacturer’s instructions.
- Contact a professional if the problem persists or if you’re unsure about how to rectify the issue.
Preventing grout discoloration and tile cracking
Grout discoloration and tile cracking are common issues that can occur during wall tile installation. However, with proper precautions, you can minimize the risks. Here are some tips to prevent these problems:
- Seal the grout lines after the installation is complete, using a grout sealer. This will protect the grout from stains and discoloration.
- Handle the tiles with care during installation to avoid cracking or chipping.
- Ensure the grout is mixed to the correct consistency, following the manufacturer’s instructions.
- Avoid excessive pressure or force when grouting the tiles to prevent cracking.
If you notice grout discoloration or tile cracking after installation, here are some quick fixes:
- Clean the grout lines using a grout cleaner to remove any stains or discoloration. Follow the instructions carefully to avoid damaging the tiles.
- Replace the cracked tiles by carefully removing them and applying new thinset mortar and grout.
- Consider using a grout colorant or stain to mask any stubborn discoloration on the grout lines.
- Seek professional help if the issue persists or if you’re unsure about how to fix the problem.
Quick fixes for uneven or unevenly spaced tiles
Uneven or unevenly spaced tiles can mar the overall appearance of your tile installation. Fortunately, there are some simple solutions to rectify these issues. Here are some quick fixes:
- If you notice an uneven tile, use a rubber mallet or a wooden block and hammer to gently tap it into place, ensuring it aligns with the surrounding tiles.
- If tiles are unevenly spaced, use tile spacers during installation to maintain consistent and even spacing.
- If the spacing is already set, carefully remove the misaligned tiles and reapply them using a proper amount of thinset mortar and spacers.
- Double-check your measurements and alignment before proceeding to the next row or section to ensure a uniform look.
By keeping these troubleshooting tips and common mistakes to avoid in mind, you can tackle your wall tile installation project with confidence. Remember to take the necessary precautions, be patient, and seek professional assistance if needed. Happy tiling!
Enhancing The Visual Impact Of Your Mesh Backing Tile Installation
Installing wall tiles with mesh backing adds a touch of sophistication and elegance to any room. The grid-like pattern of the mesh backing allows for easy installation and ensures that the tiles are evenly spaced, resulting in a professional finish. However, to truly make your tile installation visually stunning, you need to consider a few key factors. In this article, we will explore how to complement tile colors and patterns with the overall room design, as well as creative tile layout options for added visual interest.
Complementing Tile Colors and Patterns with the Overall Room Design
When it comes to selecting tile colors and patterns, it’s important to take into account the overall design and style of the room. By choosing tiles that complement the existing color scheme or add a pop of contrasting color, you can create a cohesive and visually appealing space.
Consider these tips for selecting tile colors and patterns:
- Choose a color scheme that matches or complements the room’s existing palette. For instance, if you have a neutral-toned room, opt for tiles in shades of beige or gray.
- Use tiles with patterns that add visual interest without overwhelming the space. Geometric patterns, subtle textures, or mosaic designs can provide a touch of elegance.
- Consider the size of the room. Light-colored tiles can make a small room appear more spacious, while darker tiles can add depth and drama to larger spaces.
- Don’t be afraid to mix and match different tile colors and patterns. Create a focal point by using a bold pattern or color on an accent wall, or design a striking tile border to frame the installation.
Creative Tile Layout Options for Added Visual Interest
Once you’ve chosen the perfect tile colors and patterns, it’s time to get creative with the layout. A well-planned tile arrangement can elevate the visual impact of your mesh backing tile installation. Here are some creative ideas to consider:
- Diagonal layout: Instead of the traditional horizontal or vertical orientation, laying the tiles diagonally can add a sense of movement and flow to the room.
- Herringbone pattern: This classic pattern creates a visually stunning effect by angling the tiles in a V-shape. It adds a touch of elegance and works well in both modern and traditional spaces.
- Random layout: For a more eclectic and unique look, consider randomly arranging tiles of different colors and patterns. This artistic approach can add a sense of personality and character to the room.
- Staggered layout: By staggering the tiles in a brick-like pattern, you can create a visually striking design that adds depth and dimension to the installation.
Remember, the key to enhancing the visual impact of your mesh backing tile installation is to carefully consider the tile colors, patterns, and layout options that work harmoniously with the overall room design. With a little creativity and attention to detail, your wall tiles will transform your space into a stunning masterpiece.
Safety Precautions And Preparing For The Unexpected
When it comes to installing wall tile with mesh backing, it’s important to prioritize safety precautions and be prepared for any unexpected situations that may arise. By taking the necessary steps to protect yourself and plan for potential accidents, you can ensure a smooth and safe installation process. In this section, we will discuss the protective gear and safety measures you should take during installation, as well as how to handle tile breakages or accidents.
Protective Gear and Safety Measures During Installation
To safeguard yourself during the installation process, it is essential to wear the appropriate protective gear. This includes:
- Safety goggles: Protect your eyes from flying debris and tile fragments.
- Dust mask: Prevent inhalation of dust particles generated while cutting or handling the tile.
- Work gloves: Provide a barrier between your hands and sharp tile edges, reducing the risk of lacerations.
- Knee pads: Minimize strain on your knees while working on the floor or low surfaces.
- Ear protection: Shield your ears from loud noise produced by power tools or machinery.
In addition to wearing the appropriate protective gear, it’s crucial to follow safety measures throughout the installation process:
- Keep your work area well-ventilated to minimize exposure to tile adhesive fumes.
- Use a sturdy and level ladder when working at heights to prevent falls.
- Ensure power tools are in good working condition and operate them with care, following manufacturer instructions and guidelines.
- Keep all tools and equipment organized and out of the way to reduce the risk of trip hazards.
Dealing with Tile Breakages or Accidents
No matter how careful you are, accidents can still happen during tile installation. If a tile breaks or an accident occurs, it’s essential to know how to handle the situation:
- Stay calm: In case of an accident, it’s important to remain calm and composed. Panicking can lead to further injuries or damage.
- Assess the situation: Evaluate the extent of the breakage or accident. Determine if any immediate actions need to be taken to ensure safety.
- Address any injuries: If there are any injuries, attend to them promptly. Clean and disinfect any cuts or wounds and seek medical attention if necessary.
- Clean up debris: Remove any broken tiles or debris from the work area to prevent tripping hazards.
- Replace broken tiles: If a tile is damaged beyond repair, carefully remove it and replace it with a new one using the appropriate adhesive.
- Re-evaluate the cause: After addressing the immediate issue, reflect on what caused the accident or breakage to prevent a similar incident in the future.
By following the safety precautions and being prepared for the unexpected, you can ensure a safe and successful wall tile installation with mesh backing. Remember, protective gear and caution should always be prioritized for the well-being of both yourself and those around you.
Frequently Asked Questions For Installing Wall Tile With Mesh Backing
Are you considering installing wall tile with mesh backing? Here are some frequently asked questions to help you get started on your project. From the drying time of the adhesive to the best way to clean mesh backing tiles, we have you covered with all the answers you need. Read on to find out more.
How long does it take for the adhesive to dry?
When it comes to installing wall tile with mesh backing, one common concern is how long it takes for the adhesive to dry. The drying time can vary depending on factors such as the type of adhesive used, humidity levels in the room, and the ambient temperature. In general, it is recommended to allow the adhesive to dry for at least 24 hours before grouting. However, it is always best to refer to the specific product instructions for accurate drying times.
Can mesh backing tiles be used for shower walls?
If you are looking to update your shower walls, you may be wondering if mesh backing tiles are a suitable option. Mesh backing tiles are commonly used for both interior and exterior walls, including shower walls. The mesh backing provides stability and support, making it easier to install the tiles evenly and securely on vertical surfaces. It is important to choose tiles that are specifically designed for wet areas, such as shower walls, to ensure they are water-resistant and durable.
What is the best way to clean mesh backing tiles?
Keeping your mesh backing tiles clean is essential to maintain their appearance and longevity. To clean mesh backing tiles, follow these simple steps:
- Mix a mild detergent with warm water.
- Using a soft sponge or cloth, gently scrub the tiles in a circular motion.
- Rinse the tiles thoroughly with clean water.
- Wipe the tiles dry with a clean, lint-free cloth.
It is important to avoid using harsh chemicals or abrasive cleaning tools, as they can damage the tiles’ surface or the mesh backing. Regularly cleaning the tiles will help prevent the buildup of dirt, grime, and stains, keeping them looking fresh and beautiful.
Now that you have the answers to these frequently asked questions, you can confidently proceed with your wall tile installation project. Remember to follow the manufacturer’s instructions and take proper care of your mesh backing tiles, and you’ll enjoy the stunning results for years to come.
Frequently Asked Questions
Do I Need Spacers With Mesh Backed Tile?
No, you do not need spacers with mesh backed tile. The mesh backing already provides consistent spacing between the tiles for proper installation.
What Is Tile With Mesh Backing Called?
Tile with mesh backing is commonly referred to as mosaic tile. It consists of small tile pieces arranged on a mesh sheet, making installation easier and more efficient. The mesh backing ensures that the tile pieces remain in place during installation and offers better stability on walls or floors.
How To Install Mosaic Tiles With Mesh Backing On Shower Wall?
To install mosaic tiles with mesh backing on a shower wall: 1. Prepare the wall surface by cleaning and drying it completely. 2. Apply a thin layer of thin-set mortar using a notched trowel. 3. Press the tiles onto the mortar, aligning them with the desired pattern.
4. Use a grout float to apply grout between the tiles, wiping away any excess. 5. Allow the grout to cure before sealing the tiles with a suitable grout sealer.
How Are Tiles Attached To Mesh?
Tiles are attached to mesh by using a strong adhesive. The adhesive is applied to the back of the tiles, which are then pressed onto the mesh. The mesh provides support and stability for the tiles, ensuring they stay in place once installed.
Conclusion
To sum it up, installing wall tile with mesh backing can seem daunting at first, but with the right tools and techniques, it can be a straightforward process. By following the steps outlined in this guide, you’ll be able to achieve a professional and long-lasting result.
Remember to prepare your surface properly, use the correct adhesive, and take your time to ensure each tile is properly aligned. With practice, you’ll become a pro at wall tile installation in no time!