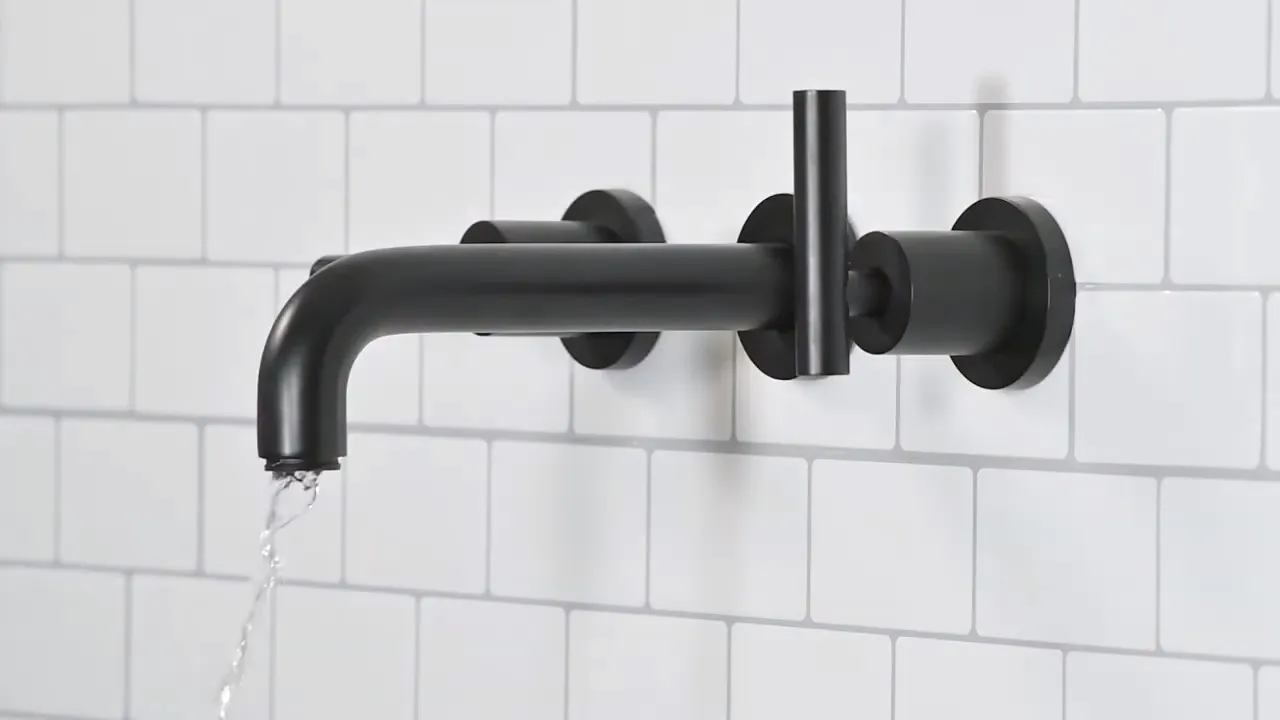
To install a wall mount faucet, follow these steps: Prepare the installation area, assemble the necessary tools and materials, mount the faucet on the wall, connect the plumbing lines, and check for any leaks. In this guide, we will provide a comprehensive overview of how to install a wall mount faucet, ensuring a successful installation without any complications.
Whether you are a DIY enthusiast or a professional plumber, this step-by-step guide will help you install a wall mount faucet with ease and confidence. So, let’s dive in and get started on this home improvement project.
Factors To Consider When Selecting A Wall Mount Faucet
When it comes to selecting a wall mount faucet for your home, there are several factors that you should consider. These factors will not only affect the functionality of the faucet but also its style and design, as well as the overall durability and aesthetic appeal. Below, we will discuss three key factors that you should keep in mind when choosing a wall mount faucet.
Functionality
The functionality of a wall mount faucet is an important aspect to consider. You want to ensure that the faucet meets your specific needs and requirements. One factor to consider is the type of valve used in the faucet. There are several types available, including compression valves, ceramic disc valves, and cartridge valves. Each type has its own benefits and drawbacks in terms of durability and ease of use. Additionally, you want to consider the flow rate of the faucet and whether it has features such as built-in aerators or adjustable water pressure.
Style and Design
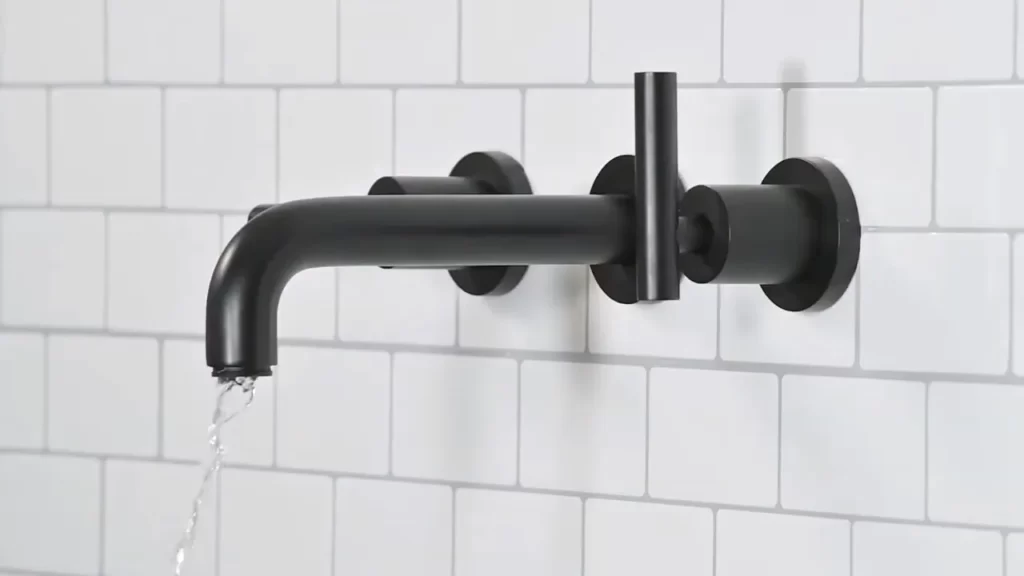
The style and design of the wall mount faucet should also be taken into account. This includes the overall shape and size of the faucet, as well as the finish and color options available. You want to choose a style and design that complements the overall aesthetic of your bathroom or kitchen. Whether you prefer a modern, minimalist look or a more traditional and ornate design, there are plenty of options to choose from. Additionally, consider whether you want a single-handle or a double-handle faucet, as well as any additional features such as a pull-out sprayer or touchless technology.
Material and Finish
The material and finish of the wall mount faucet will play a significant role in its durability and overall appearance. Common materials used for faucets include brass, stainless steel, and zinc alloy. Brass is known for its durability and resistance to corrosion, while stainless steel offers a sleek and modern look. Zinc alloy faucets are more budget-friendly but may not be as durable in the long run. In terms of finish, popular options include chrome, brushed nickel, and oil-rubbed bronze. Consider the overall style of your bathroom or kitchen and choose a material and finish that will withstand daily use and complement your existing fixtures.
Tools And Materials Needed For The Installation
Before you begin installing your wall mount faucet, it’s important to have all the necessary tools and materials at hand. This will ensure a smooth and efficient installation process. Here are the tools and materials you’ll need:
Screwdriver
A screwdriver is an essential tool for installing a wall mount faucet. It will be used to secure the faucet to the wall and tighten any screws or bolts that are part of the installation process.
Adjustable wrench
An adjustable wrench is another tool you’ll need for the installation. It will help you tighten and loosen nuts and bolts, allowing you to easily connect the various components of the faucet.
Plumber’s tape
Plumber’s tape, also known as Teflon tape, is an important material for ensuring a watertight seal. It’s commonly used to wrap around the threaded connections of the faucet to prevent leaks.
Caulk
Caulk is a sealant that is used to fill in any gaps or spaces between the wall and the faucet. This helps to prevent water from seeping behind the faucet and causing damage. Make sure to choose a caulk that is suitable for use in wet areas.
Wall mount faucet kit
Lastly, you’ll need a wall mount faucet kit. This kit includes all the necessary components for installing the faucet, such as the faucet body, handles, spout, and any additional accessories. Make sure to choose a kit that is compatible with your plumbing system and the design of your bathroom.
Having these tools and materials ready before you start the installation process will save you time and ensure a successful installation. Now that you’re equipped with the essentials, let’s move on to the next steps of installing your wall mount faucet.
Shutting Off The Water Supply
If you’re planning to install a wall mount faucet, one of the first steps you’ll need to take is shutting off the water supply. This crucial step ensures that you can work on the faucet without any water leakage or accidents. In this section, we will guide you through the process of locating the water shut-off valves and turning off the water supply.
Locating the water shut-off valves
Before you begin, it’s important to know where the water shut-off valves are located in your home. Typically, you’ll find these valves underneath the sink or near the water meter. In some cases, the shut-off valves may also be located in a basement or utility room.
To locate the shut-off valves underneath the sink, simply open the cabinet and look for two small handles or levers. These are usually located on the supply pipes coming out of the wall or floor. If you have trouble finding the shut-off valves, consult your plumbing layout or contact a professional plumber for assistance.
Turning off the water supply
Once you’ve located the shut-off valves, it’s time to turn off the water supply. This step ensures that no water will flow through the pipes while you’re working on the wall mount faucet. To turn off the water supply, follow these steps:
- Close the shut-off valve by turning the handle or lever clockwise until it is tightly closed. This will cut off the flow of water to the faucet.
- If there are separate hot and cold water shut-off valves, make sure to close both of them.
- To test if the water supply is completely shut off, turn on the faucet and check if any water is coming out. If water still flows, double-check that all shut-off valves are closed.
Remember to be gentle when turning the shut-off valves to avoid any damage. If you encounter any difficulties or notice any leaks, it’s best to seek professional help to avoid further complications.
Once you have successfully shut off the water supply, you’re ready to move on to the next steps of installing your wall mount faucet with confidence and peace of mind.
Removing The Old Faucet (If Applicable)
Before installing a wall mount faucet, you need to remove the old faucet, if there is one already in place. This step is crucial as it ensures a clean slate for the installation process. In this section, we will walk you through the different steps involved in removing the old faucet.
Disconnecting the water supply lines
The first step in removing the old faucet is to disconnect the water supply lines. These lines are responsible for delivering water to your faucet. To disconnect them, follow these steps:
- Locate the shut-off valves under the sink and turn them clockwise to shut off the water supply.
- Place a bucket or a towel under the sink to catch any remaining water.
- Using an adjustable wrench, unscrew the nuts connecting the water supply lines to the shut-off valves and the faucet.
- Once the nuts are loose, carefully remove the water supply lines.
Make sure to close the shut-off valves completely to prevent any water leakage during the removal process.
Removing the mounting nuts or screws
After disconnecting the water supply lines, the next step is to remove the mounting nuts or screws that secure the faucet to the wall. These nuts or screws hold the faucet firmly in place. Here’s how you can remove them:
- Locate the mounting nuts or screws that are attached to the faucet.
- Using an appropriate tool, such as an adjustable wrench or a screwdriver, loosen and remove the nuts or screws.
- Keep the nuts or screws in a safe place, as you may need them for the installation of the new faucet.
Once the mounting nuts or screws are removed, the old faucet will be ready to be detached from the wall.
Detaching the old faucet from the wall
With the water supply lines disconnected and the mounting nuts or screws removed, you can now detach the old faucet from the wall. Follow these steps:
- Hold the old faucet firmly.
- Gently pull the faucet away from the wall, applying steady pressure if needed.
- Inspect the area for any remaining connections, such as caulk or adhesive. Use a utility knife or a scraper to remove any traces of the old faucet.
Ensure that the wall surface is clean and free from any debris before proceeding with the installation of the new wall mount faucet.
By following these steps, you can successfully remove the old faucet, providing a clean surface for the installation of your new wall mount faucet.
Preparing The Wall For Installation
When it comes to installing a wall mount faucet, one of the crucial steps is preparing the wall for installation. This involves cleaning the wall surface, installing a reinforcement plate if necessary, and measuring and marking the mounting holes. By following these steps, you can ensure a proper and secure installation of your wall mount faucet.
Cleaning the wall surface
The first step in preparing the wall for installation is to clean the wall surface. This is important to remove any dirt, dust, or debris that may affect the adhesion of the mounting hardware or compromise the integrity of the wall. To clean the wall surface, you can follow these simple steps:
- Remove any loose dirt or debris using a soft brush or cloth.
- Wipe the wall surface with a mild cleanser or a mixture of soap and water. Avoid using harsh chemicals or abrasive cleaners as they may damage the wall finish.
- Rinse the wall surface with clean water and allow it to dry completely before proceeding to the next step.
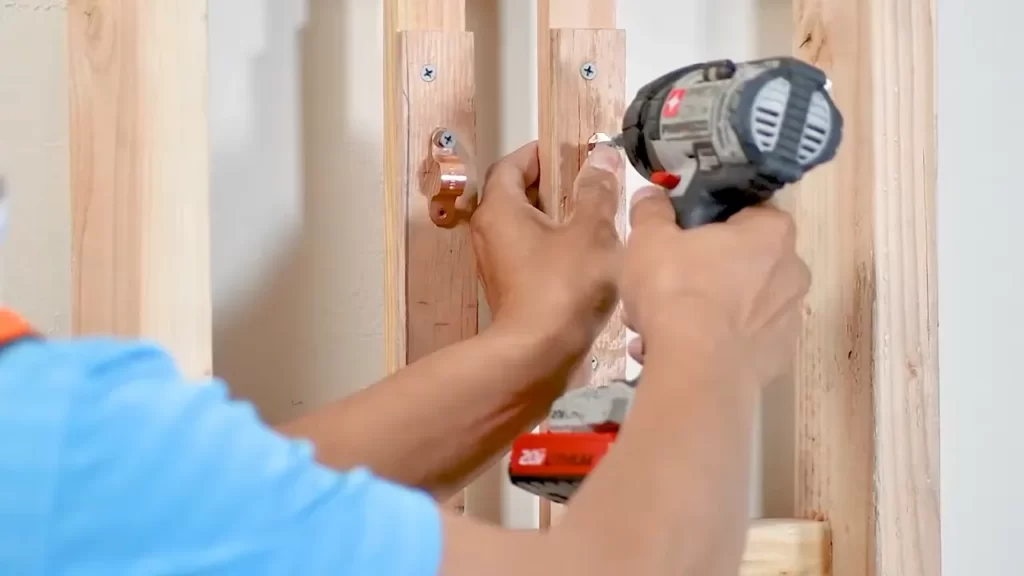
Installing a reinforcement plate (if necessary)
In some cases, it may be necessary to install a reinforcement plate to provide additional support for the wall mount faucet. This is especially true if the wall is made of a weaker material or if the faucet is being installed in an area with high water pressure. Here’s how you can install a reinforcement plate:
- Locate the studs behind the wall using a stud finder tool. Mark the location of the studs on the wall surface.
- Place the reinforcement plate over the marked studs and align it with the mounting holes of the faucet.
- Using a drill, screw the reinforcement plate into the studs securely. Make sure it is tightly secured to provide adequate support for the faucet.
Measuring and marking the mounting holes
Before installing the wall mount faucet, it is essential to measure and mark the mounting holes accurately. This ensures that the faucet will be properly aligned and securely attached to the wall. Follow these steps to measure and mark the mounting holes:
- Refer to the manufacturer’s instructions to determine the exact spacing and placement of the mounting holes.
- Using a measuring tape, measure and mark the positions of the mounting holes on the wall surface. Double-check the measurements to ensure accuracy.
- Use a level to ensure that the marked positions are straight and aligned.
- If necessary, create pilot holes at the marked positions using a drill bit that is slightly smaller than the mounting hardware.
By following these steps, you can properly prepare the wall for the installation of a wall mount faucet. Remember to clean the wall surface, install a reinforcement plate if necessary, and measure and mark the mounting holes accurately. With these preparations in place, you’ll be ready to proceed with the installation and enjoy the benefits of a beautifully mounted faucet in your space.
Mounting The Faucet
Mounting a wall mount faucet can be a straightforward process if you follow the right steps. In this section, we will guide you through attaching the faucet to the wall and securing it with mounting hardware.
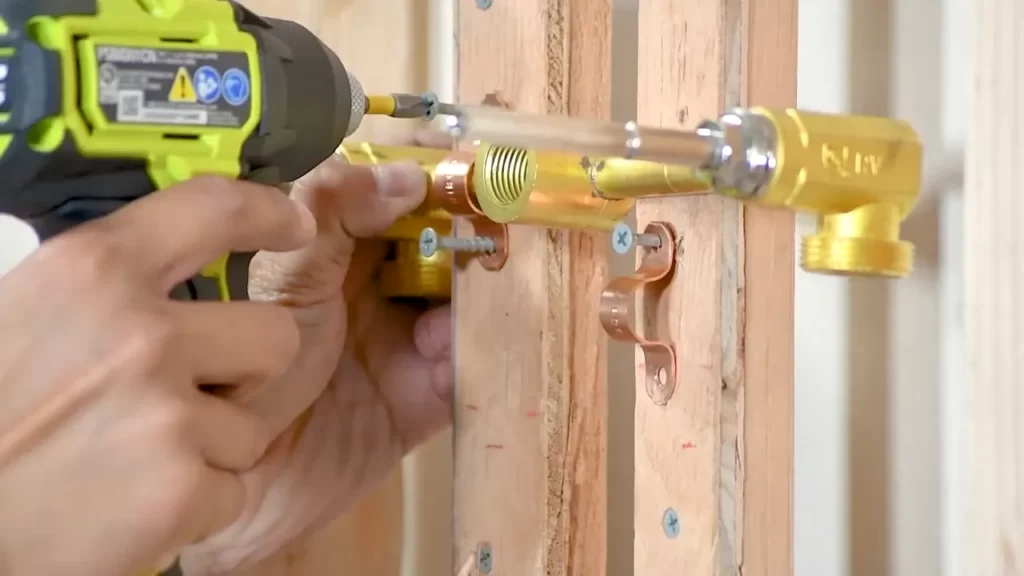
Attaching the faucet to the wall
The first step in mounting your wall mount faucet is to securely attach it to the wall. Before starting, make sure you have gathered all the necessary tools, including a drill, screws, and a screwdriver. Follow the below steps to effectively attach the faucet:
- Locate the desired position for your faucet on the wall. Ensure that it is at a comfortable height for use.
- Using a pencil, mark the positions where the faucet should be mounted on the wall.
- Next, drill pilot holes at the marked positions. Be cautious while drilling to avoid damaging any pipes or electrical wiring that may be hidden behind the wall.
- Once the pilot holes are drilled, hold the faucet against the wall, aligning it with the holes.
- Insert the screws through the mounting holes on the faucet and into the pilot holes on the wall. Tighten the screws securely using a screwdriver.
- Double-check that the faucet is level and securely attached to the wall.
Securing the faucet with mounting hardware
Securing your wall mount faucet with the correct mounting hardware will ensure its stability and longevity. Here’s how to secure your faucet:
- Consult the faucet’s manufacturer guidelines to determine the appropriate mounting hardware needed for your specific faucet model.
- Attach the mounting hardware to the wall using the provided screws or brackets. Make sure to follow the manufacturer’s instructions for proper installation.
- Place the faucet onto the mounted hardware, aligning it with the corresponding holes or brackets.
- Secure the faucet to the mounting hardware using the screws or nuts provided, ensuring a snug fit.
- Give the faucet a gentle shake to test its stability. If any wobbling occurs, tighten the mounting hardware until the faucet is firmly in place.
By following these steps, you can successfully mount your wall mount faucet, giving your bathroom or kitchen a stylish and functional upgrade. Remember to refer to the specific instructions provided by the faucet manufacturer, as different faucet models may have slight variations in mounting procedures.
Connecting The Water Supply Lines
Applying plumber’s tape to the threads
Before connecting the water supply lines in your wall mount faucet installation, it is essential to apply plumber’s tape to the threaded ends. Plumber’s tape, also known as Teflon tape, is a thin white tape made of polytetrafluoroethylene (PTFE) that helps create a watertight seal and prevent leaks at the threaded connections.
To apply plumber’s tape, simply follow these steps:
- Locate the threaded ends of the water supply lines. These are the metal fittings at the end of the lines that will be connected to the faucet.
- Ensure the threaded ends are clean and free of debris.
- Take the plumber’s tape and start wrapping it around the threaded ends in a clockwise direction. It is recommended to wrap the tape at least three times to ensure a secure seal.
- Press the tape firmly against the threads to ensure it adheres properly.
Once you have successfully applied the plumber’s tape, you are now ready to move on to attaching the water supply lines.
Attaching the water supply lines
Attaching the water supply lines is the next step in installing your wall mount faucet. These lines will connect the faucet to your plumbing system, allowing water to flow into the faucet for use. Follow these steps to ensure proper installation:
- Locate the water supply valves underneath the sink or behind the wall.
- Turn off the water supply by rotating the valves clockwise.
- Take one end of the water supply line and connect it to the corresponding valve by threading it onto the valve’s threaded end. Ensure it is tightened securely.
- Repeat the previous step for the other water supply line.
- Once both supply lines are attached to the valves, locate the threaded connections on the faucet.
- Thread the other ends of the supply lines onto the faucet’s connections, ensuring they are tightened securely.
- Once all connections are made, turn on the water supply by rotating the valves counterclockwise.
- Check for any leaks by running the faucet and inspecting all connections. If you notice any leaks, tighten the connections further or consult a professional if needed.
By following these steps, you can successfully connect the water supply lines in your wall mount faucet installation. Remember to always check for leaks and ensure all connections are tight for a hassle-free and functional faucet.
Testing The Faucet And Checking For Leaks
After successfully installing your wall mount faucet, it’s crucial to test it for functionality and ensure there are no leaks. This step is crucial as it guarantees a hassle-free experience and avoids any potential water damage.
Turning on the water supply
Before you start checking for leaks, make sure to turn on the water supply. Locate the shut-off valves beneath the sink and turn them counterclockwise to allow the water to flow. Take a moment to listen for any unusual noises and ensure a steady stream of water.
Checking for any leaks or drips
Once the water supply is turned on, it’s time to check for leaks or drips. Carefully inspect the faucet, paying close attention to the base, handles, and any connections. Look for any signs of moisture or water pooling.
Here are a few techniques to help you identify potential leaks:
- Use a dry cloth or paper towel to wipe around the base of the faucet, handles, and connections. Look for any signs of wetness or moisture on the cloth.
- Observe the water flow. If the stream appears weak or irregular, it could indicate a problem with the faucet or a blockage in the supply line.
- Closely examine the connections. Look for any visible gaps or loose fittings. Tighten any loose connections using pliers or an adjustable wrench.
- Inspect the water supply lines for leaks. A leak in the supply lines can often result in water pooling beneath the sink. Ensure the connections are securely tightened and free from any leaks or drips.
By thoroughly checking for leaks or drips, you can proactively address any issues and avoid future headaches. Remember, prevention is better than dealing with water damage later on.
If you experience any difficulty identifying the source of a leak or suspect a more significant problem, it’s recommended to consult a professional plumber.
Proper Maintenance And Cleaning Of A Wall Mount Faucet
Maintaining and cleaning your wall mount faucet is essential to ensure its longevity and optimal functionality. Regular maintenance can help prevent mineral build-up and other debris that can hinder the flow of water or damage the faucet over time. In this section, we will discuss the key steps involved in properly maintaining and cleaning your wall mount faucet.
Regularly Cleaning the Faucet
Cleaning your wall mount faucet on a regular basis is crucial to keep it looking pristine and free from any dirt or grime. Here are a few simple steps to help you effectively clean your faucet:
- Start by turning off the water supply to the faucet.
- Remove any detachable parts, such as the aerator or handles, if applicable.
- Using a gentle cleaner or a mixture of warm water and mild soap, clean the faucet thoroughly with a soft cloth or sponge.
- Rinse the faucet with clean water and wipe it dry to prevent any water spots.
- If you notice any stubborn stains or build-up, you can use a non-abrasive cleaner specifically designed for faucets.
- Once the faucet is clean, reattach any detachable parts and turn on the water supply.
Checking for Any Mineral Build-up or Debris
In addition to regular cleaning, it is important to periodically check for mineral build-up or debris that might accumulate inside your wall mount faucet. Here’s what you need to do:
- Turn off the water supply to the faucet.
- Remove any detachable parts, such as the aerator or handles, following the manufacturer’s instructions.
- Inspect the removed parts for any signs of mineral build-up or debris.
- If you see any build-up, soak the parts in a solution of equal parts vinegar and warm water for about 30 minutes.
- Scrub the parts gently with a soft brush to remove the build-up.
- Rinse the parts with clean water and reattach them to the faucet.
- Turn on the water supply and check for any improvement in the water flow.
By following these maintenance and cleaning steps, you can ensure that your wall mount faucet remains in excellent condition for years to come. Remember to perform regular cleaning and checks to avoid any potential issues and maintain the functionality and appearance of your faucet.
Troubleshooting Common Installation Issues
Installing a wall mount faucet can add a touch of elegance and style to your bathroom or kitchen. However, like any home improvement project, it’s not uncommon for a few issues to arise during the installation process. In this section, we’ll discuss some of the common problems that you may encounter and provide troubleshooting tips to help you overcome them.
Leaks at the water supply connections
One of the most common issues when installing a wall mount faucet is leaks at the water supply connections. These leaks can occur due to a variety of reasons, such as improper tightening or damaged O-rings. Here’s how you can troubleshoot and fix this issue:
- Check the connections: Start by inspecting the water supply connections to ensure they are properly tightened. Use a wrench to tighten any loose connections, but be careful not to overtighten.
- Replace the O-rings: If tightening the connections doesn’t solve the leak, you may need to replace the O-rings. Turn off the water supply, remove the faucet handle, and locate the O-rings. Replace them with new ones and reassemble the faucet. Make sure to use the correct size O-rings for a proper seal.
- Apply plumber’s tape: Another solution is to wrap plumber’s tape around the threaded ends of the water supply connections. This can help create a watertight seal and prevent any leaks.
Loose or wobbly faucet
A loose or wobbly faucet can be not only an annoyance but also a potential safety hazard. If your wall mount faucet feels unstable, here’s what you can do to troubleshoot and fix the issue:
- Check the mounting brackets: First, check if the mounting brackets are securely attached to the wall. Use a level to ensure they are level and adjust them if necessary. Tighten the screws or bolts to secure the brackets in place.
- Tighten the faucet: If the faucet itself feels loose, use a wrench or screwdriver to tighten the nuts or screws that secure it to the mounting brackets. Be careful not to overtighten, as it can damage the faucet or the wall.
- Inspect the wall: Sometimes, the issue may not be with the faucet itself but with the wall. Check if there are any cracks or damage around the mounting area. If needed, repair the wall before reattaching the faucet.
Insufficient water flow
If you’re experiencing insufficient water flow from your wall mount faucet, it can be quite frustrating. Here are some troubleshooting tips to help you address this issue:
- Clean the aerator: The problem could be due to a clogged aerator. Unscrew the aerator from the faucet spout and clean it by soaking it in vinegar or using a toothbrush to remove any mineral deposits. Rinse thoroughly before reattaching.
- Check the water supply: Ensure that the water supply valves are fully open. Sometimes, the valves may not be fully turned on, restricting the water flow. Adjust the valves to allow maximum water flow.
- Inspect the plumbing: If the issue persists, you may need to check the plumbing system for any clogs or obstructions. Call a professional plumber to investigate and resolve the problem.
By following these troubleshooting tips, you can overcome common installation issues and ensure that your wall mount faucet works perfectly, providing you with a stylish and functional addition to your bathroom or kitchen.
Hiring A Professional Plumber For Complex Installations
Installing a wall mount faucet can add a touch of elegance and functionality to your bathroom or kitchen. While some installations may be simple enough for the average DIYer, complex installations require a higher level of expertise. That’s when it’s time to call in a professional plumber. By enlisting the help of a skilled and experienced plumber, you can ensure that your wall mount faucet is installed correctly and avoid potential complications down the line.
When to seek professional help
Knowing when to seek professional help is crucial when it comes to complex installations like wall mount faucets. Here are a few signs that indicate it’s time to call in a professional plumber:
- The installation involves intricate plumbing connections or modifications.
- You lack the necessary tools or knowledge to complete the installation.
- You want to ensure that the faucet is installed according to the manufacturer’s specifications.
- You want to avoid potential leaks or water damage.
The benefits of hiring a professional plumber
There are several benefits to hiring a professional plumber for complex wall mount faucet installations:
- Expertise: Professional plumbers have the knowledge and experience to handle complex installations with precision and efficiency.
- Proper Tools: Plumbers have the specialized tools and equipment necessary to complete the installation correctly.
- Compliance: Professional plumbers are familiar with local building codes and regulations, ensuring that your installation meets all the necessary requirements.
- Time and Cost Savings: Hiring a plumber can save you time and money in the long run by preventing potential mistakes and complications.
- Warranty: Many professional plumbers offer a warranty on their work, giving you peace of mind knowing that any issues will be promptly addressed.
When it comes to complex installations like wall mount faucets, it’s important to prioritize quality and efficiency. Hiring a professional plumber ensures that your installation is completed to the highest standard, giving you confidence in the reliability and longevity of your wall mount faucet.
Frequently Asked Questions
Is It Hard To Install A Wall Mount Faucet?
Installing a wall mount faucet is not difficult. It requires following simple instructions and using basic tools.
Where Do You Mount A Wall Mount Faucet?
A wall mount faucet is mounted on the wall above the sink or bath. It offers a clean and modern look to your space and eliminates the need for a traditional countertop or basin-mounted faucet. Simply position it at a height that is convenient for you to reach.
What Are The Disadvantages Of Wall Mounted Faucets?
Disadvantages of wall-mounted faucets include limited design options, higher installation costs, and potential difficulties with repair and maintenance. They may also require additional structural support and can be less convenient to use compared to traditional sink-mounted faucets.
How High Should Wall Mount Faucet Be For Vessel Sink?
The wall mount faucet for a vessel sink should be installed at a height that allows comfortable access to the water flow. Typically, it is recommended to place the faucet spout about 3-5 inches above the edge of the sink.
This ensures adequate clearance and prevents splashing.
Conclusion
Installing a wall mount faucet may seem daunting at first, but with the right tools and step-by-step instructions, it can be a straightforward process. By following the guidelines in this blog post, you can successfully install your wall mount faucet and enjoy the convenience and style it brings to your bathroom or kitchen.
Remember to carefully read the manufacturer’s instructions and take your time to ensure a proper installation. With a little patience and effort, you’ll be able to enjoy your new wall mount faucet for years to come.