Install vinyl plank flooring in a bathroom by following these steps: prepare the subfloor, measure and cut the planks, lay the planks starting from a corner, and secure them in place with adhesive. For a successful installation, it is important to properly prepare the subfloor, measure the planks accurately, and ensure they are securely attached.
This article will guide you through the process of installing vinyl plank flooring in your bathroom, providing you with all the necessary steps and tips for a seamless and professional result. By following these instructions, you will be able to transform the appearance of your bathroom and enjoy the durability and water-resistance of vinyl plank flooring.
Step-By-Step Guide To Installing Vinyl Plank Flooring In A Bathroom
Installing vinyl plank flooring in a bathroom is a cost-effective and attractive option that can instantly transform the look of your space. With the right tools and a little know-how, you can successfully complete the project on your own. In this step-by-step guide, we will walk you through the process of installing vinyl plank flooring in your bathroom, from preparing the subfloor to adding the finishing touches with baseboard or quarter round trim.
Preparing the Subfloor
The first step in any flooring installation project is to properly prepare the subfloor. This ensures a smooth and level surface for your vinyl planks. Here’s what you need to do:
- Clear the area: Remove any existing flooring or debris from the bathroom.
- Clean the subfloor: Thoroughly sweep and vacuum the subfloor to remove any dirt or dust.
- Check for imperfections: Inspect the subfloor for any uneven areas, cracks, or moisture damage. Fix any issues before proceeding.
- Apply a primer: If your subfloor is concrete, apply a primer to seal and level the surface. Follow the manufacturer’s instructions for the specific primer you are using.
- Install an underlayment: If your subfloor is wood, consider installing a plywood or cement backer board underlayment to provide additional stability and moisture resistance.
Measuring and Cutting the Vinyl Planks
Accurate measurements and precise cuts are essential for a professional-looking vinyl plank floor. Follow these steps:
- Measure the length and width of the bathroom: Use a tape measure to determine the dimensions of the room.
- Add 10% for waste: To account for any mistakes or odd cuts, add an extra 10% to your measurements when calculating the amount of flooring needed.
- Plan the layout: Take into consideration the direction of the planks, the position of doorways, and any patterns or designs you want to create.
- Mark and cut the planks: Use a straight edge and a utility knife to mark and cut the vinyl planks to the correct length. Remember to leave a small gap around the edges to allow for expansion.
Installing the First Row
The first row sets the foundation for the rest of the flooring installation. Follow these steps to get started:
- Start with a straight edge: Begin in a corner of the room or against a straight wall.
- Apply adhesive: Using a recommended vinyl plank flooring adhesive, apply a thin, even layer to the subfloor.
- Lay the first plank: Place the first plank along the starting wall, ensuring it is parallel to the edge.
- Secure the plank: Press the plank firmly into the adhesive, making sure it is level and firmly attached.
- Continue with the next planks: Install the remaining planks in the first row, using a tapping block and rubber mallet to connect them securely.
Cutting and Installing the Remaining Rows
Once the first row is installed, you can proceed to install the remaining rows:
- Measure and cut the planks: Measure and cut the planks for each row, staggering the seams to create a natural and visually pleasing look.
- Apply adhesive and install: Following the same steps as with the first row, apply adhesive and install the planks one row at a time.
- Secure and connect the planks: Use the tapping block and rubber mallet to ensure a tight fit and secure connection between the planks.
Dealing with Obstacles and Corners
Obstacles and corners can present a challenge during vinyl plank flooring installation. Here are some tips to overcome these obstacles:
- For doorways: Use a jamb saw or undercut saw to trim the bottoms of door jambs so that the planks can slide underneath.
- Around pipes: Use a hole saw or a jigsaw to cut holes in the planks for pipes or other obstructions.
- In corners: Use a miter saw to cut the planks at a 45-degree angle for a seamless and professional-looking corner.
Installing Baseboard or Quarter Round Trim
Once all the vinyl planks are installed, it’s time to add the finishing touch with baseboard or quarter round trim. Here’s how:
- Measure and cut the trim: Measure and cut the baseboard or quarter round trim to the appropriate lengths.
- Apply adhesive: Apply adhesive to the back of the trim and press it against the wall, making sure it is level and secure.
- Secure with finishing nails: To ensure a firm and long-lasting attachment, use finishing nails to secure the trim in place.
- Fill nail holes: Use wood filler to fill in any nail holes and sand the trim for a smooth finish.

Essential Tools And Materials For Installing Vinyl Plank Flooring
Installing vinyl plank flooring in a bathroom can be a rewarding and cost-effective way to give your space a fresh, updated look. To ensure a successful installation, it’s important to have the right tools and materials on hand. Here are the essential items you’ll need:
Measuring Tape
Measuring tape is an essential tool for any flooring installation project. You’ll need it to accurately measure the dimensions of your bathroom in order to cut the vinyl planks to the correct size. Make sure to measure both the length and width of your bathroom, taking into account any alcoves or corners.
Utility Knife
A high-quality utility knife is crucial for cutting the vinyl planks to fit your bathroom’s unique layout. Look for a knife with a sharp blade that can easily slice through the planks without leaving jagged edges.
Spacers
Spacers are used to create a uniform gap between the vinyl planks and the walls. These gaps allow for proper expansion and contraction of the flooring with temperature changes. Spacers come in various sizes, so choose ones that are appropriate for the width of the gap you desire.
Hammer
A hammer is an essential tool for gently tapping the vinyl planks into place during installation. Make sure to use a rubber mallet or a hammer with a soft face to avoid damaging the planks or leaving visible marks.
Pry Bar
A pry bar will come in handy for removing any existing baseboards or quarter round trim before the installation. This tool allows you to carefully lift and remove the trim without causing damage to the walls or flooring.
Tapping Block
A tapping block is a specialized tool designed to protect the edges of the vinyl planks during installation. It evenly distributes force when tapping the planks into place, reducing the risk of damage and ensuring a tight fit.
Notched Trowel
A notched trowel is necessary if you are using adhesive to secure the vinyl planks to the subfloor. This tool helps spread the adhesive evenly, ensuring maximum coverage and adhesion.
Adhesive
If you’re installing vinyl planks with a glue-down method, you’ll need to have adhesive on hand. Make sure to choose a vinyl flooring adhesive that is suitable for use in bathrooms and follow the manufacturer’s instructions for application and drying time.
Vinyl Planks
Of course, you’ll need vinyl planks themselves for your installation. Vinyl plank flooring comes in a wide range of styles, colors, and thicknesses, so choose one that complements your bathroom’s aesthetic and meets your durability needs.
Underlayment (if necessary)
In some cases, you may need to install an underlayment before laying the vinyl planks. This additional layer helps reduce noise, provides a cushioning effect, and evens out minor imperfections in the subfloor. Check the manufacturer’s recommendations to determine if underlayment is necessary for your specific vinyl plank flooring.
Baseboard or Quarter Round Trim
Finally, you may need baseboard or quarter round trim to complete the edges and transitions of your vinyl plank flooring. This trim not only enhances the overall appearance but also covers any gaps or imperfections that may exist between the planks and the walls.
By having these essential tools and materials on hand, you’ll be well-prepared to install vinyl plank flooring in your bathroom. Remember to take your time, follow the manufacturer’s instructions, and enjoy the transformation of your space!
Preparing The Subfloor For Vinyl Plank Flooring
Preparing the subfloor is a crucial step when installing vinyl plank flooring in your bathroom. Inspecting and cleaning the subfloor, leveling it properly, and filling any cracks or gaps will ensure a smooth and durable foundation for your new flooring. Additionally, removing baseboards before installing vinyl plank flooring will help achieve a seamless and professional finish. In this section, we will discuss each step in detail to help you prepare your subfloor for vinyl plank flooring installation.
Inspecting and Cleaning the Subfloor
Before you begin installing vinyl plank flooring, it is essential to inspect and clean the subfloor thoroughly. This will help identify any potential issues that may affect the installation and ensure a clean surface for the new flooring. Here’s how you can inspect and clean your subfloor:
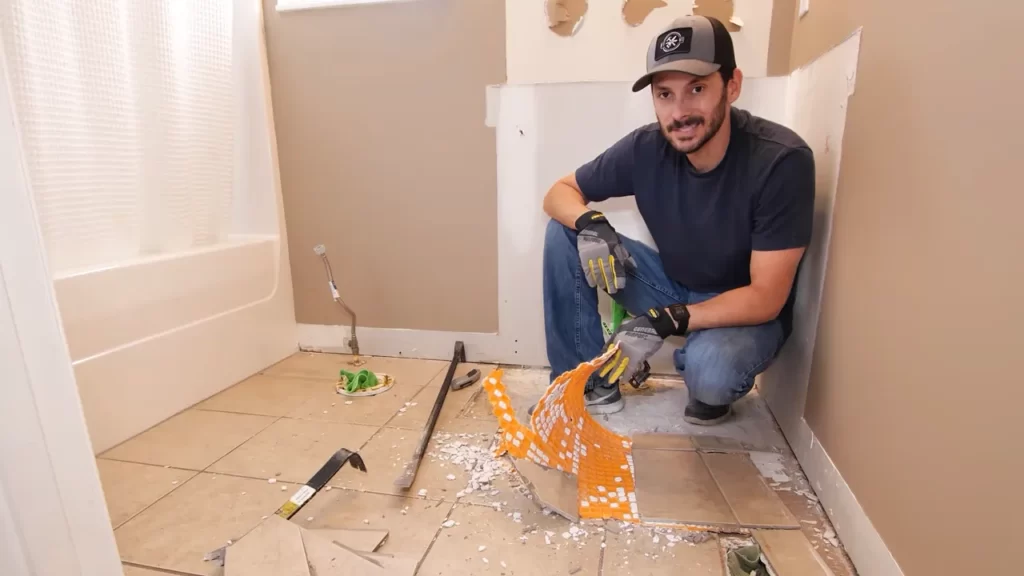
- Remove any existing flooring materials, such as tiles or old vinyl, if necessary.
- Check for unevenness, dips, or damaged areas on the subfloor. Use a level to identify any high or low spots.
- Sweep or vacuum the subfloor to remove any debris, dust, or loose particles.
- Clean the subfloor with a mild detergent and warm water to remove any stains or adhesive residue. Avoid using harsh chemicals that may damage the subfloor.
- Allow the subfloor to dry completely before proceeding to the next step.
Leveling the Subfloor
Ensuring a level subfloor is crucial for the proper installation of vinyl plank flooring. Here’s how you can level the subfloor:
- Identify any high or low spots on the subfloor using a level or straightedge.
- If there are any low spots, consider using a self-leveling compound to fill them. Follow the manufacturer’s instructions for mixing and applying the compound.
- For high spots, sand them down using a belt sander or hand sander until the subfloor is level.
- Repeat the leveling process until the entire subfloor is even and smooth.
Filling Cracks and Gaps
The presence of cracks or gaps in the subfloor can compromise the stability and appearance of your vinyl plank flooring. Here’s how you can fill cracks and gaps:
- Inspect the subfloor for any cracks or gaps between floorboards or along seams.
- Use a suitable wood filler or caulk to fill the gaps and cracks. Ensure the filler matches the color of the subfloor for a seamless finish.
- Smooth out the filler using a putty knife, ensuring it is level with the surrounding subfloor.
- Allow the filler to dry according to the manufacturer’s instructions before proceeding with the installation.
Removing Baseboards
Removing baseboards before installing vinyl plank flooring will allow for a clean and professional finish. Here’s how you can remove baseboards:
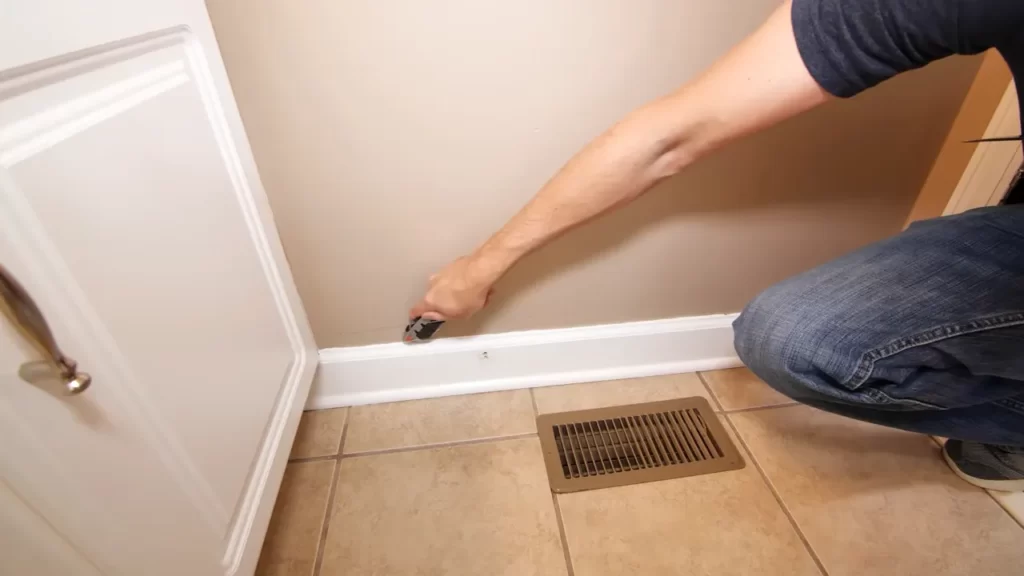
- Start by carefully prying the baseboards away from the wall using a pry bar or putty knife.
- Work your way along the baseboard, gently releasing it from the wall.
- Avoid damaging the baseboard or the wall during removal by being cautious and using steady pressure.
- Once removed, set the baseboards aside for reinstallation after the vinyl plank flooring is installed.
- Make sure to label each baseboard to ensure they are placed back in their original positions.
Measuring And Cutting Vinyl Planks For A Perfect Fit
When it comes to installing vinyl plank flooring in a bathroom, one of the most crucial steps is measuring and cutting the planks to ensure a perfect fit. This not only enhances the overall appearance of the flooring but also prevents any gaps or uneven edges. In this section, we will guide you through the process of measuring the bathroom space, calculating the number of planks needed, and cutting the planks to size, ensuring a seamless installation.
Measuring the Bathroom Space
The first step in installing vinyl plank flooring is to measure the dimensions of your bathroom. This will help you determine the amount of flooring material required for an accurate installation. To measure the bathroom space, follow these steps:
- Start by measuring the length of the bathroom from one end to the other. Use a tape measure and record the measurement in inches or centimeters.
- Next, measure the width of the bathroom by selecting the widest point. Again, use a tape measure and record the measurement.
- If your bathroom has any nooks, closets, or alcoves, measure their dimensions separately. This will help you calculate the extra material needed.
- Record all these measurements in a notebook or create a digital document. Having accurate measurements will make it easier to calculate the number of planks needed.
Calculating the Number of Planks Needed
Once you have the measurements of your bathroom, you can calculate the number of vinyl planks needed for the installation. To calculate the number of planks needed, follow these steps:
- Refer to the packaging of the vinyl planks and find the width and length of each plank.
- Divide the width of the bathroom by the width of the plank to determine how many planks will fit across the width. Round the result up to the nearest whole number to ensure you have enough planks.
- Divide the length of the bathroom by the length of the plank to determine how many planks will fit along the length. Again, round the result up to ensure you have enough planks.
- Multiply the number of planks across the width by the number of planks along the length to get the total number of planks needed.
Cutting the Planks to Size
Once you have the exact number of planks needed, it’s time to cut them to size. Cutting the planks to fit the bathroom space precisely will ensure a seamless and professional-looking installation. Here’s how to cut the planks:
- Start by measuring the leftover space at the end of the rows where whole planks won’t fit. Measure the width needed for the remaining section and mark it on the plank.
- Use a utility knife or vinyl plank cutter to cut along the marked line. Make sure to apply firm and steady pressure to get a clean and straight cut.
- Always double-check your measurements before making any cuts to avoid any mistakes. It’s better to measure twice and cut once to maintain accuracy.
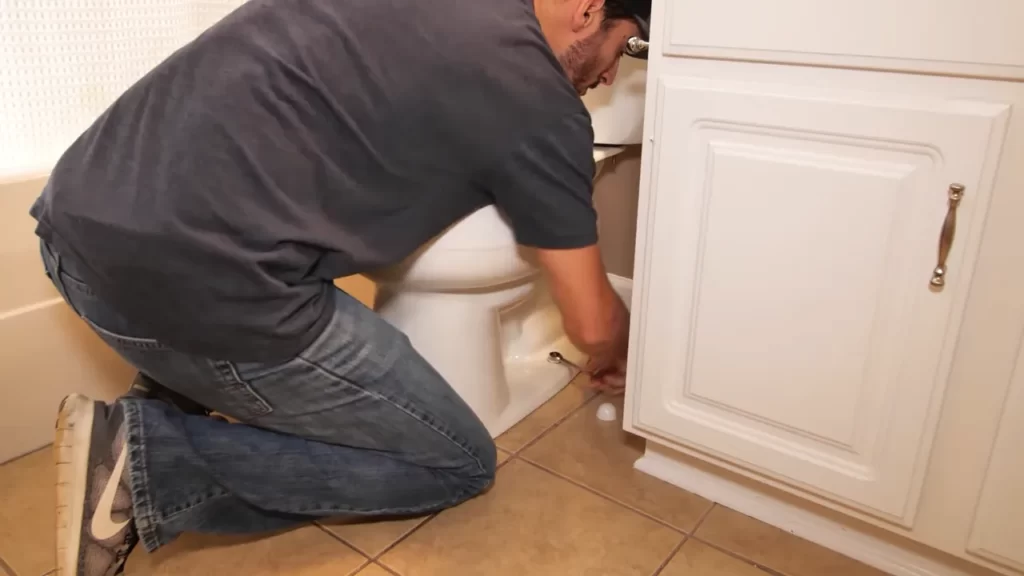
- Repeat the same process for any other planks that need to be cut to fit the end of rows or around obstacles like toilets or sinks.
By measuring and cutting the vinyl planks carefully, you can achieve a perfect fit that will enhance the overall look and durability of your bathroom flooring. Take your time during this step to ensure accuracy and precision, and you’ll be rewarded with a beautiful vinyl plank floor that will stand the test of time.

Installing The First Row Of Vinyl Planks
When it comes to installing vinyl plank flooring in a bathroom, starting with the first row correctly is essential for a successful installation. In this section, we will guide you through the steps of choosing the right starting point, creating a reference line, applying adhesive, and placing the first plank. By following these steps, you’ll be well on your way to achieving a beautiful and functional bathroom floor.
Choosing the Right Starting Point
Before you begin installing the first row of vinyl planks, it’s important to choose the right starting point. Typically, it’s recommended to start from the longest wall or the wall opposite the main entrance. This will create a visually appealing and balanced look to your flooring. In addition, consider any obstructions or fixtures in the room that may affect the placement of the planks.
Creating a Reference Line
To ensure accurate and straight installation, creating a reference line is crucial. Start by measuring the width of the room, and then find the center point. Use a chalk line or a straightedge to mark this center point on the floor. Extend the line from one end of the room to the other to create your reference line. This line will serve as a guide for aligning the first row of planks.
Applying Adhesive
Before placing the first plank, applying adhesive is necessary to ensure a strong bond between the planks and the subfloor. Read the manufacturer’s instructions on the adhesive packaging carefully, as different adhesives may have specific requirements. Using a trowel, spread a thin layer of adhesive along the reference line, covering an area that allows for the length of the first plank.
Placing the First Plank
With the adhesive applied, it’s time to place the first vinyl plank. Begin by aligning one end of the plank with the reference line and gently press it down onto the adhesive. Use a wooden block and a mallet to tap the plank firmly into place, ensuring proper adhesion. Continue installing the remaining planks in the first row, following the manufacturer’s instructions for spacing and interlocking mechanisms.
Cutting And Installing The Remaining Rows Of Vinyl Planks
Measuring and Cutting Planks for Each Row
To ensure a seamless and professional-looking installation, proper measurement and cutting of the vinyl planks is crucial. Start by measuring the width of the remaining space for each row. Use a tape measure to take accurate measurements, making sure to account for any gaps or trim that may be required.
Once you have the measurements, mark the plank accordingly using a pencil or a marker. It’s important to measure and mark each plank individually to ensure they fit perfectly into place. If you’re dealing with a narrow space, you may need to cut the planks lengthwise. In that case, use a straight edge and a utility knife to score the plank along the marked line.
Applying Adhesive to Each Plank
Before installing the planks, it’s important to apply adhesive to the back of each one. This will help create a secure bond between the vinyl plank and the bathroom floor. Make sure to use a high-quality vinyl adhesive that is specifically designed for this type of flooring.
To apply the adhesive, simply spread a thin, even layer on the back of each plank using a trowel or a putty knife. Be careful not to apply too much adhesive, as it can ooze out and create a mess. Also, avoid getting adhesive on the top surface of the plank, as it can be difficult to clean off once it dries.
Installing and Securing Each Plank
Once the adhesive is applied, it’s time to install the planks in their designated positions. Begin by aligning the first plank with the edge of the previous row, making sure it fits snugly and is level. Use a tapping block or a rubber mallet to gently secure the plank in place, ensuring a tight bond with the adhesive.
Continue installing the remaining planks in the same manner, making sure to leave a small gap between each one to accommodate for expansion. Use spacers or coins to maintain the proper gap size. As you go along, periodically check that each plank is level and aligned with the previous row.
If you encounter any irregularities or obstacles, such as pipes or corners, use a jigsaw or a utility knife to make the necessary cuts for a precise fit. Remember to use safety precautions when using power tools and always follow the manufacturer’s instructions.
In conclusion, cutting and installing the remaining rows of vinyl planks in a bathroom requires precision and attention to detail. By measuring and cutting each plank accurately, applying the right adhesive, and securing them properly, you can achieve a stunning and durable vinyl plank flooring installation in your bathroom.
Dealing With Obstacles And Corners During Vinyl Plank Flooring Installation
Installing vinyl plank flooring in a bathroom can be a great way to update the space with a durable and waterproof flooring option. However, when it comes to dealing with obstacles and corners, it’s important to have a solid plan in place. In this section, we’ll go over two key aspects of vinyl plank flooring installation: cutting planks for obstacles and installing planks around doorways. We’ll also cover handling corner pieces to ensure a seamless and professional-looking installation. Let’s dive in!
Cutting Planks for Obstacles
When installing vinyl plank flooring, it’s inevitable that you’ll encounter obstacles such as pipes, cabinets, or other fixtures. Cutting planks to fit around these obstacles can seem daunting, but with the right tools and techniques, it can be a breeze.
Here’s a step-by-step guide to cutting planks for obstacles:
- Measure the dimensions of the obstacle using a tape measure.
- Transfer the measurements onto the vinyl plank, marking the area that needs to be cut.
- Use a utility knife or vinyl plank cutter to carefully score the plank along the marked line.
- Bend the plank along the scored line to snap it cleanly.
- Trim any excess material with the utility knife or cutter.
Remember to wear safety goggles and gloves while cutting the planks, as vinyl can produce sharp edges when trimmed. Once you’ve cut the planks to fit around obstacles, you can continue with the installation process with confidence knowing that your flooring will fit perfectly.
Installing Planks Around Doorways
Doorways can present another challenge when installing vinyl plank flooring, but with proper planning and execution, you can achieve a seamless transition.
Here’s how to install planks around doorways:
- Measure the dimensions of the doorway opening, including any trim or molding.
- Transfer the measurements onto the plank, marking the area that needs to be cut.
- Use a miter saw or circular saw to cut the plank along the marked line.
- Test-fit the plank to ensure it fits snugly around the doorway.
- If necessary, make any adjustments by trimming the plank until it fits perfectly.
Once you have successfully installed the planks around the doorway, continue with the installation process, following the manufacturer’s instructions and ensuring each piece is securely locked into place.
Handling Corner Pieces
Corners can be tricky to navigate when installing vinyl plank flooring, but with the right approach, you can achieve a polished and professional look.
Here’s how to handle corner pieces:
- Measure the length of the wall where the corner will be located.
- Transfer the measurement onto the plank, marking the area that needs to be cut.
- Cut the plank using a miter saw or circular saw, ensuring a precise and angled cut.
- Test-fit the corner piece to ensure a tight and seamless fit.
- If necessary, make any adjustments by trimming or shaping the plank until it fits perfectly into the corner.
By following these steps, you’ll be able to tackle corner pieces with ease, ensuring a visually appealing and structurally sound installation.
Dealing with obstacles and corners during vinyl plank flooring installation may require some extra time and attention, but the end result will be well worth the effort. With the right tools, techniques, and a bit of patience, you can achieve a professional-looking installation that will enhance the beauty and functionality of your bathroom.
Completing The Bathroom Vinyl Plank Flooring Installation
Completing the installation of vinyl plank flooring in a bathroom requires a few final steps to ensure a professional and polished look. In this section, we will cover inspecting and cleaning the finished flooring, installing baseboard or quarter round trim, and provide some final touches and maintenance tips to keep your new bathroom flooring looking its best.
Inspecting and Cleaning the Finished Flooring
Once the vinyl plank flooring is installed in your bathroom, it’s important to inspect the finished product for any visible imperfections or damage. Take the time to walk around the room and examine each plank, looking for any chips, scratches, or misalignments that may have occurred during installation. If you spot any issues, make a note of them and plan to address them later.
After inspecting the flooring, it’s time to give it a thorough cleaning. Using a microfiber mop or a soft-bristle broom, gently sweep away any debris or dirt that may have accumulated during the installation process. Be sure to pay extra attention to the corners and edges of the room, as these areas can often collect more dust and debris.
Next, prepare a mixture of warm water and a gentle vinyl floor cleaner. Using a mop or a soft cloth, dampen it with the cleaning solution and carefully mop the entire floor surface. Be sure not to oversaturate the flooring, as excessive moisture can damage the vinyl planks. Once you’ve finished mopping, allow the floor to air dry completely before proceeding to the next step.
Installing Baseboard or Quarter Round Trim
To give your bathroom vinyl plank flooring a polished and finished look, it’s important to install baseboard or quarter round trim along the edges of the room. This trim will not only cover the expansion gap between the flooring and the walls but also add an aesthetic element to the overall design.
Start by measuring the length of each wall where the trim will be installed. Cut the baseboard or quarter round trim to the appropriate length using a saw or a miter box. Before securing the trim to the wall, apply a thin line of construction adhesive along the backside of the trim to ensure a strong and durable bond. Press the trim firmly against the wall and use finishing nails or a nail gun to secure it in place.
Final Touches and Maintenance Tips
With the baseboard or quarter round trim installed, take a moment to inspect the overall appearance of your newly installed vinyl plank flooring. Make any necessary touch-ups or repairs as needed, addressing any imperfections or unfinished areas.
For ongoing maintenance, regular sweeping and occasional mopping with a vinyl floor cleaner will help keep your bathroom flooring looking its best. Avoid using harsh chemicals or abrasive tools that could potentially damage the surface of the vinyl planks. Additionally, placing mats or rugs near the sink and shower area can offer extra protection against water damage.
By following these final steps and incorporating proper maintenance techniques, you can complete your bathroom vinyl plank flooring installation with confidence and enjoy a beautiful and durable flooring surface for years to come.
Frequently Asked Questions
What Do You Put Under Vinyl Plank Flooring In A Bathroom?
You should place a moisture barrier or underlayment under vinyl plank flooring in a bathroom to prevent water damage.
Is It Ok To Install Vinyl Plank Flooring In A Bathroom?
Yes, it is perfectly fine to install vinyl plank flooring in a bathroom. Vinyl plank is waterproof, durable, and easy to clean, making it an ideal choice for bathroom flooring. Its design options also allow you to create a stylish look for your bathroom.
Do You Need A Moisture Barrier Under Vinyl Plank In Bathroom?
A moisture barrier is essential under vinyl plank in a bathroom to prevent moisture damage. It acts as a protective layer between the subfloor and the vinyl, keeping out any moisture that may seep through. Without it, the vinyl could become warped or damaged over time.
Which Direction Do You Lay Vinyl Plank Flooring In A Bathroom?
Lay vinyl plank flooring in a bathroom in the direction that runs parallel to the longest wall. This helps create a visually appealing and spacious look.
Conclusion
Installing vinyl plank flooring in a bathroom is a great way to enhance its look and durability. With these simple steps, you can transform your bathroom into a stylish and functional space. From preparing the subfloor to laying the planks, we’ve covered everything you need to know.
So, go ahead and give your bathroom a fresh new look with vinyl plank flooring!