
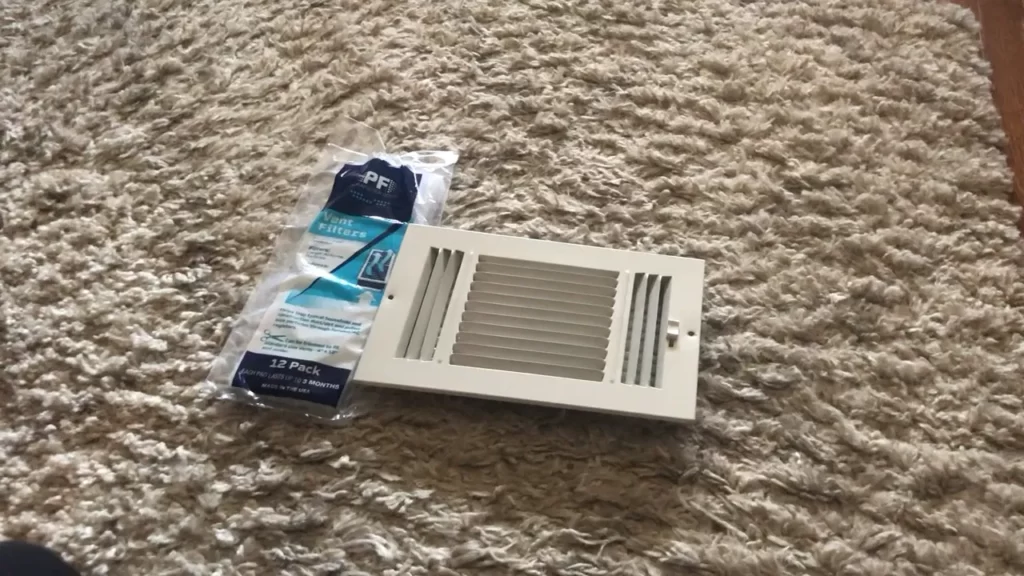
To install vent filters, remove the vent cover and measure the size of the opening. Purchase vent filters that match the measurements and place them securely into the vent opening.
Vent filters are essential for maintaining clean air quality in your home or office. They help to filter out dust, allergens, and other airborne particles, improving the overall air circulation. Installing vent filters is a simple and cost-effective way to ensure healthier indoor air.
By following a few easy steps, you can enjoy the benefits of cleaner air and reduce the risk of allergies and respiratory issues. We will guide you through the process of installing vent filters effectively. Keep reading to learn more about this crucial step in maintaining good air quality in your space.
Why You Need Vent Filters
When it comes to maintaining a healthy and clean indoor environment, one aspect that often gets overlooked is the air quality. Many people don’t realize that the air they breathe indoors can be just as polluted, if not more, than the outdoor air. This is due to various factors such as dust, allergens, and other contaminants that get trapped in our ventilation systems.
That is where vent filters come in. Vent filters help to improve indoor air quality by capturing and trapping these pollutants before they can circulate throughout your home. In this article, we will explore the importance of clean indoor air, common contaminants found in air vents, and the health benefits of using vent filters.
Importance of clean indoor air
Air quality plays a significant role in the overall health and well-being of individuals. Poor indoor air quality can lead to a variety of health issues, including allergies, respiratory problems, and even long-term health complications. This is especially true for those who suffer from asthma or other respiratory conditions. Clean indoor air is essential for ensuring that you and your family can breathe easily and live in a healthy environment.
Common contaminants in air vents
Our air vents act as a gateway for a multitude of contaminants to enter our homes. Some of the common contaminants that can be found in air vents include:
- Dust and debris
- Pollen and other allergens
- Mold spores
- Bacteria and viruses
These contaminants can accumulate over time and circulate throughout your home every time your HVAC system is running. Breathing in these pollutants can trigger allergic reactions, aggravate existing respiratory conditions, and compromise your immune system.
Health benefits of using vent filters
By using vent filters, you can effectively reduce the presence of these contaminants in your indoor air. Some of the key health benefits of using vent filters include:
- Improved Respiratory Health: Vent filters help to remove allergens and irritants from the air, reducing the risk of respiratory problems and improving overall lung function.
- Allergy Relief: Vent filters trap and capture common allergens, such as pollen and pet dander, preventing them from circulating in your home and triggering allergic reactions.
- Mold Prevention: Vent filters can prevent mold spores from entering your living spaces, reducing the risk of mold growth and associated health issues.
- Better Indoor Environment: By removing dust and debris, vent filters help to keep your home cleaner and minimize the need for frequent dusting and cleaning.
Investing in high-quality vent filters is a simple and effective way to protect your health and improve the air quality inside your home. By making this small change, you can create a healthier living environment for you and your loved ones.
Understanding Vent Filters
Different types of vent filters available
When it comes to understanding vent filters, it’s important to familiarize yourself with the different types available. Vent filters serve the crucial function of trapping dust, allergens, and other airborne particles, ensuring that the air you breathe is clean and healthy. Let’s take a closer look at the various types of vent filters:
| Type | Description |
|---|---|
| Fiberglass Filters | These filters are made of layered fiberglass material and are designed to capture larger particles like dust and debris. |
| Pleated Filters | Pleated filters are constructed with folded layers of material, offering a larger surface area for increased filtration efficiency. |
| Electrostatic Filters | Electrostatic filters utilize charged fibers to attract and capture smaller particles, including allergens and pet dander. |
| Activated Carbon Filters | Activated carbon filters are excellent at eliminating odors, chemicals, and volatile organic compounds (VOCs) from the air. |
| HEPA Filters | HEPA (High-Efficiency Particulate Air) filters are known for their exceptional ability to remove a wide range of airborne pollutants, including bacteria, mold spores, and pollen. |
Key features to consider when choosing a vent filter
Choosing the right vent filter can make a significant difference in the quality of your indoor air. To ensure you make an informed decision, keep these key features in mind:
- Filtration Efficiency: Look for filters with high MERV (Minimum Efficiency Reporting Value) ratings, indicating their ability to capture smaller particles.
- Airflow: Consider the airflow resistance of the filter to prevent strain on your HVAC system.
- Durability: Opt for filters made from durable materials to ensure they last longer.
- Ease of Installation: Choose filters that are easy to install and replace, saving you time and effort.
- Price: Compare prices while considering the filter’s longevity and performance to find the best value for your money.
Proper sizing of vent filters for different types of vents
Proper sizing of vent filters is crucial to ensure optimal performance and prevent airflow restriction. Here’s a guide to help you choose the right size filter for different types of vents:
- Standard Floor Vents: Measure the width and height of the grille and choose a filter that matches these dimensions.
- Return Air Vents: Measure the width and height of the opening in the wall or ceiling and select a filter that fits snugly.
- Register Vents: Measure the width and height of the register plate and choose a filter that covers the entire surface.
- Baseboard Vents: Measure the length and height of the vent and select a filter that matches these dimensions.
By understanding the different types of vent filters, considering key features, and ensuring proper sizing, you can effectively improve the air quality in your home or office. Take the time to evaluate your specific needs and make an informed decision when selecting and installing vent filters.
Steps To Install Vent Filters
Installing vent filters is a simple and effective way to improve the air quality in your home. By preventing dust, pollen, and other airborne particles from entering your vents, you can enjoy cleaner and healthier air. In this guide, we will walk you through the steps to install vent filters in your home.
1. Assessing your vent system
Before you begin the installation process, it is important to assess your vent system to determine the size and type of filters you will need. Check the size and material of your vent covers to ensure that they are compatible with the filters you plan to install. Additionally, consider the type of air ducts you have, as some filters are specifically designed for certain types of ducts.
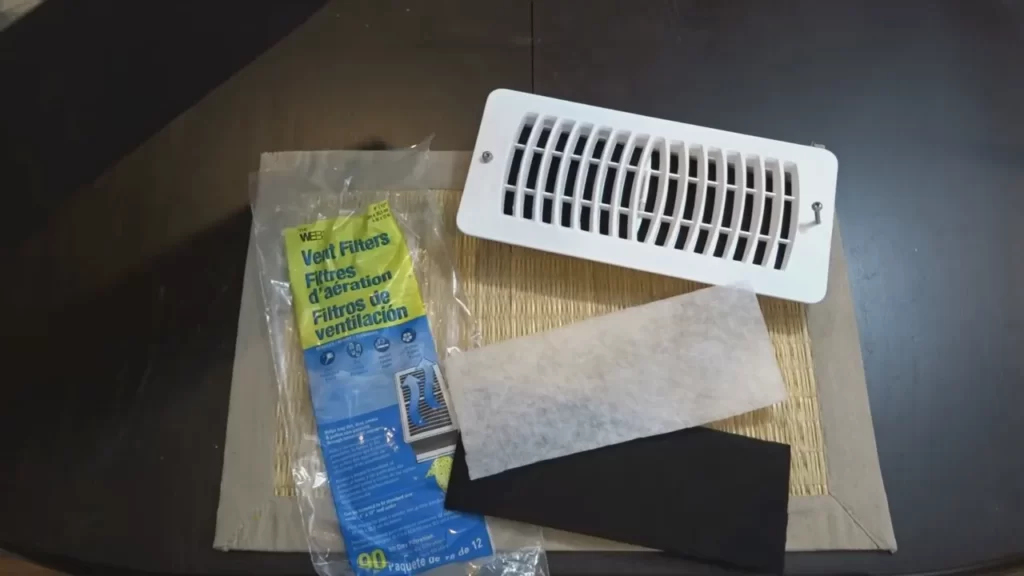
2. Gathering the necessary tools and materials
Once you have assessed your vent system, gather all the tools and materials you will need for the installation. Here is a list of what you will typically need:
| Tools | Materials |
|
|
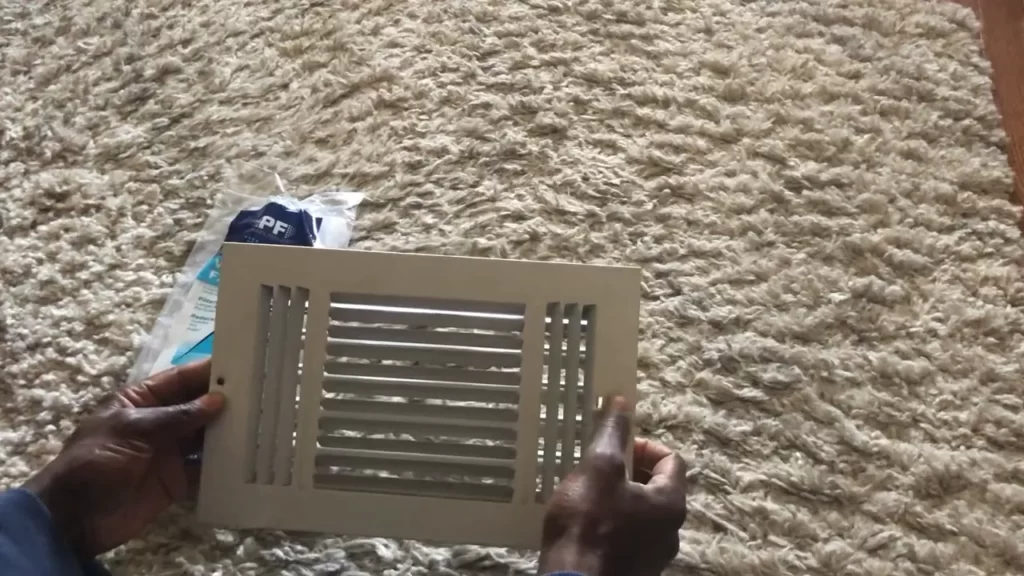
3. Removing the vent cover
Use a screwdriver to carefully remove the screws holding the vent cover in place. Set the screws aside in a safe place as you will need them later. Once the screws are removed, gently pull the vent cover away from the wall or ceiling. Be cautious not to damage the surrounding area.
4. Cleaning the vent and air duct
Before installing the vent filter, take the opportunity to clean the vent and air duct. Use a vacuum cleaner or a brush attachment to remove any dust or debris that may have accumulated. This will ensure that the vent filter can work efficiently and effectively.
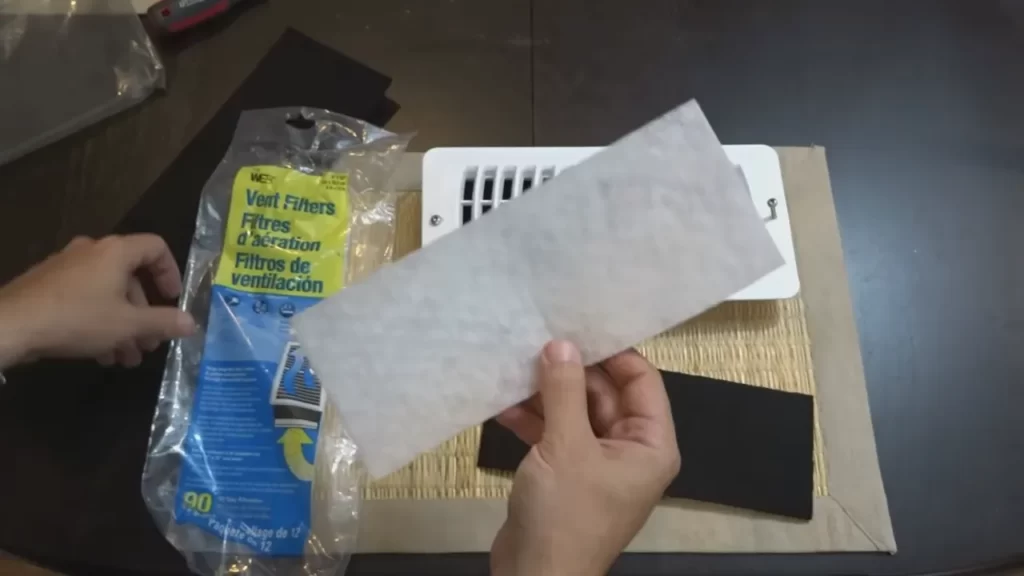
5. Installing the vent filter
Place the vent filter over the opening, ensuring a secure fit. If needed, trim the filter material to match the size of the vent cover using a utility knife. Some vent filters may come with adhesive strips or tabs to help secure them in place. Follow the instructions provided with the filters to ensure proper installation.
6. Securing the vent cover back into place
Once the vent filter is securely in place, carefully align the vent cover with the opening and push it back into position. Use the screws you set aside earlier to reattach the vent cover to the wall or ceiling. Tighten the screws until the cover is securely fastened but be cautious not to overtighten and damage the vent cover or the surface it is attached to.
By following these steps, you can easily install vent filters in your home and enjoy cleaner and healthier air. Remember to regularly clean and replace the filters to maintain optimal air quality.
Maintaining Vent Filters
Proper maintenance of your vent filters is essential for maintaining good air quality in your home and ensuring the efficient operation of your HVAC system. Regular cleaning and replacement of filters are key aspects of vent filter maintenance. Additionally, being able to identify signs that indicate the need for a filter change can help you stay on top of your maintenance schedule. In this section, we will discuss the importance of maintaining vent filters and provide you with some useful cleaning tips for different types of filters.
Regular Cleaning and Replacement Schedule
To keep your vents clean and prevent contaminants from circulating in your home, establish a regular cleaning and replacement schedule for your vent filters. How often you should clean or replace your filters depends on various factors such as the type of filter you have, the air quality in your area, and the level of pollutants in your home.
As a general guideline, we recommend cleaning or replacing your filters every 1-3 months. However, it’s important to check the manufacturer’s recommendations for your specific filter type, as some filters may require more frequent maintenance. Additionally, if you have pets or if someone in your household suffers from allergies, you may need to clean or replace your filters more frequently.
Signs That Indicate the Need for a Filter Change
Knowing when it’s time to change your vent filters is crucial for maintaining good air quality and preventing the buildup of harmful pollutants. Here are some common signs that indicate the need for a filter change:
- Visible dirt or debris on the filter
- Increased allergen or dust particles in the air
- Reduced airflow from the vents
- Unpleasant odors coming from the vents
If you notice any of these signs, it’s time to clean or replace your vent filters. Ignoring these signs can lead to decreased efficiency of your HVAC system and poor indoor air quality.
Cleaning Tips for Different Types of Vent Filters
Cleaning your vent filters properly is essential to ensure their longevity and effectiveness. The cleaning method will depend on the type of filter you have. Here are some cleaning tips for different types of vent filters:
Disposable Fiberglass Filters:
Disposable fiberglass filters are the most basic and affordable type of vent filters. They are typically replaced rather than cleaned. When it’s time to replace the filter, remove it and dispose of it properly. To install a new filter, simply slide it into place, ensuring the airflow direction arrow on the filter matches the airflow direction of the vent.
Pleated Filters:
Pleated filters are more efficient at trapping dust and allergens compared to fiberglass filters. These filters can be cleaned using a vacuum cleaner with a brush attachment. Gently vacuum the filter to remove any accumulated dirt and dust. If the filter is heavily soiled, it’s recommended to replace it instead.
Washable Filters:
Washable filters offer a more eco-friendly option as they can be cleaned and reused multiple times. To clean a washable filter, remove it from the vent and rinse it under running water. Use a mild detergent if necessary to remove stubborn dirt. Allow the filter to dry completely before reinserting it into the vent.
By following these cleaning tips and establishing a regular maintenance schedule, you can ensure that your vent filters continue to provide clean and fresh air for you and your family to breathe.
Troubleshooting Common Issues
While installing vent filters is a great way to improve indoor air quality, there may be some common issues that can arise. In this section, we will discuss and troubleshoot these issues to help ensure that your vent filters work effectively.
Reduced airflow after installing vent filters
If you notice reduced airflow after installing vent filters, there are a few potential causes that could be causing this issue:
- Dirty filters: Over time, dust and debris can accumulate on the filters, obstructing the airflow. To resolve this, make sure to regularly clean or replace the filters as recommended by the manufacturer.
- Incorrect installation: It’s essential to ensure that vent filters are installed correctly. Double-check that they are securely in place and not blocking the vents, as this can restrict airflow. Refer to the installation instructions provided by the manufacturer for guidance.
- Blockage in the duct system: Sometimes, the reduced airflow may not be due to the vent filters themselves, but rather other blockages in the duct system. Inspect the ducts for any obstructions or debris that may be hindering airflow. If you find any blockages, it may be necessary to contact a professional HVAC technician to perform a thorough cleaning.
Unpleasant odors despite using vent filters
If you are experiencing unpleasant odors even after installing vent filters, consider the following possible reasons:
- Expired filters: Vent filters typically have a lifespan, and using expired filters can result in reduced effectiveness in eliminating odors. Make sure to replace the filters as recommended by the manufacturer to ensure optimal odor control.
- Contaminated filters: When vent filters become saturated with particles and contaminants, they can emit unpleasant odors. In this case, cleaning or replacing the filters is necessary to maintain fresh and clean-smelling air.
- Other sources of odors: It’s essential to remember that vent filters can only do so much to eliminate odors. If there are other sources of unpleasant smells in your home, such as a mold infestation or pet odors, addressing these issues directly may be required to achieve a completely odor-free environment.
Choosing the right filter for specific air quality issues
When it comes to addressing specific air quality issues, it is crucial to choose the right vent filter for the job. Consider the following factors when selecting a filter:
- Air quality concern: Identify the specific air quality problem you want to address, such as pollen, dust, pet dander, or odors. Different filters are designed to target different types of pollutants, so understanding your concern will help you make an informed decision.
- Filter efficiency: Look for filters with high-efficiency ratings, such as MERV (Minimum Efficiency Reporting Value) ratings. Higher ratings indicate better filtration capabilities.
- Filter type: There are various types of filters available, including fiberglass, pleated, and electrostatic filters. Make sure to select the one that best suits your needs and budget.
- Filter size: Check the dimensions of your vents to ensure that the filters you choose will fit properly.
- Manufacturer recommendations: Lastly, always refer to the manufacturer’s recommendations and guidelines when selecting a filter. They can provide valuable insights on the most suitable option for your specific air quality concerns.
By considering these factors and choosing the right vent filter, you can effectively address your air quality issues and create a healthier indoor environment for you and your family.
Frequently Asked Questions
Which Way Does The Air Filter Go In The Vent?
The air filter should fit snugly in the vent with the arrow pointing towards the air flow direction.
Should You Put Filters In Air Vents?
Yes, it is advisable to put filters in air vents. Air filters help to trap dust, pollen, and other allergens, improving indoor air quality and preventing them from circulating through your home. Filters also help to prolong the lifespan of your HVAC system by preventing build-up of dirt and debris.
What Happens If Air Filter Is Backwards?
If an air filter is installed backwards, it can disrupt airflow and reduce filtration effectiveness. This may lead to poor engine performance, increased fuel consumption, and potential damage to the engine. Make sure to install the air filter correctly for optimal functioning.
Which Way Do Filtrete Filters Go?
Filtrete filters should be installed with the arrows pointing towards the blower or air handler.
Conclusion
Installing vent filters is an essential step in maintaining clean and healthy indoor air quality. By following the step-by-step guide provided in this blog post, you can easily install vent filters in your home and enjoy the benefits of reduced allergens, dust, and pollutants.
Remember, regular maintenance and replacement of these filters will ensure the continued effectiveness of your ventilation system. Breathe easier and live healthier with clean air in your home.