
To install an under deck drainage system, start by measuring the area and purchasing the necessary materials. Then, secure the flashing to the ledger board, install the troughs, and connect the downspouts.
Under deck drainage systems are a great way to maximize the usable space beneath your deck while preventing water damage. By diverting rainwater away from the area, these systems keep the space dry and comfortable. However, installing such a system requires careful planning and execution.
This article will guide you through the process of installing an under deck drainage system. From measuring the area and purchasing the needed materials to securing the flashing, installing the troughs, and connecting the downspouts, we will cover every step in detail. By following these instructions, you can ensure a successful installation and enjoy a dry and functional area beneath your deck.
Assessing The Deck For Drainage System Installation
Before installing an under deck drainage system, it is crucial to thoroughly assess the current deck structure. This assessment will help determine if the deck is compatible with the installation and identify any potential issues that may need to be addressed.
Evaluating the current deck structure for compatibility
Start by examining the construction materials and design of your deck. Determine whether the deck is made of wood, composite materials, or any other type of material. Understanding the materials used will help determine the best approach for installing the under deck drainage system.
Additionally, assess the structure’s size and shape. Measure the dimensions of the deck, including its length, width, and height. This information will guide you in determining the amount of materials required for the installation.
Next, inspect the deck’s slope or pitch. A proper slope is essential for effective drainage. Check to see if the deck has a slight pitch or if it is completely level. Ideally, a deck should have a minimum slope of 1/8 inch per foot to ensure proper water runoff. If the deck is entirely level, modifications may be needed to create the necessary slope.
Determining the necessary tools and materials
Once you have evaluated the deck’s compatibility for under deck drainage system installation, it is time to determine the tools and materials needed for the project.
Here is a list of essential tools and materials you will likely need:
| Tools | Materials |
|---|---|
| Measuring tape | Under deck drainage panels |
| Level | Gutter system |
| Power drill | Downspouts |
| Screwdriver | PVC cement or adhesive |
| Saw | Fasteners (screws, nails, or clips) |
| Sealant | Flashing tapes |
Make sure to gather all the necessary tools and purchase high-quality materials to ensure a durable and long-lasting under deck drainage system.
By thoroughly assessing your deck for compatibility and determining the necessary tools and materials, you are taking crucial steps towards a successful under deck drainage system installation. This preparation will help you avoid any setbacks and ensure a smooth and efficient installation process.
Preparing The Deck For Drainage System Installation
Before installing an under deck drainage system, it is crucial to properly prepare your deck. This step is essential to ensure the longevity and effectiveness of the drainage system. In this section, we will discuss two important tasks: cleaning the deck surface thoroughly and repairing any visible damage or decay.
Cleaning the deck surface thoroughly
Before starting the installation process, it is vital to clean the deck surface thoroughly. This ensures that the under deck drainage system can be installed on a clean and debris-free surface. Follow these steps to effectively clean your deck:
-
Remove any furniture, plants, or other items from the deck to clear the surface completely.
-
Using a broom or leaf blower, sweep away any loose dirt, leaves, or debris from the deck surface. Pay special attention to corners and hard-to-reach areas.
-
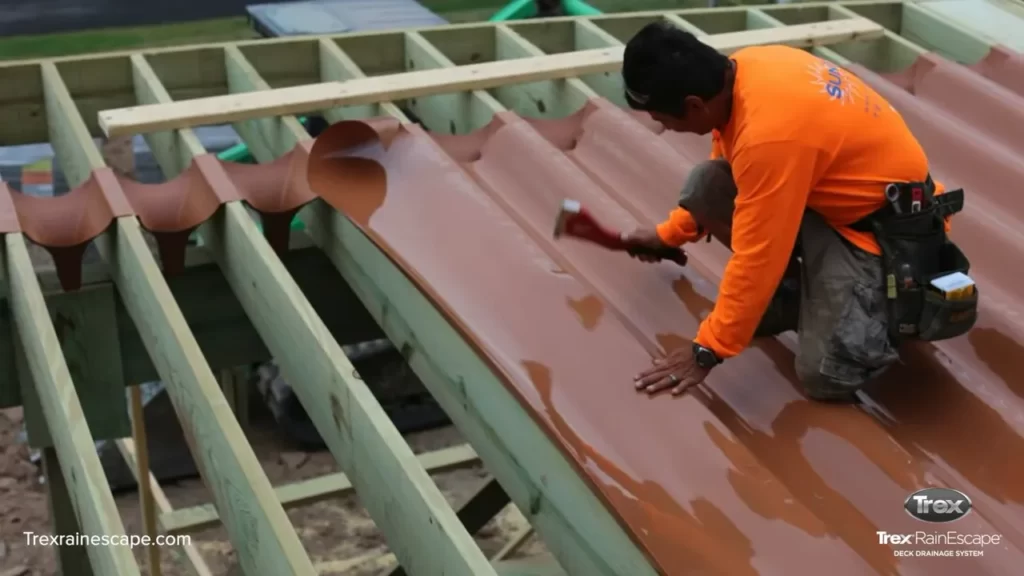
Next, thoroughly wash the deck using a power washer or a garden hose with a high-pressure nozzle attachment. This will help remove stubborn dirt, grime, and mold from the surface.
-
If there are any tough stains or mildew spots, use a mild deck cleaner and a scrub brush to gently scrub the affected areas. Rinse thoroughly after cleaning.
-
Allow the deck surface to dry completely before proceeding with the installation. This will ensure a strong adhesive bond and prevent any moisture-related issues in the future.
Repairing any visible damage or decay
Prior to installing the under deck drainage system, it is essential to inspect the deck for any visible damage or decay. Addressing these issues before the installation will prevent further deterioration and ensure a sturdy foundation for the drainage system. Here’s what you need to do:
-
Closely examine the entire deck surface, including the support beams and joists, for any signs of rot, decay, or structural damage. Look for soft or discolored wood, loose nails, or cracks.
-
If you spot any damaged or decayed sections, take immediate action to repair or replace them. This may involve removing the affected boards or reinforcing the support structures.
-
Use a suitable wood filler or epoxy to fill in any cracks or holes in the deck surface. Sand down the repaired areas for a smooth finish.
-
Consider applying a wood preservative or sealant to protect the repaired sections from future damage caused by moisture or insects.
-
It is recommended to consult a professional if you encounter extensive damage or feel unsure about the repair process. They can provide expert guidance and ensure a safe installation.
By thoroughly cleaning the deck surface and repairing any visible damage or decay, you are setting a solid foundation for the under deck drainage system. These steps will help enhance the performance and longevity of the system, ensuring a dry and functional outdoor living space for years to come.
Installing The Under Deck Joists And Downspouts
Once you have chosen and prepared your under deck drainage system, the next step is to install the under deck joists and downspouts. This crucial step will ensure that your under deck area stays dry and functional, allowing you to make the most out of your outdoor space.
Attaching and positioning the under deck joists
To begin the installation process, start by attaching and positioning the under deck joists. These joists will serve as the framework for your under deck drainage system, providing the necessary support. Here are the steps you need to follow:
- Measure and mark the spacing for the under deck joists, ensuring that they are evenly spaced for optimal stability.
- Using appropriate hardware, attach the joists to the existing deck structure. Ensure that they are securely fastened to prevent any movement or instability.
- Check the level of each joist to ensure that they are positioned correctly. This step is crucial for the proper drainage of water from your under deck area.
Remember, the accuracy and precision of this step will greatly impact the effectiveness of your under deck drainage system. So take your time to ensure everything is aligned correctly.
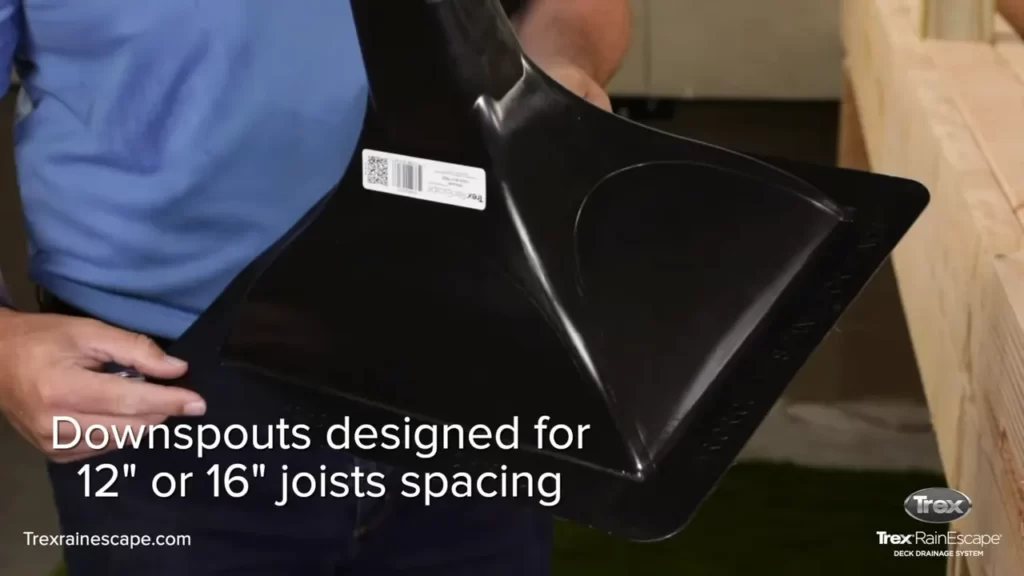
Mounting and connecting the downspouts
Once the under deck joists are securely in place, it’s time to mount and connect the downspouts. These will be responsible for channeling the water collected by the under deck drainage system away from your home’s foundation. Follow these steps for a successful installation:
- Measure and mark the desired locations for the downspouts. Consider the layout of your outdoor space and aim to place them in areas that are convenient and discreet.
- Securely mount the downspout brackets at the marked locations. Use appropriate hardware and ensure that they are level and securely attached to the under deck joists.
- Connect the downspouts to the brackets, making sure they are aligned and securely fastened. This step might require cutting and adjusting the downspouts to the desired length.
- Ensure that the downspouts are angled away from the house to avoid any water pooling near the foundation. This will prevent potential water damage and maintain the integrity of your home.
By correctly positioning and connecting the downspouts, you can ensure that the water collected by your under deck drainage system is efficiently directed away from your home, minimizing any potential water-related issues.
Attaching The Decking And Under Deck Ceiling
Inspecting And Testing The Drainage System
When installing an under deck drainage system, it is essential to inspect and test the system to ensure its proper functioning. This step is crucial to identify any potential issues or areas of improvement before the installation is complete. By thoroughly inspecting and testing the system, you can ensure that it will effectively divert water away from your deck, preventing structural damage and enhancing the overall longevity of your outdoor space.
Checking for proper water flow and drainage
Before conducting a full system test, it is important to check for proper water flow and drainage. Inspect the drainage system to ensure that there are no blockages or obstructions that may hinder the water from properly flowing. Check for debris, such as leaves or twigs, that might have accumulated over time and potentially clog the system. Remove any obstacles that you come across to ensure seamless water flow.
Conducting a thorough system test to ensure effectiveness
Once you have ensured proper water flow and drainage, it is time to conduct a thorough system test to ensure the effectiveness of the under deck drainage system. Begin by simulating heavy rainfall or the highest amount of water that the system is expected to handle. This can be done using a garden hose or bucket of water. Pour the water over the deck and observe how it drains through the system.
During the system test, pay attention to the following:
- Observe the water flow: Check if the water is effectively being diverted away from the deck and into the designated drainage area. Ensure that it is not pooling or accumulating in any part of the system.
- Inspect for leaks: Look for any leaks or signs of water seeping through the system. Focus on joints, connections, and any areas where water might escape.
- Check for proper drainage: Verify that the water is draining efficiently and not lingering on the surface of the deck or pooling in any other unintended areas.
Make any necessary adjustments:
- If you encounter any issues during the system test, such as poor water flow or leaks, make necessary adjustments and repairs. This may involve repositioning parts of the system, sealing connections, or replacing damaged components.
- Re-test the system after making adjustments to ensure that the desired functionality has been achieved.
By thoroughly inspecting and testing your under deck drainage system, you can identify any potential issues and address them before they become bigger problems. This process will help ensure the long-lasting effectiveness of the system, providing you with a dry and enjoyable outdoor space.
Enhancing And Maintaining The Under Deck Drainage System
Adding additional features for improved functionality
If you’re looking to enhance and maintain your under deck drainage system, adding additional features can improve its functionality and extend its lifespan. By incorporating these upgrades, you can create an even more efficient and versatile space beneath your deck.
1. LED Lighting: Installing LED lights can not only illuminate the area under your deck but also create a relaxing ambiance. LED lights are energy-efficient and long-lasting, making them an ideal choice for enhancing the aesthetics of your outdoor space.
2. Screens and Curtains: To maximize privacy and protection from insects, consider adding screens or curtains to your under deck area. It will create a comfortable outdoor oasis, allowing you to enjoy the space without worrying about unwanted pests.
3. Fans: If you live in a region with hot and humid climates, installing fans can make your under deck area more enjoyable. Fans will improve air circulation and provide relief from the sweltering heat, ensuring you can relax comfortably no matter the weather.
4. Access Doors: Depending on the layout of your under deck area, consider adding access doors for easy entry and exit. Access doors provide convenient storage solutions and simplify maintenance tasks, allowing you to access the space beneath your deck with ease.
Regular maintenance and cleaning tips
Maintaining your under deck drainage system is essential for its longevity and efficiency. Regular cleaning and maintenance can prevent clogs, water damage, and the growth of mold and mildew. Follow these tips to ensure your under deck area remains clean and functional:
1. Cleaning the gutters: Remove debris such as leaves, twigs, and dirt from your gutter system regularly. Use a hose with a high-pressure nozzle to flush out any remaining residue. This will prevent blockages and allow water to flow freely through the drainage system.
2. Inspecting for leaks: Check for any leaks or damages in your under deck drainage system. Pay close attention to the joints, connectors, and downspouts. If you notice any issues, repair or replace the damaged components promptly to prevent further damage.
3. Removing standing water: After heavy rain or snowfall, remove any standing water from your under deck area. Use a broom or a squeegee to sweep the water towards the nearest downspout. This will prevent the formation of stagnant water and potential water damage.
4. Sealing the deck surface: Apply a waterproof sealant to the floorboards of your deck to protect them from moisture and prolong their lifespan. This will also help in preventing water from seeping into the under deck area, ensuring the integrity of the drainage system.
Remember, regular maintenance and cleaning not only enhances the performance of your under deck drainage system but also helps you avoid costly repairs and keep the space beneath your deck in optimal condition for years to come.
Frequently Asked Questions
How Do You Install Drainage Under A Deck?
To install drainage under a deck, follow these steps: 1. Determine the slope and direction of water runoff. 2. Dig trenches around the deck perimeter at a depth of at least 12 inches. 3. Install a layer of landscape fabric to prevent soil erosion.
4. Place perforated pipes in the trenches and connect them to a drainage system or a designated outlet. 5. Backfill the trenches with gravel and cover it with soil. Ensure proper grading for efficient water flow.
Can You Add Under Deck Drainage System To Existing Deck?
Yes, it is possible to add an under deck drainage system to an existing deck. You can install a drainage system beneath the deck boards, which will help redirect water away from the space underneath the deck, keeping it dry and usable.
How Do You Drain Water From Under A Deck?
To drain water from under a deck, you can install drains or create a slope with gravel or sand. These methods help direct water away from the deck, preventing pooling and potential damage. Regular maintenance and cleaning also keep water flowing properly.
Is An Under Deck Drainage System Worth It?
Yes, an under deck drainage system is worth it. It prevents water from accumulating under your deck, protecting it from damage and extending its lifespan. It also adds usable space below your deck, creating a dry area for activities. This investment enhances your outdoor living experience and adds value to your home.
Conclusion
Installing an under deck drainage system is a practical solution to maximize the use of your outdoor space and protect it from the elements. By following the step-by-step guide provided in this blog post, you can DIY this project and save on installation costs.
Keep in mind the necessary materials and proper installation techniques to ensure the longevity and effectiveness of your under deck drainage system. So, roll up your sleeves and get ready to enjoy a dry and usable outdoor area all year round!