
To install a toilet bidet, follow these steps: shut off the water supply, remove the toilet seat, install the bidet attachment, reconnect the water supply, and test for leaks. Installing a bidet can enhance personal hygiene and reduce toilet paper usage.
This article provides a step-by-step guide on how to install a bidet, ensuring a clean and efficient bathroom experience. So, let’s get started!
Understanding The Different Types Of Bidets
Understanding the Different Types of Bidets
Bidets are becoming increasingly popular in households due to their many benefits, including improved hygiene and enhanced comfort. When it comes to bidets, there are different types available on the market to suit individual preferences and needs. In this article, we will explore the three main types of bidets: Electric Bidets, Non-Electric Bidets, and Attachment Bidets.
Electric Bidets
Electric bidets are the Cadillac of bidets, offering a luxurious and technologically advanced experience. These bidets are equipped with a wide range of features and functions that can be controlled via a remote control or side panel. Some of the features you can expect from an electric bidet include adjustable water temperature, pressure, and nozzle position, as well as built-in air dryers and heated seats.
The installation process for electric bidets may vary depending on the model, but it typically involves connecting the bidet to the water supply and electrical source. It is important to ensure that you have access to a nearby power outlet and a water source with easy access for installation.
Non-Electric Bidets
Non-electric bidets, also known as mechanical bidets, are a more budget-friendly option that still provides the benefits of a bidet. These bidets do not require electricity to operate and are often installed by attaching them directly to the toilet seat. Non-electric bidets typically feature a dial or lever that allows you to adjust the water pressure and angle for a personalized cleaning experience.
Installation of a non-electric bidet is relatively simple and can be done without the need for professional assistance. Most non-electric bidets come with installation instructions and all necessary hardware for a hassle-free setup. However, it is important to ensure that the bidet is compatible with your toilet seat before making a purchase.
Attachment Bidets
Attachment bidets, also known as add-on bidets or bidet seats, are a convenient option for those looking to upgrade their existing toilet without the need for a separate bidet fixture. These bidets can be easily attached to a standard toilet seat, transforming it into a functional bidet. Attachment bidets offer a range of features and can be electric or non-electric, depending on the model.
The installation process for attachment bidets may vary depending on the brand and model you choose. However, they typically involve removing the existing toilet seat, attaching the bidet seat to the toilet bowl, and connecting the water supply. The installation instructions provided with the attachment bidet should guide you through the process and ensure a successful installation.
In conclusion, understanding the different types of bidets is essential when it comes to selecting the right bidet for your needs. Whether you opt for an electric bidet with all the bells and whistles, a non-electric bidet for a simple yet effective cleaning experience, or an attachment bidet for added convenience, there is a bidet option out there to suit your preferences and budget. Take the time to research and consider your options to make an informed decision that will enhance your bathroom routine and improve your overall hygiene.
Assessing Your Toilet For Bidet Installation
Before you jump into installing a bidet on your toilet, it’s crucial to assess if your toilet is compatible and meets the necessary requirements for installation. This step is essential not only to ensure a smooth installation process but also to avoid any potential issues or damage in the future. In this section, we will guide you through the assessment process, including a compatibility check and the required tools and materials. Let’s get started!
Compatibility Check
When it comes to bidet installation, not all toilets are created equal. Before proceeding, it’s important to determine if your toilet is compatible with a bidet attachment or if any modifications are needed. To assess compatibility, follow these steps:
- Check the shape of your toilet bowl: Bidet attachments come in different shapes and sizes. The most common toilet bowl shapes are round and elongated. Measure the distance from the center of the mounting holes at the back of your toilet to the front edge of the bowl. This measurement will help you determine the correct attachment size.
- Check the water supply line: Take a look at the water supply line connecting your toilet tank to the wall. Bidet attachments typically require a standard 7/8-inch T-valve connection. Make sure your toilet has this type of connection.
- Check the water pressure: Bidet attachments require a minimum water pressure to function properly. You can check your water pressure using a pressure gauge, which can be purchased at a local hardware store. Ensure that your water pressure meets the manufacturer’s recommended requirements.
Required Tools and Materials
Now that you’ve determined the compatibility of your toilet for bidet installation, it’s time to gather the necessary tools and materials. Having these items handy will make the installation process much easier and smoother. Here’s a list of the required tools and materials:
- Bidet attachment kit: This includes the bidet attachment itself, along with any additional components such as hoses and connectors.
- Adjustable wrench or channel locks: These tools will assist you in loosening and tightening nuts and bolts during installation.
- Teflon tape: This tape helps create a leak-free seal when connecting the bidet attachment to the water supply line.
- Screwdriver: Depending on the bidet attachment, you may need a screwdriver to secure certain parts.
- Bucket and towels: It’s always a good idea to have a bucket and towels on hand to catch any excess water and clean up any spills.
By ensuring your toilet is compatible and having the required tools and materials ready, you’re now one step closer to installing a bidet attachment. In the next section, we will guide you through the installation process, providing step-by-step instructions for a successful installation. Stay tuned!
Preparing For Bidet Installation
Before installing a toilet bidet, there are a few important steps you need to take to prepare for the installation process. By following these steps, you can ensure a smooth bidet installation and avoid any potential complications. Here, we will discuss how to shut off the water supply, drain the toilet, and remove the toilet seat.
Shutting Off the Water Supply
The first step in preparing for bidet installation is to shut off the water supply to your toilet. This will prevent any water from flowing while you work on the bidet. Follow the steps below to perform this task:
- Locate the water shut-off valve usually situated behind or beside the toilet.
- Turn the valve clockwise until it is completely closed. This will stop the water flow into the toilet tank.
- Once the valve is closed, you can flush the toilet to empty the tank before proceeding to drain the toilet.
Draining the Toilet
After shutting off the water supply, you need to drain the toilet to avoid any water spillage during the bidet installation. Here’s how you can drain the toilet:
- Remove the tank lid and locate the toilet flapper valve at the bottom of the tank.
- Gently lift the flapper valve to allow the water in the tank to drain into the toilet bowl.
- Note that the water may be dirty, so it’s recommended to wear gloves to avoid any mess.
- Use a small container or a towel to soak up any remaining water in the bowl.
- Make sure the toilet bowl is completely empty before moving on to the next step.
Removing the Toilet Seat
Before installing the bidet, it’s necessary to remove the existing toilet seat. Follow these steps to remove the toilet seat:
- Locate the plastic caps covering the bolts that secure the seat to the toilet.
- Gently pry open the caps using a flathead screwdriver or your fingers.
- Using a wrench or pliers, unscrew the bolts counterclockwise to loosen them.
- Once the bolts are loose, lift the seat and detach it from the toilet bowl.
- Set the removed seat aside for disposal or future use.
By following the steps above, you will have successfully prepared your toilet for bidet installation. Now, you can move on to the next steps, which involve installing the bidet and reconnecting the water supply. Stay tuned for our next blog post on bidet installation!
Installing An Electric Bidet
Installing an Electric Bidet
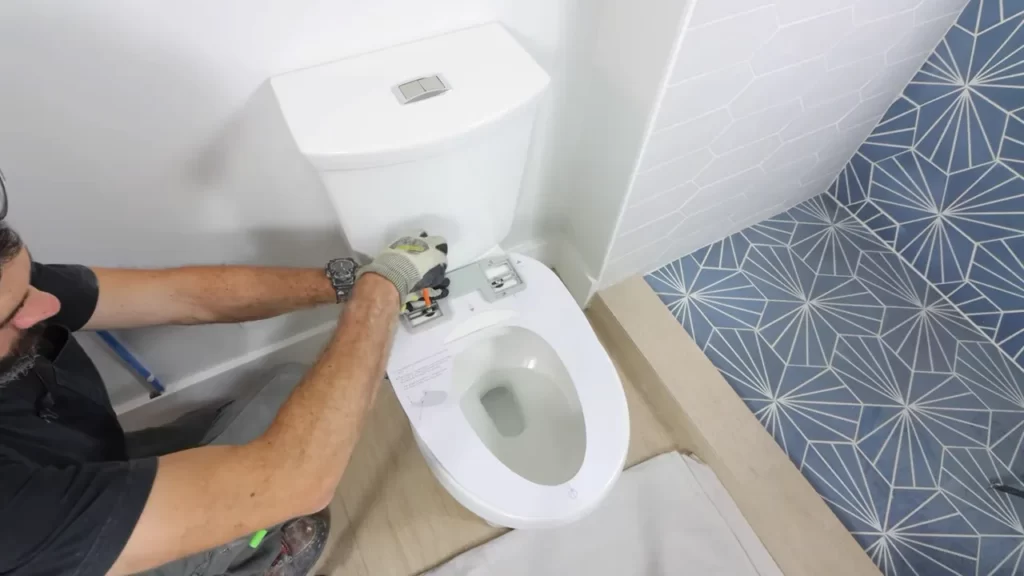
Mounting the Bidet Bracket
Before you begin, ensure that you have all the necessary tools and parts ready to avoid any interruptions during the installation process.
1. Measure the distance between the mounting holes on your toilet bowl. This will help you determine the correct placement for the bidet bracket.
2. Place the bidet bracket against the back of the toilet bowl, aligning the holes on the bracket with the holes on the bowl.
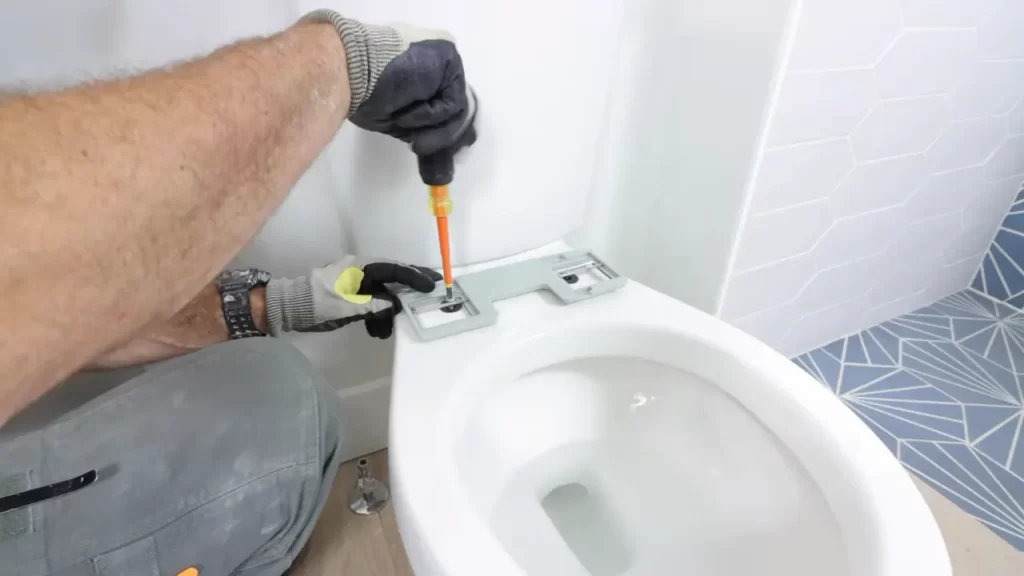
3. Use the provided screws and a screwdriver to firmly attach the bidet bracket to the toilet bowl. Make sure the bracket is secure and does not wobble.
4. Check the manufacturer’s instructions to see if any additional steps are required for mounting the bidet bracket.
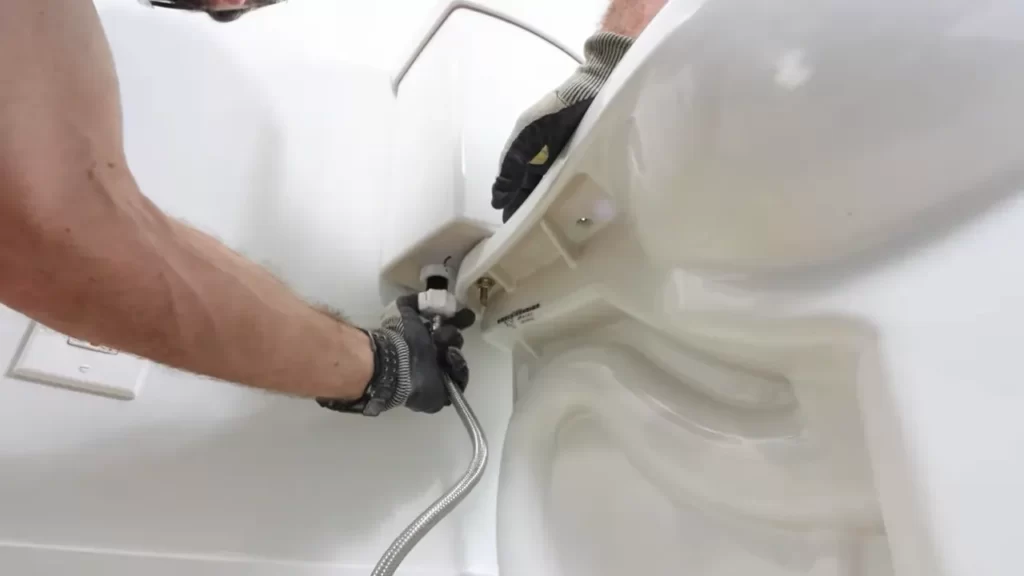
Connecting the Water Supply
Now that you have successfully mounted the bidet bracket, it is time to connect the water supply for the bidet.
1. Locate the water supply valve behind your toilet. This valve controls the flow of water to your toilet.
2. Turn off the water supply by turning the valve clockwise. This will prevent any water from flowing while you connect the bidet.
3. Disconnect the existing water supply hose from the bottom of the toilet tank. This hose is usually connected to a valve or a T-connector.
4. Connect one end of the bidet water supply hose to the valve or T-connector, depending on your bidet model.
5. Attach the other end of the bidet water supply hose to the water inlet on the bidet. Make sure it is firmly connected to prevent any leaks.
6. Turn on the water supply by turning the valve counterclockwise. Check for any leaks around the connections and fix them if necessary.
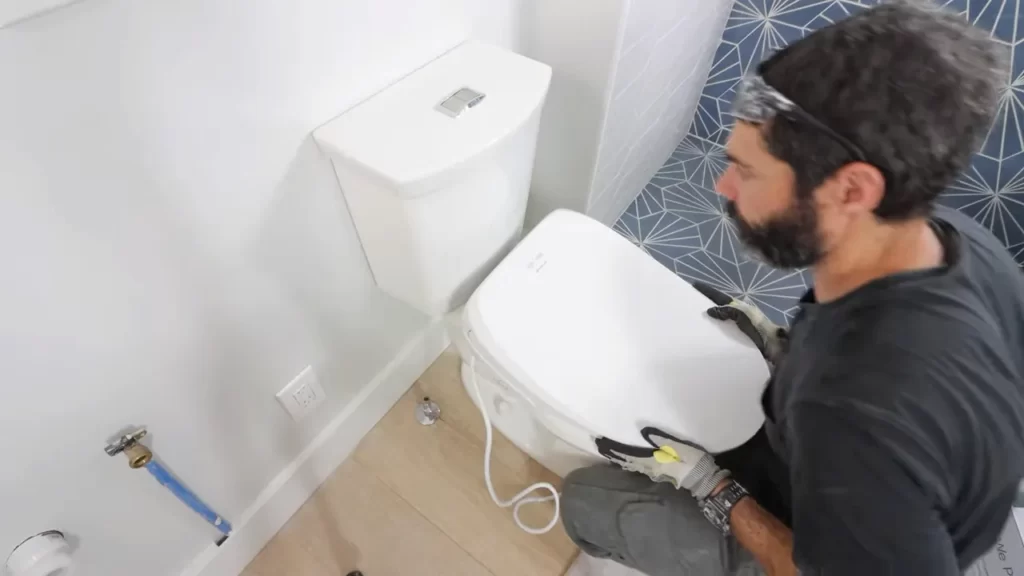
Attaching the Bidet Seat
With the bidet bracket securely mounted and the water supply connected, it’s time to attach the bidet seat.
1. Place the bidet seat onto the bidet bracket, aligning the holes on the seat with the holes on the bracket.
2. Insert the provided screws through the holes on the seat and into the bracket. Use a screwdriver to tighten the screws until the seat is securely attached.
3. Ensure that the bidet seat is level and does not wobble. Adjust the screws if needed to achieve a stable and comfortable seating position.
4. Double-check all the connections and make sure everything is secure before using the bidet.
Congratulations! You have successfully installed your electric bidet. Enjoy the enhanced hygiene and comfort it provides!
Installing A Non-Electric Or Attachment Bidet
Installing a non-electric or attachment bidet is a straightforward process that can offer numerous benefits such as enhanced personal hygiene and reduced toilet paper usage. In this section, we will walk you through the steps of mounting the bidet attachment, connecting the water supply, and adjusting the spray nozzle. Let’s get started!
Mounting the Bidet Attachment
To begin the installation process, you’ll need to mount the bidet attachment onto your existing toilet. Follow these simple steps:
- Start by turning off the water supply to your toilet. Locate the shut-off valve, usually situated behind or below the toilet tank, and turn it clockwise to close.
- Next, remove the toilet seat by unscrewing the bolts that hold it in place. You can typically find these bolts at the back of the seat. Once the bolts are removed, gently lift the seat off the toilet.
- Before attaching the bidet, ensure that the toilet surface is clean and dry. Place the bidet attachment over the toilet bowl opening, aligning it with the mounting holes that were previously occupied by the toilet seat bolts.
- Using the provided hardware, secure the bidet attachment in place by fastening the bolts through the mounting holes. Tighten the bolts until the bidet attachment feels stable and does not shift.
- Once the bidet attachment is securely mounted, reattach the toilet seat by lining up the seat’s mounting holes with the bidet attachment’s bolts. Tighten the seat bolts to secure the seat in place.
Connecting the Water Supply
Now that the bidet attachment is properly mounted, you can connect it to the water supply. Follow these steps:
- Locate the T-adapter, which should have come with your bidet attachment. This adapter allows you to divert water from the toilet’s water supply line to the bidet attachment.
- Turn off the water supply to the toilet by closing the shut-off valve if you haven’t already done so.
- Disconnect the flexible hose that connects the toilet tank to the water supply valve. Attach one end of the T-adapter to the shut-off valve, and the other end to the water supply valve.
- Now, take the other end of the T-adapter and attach it to the bidet attachment. Ensure that all connections are secure by hand-tightening them.
- Once the connections are secure, turn on the water supply by reopening the shut-off valve. Check for any leaks around the T-adapter, bidet attachment, and toilet connections. If necessary, tighten the connections further to eliminate leaks.
Adjusting the Spray Nozzle
With the bidet attachment mounted and connected to the water supply, it’s time to adjust the spray nozzle for optimal comfort. Follow these steps:
- Sit on the toilet and activate the bidet by turning on the water supply. Allow the water to flow from the nozzle for a few seconds to ensure proper functionality.
- Depending on your bidet attachment model, there may be a dial or lever to control the angle and pressure of the water spray. Adjust these settings according to your preference, keeping in mind that gentler sprays are usually more comfortable.
- Once you’ve adjusted the spray nozzle to your liking, test it out by using the bidet. If necessary, make further adjustments until you find the perfect settings for your comfort.
- Lastly, remember to dry yourself with toilet paper or a towel after using the bidet, as bidets are not intended to be a replacement for complete drying.
By following these steps, you can easily install a non-electric or attachment bidet onto your toilet. Enjoy the added comfort and hygiene benefits that bidets can provide!
Testing And Adjusting The Bidet
Turning On the Water Supply
Before testing the bidet, ensure that the water supply is turned on and flowing properly. Locate the water valve under your sink or behind the toilet and make sure it is in the open position. If the valve is closed, turn it counterclockwise to allow water to flow to the bidet. Check for any leaks or drips from the water connections. If everything looks good, move on to the next step.
Testing the Spray
Once the water supply is turned on, it’s time to test the bidet spray. Take a seat on the toilet and activate the bidet by using the controls on the side or the remote control. Start with the lowest water pressure setting and gradually increase it to find the level that suits your preferences. Take note of the spray pattern and adjust the position of the nozzle if necessary. Ensure that the spray reaches the desired areas and provides effective cleaning.
If you notice any leaks or weak spray, check the connections and make sure they are tight. Sometimes, air may be trapped in the water lines, causing a weak spray. To resolve this, simply run the bidet for a few minutes to flush out the air bubbles.
Adjusting Water Pressure and Temperature
Now that you have tested the bidet spray, you can fine-tune the water pressure and temperature according to your comfort. Most bidets come with adjustable settings to suit individual preferences. Use the controls to increase or decrease the water pressure and adjust the temperature to your desired level. Remember to test each adjustment to ensure it meets your requirements.
If you are unsure about the ideal water pressure and temperature, start with a moderate setting and make small adjustments until you find the perfect balance. It may take some trial and error to find what works best for you, but it will be worth it once you achieve optimal comfort and cleanliness.
Remember: Regularly clean and maintain your bidet to keep it in optimal working condition. Follow the manufacturer’s instructions for cleaning and maintenance, and if you encounter any issues or concerns, don’t hesitate to reach out for professional assistance.
Frequently Asked Questions
Can You Add A Bidet To An Existing Toilet?
Yes, it is possible to add a bidet to an existing toilet. This can be done through various options such as installing a bidet seat or attaching a bidet attachment to the existing toilet. Consulting a professional plumber is recommended to ensure proper installation.
What Plumbing Is Needed For A Bidet?
Bidets require a hot and cold water supply and a separate drain line connected to the existing plumbing system.
Do You Need A Water Line For A Bidet?
Yes, you need a water line for a bidet. A water line connects the bidet to a water supply so it can provide the necessary water for cleaning.
Do Bidet Toilets Need Hot Water Line?
Bidet toilets do not necessarily require a hot water line. Some bidet toilets come with built-in water heaters, while others use ambient temperature water. The choice depends on personal preference.
Conclusion
Installing a toilet bidet is a simple and effective way to enhance your bathroom experience. By following the step-by-step instructions provided in this blog post, you can easily install a bidet and enjoy the benefits it provides. Remember to carefully consider the necessary tools and measurements before beginning the installation process.
So, go ahead and upgrade your bathroom with a bidet for a more hygienic and comfortable lifestyle.