To install tile with mesh backing, ensure the surface is smooth, clean, and dry, then apply thin-set mortar and press the tile into place firmly. Thinking of giving your space a fresh new look?
Installing tile with mesh backing can be an excellent option. Whether you’re updating your kitchen backsplash or renovating a bathroom, mesh-backed tile makes the installation process a breeze. With its convenient design, you can easily apply the tiles without having to deal with individual adhesive application.
In this guide, we’ll walk you through the steps to install mesh-backed tile, giving you the confidence to tackle your next home improvement project. So, let’s dive in and discover how you can install tile with mesh backing.
Choosing The Right Tile: Factors To Consider
When it comes to installing tile with mesh backing, it’s important to choose the right tile that will not only complement your space visually, but also provide the necessary durability and functionality. There are various factors you should consider before making a decision on the type of tile suitable for mesh backing installations. Here are some key factors to keep in mind:
Types of tile suitable for mesh backing installations
- Ceramic tile: Ceramic tile is a popular choice for mesh backing installations due to its affordability and versatility. It is available in a wide range of colors, patterns, and textures, making it suitable for various design aesthetics.
- Porcelain tile: Porcelain tile is known for its exceptional durability and water resistance, making it perfect for areas prone to moisture, such as bathrooms and kitchens. It can mimic the look of natural stone or wood, allowing you to achieve the desired aesthetic.
- Glass tile: Glass tile adds a touch of elegance and sophistication to any space. It comes in a variety of sizes, shapes, and colors, allowing for creative and unique designs. However, it is important to note that glass tile can be more fragile compared to ceramic or porcelain tile.
- Stone tile: Natural stone tile, such as marble, granite, or slate, provides a timeless and luxurious look. Each piece of stone tile is unique in its patterns and colors. However, stone tile requires regular sealing and maintenance to prevent staining and water damage.
Durability, aesthetics, and suitability for different spaces
When choosing tile for a mesh backing installation, it is crucial to consider its durability, aesthetics, and suitability for different spaces. Here are some points to consider:
- Durability: Determine the level of foot traffic in the area where the tile will be installed. For high-traffic areas, such as entryways or hallways, a durable tile like porcelain or ceramic is recommended. In low-traffic areas, you may have more flexibility in choosing a softer stone tile or glass tile.
- Aesthetics: Consider the overall style and design of your space. Choose a tile that complements the existing color palette and decor. For a modern look, sleek and minimalist porcelain tile may be a good choice. If you prefer a rustic or natural aesthetic, stone tile can add warmth and character.
- Suitability for different spaces: Different spaces have different requirements. For wet areas, such as bathrooms or shower surrounds, choose a tile that is water resistant, like porcelain or glass. For outdoor installations, make sure the tile is frost-resistant and has a high slip resistance rating.
By considering these factors, you can select the right tile that not only works well with mesh backing installations but also suits your personal style, budget, and the specific needs of your space.

Preparing The Subfloor For Installation
The subfloor is the foundation for any tile installation project, so it is crucial to properly prepare it before proceeding. This ensures that the tiles will have a solid base and ensures a successful and long-lasting installation. There are a few key steps involved in preparing the subfloor for tile installation:
Assessing the condition of the subfloor
The first step in preparing the subfloor is to assess its condition. This involves checking for any damage or discrepancies that could affect the tile installation. Inspect the subfloor for cracks, loose boards, or any other issues that need to be addressed before proceeding. It’s important to fix any problems with the subfloor to ensure that the tiles will be laid on a stable and even surface.
Repairing any damage or discrepancies
Once you have identified any issues with the subfloor, the next step is to repair them. This may involve replacing damaged boards, filling in cracks, or reinforcing weak spots. Repairing the subfloor ensures that it will be able to support the weight of the tiles and prevent future issues such as cracking or shifting. It’s important to take the time to properly repair any damage to ensure a smooth and successful tile installation.
Cleaning and leveling the surface
After repairing any damage, it’s important to clean the subfloor to ensure a proper bond between the tiles and the surface. Remove any debris, dust, or grease from the subfloor using a broom or vacuum cleaner. Next, check for any uneven areas and level the surface as needed. Uneven subfloors can cause tiles to crack or come loose over time, so it’s important to address any unevenness before proceeding.
To level the subfloor, you can use a self-leveling compound. Follow the manufacturer’s instructions to mix and apply the compound, ensuring that it is spread evenly across the subfloor. This will provide a smooth and level surface for the tile installation. Let the compound dry completely before moving on to the next step.
Once the subfloor is clean and level, you are ready to begin the tile installation process. Taking the time to properly prepare the subfloor will ensure a successful and long-lasting installation, allowing you to enjoy your new tile floor for years to come.
Installing Tiles With Mesh Backing
Installing tiles with mesh backing is an efficient and convenient way to create a beautiful tiled surface. The mesh backing not only provides stability but also ensures that the tiles are evenly spaced and aligned. In this guide, we will walk you through the step-by-step process of laying out the tiles, applying thin-set mortar, pressing the tiles into place, and checking for even spacing.
Laying out the tiles for proper alignment
Before you begin installing the tiles, it is crucial to lay them out in a pattern that ensures proper alignment. This step is especially important if you are working with larger tiles or intricate designs. To lay out the tiles:
- Start by cleaning and preparing the subfloor to create a smooth and even surface.
- Measure the area and determine the placement of the tiles, taking into account any focal points or design elements.
- Use a chalk line or a straight edge to create guidelines on the subfloor, ensuring that they are parallel or perpendicular to the walls.
- Begin laying the tiles, starting from the center of the room and working your way outwards. Be sure to follow the pattern you have chosen, placing the mesh-backed tiles one by one.
- Continue this process until all the tiles are laid out, making any necessary cuts along the edges for a perfect fit.
Applying thin-set mortar to the subfloor
Once you have laid out the tiles, it’s time to apply thin-set mortar to the subfloor:
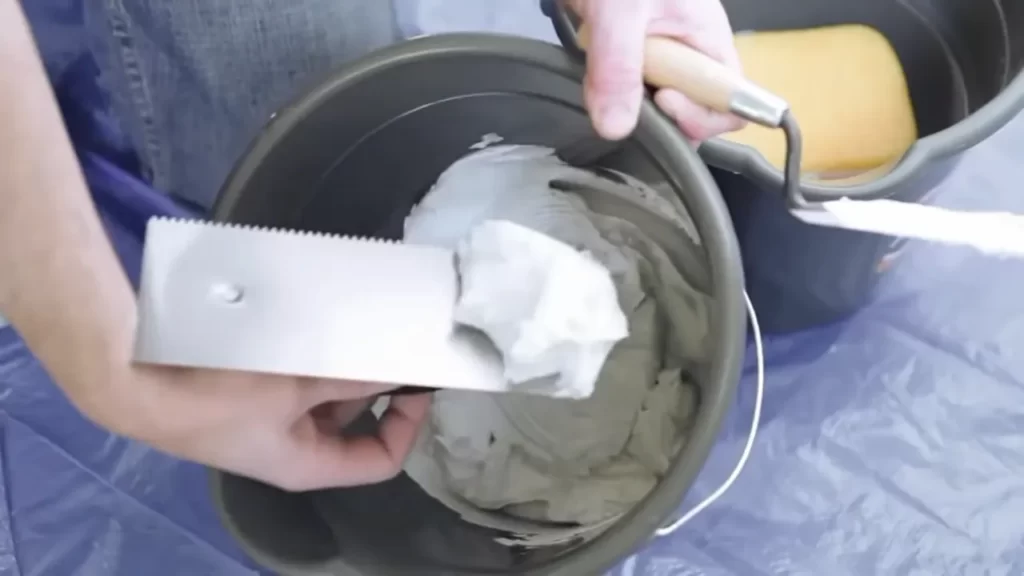
- Mix the thin-set mortar according to the manufacturer’s instructions. Achieve a consistency that allows the mortar to hold its shape when applied.
- Using a notched trowel, spread a layer of thin-set mortar onto a small section of the subfloor. Make sure to only cover an area that you can work on within a reasonable amount of time to avoid the mortar drying out.
- Hold the trowel at a 45-degree angle and use the notched side to create ridges in the mortar. This will enhance the adhesion between the mortar and the mesh backing of the tiles.
- Repeat this process for each section, working in small areas and ensuring that the ridges are consistent.
Pressing the tile into place on the mortar
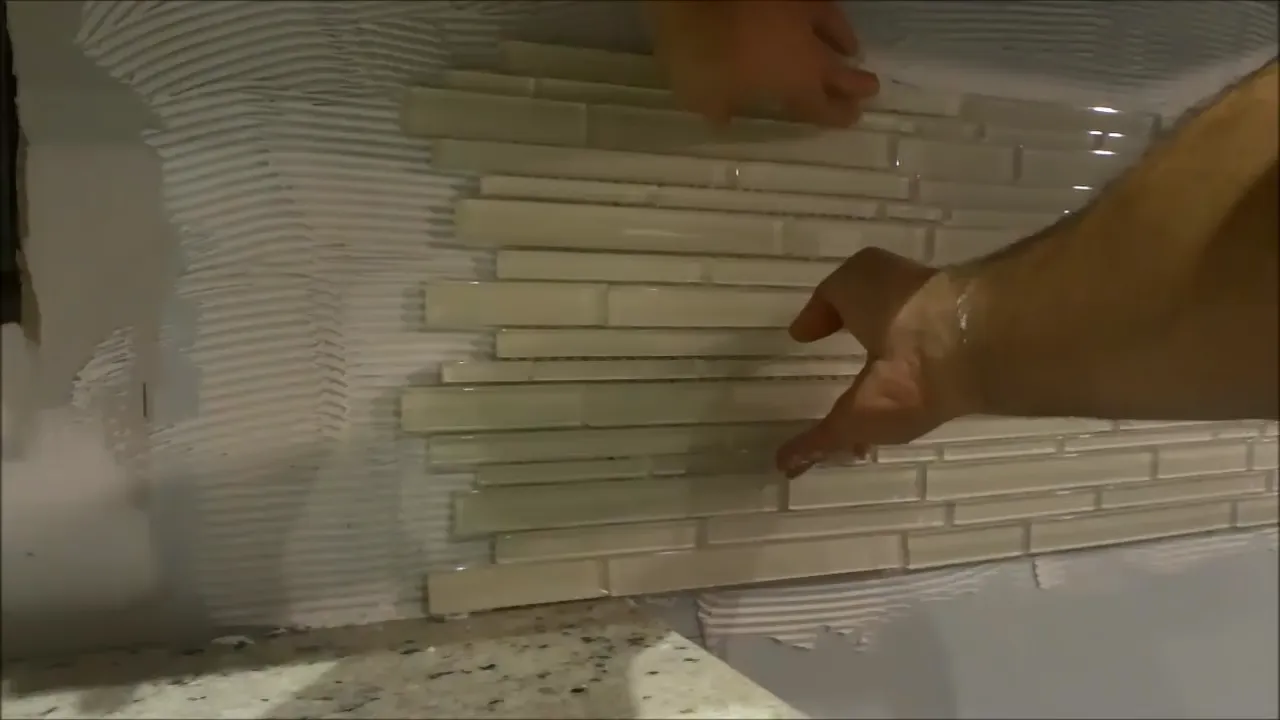
After applying the thin-set mortar, it’s time to press the tiles into place:
- Starting from the center of the room, firmly press each tile into the mortar using a twisting motion. This will ensure that the tiles are properly adhered to the subfloor.
- Work your way outward, applying even pressure to each tile. Use a rubber mallet or a wooden block to gently tap the tile into place if necessary.
- Continue this process until all the tiles are pressed firmly into the mortar, paying attention to maintain the alignment and spacing.
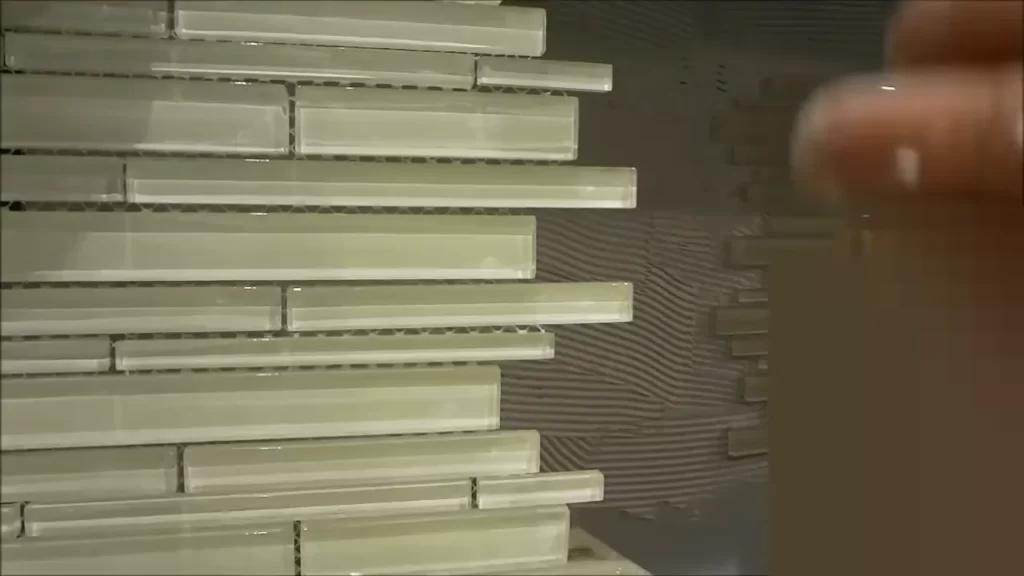
Checking for even spacing between tiles
Once all the tiles are in place, it’s crucial to check for even spacing:
- Use tile spacers or the edge of a grout float to ensure consistent spacing between each tile. Adjust the tiles as needed to achieve the desired spacing.
- Check the alignment of the tiles using a level or straight edge. Make any necessary adjustments to ensure that the tiles are perfectly aligned.
- Clean off any excess mortar from the surface of the tiles using a damp sponge or cloth.
By following these steps, you can successfully install tiles with mesh backing, creating a stunning and durable tiled surface. Enjoy your new tiled space!

Grouting And Finishing The Installation
After successfully installing the tile with mesh backing, the next crucial step is grouting and finishing the installation. Grouting not only enhances the appearance of your tile but also strengthens the overall durability of the installation. It fills the gaps between tiles, providing a seamless and polished finish.
Selecting the appropriate grout for the tile
Choosing the right grout is essential to ensure a long-lasting and aesthetically pleasing result. There are various types of grout available, such as cement-based grout, epoxy grout, and urethane grout. Consider factors like tile type, location, and personal preference when making your selection.
For example, cement-based grout is a versatile and cost-effective option suitable for most installation scenarios. On the other hand, epoxy grout is highly resistant to stains, chemicals, and moisture, making it ideal for high-traffic areas like kitchens and bathrooms. Urethane grout, with its superior flexibility and crack resistance, is perfect for areas prone to movement, such as floors with underfloor heating.
Applying the grout and ensuring full coverage
Once you have chosen the appropriate grout, it’s time to apply it to the tile surface. Start by mixing the grout according to the manufacturer’s instructions. Use a grout float to spread the grout over the tile, making sure to push it into the gaps between the tiles.
Work in small sections to prevent the grout from drying before you can clean it off. Hold the float at a 45-degree angle and move it diagonally across the tile to ensure the grout fills all the spaces completely. Make multiple passes to ensure full coverage and remove any excess grout on the tile surface.
Cleaning off excess grout and finishing touches
Once you have applied the grout, it’s important to clean off any excess grout promptly. Use a damp sponge to gently wipe away the excess grout, being careful not to disturb the grout lines. Rinse the sponge frequently to avoid smearing grout residue onto the tile.
After cleaning, inspect the tile surface for any remaining grout haze or residue. If necessary, use a grout haze remover or a cloth dampened with water to remove any stubborn stains or haze. Take your time during this step to ensure a pristine finish that showcases the beauty of your newly installed tiles.
Allowing adequate drying and curing time
After completing the grouting process, it’s crucial to allow sufficient drying and curing time for the grout to set properly. This helps prevent any premature damage to the grout lines and ensures the longevity of your tiled surface.
Refer to the manufacturer’s instructions to determine the specific drying and curing time required for your chosen grout. Keep in mind that temperature and humidity levels can affect the drying time. Avoid walking on or applying any pressure to the tiled area until the grout is fully cured to achieve the best possible results.
By following these steps and taking the time to grout and finish your tile installation correctly, you’ll be rewarded with a stunning and long-lasting finished product. So go ahead, get creative, and add a touch of elegance to your space with beautifully installed tiles!
Maintenance And Care Tips
Proper cleaning techniques for tiled surfaces with mesh backing
Proper cleaning techniques are essential to maintain the beauty and durability of your tiled surfaces with mesh backing. By following these tips, you can ensure that your tile installation remains pristine for years to come:
- Use a soft bristle brush: When cleaning, opt for a soft bristle brush instead of harsh abrasive tools. This will prevent any scratching or damage to the tile or mesh backing.
- Mild soap and warm water: Create a cleaning solution by mixing mild soap with warm water. This gentle combination is effective in removing dirt and grime without causing any discoloration or damage to the mesh backing.
- Gently scrub the surface: Dip the soft bristle brush in the cleaning solution and gently scrub the tiled surface with mesh backing. Pay extra attention to any stained or dirty areas, ensuring that you remove all traces of grime.
- Thoroughly rinse: After scrubbing, rinse the tiled surface with clean water to remove any soap residue. This will prevent any streaking or film from forming on the tile and mesh backing.
- Dry the surface: Finally, use a clean and dry microfiber cloth or towel to dry the tiled surface. This will prevent any water spots or marks, leaving your tiles looking shiny and clean.
Preventing and addressing potential issues like grout cracking
Grout cracking can be a common issue with tiled surfaces over time. However, with the right preventative measures and prompt addressing, you can keep your tile installation looking flawless. Here are some tips:
- Apply a grout sealer: Before grouting, apply a grout sealer to protect it from moisture and potential cracking. This will create a barrier that prevents water penetration and helps maintain the integrity of the grout.
- Allow sufficient curing time: After grouting, ensure that the grout is given enough time to cure properly. This will help prevent premature cracking and enhance its overall strength.
- Address cracks promptly: If you notice any cracks in the grout, it’s important to address them promptly. Remove the damaged grout, clean the area thoroughly, and regrout using the proper techniques and materials.
- Avoid excessive weight or pressure: Avoid placing excessive weight or applying unnecessary pressure on tiled surfaces with mesh backing. This can potentially lead to grout cracking. Use caution when moving heavy objects or furniture to avoid any damage.
Regular maintenance to extend the lifespan of the tile installation
To ensure the longevity of your tile installation with mesh backing, regular maintenance is key. Implement the following practices to extend its lifespan:
- Regularly sweep or vacuum: Remove loose dirt and debris from the tiled surface with a broom or vacuum cleaner regularly. This will prevent any scratching or abrasive damage caused by particles.
- Place mats or rugs in high-traffic areas: Areas that experience heavy foot traffic can cause wear and tear on the tiled surface. To prevent this, place mats or rugs in these areas to distribute the pressure and protect the tile.
- Wipe up spills immediately: Accidental spills are bound to happen. Ensure that you wipe up any spills promptly to prevent staining or potential damage to the tile and mesh backing.
- Regularly check for loose or damaged tiles: Periodically inspect your tiled surfaces for any loose or damaged tiles. If you find any, it’s crucial to repair or replace them to maintain the integrity of the installation.
- Perform regular deep cleaning: In addition to regular cleaning, schedule deep cleaning sessions to remove any embedded dirt and grime. This can be done using professional-grade cleaning solutions or by hiring a professional tile cleaning service.
Additional Tips And Tricks
In addition to following the basic steps for installing tile with mesh backing, there are a few tips and tricks that can help you achieve professional-looking results, explore creative tile patterns, and find further inspiration and guidance. Let’s dive into each of these aspects in detail.
Suggestions for Achieving Professional-Looking Results
When it comes to installing tile with mesh backing, attention to detail is key. Here are some suggestions to help you achieve professional-looking results:
- Prepare the surface: Before installing the tile, make sure the surface is clean, smooth, and free from any dust or debris. This will provide a stable foundation for the tile installation.
- Use the right adhesive: Choose an adhesive that is specifically formulated for mesh-backed tile. This will ensure proper bonding and long-lasting results.
- Pay attention to spacing: Proper spacing between tiles is vital to achieve a uniform and aesthetically pleasing look. Use tile spacers to maintain consistent spacing throughout the installation process.
- Level the tiles: Use a level to ensure that the tiles are laid flat and even. This will prevent any unevenness or tripping hazards.
- Grout with care: When applying grout, make sure to fill the gaps between the tiles evenly and remove any excess grout before it dries. This will result in clean and professional-looking grout lines.
Creative Ways to Incorporate Different Tile Patterns
One of the exciting aspects of working with tile is the ability to create unique and visually stunning patterns. Here are a few creative ways to incorporate different tile patterns:
- Herringbone: This classic pattern adds a touch of elegance and sophistication to any space. By arranging rectangular tiles in a zigzag formation, you can achieve a timeless look.
- Diagonal: Laying tiles in a diagonal pattern creates visual interest and can make a small space appear larger. This pattern works well with square or rectangular tiles.
- Checkerboard: By alternating two different colored tiles, you can create a bold and eye-catching checkerboard pattern. This works particularly well in kitchens and bathrooms.
- Mosaic: Incorporating mosaic tiles allows you to create intricate designs and add a pop of color to your space. Consider using mosaic tiles as accents or focal points.
Resources for Further Inspiration and Guidance
If you need further inspiration or guidance for your tile installation project, here are some resources to explore:
| Website | Description |
|---|---|
| TileBar | TileBar offers a wide range of tile options and design ideas. Browse their online gallery for inspiration and access their helpful installation guides. |
| Houzz | Houzz is a popular platform for home improvement and interior design. Explore their extensive collection of tile ideas and connect with professionals in the industry. |
| YouTube | YouTube is a treasure trove of video tutorials on tile installation. Search for specific techniques or tile patterns to find step-by-step guides. |
By following these tips, exploring creative tile patterns, and utilizing the resources available, you’ll be well-equipped to install tile with mesh backing and achieve professional-looking results. Happy tiling!
Frequently Asked Questions
Yes, you need spacers with mesh backed tile.
What Is Tile With Mesh Backing Called?
Tile with mesh backing is commonly known as mesh-backed tile. This type of tile has a layer of mesh attached to the back, which helps to hold the individual tiles together during installation. It makes the tiling process easier and faster.
How Are Tiles Attached To Mesh?
Tiles are attached to mesh using a process called mesh-mounted or mesh-backed. The tiles are placed on a mesh sheet and secured with an adhesive, creating a stable surface for installation.
How To Install Mosaic Tiles With Mesh Backing On Shower Wall?
To install mosaic tiles with mesh backing on a shower wall, first, prepare the surface by cleaning and ensuring it’s dry. Apply adhesive to the wall using a trowel, then press the mesh-backed tiles onto the adhesive. Use tile spacers to ensure even spacing, and let the adhesive dry.
Finally, grout the tiles and clean off excess grout for a finished look.
Conclusion
Installing tile with mesh backing can be a straightforward process that yields beautiful results. By following these step-by-step instructions, you can effortlessly tackle your next tiling project. Remember to prepare the surface properly, apply the mortar evenly, and press the tile firmly into place.
With some patience and attention to detail, your tile installation will be a success. Enjoy the satisfaction of a newly tiled area in your home!