To install tile countertops over laminate, you need to follow a specific process. First, thoroughly clean and dry the laminate surface.
Then, apply a layer of thin-set adhesive and lay the tiles, ensuring they are evenly spaced and aligned.
Preparing The Laminate Surface
Assess the Condition of the Laminate Countertop
Before you begin the installation process, it’s important to assess the condition of the laminate countertop. Check for any signs of damage, such as cracks or chips, as these will need to be addressed before proceeding. Additionally, make sure the laminate surface is clean and free from any debris or old adhesive.
Gather the Necessary Tools and Materials
Now that you’ve assessed the condition of the laminate countertop, it’s time to gather the necessary tools and materials for the installation. Here is a list of items you’ll need:
| 1. Trowel | 6. Sponge |
| 2. Tile adhesive | 7. Primer |
| 3. Notched trowel | 8. Sandpaper (medium grit) |
| 4. Tiles | 9. Dust mask |
| 5. Level | 10. Safety goggles |
Clean and De-Grease the Laminate Surface
Before applying any adhesive, it’s crucial to clean and de-grease the laminate surface. Start by wiping down the countertop using a mild detergent and warm water to remove any dirt or grime. Pay special attention to areas around the stove and sink, as these tend to accumulate grease. Rinse the surface thoroughly and allow it to dry completely.
Next, use a de-greasing cleaner specifically formulated for laminate surfaces. Apply the cleaner according to the manufacturer’s instructions and scrub the countertop gently with a sponge or soft brush. This will ensure that any stubborn grease or residue is removed, providing a clean surface for the adhesive to bond to.
Sand the Laminate Countertop to Create a Rough Texture
In order to create a rough texture on the smooth laminate surface, sanding is necessary. Start by wearing a dust mask and safety goggles to protect yourself from airborne particles. Use medium-grit sandpaper and sand the entire countertop in a circular motion.
Be sure to sand the edges and corners as well to ensure a uniform texture. The purpose of this step is to roughen up the surface, allowing the adhesive to adhere better to the laminate. Once you’ve finished sanding, thoroughly clean the countertop to remove any dust or debris.
By following these steps to prepare the laminate surface, you’ll be well on your way to successfully installing tile countertops over laminate. Remember to assess the condition of the countertop, gather all the necessary tools and materials, clean and de-grease the surface, and sand to create a rough texture. With careful preparation, your tile countertops will have a solid foundation and long-lasting durability.
Applying The Tile Backer Board
Applying the tile backer board is a crucial step in the process of installing tile countertops over laminate. The backer board provides a stable and durable surface for the tiles to adhere to, ensuring a long-lasting and professional-looking countertop. In this section, we will discuss the step-by-step process of applying the tile backer board, including measuring and cutting the board, attaching it to the laminate countertop, filling any gaps or holes, and allowing sufficient time for the backer board to set.
Measure and Cut the Tile Backer Board
The first step in applying the tile backer board is to accurately measure and cut the board to fit your laminate countertop. Use a tape measure to measure the dimensions of your countertop, and transfer those measurements onto the backer board. It is important to leave a small gap between the backer board and the walls to allow for expansion. Using a circular saw or a jigsaw, carefully cut the backer board to the required size.
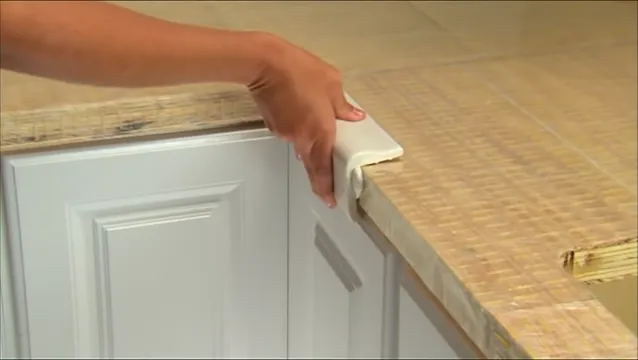
Attach the Backer Board to the Laminate Countertop
Once the backer board is cut to size, it is time to attach it to the laminate countertop. Apply a coat of thin-set mortar to the top of the laminate countertop using a notched trowel. This will create a strong bond between the backer board and the countertop. Place the backer board on top of the thin-set mortar, making sure it is aligned with the edges of the countertop. Press down firmly to ensure good adhesion.
Fill any Gaps or Holes in the Backer Board
After attaching the backer board to the laminate countertop, inspect it for any gaps or holes. Use a patching compound or wood filler to fill in any imperfections, ensuring a smooth and even surface for the tiles. Allow the filler to dry completely before proceeding to the next step.
Allow Sufficient Time for the Backer Board to Set
Once the backer board is in place and any gaps or holes have been filled, it is crucial to allow sufficient time for the backer board to set. This typically takes around 24 hours, but it is important to check the manufacturer’s recommendations for the specific backer board you are using. During this time, it is important to avoid putting any weight or pressure on the backer board to ensure a strong bond.
By following these steps to apply the tile backer board, you can ensure a solid foundation for your tile countertops over laminate. Taking the time to properly measure, cut, attach, and set the backer board will result in a professional-looking countertop that will stand the test of time.
Planning The Tile Layout
Planning the tile layout is an essential step when installing tile countertops over laminate. Taking the time to carefully plan the layout will ensure a professional and aesthetically pleasing result. In this section, we will discuss the important steps involved in planning the tile layout.
Choose the Right Tiles for Your Countertop
Before starting the tile installation, it’s crucial to choose the right tiles for your countertop. Consider the style and color scheme of your kitchen or bathroom, as well as the durability and maintenance requirements of different tile materials.
To achieve a cohesive look, select tiles that complement the existing design elements in your space. Natural stone tiles like granite or marble offer a luxurious and timeless appeal, while ceramic or porcelain tiles are more affordable and come in a wide variety of colors and patterns.
Measure and Mark the Layout on the Backer Board
Once you have chosen the tiles, it’s time to measure and mark the layout on the backer board. Start by measuring the dimensions of your countertop and transferring those measurements onto the backer board.
Use a pencil and a straightedge to create layout lines on the backer board, marking the exact positions of the tiles. Consider the size and shape of the tiles, as well as the desired grout lines, when determining the layout.
If you have any outlets or other obstacles on your countertop, make sure to mark them on the backer board as well. This will help you plan the layout around these obstructions and ensure a seamless installation.
Determine the Starting Point for the Tile Installation
Next, you need to determine the starting point for the tile installation. This step is crucial as it sets the foundation for the entire layout. The starting point is typically the corner of the countertop closest to the sink or stove.
Start by measuring and marking the center point of the starting wall. From there, use a level and a chalk line to create a straight and level guideline across the entire length of the countertop. This guideline will serve as a reference for laying the tiles.
Dry Fit the Tiles to Ensure Proper Placement
Before applying any adhesive, it’s important to dry fit the tiles to ensure proper placement and alignment. Dry fitting involves arranging the tiles on the backer board without adhesive to get an idea of how they will look once installed.
Place the tiles along the layout lines, paying attention to the spacing and alignment. Make any necessary adjustments, such as cutting tiles to fit or shifting the layout for better symmetry. This step will help you avoid any unexpected surprises during the actual installation.
Once you are satisfied with the dry fit, take a picture or make a note of the arrangement. This will serve as a reference when applying the adhesive and laying the tiles permanently.
Now that you have completed the planning phase, you are ready to move on to the actual tile installation. Stay tuned for the upcoming section where we will guide you through the steps of applying the adhesive and securing the tiles in place.

Installing The Tiles
Installing the tiles is a crucial step in transforming your laminate countertops into stunning tile countertops. This process involves mixing and applying thinset mortar, laying the first row of tiles, continuing to install tiles row by row, and cutting tiles to fit around edges and appliances. Let’s dive into each of these steps to help you achieve a beautiful and functional tile countertop.
Mix and Apply the Thinset Mortar
The first step in installing the tiles is to mix and apply the thinset mortar. Thinset mortar is a cement-based adhesive that provides a strong and durable bond between the tiles and the countertop surface.
- Start by pouring a suitable amount of thinset mortar powder in a clean bucket.
- Add water to the powder gradually while stirring continuously until you achieve a smooth and creamy consistency.
- Allow the mixed mortar to sit for a few minutes to activate its adhesive properties.
- Using a notched trowel, apply the thinset mortar evenly onto the countertop surface.
Lay the First Row of Tiles
Once the thinset mortar is applied, it’s time to lay the first row of tiles. This step determines the alignment and spacing of the entire countertop, so pay attention to details.
- Start by placing a tile spacer at one corner of the countertop to create a consistent gap between tiles.
- Press the first tile firmly into the thinset mortar, aligning it with the corner and against the spacer.
- Continue laying the tiles adjacent to the first one, using tile spacers to maintain a consistent gap between each tile.
- Use a tile cutter or wet saw to trim any tiles that need to fit the edges of the countertop.
- Repeat this process until the first row of tiles is complete.
Continue Installing Tiles Row by Row
With the first row of tiles in place, it’s time to continue installing tiles row by row. This process ensures a seamless and visually appealing countertop surface.
- Apply thinset mortar on the countertop surface, using the notched trowel.
- Begin laying the second row of tiles above the first row, following the same alignment and spacing.
- Continue adding thinset mortar and laying tiles row by row until you reach the desired height of the countertop.
- Remember to use tile spacers to maintain consistent gaps between tiles for a professional finish.
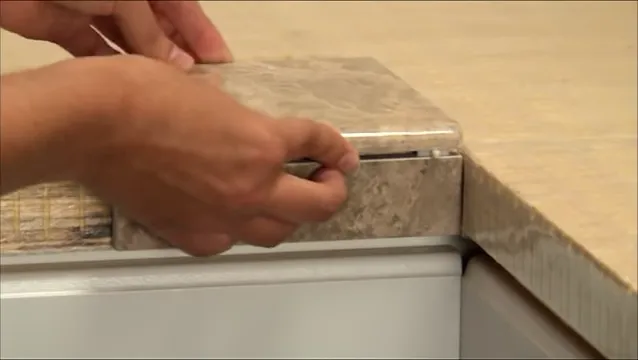
Cut Tiles to Fit Around Edges and Appliances
As you reach the edges and appliances, you’ll need to cut tiles to fit perfectly. This step ensures a seamless transition and professional appearance.
- Measure the area where the tile needs to be cut, leaving a small gap for expansion.
- Use a tile cutter or wet saw to make precise cuts according to the measurements.
- Fit the cut tiles into place, ensuring they align with the surrounding tiles and leave an appropriate gap for grouting.
- Continue cutting and fitting tiles until you complete the entire countertop surface.
By following these steps and taking your time with the installation, you’ll be able to achieve a stunning tile countertop that adds beauty and functionality to your kitchen or bathroom. Enjoy the process and the rewarding outcome!
Grouting And Sealing The Tiles
When it comes to installing tile countertops over laminate, grouting and sealing the tiles is a crucial step. Grouting helps to fill in the spaces between the tiles, giving them a finished and polished look. It also helps to secure the tiles in place and prevent any shifting or movement. Sealing the tiles, on the other hand, is essential for protection against stains, moisture, and everyday wear and tear. In this section, we will guide you through the process of grouting and sealing your freshly installed tiles, ensuring durability and longevity for your new tile countertops.
Allow the Installed Tiles to Set Properly
Before you begin the grouting process, it is important to allow the installed tiles to set properly. This typically takes around 24 to 48 hours, depending on the type of adhesive used. It’s crucial to follow the manufacturer’s instructions for the adhesive and ensure the tiles are fully cured before proceeding with the grouting process. This waiting period allows the adhesive to dry and ensure the tiles are firmly in place, minimizing the risk of any shifting or movement during grouting.
Mix and Apply the Grout
Once the tiles have set, it’s time to mix and apply the grout. Start by gathering all the necessary tools and materials, including grout powder, a mixing bucket, a grout float or trowel, and a sponge or damp cloth for cleanup. Follow the instructions on the grout packaging to mix the grout to the correct consistency.
Pro tip: Wear gloves to protect your hands from the grout mixture and consider using a grout additive that offers additional stain resistance and flexibility.
Use the grout float or trowel to apply the grout mixture onto the tiles at a 45-degree angle. Work in small sections to ensure the grout is applied evenly and fills in all the spaces between the tiles. Press the grout into the gaps, making sure there are no voids or air bubbles. Use the edge of the grout float or trowel to scrape off the excess grout.
Remove Excess Grout and Wipe Clean
Once the grout has slightly dried and is firm to the touch, it’s time to remove the excess grout. Use a damp sponge or cloth to wipe over the tiles at a 45-degree angle, removing the excess grout from the surface. Rinse the sponge or cloth frequently to ensure a clean and tidy finish. Be careful not to dig into the grout lines as this may cause unevenness. Repeat the wiping process as necessary until the tiles are clean and the grout lines are defined.
Apply Tile Sealer for Protection and Durability
Finally, to ensure maximum protection and durability for your tile countertops, it’s essential to apply a tile sealer. Tile sealers help to protect the grout and tiles from stains, moisture, and everyday wear and tear. They also enhance the color and luster of the tiles, giving them a polished and finished appearance. Follow the manufacturer’s instructions for the specific tile sealer you choose, and apply it evenly onto the tiles using a clean cloth or brush. Allow the sealer to dry completely before using the countertops.
Pro tip: Consider applying multiple coats of sealer for added protection, especially in high-traffic areas or areas prone to spills and stains.
Finishing Touches
Now that you have successfully installed tile countertops over laminate, it’s time for the finishing touches. This is the stage where you bring back the sink, faucet, and appliances, clean the countertop and tiles thoroughly, and learn how to enjoy and maintain your newly installed tile countertop. Let’s dive into each step and complete the transformation of your kitchen!
Reinstall Sink, Faucet, and Appliances
First things first, it’s essential to reinstall your sink, faucet, and appliances to make your tile countertop fully functional. Follow these simple steps to securely reinstall them:
- Reinstalling the Sink: Carefully place the sink back into its designated space on the tile countertop. Ensure it is aligned properly and fits snugly. Apply a bead of waterproof silicone around the edges to create a watertight seal. Tighten the clips underneath to secure the sink in place.
- Reattaching the Faucet: Connect the water supply lines to the faucet’s inlet valves. Use an adjustable wrench to firmly tighten the connections. Turn the water supply back on and check for any leaks. If everything looks good, you can move on to the next step.
- Reinstalling the Appliances: If you temporarily removed any appliances during the installation, now is the time to put them back in their rightful places. Ensure they are level and securely fastened. Double-check all the connections, such as electrical and gas, to ensure everything is safe and properly set up.
Clean the Countertop and Tiles Thoroughly
After the installation process, it’s important to thoroughly clean the countertop and tiles to remove any dust, grout haze, or adhesive residue. Follow these steps to achieve a sparkling clean surface:
- Dust Removal: Start by using a clean, dry cloth or a soft-bristle brush to remove any loose debris or dust from the countertop and tiles. Pay extra attention to the grout lines, ensuring they are free from any lingering particles.
- Grout Haze Removal: If you notice a hazy film on the surface of the tiles, you can use a grout haze remover. Follow the instructions provided by the manufacturer, and use a clean cloth or sponge to wipe away the residue. Rinse the area well with water to remove any remaining residue.
- Cleaning Solution: Mix a mild, non-abrasive cleaning solution with warm water. Dip a sponge or soft cloth into the solution and gently wipe the countertop and tiles, ensuring you cover every inch. Avoid using harsh chemicals or abrasive cleaners, as they can damage the tiles.
- Drying: Once you have thoroughly cleaned the countertop and tiles, use a dry cloth or towel to wipe away any excess moisture. This will prevent water spots or streaks from forming, leaving your newly installed tile countertop looking pristine.
Enjoy and Maintain Your Newly Installed Tile Countertop
Now, it’s time to enjoy your beautiful new tile countertop! To ensure its longevity and keep it looking its best, follow these maintenance tips:
- Regular Cleaning: Clean up spills and messes promptly using a mild cleaning solution. Avoid using abrasive sponges or cleansers that can scratch the tiles.
- Sealing: Depending on the type of tiles you’ve installed, consider applying a sealer to protect them from stains and moisture. Follow the manufacturer’s instructions for proper application and frequency of resealing.
- Avoid Heat and Impact: Protect your tile countertop by using trivets or hot pads for hot pots and pans. Be mindful of not dropping heavy objects onto the tiles, as they can crack or chip.
- Regular Inspections: Periodically inspect the grout lines for any signs of wear or damage. Repair any cracks or deterioration promptly to prevent further issues.
By following these simple steps, you can enjoy your newly installed tile countertop for years to come while maintaining its beauty and functionality.
Frequently Asked Questions
Can You Cover Laminate Countertops?
Yes, laminate countertops can be covered with other materials to give them a new look and enhance their durability.
Can You Tile Over Your Countertops?
Yes, you can tile over your countertops. Tiling can be a great way to refresh the look of your countertops and give them a new, stylish appearance. It is important to properly prepare the surface and select the appropriate tiles for durability and functionality.
Can You Use Peel And Stick Tile On Countertops?
Yes, you can use peel and stick tile on countertops.
How Do You Overlay Laminate Countertops?
To overlay laminate countertops, follow these steps: 1) Clean and prep the existing surface. 2) Measure and cut the laminate to fit. 3) Apply adhesive to the countertop and laminate. 4) Carefully position and press the laminate onto the countertop.
5) Trim the edges and seal the edges to complete the overlay.
Conclusion
Installing tile countertops over laminate is an effective way to upgrade your kitchen’s appearance. By following the steps outlined in this guide, you can create a beautiful and durable surface that enhances the overall aesthetics. Remember to prepare the laminate properly, choose high-quality tiles, and utilize the appropriate adhesive.
With a little patience and attention to detail, you can transform your kitchen into a stylish and functional space.