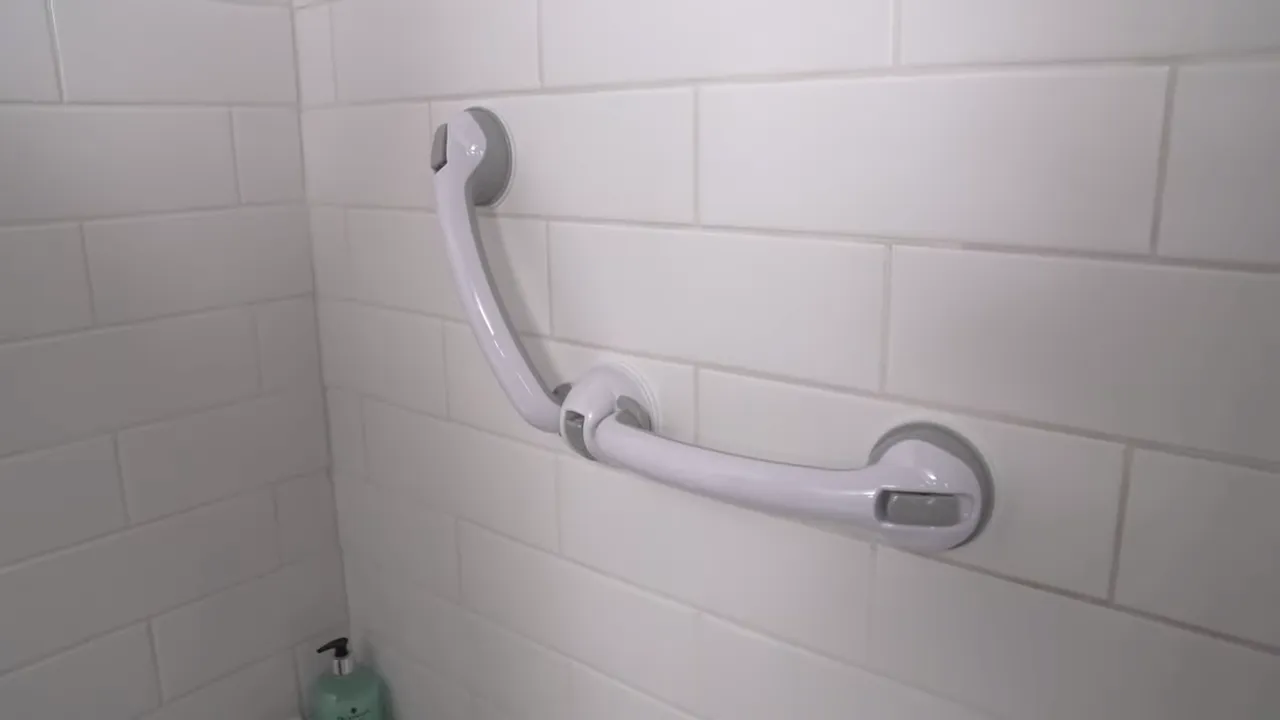
To install suction cup grab bars, clean the surface, moisten the suction cups, and press firmly against the wall, ensuring proper alignment and locking mechanism engagement. Suction cup grab bars offer a convenient and temporary solution for adding stability in bathrooms or other spaces where traditional grab bars are not feasible.
They can be easily installed without the need for drilling or damaging the walls. We will guide you through the step-by-step process of installing suction cup grab bars to ensure a secure and sturdy grip. Whether you need extra support in the shower or by the toilet, these grab bars can provide the assistance you need without the hassle of permanent installation.
Factors To Consider Before Installation
Before installing suction cup grab bars in your bathroom or other areas of your home, there are several important factors you should take into consideration. These factors will ensure that your grab bars are safe, durable, and suitable for your needs. Here are three key aspects to think about before you begin the installation process.
Weight-bearing capacity
One of the most crucial factors to consider before installing suction cup grab bars is their weight-bearing capacity. These grab bars provide support and stability, so it’s important to choose ones that can safely handle the weight they will be subjected to. The weight-bearing capacity will vary depending on the specific grab bar and manufacturer, so be sure to check the product details and choose one that is suitable for your needs. It’s important to consider the weight of the individuals who will be using the grab bars, as well as any additional force or pressure that may be applied. This will ensure that the grab bars are strong enough to provide the necessary support.
Material and durability
The material and durability of the suction cup grab bars are also important factors to consider. You want grab bars that are not only sturdy and reliable but also resistant to moisture and rust. Stainless steel and high-quality plastic are common materials used in grab bars, which provide strength and durability. Look for grab bars with a corrosion-resistant coating or finish to ensure they can withstand the humid environment of a bathroom. It’s also a good idea to check for any specific cleaning or maintenance requirements to keep the grab bars in top condition.
Size and length
The size and length of the suction cup grab bars are important considerations to ensure they fit properly in your desired location. Measure the area where you plan to install the grab bars to determine the appropriate length. Additionally, take into account the available space and ensure the grab bars will not obstruct any fixtures or fittings. It’s also worth noting that suction cup grab bars are available in various sizes and diameters, so choose one that is comfortable for your grip and provides sufficient support. Consider both the overall size of the grab bars and the dimensions of the suction cups themselves to ensure a secure fit and ease of use.
By considering these factors before the installation process, you can choose the right suction cup grab bars that will meet your needs and provide the necessary support and stability for a safer environment.
Cleaning The Surface
Before installing suction cup grab bars, it’s crucial to ensure that the surface is clean, smooth, and dry. Proper cleaning not only improves the adhesion of the suction cups but also extends the lifespan of the grab bars. Here are the essential steps to follow when cleaning the surface:
Removing any debris or residue
The first step in cleaning the surface is to remove any debris or residue that might hinder the suction cups from adhering properly. Use a dry cloth or brush to sweep away any dust, dirt, or loose particles. If you come across sticky substances like adhesive residue or grease, a mild cleaning solution can be used. Be sure to avoid using harsh chemicals that may damage the surface or compromise the integrity of the suction cups.
Ensuring a smooth and dry surface
Once the debris and residues are removed, it’s important to ensure that the surface is smooth and dry. Any bumps, roughness, or moisture on the surface may prevent the suction cups from creating a secure seal, leading to potential accidents or instability of the grab bars. Utilize a damp cloth to wipe down the surface, focusing on any areas that may require extra attention. Ensure that the surface is completely dry before proceeding with the installation.
Remember, proper cleaning of the surface is essential for the successful installation and stability of the suction cup grab bars. By following these steps, you can ensure that the grab bars adhere firmly and provide a reliable support system for anyone in need. Now that the surface is clean and ready, let’s move on to the next step in the installation process.
Measuring And Marking
Installing suction cup grab bars can be a simple and effective solution for improving bathroom safety. However, proper installation is crucial to ensure they are secure and functional. In this section, we will guide you through the process of measuring and marking the ideal placement for grab bars.
Determining the ideal placement for the grab bars
Before you begin the installation, it is important to determine the right placement for your grab bars. This will ensure they provide optimal support and convenience. Here are a few factors to consider when determining the ideal placement:
- Identify the areas in your bathroom where you need additional support. Common spots include next to the toilet, near the bathtub or shower, and along the walls.
- Consider the needs and physical abilities of the individuals who will be using the grab bars. Install them at a height and position that is comfortable and easily reachable for their specific requirements.
- Take into account any local building codes or ADA (Americans with Disabilities Act) guidelines that might dictate the placement of grab bars in certain areas.
By carefully considering these factors, you can determine the ideal placement for your suction cup grab bars to maximize their functionality and safety.
Marking the locations for installation
Once you have determined the ideal placement for your grab bars, it’s time to mark the locations for installation. Follow these steps to ensure accurate and precise placement:
- Using a tape measure, measure and mark the desired height and position for each grab bar. Make sure the height is appropriate for the individuals who will be using them and that the placement complies with any relevant guidelines or regulations.
- Clean the surface where the suction cups will be attached. Remove any dirt, oil, or moisture that could affect the suction power.
- If the grab bars have adjustable length, extend or retract them to match the measurements you previously marked.
- Position the suction cups of each grab bar on the marked locations and press firmly against the surface to create a strong seal.
- Double-check the alignment and stability of each grab bar before putting weight or pressure on them.
Following these steps will help ensure that your suction cup grab bars are securely and correctly installed, providing the support and safety you need in your bathroom.
Testing The Suction Cups
Before installing suction cup grab bars, it is crucial to test the suction cups for a strong and secure hold. This step ensures that the grab bars will provide the necessary support and stability when used. Here are some important factors to consider when testing the suction cups:
Ensuring a strong and secure hold
Ensuring that the suction cups have a strong and secure hold is essential for the safety and effectiveness of the grab bars. Follow these steps to test the suction cups:
- Thoroughly clean the surface where you plan to install the grab bars. Use a mild detergent or alcohol-based cleaner to remove any dirt or residue.
- Inspect the suction cups for any signs of damage or wear. It is important to use suction cups with intact sealing edges and no visible cracks.
- Moisten the suction cups with water or apply a small amount of petroleum jelly to enhance their grip.
- Press the suction cups firmly against the surface, ensuring that the entire sealing edge comes into contact with it.
- Apply pressure to the suction cups by pulling or pushing on the grab bars. Check for any movement or slippage. The suction cups should hold firmly without budging.
- Leave the suction cups in place for at least 24 hours to test their long-term grip. Check regularly during this period to ensure they maintain their hold.
If the suction cups fail the test or show any signs of instability, do not proceed with the installation. It is crucial to have reliable suction cups for optimal safety.
Conclusion
Testing the suction cups before installing grab bars is an important step to ensure a strong and secure hold. By following the aforementioned steps, you can be confident that the suction cups will provide the necessary support and stability. Remember, safety should always be a top priority when it comes to installing grab bars.
Attaching The Grab Bars
Now that you have properly prepared the surface and chosen the suitable location for your suction cup grab bars, it’s time to attach them securely. Follow these steps to ensure a safe and reliable installation.
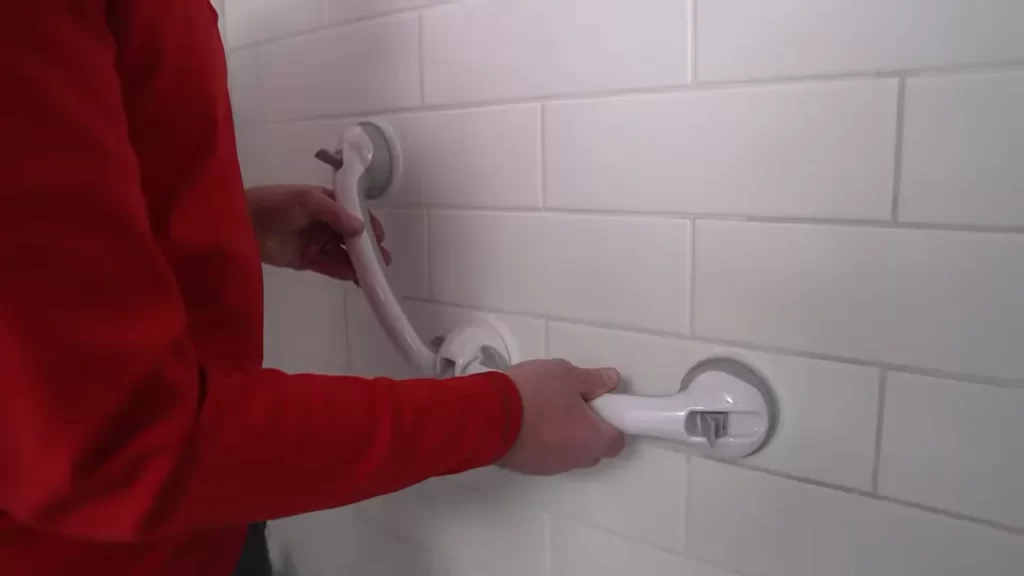
Applying pressure to activate the suction cups
The first step in attaching the grab bars is to activate the suction cups. Suction cups work by creating a vacuum between the cup and the surface, forming a strong grip. To activate the suction cups, follow these instructions:
- Place the grab bar against the desired surface. This could be a shower wall, bathtub, or any other smooth, non-porous surface.
- Apply firm pressure evenly across the entire length of the grab bar. This will help create a tight seal and improve the suction cup’s grip.
- In most cases, you will hear a clicking sound when the suction cups engage. This indicates that they are securely attached to the surface.
By following these steps, you can ensure that the suction cups adhere properly and provide the stability and support you need.
Securing the grab bars in place
While the suction cups provide initial attachment, it’s crucial to secure the grab bars in place for added safety. Without proper securing, the grab bars might still be prone to movement or dislodging.
To ensure the grab bars stay firmly in place, consider the following:
- Check if the grab bars have additional securing mechanisms, such as screw holes or locking mechanisms. These features can provide extra stability and prevent accidental detachment.
- If your grab bars don’t have additional securing options, you can use safety adhesive or mounting brackets to reinforce their attachment. These methods can provide additional peace of mind.
- Before securing the grab bars, make sure the surface is clean and dry. Any dirt or moisture can reduce the overall effectiveness of the adhesive or mounting brackets.
Remember, the goal is to make the grab bars as secure as possible, so take the necessary precautions to achieve a reliable installation.
Checking Stability And Reinforcement
Checking Stability and Reinforcement
Once you have successfully installed your suction cup grab bars, it is essential to ensure that they are stable and secure. Testing the stability of the grab bars and reinforcing the installation if necessary will provide peace of mind for both yourself and anyone who may need to rely on these grab bars for support. By following these simple steps, you can be confident in the stability and safety of your suction cup grab bars.
Testing the stability of the grab bars
To begin, the first step is to test the stability of the grab bars. This will help determine whether any adjustments or reinforcements need to be made. To test the stability:
- Apply gentle pressure in various directions on the grab bars to ensure they do not move or come loose.
- Try to pull the grab bars away from the wall with reasonable force. If they remain securely in place, they have passed the stability test.
If the grab bars pass the stability test, you can proceed with confidence. However, if you notice any movement or instability during the test, it is crucial to reinforce the installation to ensure the safety and reliability of the grab bars.
Reinforcing the installation if necessary
If your stability test reveals any issues or concerns with the grab bars, it is important to reinforce the installation. This will help enhance the stability and reliability of the grab bars. Here’s how you can reinforce the installation if necessary:
- Remove the grab bars by gently pulling them away from the wall.
- Clean the surface of both the suction cup and the wall for optimal adhesion.
- Apply a small amount of water to the suction cup.
- Place the suction cup back on the wall, ensuring it is aligned with the desired position.
- Apply firm pressure to the suction cup, pressing it against the wall to create a strong seal.
- Wait for the grab bars to adhere fully to the wall before testing the stability again.
- Repeat the stability test to ensure that the grab bars remain securely in place.
By reinforcing the installation, you can significantly improve the stability and strength of the grab bars. This extra step will provide you with the confidence and peace of mind you need, knowing that your suction cup grab bars are reliable and secure.
Cleaning And Care
Proper cleaning and care of your suction cup grab bars is essential for ensuring their longevity and effectiveness. By regularly removing and cleaning the grab bars, and by using gentle cleaning products, you can keep them in optimal condition. In this section, we will discuss the importance of removing and cleaning the grab bars periodically and provide tips for avoiding harsh cleaning products that may damage the suction cups.
Removing and cleaning the grab bars periodically
Over time, dirt, grime, and soap scum can accumulate on the suction cups of your grab bars, compromising their grip and overall performance. To prevent this buildup and maintain a secure hold, it’s crucial to remove and clean the grab bars on a regular basis.
Here is a simple step-by-step process for removing and cleaning your suction cup grab bars:
- Ensure that the grab bar is not being used at the time of removal.
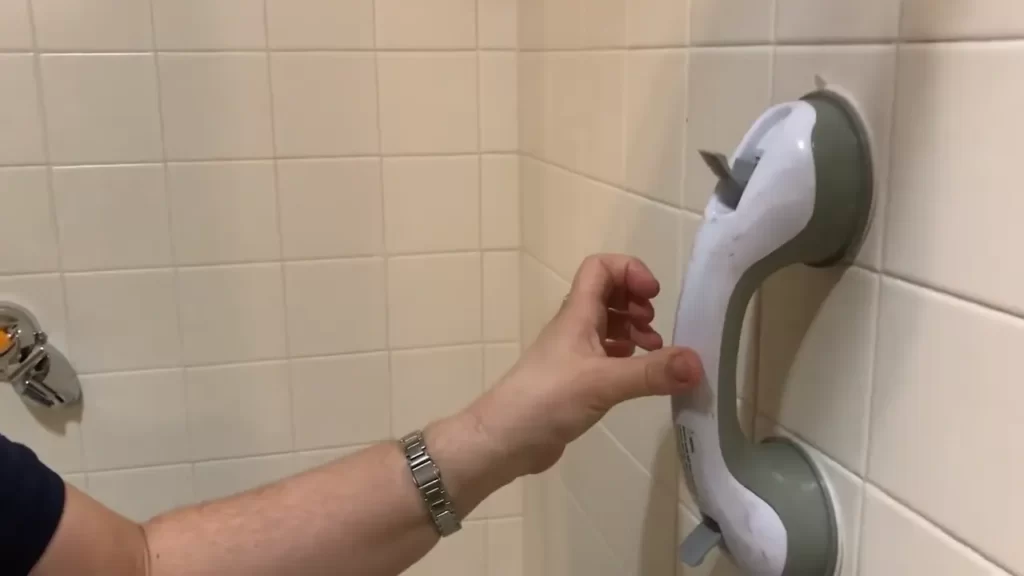
- Locate the release tab or lever on each suction cup.
- Gently press or lift the release tab or lever to release the suction.
- Remove the grab bar from the surface, taking care not to damage the suction cups.
- Fill a sink or basin with warm water and a mild, non-abrasive cleaning solution.
- Submerge the suction cups and grab bar in the cleaning solution.
- Use a soft, non-abrasive cloth or sponge to gently wipe away any dirt or residue.
- Rinse the suction cups and grab bar thoroughly with clean water.
- Allow the components to air dry completely before reattaching the grab bar to the surface.
Avoiding harsh cleaning products that may damage the suction cups
While it’s important to keep your suction cup grab bars clean, it’s equally crucial to use gentle cleaning products that won’t harm the suction cups. Harsh chemicals and abrasive cleaners can weaken the grip of the suction cups or cause them to deteriorate, rendering the grab bars less effective.
Here are some tips to help you avoid damaging the suction cups:
- Always use mild, non-abrasive cleaning solutions specifically designed for use on bathroom fixtures.
- Avoid using bleach, ammonia, or other strong chemicals that could degrade the suction cups.
- Never use abrasive scrub brushes or scouring pads, as they may scratch or damage the suction cups.
- Test any new cleaning product on a small, inconspicuous area of the suction cup before applying it to the entire surface.
- Regularly inspect the suction cups for any signs of wear or damage and replace them if necessary.
By following these cleaning and care tips, you can ensure that your suction cup grab bars remain secure and functional for years to come.
Troubleshooting Common Issues
When it comes to installing suction cup grab bars, a few common issues may arise that can affect their stability and overall effectiveness. However, with a few troubleshooting techniques, these issues can be easily addressed. In this section, we will delve into two of the most common problems encountered when installing suction cup grab bars: suction loss or instability, and the need to reinstall or replace suction cups.
Addressing Suction Loss or Instability
Suction loss or instability is a common issue that may occur when installing suction cup grab bars. This can be caused by a variety of factors, such as insufficient surface cleanliness, inadequate suction cup contact, or improper installation technique. To address this issue, follow these steps:
- Clean the surface: Thoroughly clean the surface where the suction cup grab bar will be installed. Use a non-abrasive cleaner to remove any dirt, oil, or residue that may hinder the suction cup’s grip.
- Moisten the suction cups: Before installation, moisten the suction cups slightly to enhance their adhesion. This can be done by spraying a small amount of water onto the cups.
- Press firmly and evenly: When attaching the suction cup grab bar, ensure that you press it firmly against the surface. Apply even pressure across the entire length of the grab bar to create a strong seal.
- Avoid uneven weight distribution: Once installed, be mindful of the weight distribution on the grab bar. Uneven weight distribution can lead to instability. Make sure to distribute your weight evenly and avoid pulling or hanging on the grab bar.
Reinstalling or Replacing Suction Cups if Needed
In some cases, the suction cups may not adhere properly, even after troubleshooting. When this happens, reinstalling or replacing the suction cups can help restore stability. Here’s what you can do:
- Remove the grab bar: Gently remove the grab bar from the surface by pulling on its tabs or edges.
- Clean the suction cups: Wash the suction cups with warm, soapy water to remove any debris or residue. Rinse thoroughly and pat dry.
- Inspect the cups: Check the suction cups for any visible signs of damage or wear. If they appear worn out or cracked, it’s time to replace them with new ones.
- Apply fresh water: Moisten the new suction cups with water to improve their sticking ability.
- Reinstall the grab bar: Follow the initial installation steps, ensuring proper surface cleanliness, even pressure, and secure attachment. Test the stability of the new suction cups by gently pulling on the grab bar after installation.
By following these troubleshooting techniques, you can overcome common issues encountered during the installation of suction cup grab bars. Remember to regularly inspect your grab bars and replace any worn-out suction cups to maintain their stability and reliability over time.
Frequently Asked Questions
How Do You Get Suction Cup Grab Bars To Stick?
To ensure suction cup grab bars stick securely, follow these steps: 1. Thoroughly clean and dry the surface where you want to attach the grab bar. 2. Moisten the suction cups with water, ensuring they are wet. 3. Press the suction cups firmly against the surface, avoiding any gaps or air bubbles.
4. Double-check the suction cups are securely attached by giving them a gentle tug. 5. Regularly check the grab bars to ensure they remain secure and reattach if needed.
How Do You Keep A Suction Cup From Falling Down In The Shower?
To keep a suction cup from falling down in the shower, make sure the surface is clean and dry before attaching it. Press the suction cup firmly against the wall or tile, removing any air bubbles. Avoid putting too much weight on the suction cup, as this can cause it to lose its grip.
Do Suction Cup Grab Bars Work?
Yes, suction cup grab bars do work. They provide temporary support and can be easily installed without drilling. However, they may not be as secure as permanent grab bars and are not suitable for all surfaces.
How Do You Install A Grab Bar Without Drilling?
To install a grab bar without drilling, use suction cup grab bars. These attach to smooth, non-porous surfaces like tiles or glass without needing any tools or drilling. Simply moisten the suction cups, press them onto the surface, and secure the grab bar in place.
Conclusion
Installing suction cup grab bars is a quick and efficient way to enhance safety in your bathroom without the need for drilling or damaging your walls. By following the step-by-step instructions provided in this blog post, you can easily install these grab bars yourself.
With their strong suction power, these bars provide stability and support for individuals of all ages and abilities. Improve accessibility and prevent accidents by incorporating suction cup grab bars into your bathroom today.