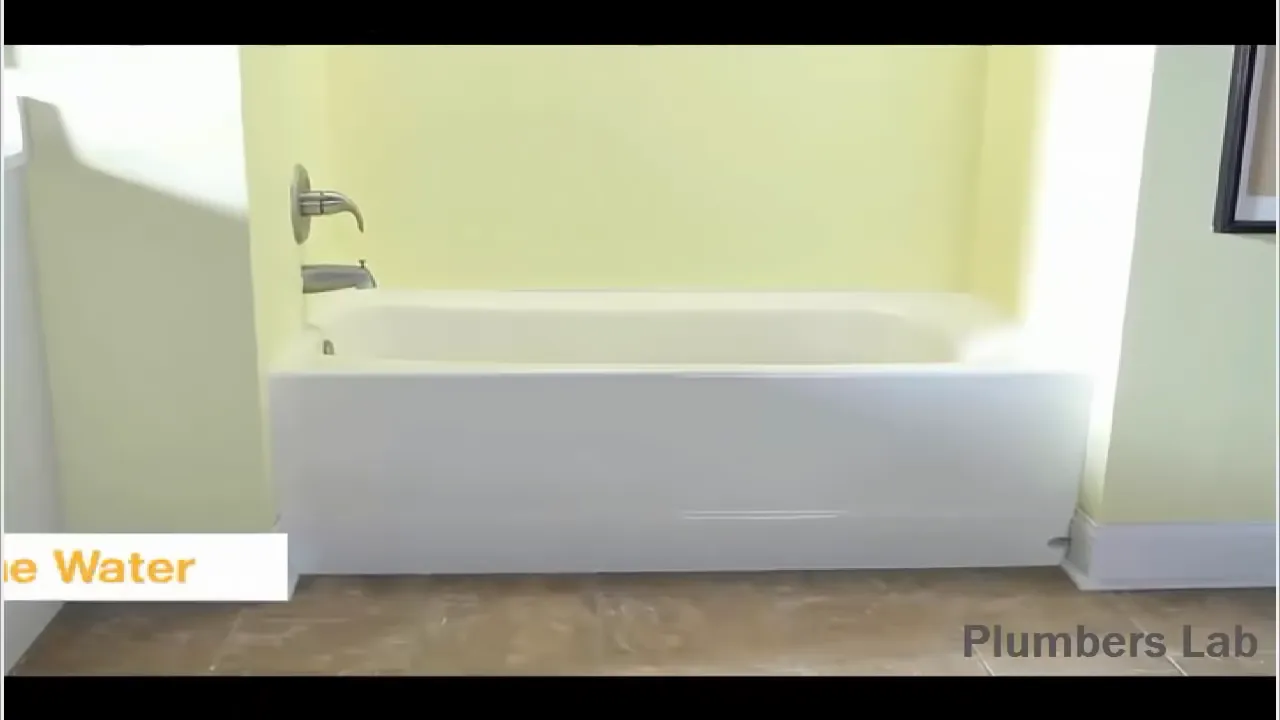
To install a steel tub, begin by preparing the area and ensuring it is dry and level. Then, carefully lift and position the tub in place, aligning it with the drain and plumbing connections.
Factors To Consider While Selecting A Steel Tub
When it comes to selecting a steel tub for your bathroom, there are several important factors that you need to consider. This decision is not one to be taken lightly, as it will not only affect the overall look and feel of your bathroom but also the functionality and durability of your tub. By carefully considering these factors, you can ensure that you choose the right steel tub that meets all your needs and preferences. In this article, we will explore three key factors that you should keep in mind while making your selection: size and dimensions, style and design options, and material and durability.
Size and Dimensions
The size and dimensions of your steel tub play a crucial role in determining whether it will be a perfect fit for your bathroom. Before starting your search, it is important to measure the available space in your bathroom to ensure that you choose a tub that fits perfectly. Consider the length, width, and depth of the tub to determine if it will provide enough space for you to comfortably soak and relax.
If you have a small bathroom, you may want to opt for a compact-sized steel tub that doesn’t take up too much space. On the other hand, if you have a spacious bathroom, you can consider larger tubs with generous dimensions for a more luxurious bathing experience. Remember, striking the right balance between size and available space is key to achieving both aesthetics and functionality in your bathroom.
Style and Design Options
Style and design are important factors to consider while selecting a steel tub, as they contribute to the overall visual appeal of your bathroom. With a wide range of style and design options available, you can find a steel tub that perfectly complements the existing décor and theme of your bathroom.
Whether you prefer a classic, vintage look or a modern, sleek design, there are steel tubs available to suit every taste. Pay attention to details such as the shape, finish, and color of the tub to ensure that it aligns with your desired aesthetic. Additionally, consider any unique features or embellishments that may enhance the overall style and functionality of the tub, such as built-in handles or ergonomic designs.
Material and Durability
The material with which the steel tub is constructed determines its durability and longevity. It is important to choose a tub made from high-quality steel that can withstand the wear and tear of frequent use. Look for tubs that are made from stainless steel, as this material is known for its corrosion resistance and ability to retain heat.
By selecting a tub made from durable steel, you can enjoy a long-lasting bathing solution that requires minimal maintenance. Stainless steel tubs are not only resistant to rust and stains but also easy to clean, making them a practical choice for busy households.
In conclusion, when selecting a steel tub, consider the size and dimensions, style and design options, and material and durability. Taking these factors into account will ensure that you choose a tub that not only fits perfectly in your bathroom but also enhances its overall aesthetic appeal and functionality.
Measuring And Marking The Installation Area
Installing a steel tub requires careful measurements and precise marking to ensure a seamless fit in your bathroom. This step is crucial in ensuring that the tub aligns perfectly with your existing plumbing and space constraints. In this section, we will guide you through the process of measuring and marking the installation area, including assessing the available space, determining the optimal placement, and marking the area for installation.
Assessing the Available Space
Before installing a steel tub, it’s essential to assess the available space in your bathroom. Measure the length, width, and height of the area you intend to install the tub. Keep in mind any structural features, such as walls or windows, that might affect the placement of the tub. Also, consider the necessary clearance space around the tub for comfortable access and maintenance.
To ensure accurate measurements, use a quality tape measure and record the dimensions in both inches and centimeters. Having these measurements handy will help you choose the right-sized tub and plan the installation accordingly.
Determining the Optimal Placement
Once you have measured the available space, it’s time to determine the optimal placement for your steel tub. Consider factors like the existing plumbing layout and the overall aesthetic appeal of your bathroom. You want to select a location that not only fits the tub but also enhances the functionality and visual appeal of the space.
Consulting with a professional contractor or a bathroom designer can provide valuable insights and ensure that the tub is positioned in the most practical and aesthetically pleasing way. They will take into account factors like traffic flow, natural lighting, and room for additional bathroom fixtures.
Marking the Area for Installation
Now that you have assessed the available space and determined the optimal placement, it’s time to mark the area for installation. This step will serve as a visual guide for both you and the professionals during the actual installation process.
Begin by outlining the perimeter of the tub using painter’s tape or a washable marker. Double-check the dimensions and alignment to ensure accuracy. Additionally, mark the location of any needed connections such as the drain and water supply lines. These reference points will help align the tub precisely with the plumbing fixtures.
If you are not experienced in marking the area for installation, or if your bathroom has unique features that require special attention, it’s best to seek professional assistance. They can provide expert guidance and ensure that the marking process is done accurately.
By taking the time to assess the available space, determine the optimal placement, and mark the installation area correctly, you’ll set the stage for a successful steel tub installation. Following these steps will help ensure that your newly installed tub fits seamlessly into your bathroom, enhancing both its functionality and aesthetic appeal.
Removing The Old Tub (If Applicable)
When it comes to installing a new steel tub, one of the first steps is to remove the old tub. This process involves disconnecting the plumbing and fixtures, removing surrounding tiles or walls, and properly disposing of the old tub. In this section, we will discuss each step in detail, ensuring a smooth and efficient removal process.
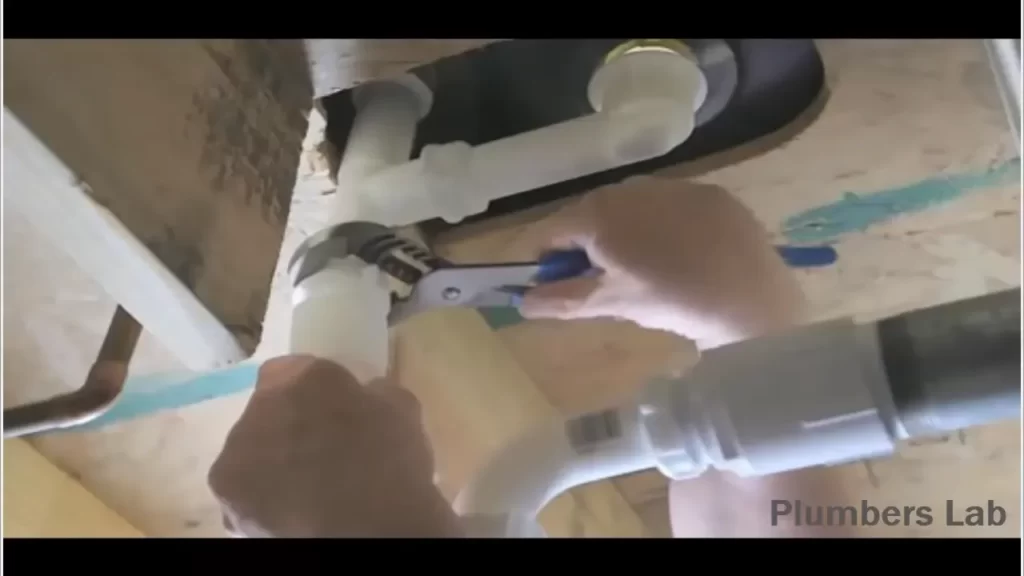
Disconnecting Plumbing and Fixtures
To begin with, you’ll need to disconnect the plumbing and fixtures attached to the old tub. This includes turning off the water supply and draining any water that may be in the tub. Start by shutting off the water valves connected to the tub. Once the water is turned off, use an adjustable wrench to detach the plumbing connections. It’s important to have a bucket or towel handy to catch any remaining water or debris.
Removing Surrounding Tiles or Walls
Next, it’s time to remove the surrounding tiles or walls that may be present. This step is necessary if the old tub is built into a tiled or enclosed area. Start by using a hammer and chisel to carefully remove the tiles or wall coverings around the tub. Be sure to wear protective eyewear and gloves during this process to prevent any injuries. Additionally, it may be necessary to use a utility knife to cut through any caulking or adhesive that was used to secure the tiles or walls.
Disposing of the Old Tub Properly
Once the plumbing and surrounding tiles or walls have been removed, it’s important to dispose of the old tub properly. Depending on your local waste management regulations, you may need to contact a professional waste removal service or take the tub to a designated disposal facility. It’s essential to follow the proper disposal guidelines to avoid any environmental impact or fines. If the old tub is in good condition, you may also consider donating it or exploring recycling options.
In conclusion, removing the old tub is a vital step before installing a new steel tub. By following these steps of disconnecting the plumbing and fixtures, removing surrounding tiles or walls, and properly disposing of the old tub, you can ensure a successful and efficient removal process.
Preparing The Plumbing And Drainage System
Before installing a steel tub, it is crucial to prepare the plumbing and drainage system to ensure a smooth and functional installation. This involves evaluating the existing plumbing setup, making necessary adjustments or replacements, and ensuring proper drainage and ventilation. By adhering to these important steps, you can create a sturdy and efficient plumbing system that complements your steel tub installation.
Evaluating the Existing Plumbing Setup
Begin by carefully assessing the current plumbing arrangement in your bathroom. Locate the water supply lines, drain pipe, and ventilation system. Check for any signs of leaks, corrosion, or damage. It’s important to address these issues before proceeding with the installation to prevent any future complications. Take note of the measurements and specifications of the existing plumbing setup.
Making Necessary Adjustments or Replacements
Based on your evaluation, take the required steps to adjust or replace any components of the plumbing system that may not be compatible with the new steel tub. This may involve replacing old pipes, upgrading fittings, or repositioning supply lines and drains to accommodate the dimensions and requirements of the steel tub. Ensuring proper alignment and fit will not only promote functionality but also prevent leaks and potential damage in the future.
Ensuring Proper Drainage and Ventilation
Proper drainage and ventilation are vital for the longevity and effectiveness of your steel tub installation. As part of the preparation process, ensure that the drain pipe is clear of any debris or clogs that may obstruct the water flow. Additionally, check the ventilation system to confirm that it is operating efficiently. Proper ventilation helps to prevent dampness and mold growth.
To optimize drainage efficiency, consider installing anti-siphon traps or p-traps beneath the tub. These devices help to prevent sewer gases from entering the bathroom while still allowing waste water to flow freely. Moreover, ensure that the drain pipe has the appropriate slope to facilitate the smooth expulsion of water from the tub.
By meticulously evaluating the existing plumbing setup, making necessary adjustments or replacements, and ensuring proper drainage and ventilation, you can lay the groundwork for a successful steel tub installation. With a well-prepared plumbing system, your new tub will not only function flawlessly but also enhance the overall aesthetics and functionality of your bathroom.
Unpacking And Inspecting The Steel Tub
Welcome to the exciting process of installing a steel tub in your bathroom! Properly unpacking and inspecting the tub is an essential first step that shouldn’t be overlooked. By thoroughly going through this process, you can ensure that the tub is free from any damage or defects right from the start, saving you time and hassle in the long run.
Checking for Any Damage or Defects
Before you begin the actual installation, it’s crucial to carefully inspect the steel tub for any damage or defects. By doing so, you can identify any issues early on and take appropriate action. Here’s how you can complete this step:
- Unpack the tub: Gently remove the steel tub from its packaging, being careful not to scratch or damage the surface. Place it on a clean and protected area.
- Inspect the exterior: Thoroughly examine the outer shell of the tub for any visible cracks, dents, or scratches. Pay close attention to the edges and corners where damages are more likely to occur during transportation.
- Check the interior: Take a close look at the inside of the tub. Look for any signs of manufacturing defects, such as uneven surfaces, rough patches, or inconsistencies in the finish.
- Examine the fittings: Inspect the fittings, such as the drain opening and overflow hole, for proper alignment and overall quality. Make sure they are securely attached and free from any damages.
Cleaning and Prepping the Tub Surfaces
Once you have confirmed that the steel tub is free from any damage or defects, it’s time to clean and prep the surfaces before installation. This will ensure a smooth and successful installation process. Follow these steps to get your tub ready:
- Clean the exterior: Use a gentle cleanser and a non-abrasive cloth to clean the exterior of the tub. This will remove any dust, dirt, or residue that may have accumulated during the unpacking process.
- Clear the interior: Carefully remove any packaging materials or protective films from the inside of the tub. Be cautious not to use abrasive tools or harsh chemicals that could damage the surface.
- Inspect the surfaces: Once the tub is clean, carefully inspect the surfaces again to ensure there are no hidden damages or defects that may have been missed during the initial inspection.
- Prep the surfaces: If necessary, lightly sand any rough patches or imperfections on the tub’s surfaces. This will create a smooth and even base for any further finishing or sealing required.
By unpacking and inspecting the steel tub properly, you’re taking the essential first step towards a successful installation. Furthermore, cleaning and prepping the tub surfaces ensure that your installation process goes smoothly without any unforeseen issues. Now that the tub is ready, let’s move on to the exciting next steps of installing your steel tub!
Positioning And Securing The Steel Tub
When it comes to installing a steel tub in your bathroom, one of the most crucial steps is properly positioning and securing it. This ensures that the tub fits seamlessly into the designated installation area and stays firmly in place for years to come. In this guide, we will walk you through the steps of aligning the tub with the marked installation area, adjusting the level, ensuring stability, and securing the tub to the floor and surrounding walls.
Aligning the Tub with the Marked Installation Area
To begin the installation process, you need to align the steel tub with the marked installation area. Following the manufacturer’s instructions, carefully position the tub in the designated spot. Ensure that the tub is centered and aligns perfectly with the marked guidelines. Using a measuring tape and level, double-check the tub’s alignment from multiple angles to ensure accuracy.
Adjusting the Level and Ensuring Stability
Once the tub is correctly aligned, the next step is to adjust the level and ensure stability. Begin by placing a level horizontally on the rim of the tub. Gradually lift or lower the tub as necessary, using shims or adjustable feet, until the bubble on the level aligns perfectly. This will ensure that the tub is level and won’t cause any draining or water flow issues.
In addition to leveling the tub, it is important to ensure its stability as you don’t want it to shift or wobble once it’s in use. To achieve this, place shims or additional support under the tub’s base, especially in areas where it feels unstable. These shims will help distribute the weight evenly, preventing any movement or rocking.
Securing the Tub to the Floor and Surrounding Walls
Finally, securing the tub to the floor and surrounding walls is essential for its long-term stability. Follow the manufacturer’s recommendations on the type and number of fasteners needed for your specific tub model. Using a drill and appropriate screws or anchors, secure the tub to the floor and walls at designated anchor points.
Make sure to evenly distribute the fasteners, ensuring that the tub is firmly secured at multiple points. This will prevent any potential movement or shifting over time. Lastly, ensure that the fasteners do not penetrate any crucial plumbing lines or electrical wires beneath the floor or within the walls.
By properly aligning the tub with the marked installation area, adjusting the level and ensuring stability, and securely fastening it to the floor and surrounding walls, you can confidently proceed with the installation of your steel tub. Following these steps will not only result in a beautiful and functional bathroom but also give you peace of mind knowing that your tub is secure and built to last.
Connecting The Plumbing And Fixtures
To complete the installation of your steel tub, it is important to properly connect the plumbing and fixtures. This process involves attaching the drain assembly, connecting the water supply lines, and installing the faucet and other fixtures. By following these steps, you can ensure a secure and functional plumbing system for your steel tub.
Attaching the Drain Assembly
Attaching the drain assembly is an essential step in connecting your steel tub to the plumbing. This assembly includes a drain trap, tailpiece, and drain flange. To start, place the drain trap underneath the tub and align it with the drain hole. Secure it in place using the provided screws or fittings. Next, insert the tailpiece into the drain trap and attach the drain flange on top, ensuring a tight seal. Make sure to align the drain flange with the overflow drain if your tub has one. Finally, connect the drain assembly to the main drain pipe using suitable fittings and tighten them.
Connecting the Water Supply Lines
Connecting the water supply lines is the next step in the plumbing process. Start by turning off the main water supply to ensure no water flows while you work. Locate the water supply valves, typically found near the tub area. Connect the hot and cold water supply lines to their respective valves, ensuring a secure and leak-free connection. Use thread seal tape or pipe compound on the threads to ensure a watertight seal. Finally, turn on the water supply and check for any leaks. If necessary, tighten the connections further.
Installing the Faucet and Other Fixtures
Installing the faucet and other fixtures is the final step in connecting the plumbing for your steel tub. Begin by selecting a suitable faucet that matches your tub and bathroom decor. Follow the manufacturer’s instructions to install the faucet, making sure to connect the hot and cold water supply lines correctly. Secure the faucet firmly to the tub using the provided hardware. Additionally, install any other fixtures such as a handheld showerhead or a diverter valve if desired.
| Action | Steps |
|---|---|
| Attaching the Drain Assembly | 1. Place drain trap underneath the tub and secure it 2. Insert tailpiece into drain trap 3. Attach drain flange on top of tailpiece and align with overflow drain if applicable 4. Connect drain assembly to main drain pipe |
| Connecting the Water Supply Lines | 1. Turn off main water supply 2. Locate water supply valves near tub area 3. Connect hot and cold water supply lines to valves using thread seal tape or pipe compound 4. Turn on water supply and check for leaks |
| Installing the Faucet and Other Fixtures | 1. Select appropriate faucet 2. Follow manufacturer’s instructions to install faucet 3. Connect hot and cold water supply lines correctly 4. Secure faucet to tub using provided hardware 5. Install other fixtures if desired |
Sealing And Waterproofing The Tub
Properly sealing and waterproofing your steel tub is crucial to prevent any potential leaks and water damage. By taking a few simple steps, you can ensure that your tub remains durable and in pristine condition for years to come. In this section, we will discuss applying caulk or sealant to prevent leaks, ensuring proper waterproofing measures, and allowing sufficient drying time for optimal results.
Applying Caulk or Sealant to Prevent Leaks
One of the most important steps in sealing your steel tub is applying a high-quality caulk or sealant around the edges. This helps to create a watertight seal and prevents any water from seeping through the gaps between the tub and the surrounding walls or floor. Here are a few simple steps to guide you through the process:
- Clean the surface: Before applying the caulk or sealant, make sure to clean the entire area thoroughly. Remove any dirt, debris, or old caulk using a scraper or putty knife.
- Choose the right product: Select a caulk or sealant that is specifically designed for use in bathrooms or with steel tubs. Look for products that are waterproof, mold-resistant, and durable.
- Apply the caulk: Using a caulk gun, carefully apply a thin bead of caulk along the joint where the tub meets the walls or floor. Start from one corner and work your way around, ensuring full coverage and an even application.
- Smooth and shape: Immediately after applying the caulk, use a caulk smoothing tool or your finger to smooth and shape the caulk. This helps to create a professional-looking finish and ensures a tight seal.
- Allow for curing time: Follow the manufacturer’s instructions regarding the curing time of the caulk. It is crucial to allow sufficient time for the caulk to dry and form a strong bond before using the tub.
Ensuring Proper Waterproofing Measures
In addition to applying caulk or sealant, it is essential to take other waterproofing measures to enhance the longevity and effectiveness of your steel tub. These measures include:
- Installing a waterproofing membrane: Consider using a waterproofing membrane beneath the tub to provide an added layer of protection against water damage. This membrane acts as a barrier, preventing any water from penetrating through to the subfloor.
- Tightening the drain connection: Check the drain connection of your steel tub to ensure it is properly tightened. Loose drain connections can lead to leaks and water seepage, so it is essential to tighten them securely.
- Inspecting and repairing any damage: Regularly inspect your tub for any signs of damage or wear. Cracks, chips, or rust spots should be addressed promptly to prevent water from seeping through and causing further damage.
Allowing Sufficient Drying Time
After completing the sealing and waterproofing process, it is essential to allow sufficient drying time to ensure the effectiveness of your efforts. Follow these guidelines:
- Follow the manufacturer’s instructions: Pay attention to the recommended drying time provided by the caulk or sealant manufacturer. This will vary depending on the product and environmental conditions.
- Avoid using the tub: Do not use the tub until the caulk or sealant has fully cured. Premature use can compromise the seal and increase the risk of leaks or water damage.
- Maintain proper ventilation: Adequate ventilation in the bathroom will help expedite the drying process. Open windows or use fans to promote air circulation and reduce humidity levels.
By carefully following these steps, you can confidently seal and waterproof your steel tub, ensuring its durability and preventing any potential leaks or water damage. Remember that proper maintenance and regular inspections are key to preserving the integrity of your tub over time.
Reinstalling Tiles Or Wall Surroundings
When installing a new steel tub, it is crucial to ensure that the tiles or wall surroundings around the tub are properly reinstalled. This not only enhances the appearance of your bathroom but also creates a watertight seal, preventing any water damage or leaks. In this section, we will guide you through the process of patching and repairing any damaged areas and affixing tiles or wall panels around the tub.
Patching and Repairing Any Damaged Areas
Before reinstalling the tiles or wall panels, it is essential to inspect the surrounding areas for any damage. Whether it’s loose tiles, cracks, or holes, these issues need to be addressed before proceeding with the installation. Here’s a step-by-step guide on how to patch and repair damaged areas:
- Assess the damage: Carefully examine the tiles or wall surroundings to identify any cracks, loose tiles, or holes that need repair.
- Remove any loose tiles: Using a putty knife or scraper, gently remove any tiles that are loose or damaged. Be careful not to damage the neighboring tiles.
- Fill cracks and holes: Prepare a suitable filler material, such as grout or caulk, and use it to fill in any cracks or holes in the wall. Smooth the surface with a putty knife and allow it to dry completely.
- Reattach loose tiles: Apply tile adhesive to the back of the loose tile and press it firmly onto the repaired surface. Use tile spacers to ensure even spacing between the tiles. Allow the adhesive to dry according to the manufacturer’s instructions.
- Grout the tiles: Once the adhesive is dry, mix the grout according to the manufacturer’s instructions. Apply the grout using a grout float, making sure to fill the gaps between the tiles. Wipe off any excess grout with a damp sponge, taking care not to remove too much grout from the joints. Allow the grout to dry.
Affixing Tiles or Wall Panels Around the Tub
Now that you have patched and repaired any damaged areas, it’s time to affix tiles or wall panels around the tub. This process involves careful measurement, proper adhesive application, and precise placement. Follow these steps for a successful installation:
- Measure and plan: Measure the area around the tub to determine the number of tiles or wall panels you will need. Plan the layout to ensure a balanced and aesthetically pleasing design.
- Prepare the surfaces: Clean the tub and the surrounding walls thoroughly, removing any dust, dirt, or old adhesive residue. This provides a clean and smooth surface to work with.
- Apply adhesive: Follow the manufacturer’s instructions to apply the appropriate adhesive to the back of each tile or wall panel. Use a notched trowel to create ridges in the adhesive, ensuring proper adhesion.
- Place the tiles or wall panels: Carefully place each tile or wall panel onto the adhesive, pressing firmly and evenly to secure it in place. Use tile spacers to maintain consistent spacing between the tiles or wall panels.
- Grout the tiles or wall panels: Once the adhesive has cured as per the manufacturer’s instructions, mix the grout and apply it to the gaps between the tiles or wall panels. Wipe off any excess grout with a damp sponge.
- Seal the grout: To protect the grout from moisture and stains, apply a grout sealer according to the manufacturer’s instructions.
By following these steps, you can reinstall the tiles or wall panels around your steel tub, creating a seamless and visually appealing finish. Remember to allow proper drying and curing times before using the tub or exposing it to water. Now, your bathroom renovation is one step closer to completion!
Cleaning And Polishing The Steel Tub
Once you have successfully installed your steel tub, it is essential to clean and polish it regularly to keep it looking brand new and shiny. Cleaning and polishing not only remove any residue or stains but also protect the steel tub from future damage. Here are a few simple steps to help you achieve a sparkling finish.
Removing Any Residue or Stains
The first step in cleaning your steel tub is to remove any residue or stains that may have accumulated over time. Here’s what you need to do:
- Prepare a cleaning solution by mixing warm water with mild dish soap. Avoid using harsh chemicals or abrasive cleaners as they can damage the steel surface.
- Using a soft sponge or cloth, apply the cleaning solution to the stained areas and gently scrub in circular motions. Be sure to cover the entire tub surface.
- Rinse the tub thoroughly with clean water to remove any soapy residue. This will prevent any potential damage to the steel tub.
- Dry the surface completely with a clean, soft towel to prevent water spots or streaks.
Applying Polish for a Shiny Finish
After removing any residue or stains, it’s time to give your steel tub a shiny finish by applying polish. Follow these steps:
- Choose a high-quality stainless steel polish specifically formulated for tubs. Make sure to read and follow the instructions provided by the manufacturer.
- Apply a small amount of polish to a soft, lint-free cloth. It’s best to start with a small area to test the polish and ensure it doesn’t cause any damage.
- Gently rub the polish onto the steel tub’s surface using circular motions. This will help distribute the polish evenly and cover any visible imperfections.
- Allow the polish to sit on the tub surface for the recommended time as per the manufacturer’s instructions.
- Using a clean part of the cloth, buff the tub in circular motions to remove any excess polish and bring out a brilliant shine.
Regular cleaning and polishing will not only maintain the beauty of your steel tub but also protect it from scratches and corrosion. Remember to clean the tub at least once a week and apply polish every month to keep it looking its best. Follow the above steps, and you’ll have a gleaming steel tub that adds a touch of elegance to your bathroom for years to come.
Inspecting For Leaks And Any Issues
When it comes to installing a steel tub, one crucial step is inspecting for leaks and any issues that may arise. This ensures that your new tub functions properly and is free from any leaks that could lead to water damage or plumbing problems down the line. In this section, we will cover two essential aspects of the inspection process: testing the drainage and plumbing connections and checking for proper functionality.
Testing the Drainage and Plumbing Connections
To ensure that your steel tub drains properly and that all plumbing connections are secure, it is important to conduct a thorough test. Follow these steps to test the drainage and plumbing connections:
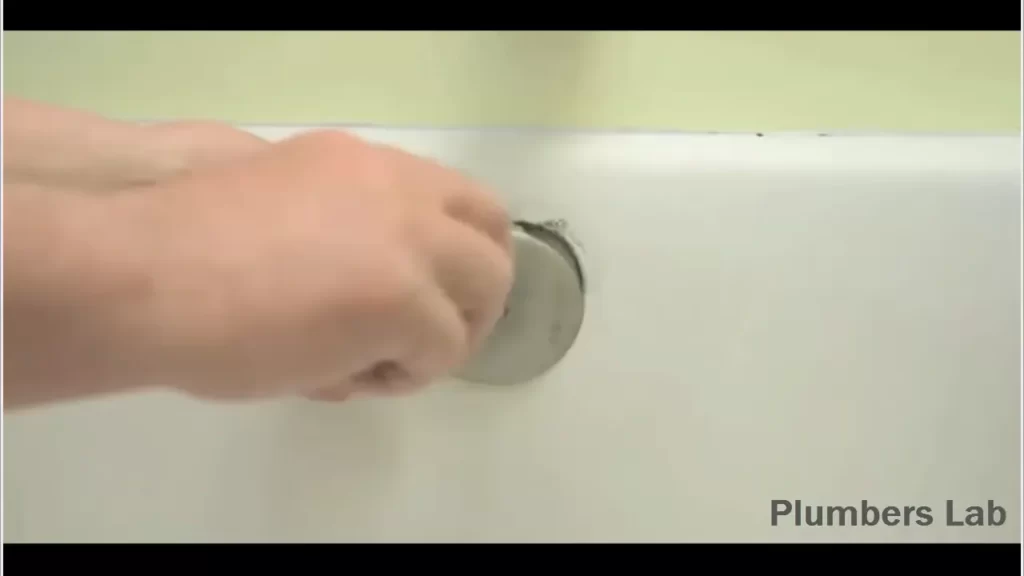
- First, check the tub’s drain stopper. Make sure it is properly installed and functioning correctly. A faulty drain stopper can impede proper drainage, leading to water accumulation.
- Next, fill the tub with water and let it drain completely. Observe the drainage speed and assess whether the water flows smoothly without any blockages or slow draining. If you notice any issues, such as slow drainage or gurgling sounds, consult a professional plumber to address the problem.
- Inspect the plumbing connections, such as the P-trap and overflow drain, for any signs of leaks or loose fittings. Look for water stains, moisture, or dripping water. Tighten any loose connections and replace any faulty parts to prevent future leaks.
Checking for Proper Functionality
In addition to testing the drainage and plumbing connections, it is crucial to ensure that your steel tub functions properly. Follow these steps to check for proper functionality:
- Verify that the hot and cold water supply valves are turned on and functioning correctly.
- Test the water flow from both the faucet and the showerhead, if applicable. Ensure that the water pressure is adequate and the water temperature can be adjusted easily.
- Check the tub’s stability by applying gentle pressure to various areas. It should feel sturdy and secure, without any noticeable movement or shifting.
- Lastly, test the tub’s safety features, such as handrails and slip-resistant surfaces. These aspects contribute to the overall functionality and ensure a safe bathing experience.
Inspecting for leaks and any issues is essential to guarantee the proper installation and functionality of your steel tub. By conducting thorough tests and checks, you can identify and address any potential problems before they become more significant issues. Remember to consult a professional if you encounter any complicated plumbing or installation challenges.
Adding Additional Features And Accessories
When it comes to installing a steel tub in your bathroom, the possibilities for customization are nearly endless. Not only can you choose the perfect style and size for your space, but you can also add additional features and accessories to enhance your bathing experience. In this section, we will explore some of the popular options available for enhancing your steel tub installation and turning your bathroom into a luxurious retreat.
Installing Shower Heads or Handheld Sprayers
One way to upgrade your steel tub is by installing a shower head or handheld sprayer. This allows you to easily switch between a relaxing bath and a refreshing shower, providing you with the best of both worlds. To install a shower head or handheld sprayer, follow these simple steps:
- Choose the desired location for your shower head or handheld sprayer, keeping in mind factors such as water pressure and accessibility.
- Use a drill to create the necessary holes in the wall or tub surround. Make sure to consult the manufacturer’s instructions for the correct size and placement of the holes.
- Attach the shower head or handheld sprayer to the water supply using the provided fittings. Tighten them securely to prevent leaks.
- Turn on the water supply and check for any leaks. If necessary, make adjustments to the fittings until the connection is tight and leak-free.
- Test the shower head or handheld sprayer to ensure that the water flow is to your liking. Make any necessary adjustments to the water pressure or spray pattern.
Incorporating Grab Bars or Safety Rails
Including grab bars or safety rails in your steel tub installation can provide added security and stability, especially for those with limited mobility or disabilities. Here’s how you can incorporate grab bars or safety rails into your bathroom:
- Identify the areas in your bathroom where you would benefit from grab bars or safety rails. Common locations include near the tub, next to the toilet, and by the sink.
- Measure the space to determine the length and height of the grab bars or safety rails that you need.
- Drill the necessary holes in the wall or tile using a drill and the appropriate drill bit.
- Secure the grab bars or safety rails to the wall using screws or mounting brackets. Ensure that they are firmly attached and can support the weight of an individual.
- Test the stability of the grab bars or safety rails by applying pressure in various directions. Make any adjustments or reinforcements as needed to ensure a secure installation.
Including Bath Caddies or Storage Options
Another way to enhance your steel tub installation is by incorporating bath caddies or storage options. These provide convenient storage space for your bath essentials and help to keep your bathroom organized. To include bath caddies or storage options in your bathroom, follow these steps:
- Select a bath caddy or storage solution that suits your style and meets your storage needs. Consider options such as freestanding caddies, wall-mounted shelves, or built-in storage compartments.
- Measure the dimensions of your tub or bathroom wall to ensure a proper fit.
- Install the bath caddy or storage solution according to the manufacturer’s instructions. This may involve attaching it to the tub rim or mounting it on the wall.
- Arrange your bath essentials, such as shampoo, conditioner, soap, and loofahs, in the caddy or storage compartments.
- Regularly clean and organize your bath caddy or storage solution to keep your bathroom clutter-free and maintain a relaxing atmosphere.
Incorporating Lighting And Décor Elements
Installing a steel tub can transform your bathroom into a sleek and modern space. But why stop at just the tub? By incorporating lighting and décor elements, you can take your bathroom to the next level. From choosing suitable lighting fixtures to personalizing the surrounding area with plants, artwork, or bath accessories, every detail counts. In this section, we will guide you through the process of enhancing your steel tub installation with the perfect lighting and décor touches.
Choosing Suitable Lighting Fixtures
When it comes to lighting your steel tub area, it’s essential to make informed decisions. The right choice of lighting fixtures can set the mood and create a welcoming ambiance. Here are some tips to consider:
- 1. Assess the area: Before choosing the lighting fixtures, assess the size and layout of your bathroom. Consider the natural light sources and think about where you want to place the fixtures to enhance the tub area.
- 2. Consider the style: Lighting fixtures come in various styles, from modern and minimalist to elegant and ornate. Choose a style that complements your steel tub and overall bathroom design.
- 3. Opt for dimmable lights: To create a soothing and relaxing ambiance, consider installing dimmable lights. This way, you can adjust the brightness according to your preference.
- 4. Focus on task lighting: Ensure that the tub area has adequate task lighting for activities like reading or shaving. Wall sconces or pendant lights near the tub can provide focused illumination.
Decorating the Surrounding Area
Decorating the area surrounding your steel tub can elevate the overall aesthetic and create a cohesive look. Here are some ideas to inspire you:
- 1. Use tiles: Choose tiles that complement the color and style of your steel tub. Use them to create a backsplash or accent wall to add visual interest.
- 2. Enhance with mirrors: Mirrors not only make the space feel larger but also reflect the light, making the area brighter. Consider installing a statement mirror above the tub or a smaller mirror on the nearby wall.
- 3. Incorporate shelving: Install shelves near the tub to keep bath essentials, such as candles, soaps, or bath salts, easily accessible. This will also allow you to display decorative items that enhance the overall look.
- 4. Choose a cohesive color palette: Select a color scheme that complements the steel tub, such as neutral tones or shades of blue. This will create a harmonious and attractive visual appeal.
Personalizing with Plants, Artwork, or Bath Accessories
Adding personal touches to your steel tub area can make it feel like a spa retreat. Here are some ways to personalize the space:
- 1. Bring in plants: Incorporate greenery into your bathroom by placing potted plants near the tub area. Plants not only add a touch of nature but also improve air quality.
- 2. Hang artwork: Choose artwork that resonates with your personal style and hang it on the walls near the tub. Abstract paintings or serene landscapes can create a calming atmosphere.
- 3. Select stylish bath accessories: Opt for chic and luxurious bath accessories, such as elegant soap dispensers, scented candles, or plush towels. These small details can elevate the overall aesthetic.
- 4. Incorporate a bath tray: A bath tray placed across the tub can hold a book, a glass of wine, or bath essentials. It adds functionality while enhancing the overall visual appeal.
By carefully considering lighting fixtures, decorating the surrounding area, and personalizing the space with plants, artwork, or bath accessories, you can create a steel tub installation that is not only functional but also visually stunning. Let your creativity shine and transform your bathroom into a sanctuary of relaxation!
Frequently Asked Questions
How Do You Secure A Steel Tub To Studs?
Secure a steel tub to studs by following these steps: 1. Measure and mark the position of the studs on the wall. 2. Drill pilot holes into the studs at the marked positions. 3. Attach a flange or mounting bracket to the studs using screws or bolts.
4. Place the steel tub onto the flange or bracket. 5. Secure the tub to the flange/bracket using screws or bolts. Ensure a tight fit for stability.
Does A Steel Bathtub Need Mortar?
No, a steel bathtub does not require mortar.
What Is The Easiest Bathtub To Install?
The easiest bathtub to install is a freestanding bathtub. It requires no major demolition work or plumbing modifications. Just place it in the desired location, connect the drain, and you’re done. It’s a hassle-free option for quick bath renovations.
Is Steel Bathtub Good?
Steel bathtubs are good due to their durability, strength, and resistance to scratches and stains. They are easy to clean and maintain, making them a practical choice for any bathroom. With their sleek and modern appearance, steel bathtubs also add a touch of elegance to your space.
Conclusion
To sum up, installing a steel tub is a straightforward process that can be easily accomplished with the right tools and guidance. By following the step-by-step instructions provided in this blog post, you can ensure a successful installation that will enhance the functionality and aesthetic appeal of your bathroom.
Remember to prioritize safety and precision throughout the installation process for optimal results. So, go ahead and give your bathroom a modern and durable upgrade with a steel tub installation!