To install a stand-up shower, you need to remove the existing shower, add a new drain, prepare the shower base, install the shower walls, and connect the plumbing. Once all the necessary steps are completed, you can enjoy your new stand-up shower.
Do you want to upgrade your bathroom with a sleek and modern stand-up shower? Installing a stand-up shower can be a daunting task if you don’t know where to start. However, with the right knowledge and tools, it can be a relatively straightforward project.
In this guide, we will walk you through the step-by-step process of installing a stand-up shower in your bathroom. From removing the old shower to connecting the plumbing, we’ll cover all the essential steps you need to know. So, let’s dive in and get your new stand-up shower up and running in no time!
Planning And Preparation
Before embarking on the installation of a stand-up shower, proper planning and preparation are essential. Taking the time to assess the space and size requirements, choosing the right stand-up shower kit, and gathering the necessary tools and materials will ensure a smooth and successful installation process.
Assessing the Space and Size Requirements
The first step in planning for your stand-up shower installation is assessing the space available in your bathroom. Measure the area where you intend to install the shower to determine the size requirements. Consider factors such as the placement of existing plumbing and drainage systems, as well as the proximity to any walls or fixtures that may affect the installation process.
A good tip is to create a rough sketch of your bathroom and mark the area where the stand-up shower will be placed. This will give you a visual reference and help you make informed decisions while choosing a suitable stand-up shower kit.
Choosing the Right Stand Up Shower Kit
When it comes to choosing the right stand-up shower kit, it is important to consider both functionality and style. Look for a kit that fits well into the available space and complements the overall aesthetic of your bathroom. Take into account elements such as the shape, size, and design of the shower walls, doors, and base.
There are a variety of stand-up shower kits available in the market, ranging from pre-fabricated options to customizable kits that allow for personalized designs. Consider your budget, as well as the level of difficulty you are comfortable with when it comes to installation. Additionally, read customer reviews and seek recommendations to ensure that you choose a reliable and durable option.
Gathering the Necessary Tools and Materials
Once you have assessed the space requirements and chosen the right stand-up shower kit, it’s time to gather the necessary tools and materials. This will ensure that you have everything at hand when starting the installation process, saving you time and preventing delays.
Here is a list of the essential tools and materials you might need:
| Tools | Materials |
|---|---|
|
|
Make sure to double-check the instructions provided with your specific stand-up shower kit, as they may have additional requirements or recommendations for tools and materials.
By thoroughly assessing the space, choosing the right stand-up shower kit, and gathering all the necessary tools and materials beforehand, you will be well-equipped for a successful stand-up shower installation. This careful planning and preparation will save you time, effort, and help ensure a long-lasting and satisfying end result.
Preparing The Bathroom Space
Before you begin the installation of a stand-up shower, it is crucial to adequately prepare the bathroom space. This step ensures a smooth and efficient installation process, resulting in a functional and visually appealing shower. The preparations include removing the existing shower or tub, repairing and preparing the walls and floor, and waterproofing the shower area.
Removing the Existing Shower or Tub
The first step in preparing the bathroom space is to remove the existing shower or tub. This requires careful planning and execution to avoid causing any damage to the surrounding areas. Here are the steps to follow:
- Turn off the water supply to the bathroom to prevent any leaks or accidents.
- Remove any fixtures, such as showerheads and handles, using the appropriate tools.
- Dismantle the walls around the shower or tub, taking care not to damage the plumbing or electrical wiring.
- Detach the shower or tub from the drain and carefully remove it from the bathroom.
Repairing and Preparing the Walls and Floor
Once the existing shower or tub is successfully removed, the next step is to repair and prepare the walls and floor for the installation of the stand-up shower. This ensures a sturdy foundation and prevents any future issues. Follow these guidelines:
- Inspect the walls and floor for any damages or wear and tear. Repair any cracks, holes, or uneven surfaces.
- Ensure that the walls and floor are clean and free from any debris, dust, or moisture.
- If necessary, apply a primer to the walls and floor to create a smooth surface for the waterproofing process.
- Allow sufficient time for the primer to dry completely before proceeding to the next step.
Waterproofing the Shower Area
Waterproofing the shower area is a crucial step to prevent any water damage to the walls and floor surrounding the stand-up shower. Follow the steps below to ensure an effective waterproofing process:
- Apply a waterproofing membrane on the walls and floor of the shower area. This acts as a protective layer to prevent water penetration.
- Choose a high-quality waterproofing material and carefully follow the manufacturer’s instructions for application.
- Ensure proper coverage of the entire shower area, paying close attention to corners, seams, and joints.
- Allow sufficient time for the waterproofing material to dry, as per the manufacturer’s recommendations, before proceeding with the installation of the stand-up shower.
Installing The Stand Up Shower
Assembling the Shower Base and Walls
Before you begin assembling the stand-up shower, make sure you have all the necessary tools and materials readily available. This includes the shower base, walls, screws, drill, silicone sealant, and a level. Follow these steps to properly assemble the shower base and walls:
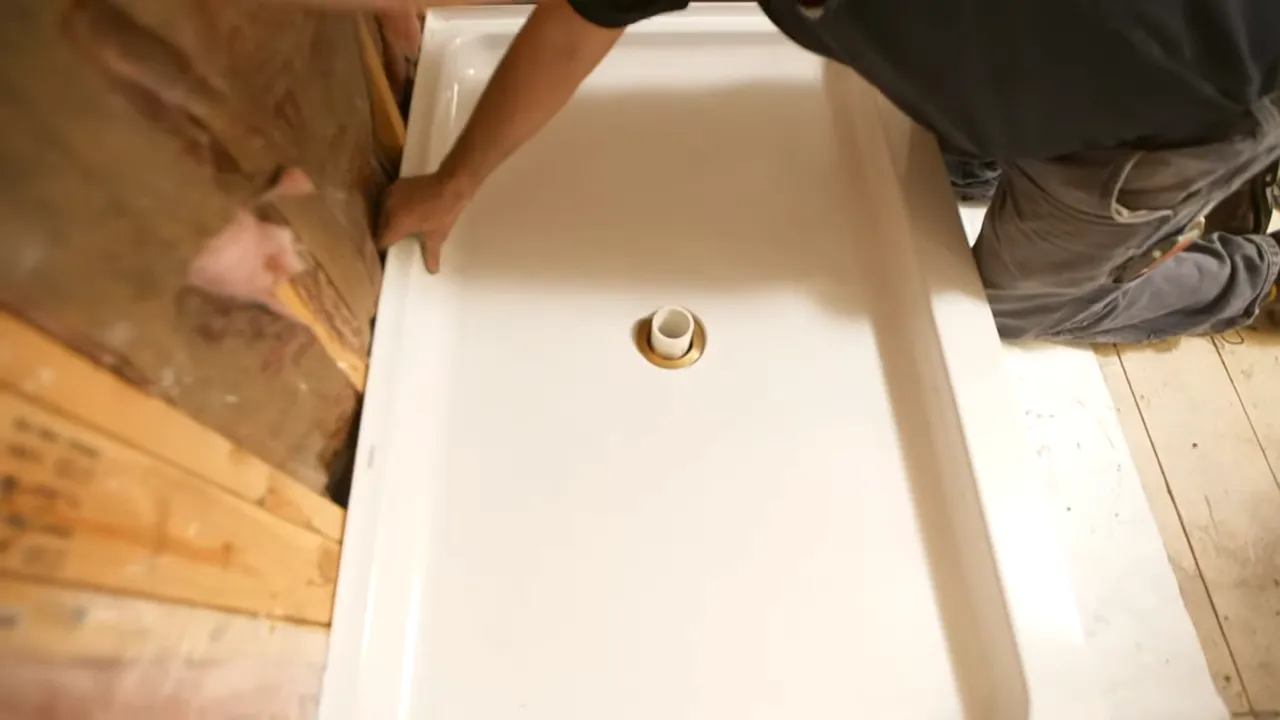
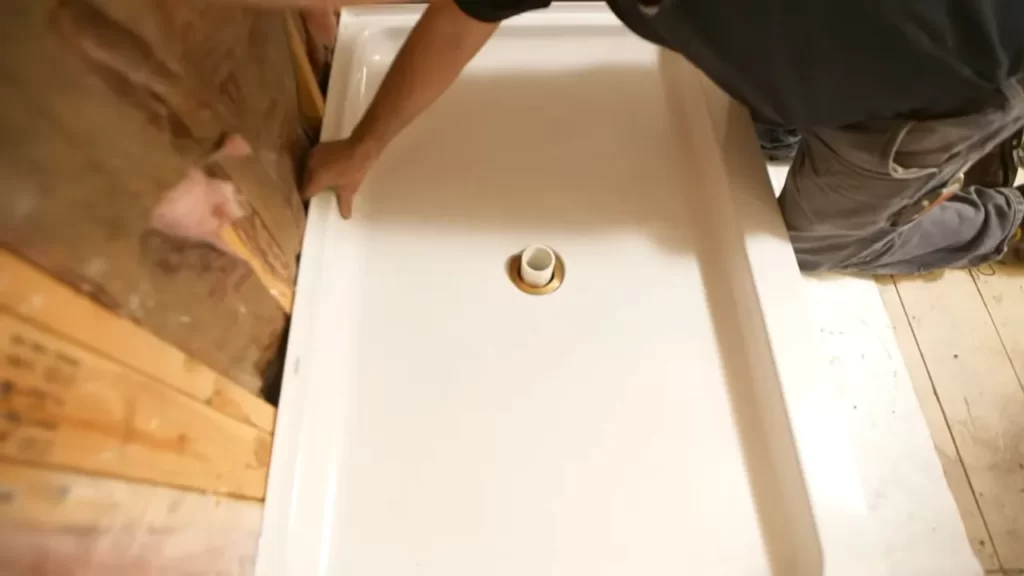
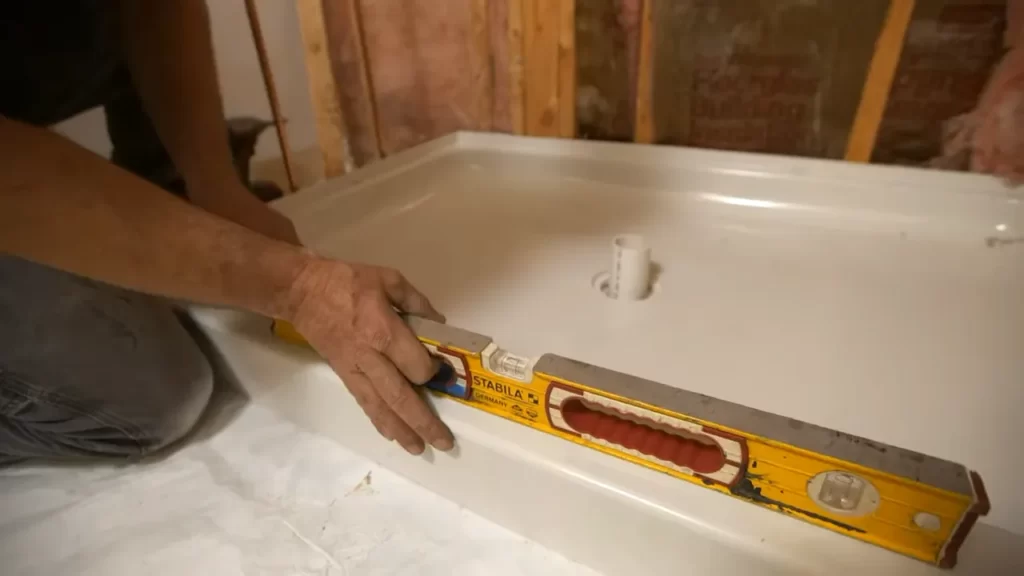
- Start by placing the shower base in the desired location, ensuring it is centered and level on the floor. Use a level to check for any unevenness.
- Next, attach the shower base to the floor using screws. Make sure to place the screws evenly along the edges of the base to secure it firmly.
- Once the base is secured, it’s time to install the shower walls. Start by applying silicone sealant to the bottom edges of the walls to create a watertight seal.
- Position the first wall against the wall opposite the shower base and press it firmly into place. Use a level to ensure it is plumb.
- Repeat the process for the remaining walls, applying silicone sealant to each joint as you go along.
- Allow the silicone sealant to dry completely before moving on to the next step.
Connecting the Plumbing Fixtures
Once the shower base and walls are securely assembled, it’s time to connect the plumbing fixtures. Follow these steps to ensure a proper installation:
- Start by installing the shower valve, following the manufacturer’s instructions. This will typically involve attaching the valve to the wall and connecting the hot and cold water supply lines.
- Next, install the showerhead, making sure to wrap plumber’s tape around the threads before screwing it onto the shower arm.
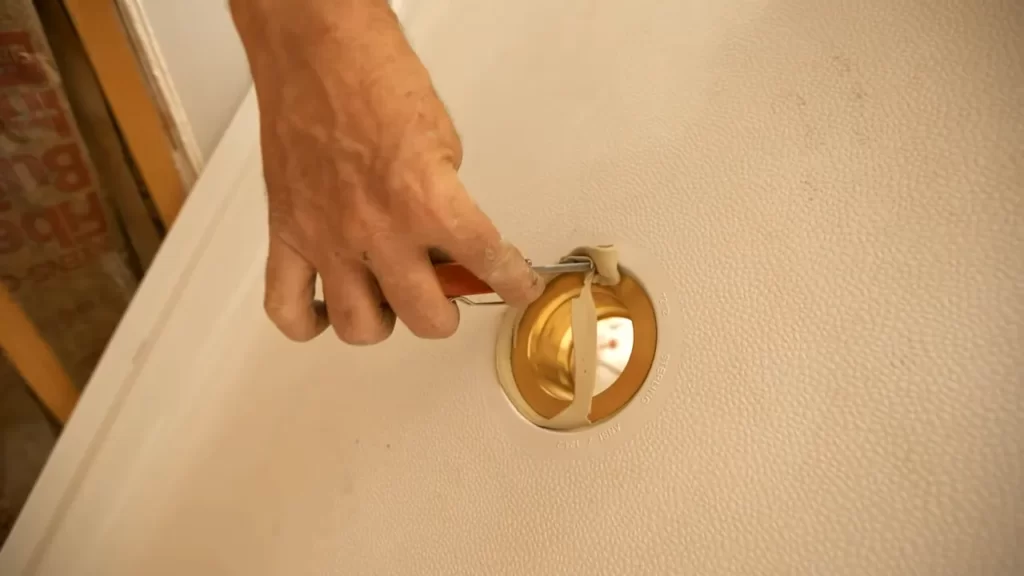
- Connect the drainpipe to the shower base, ensuring a secure and watertight connection.
- Test the plumbing fixtures by turning on the water supply and checking for any leaks. If any leaks are detected, tighten the connections or apply additional sealant as needed.
Installing the Shower Door or Curtain Rod
Finally, it’s time to complete the installation by installing the shower door or curtain rod. Follow these steps to finish off your stand-up shower:
- If you’ve opted for a shower door, carefully follow the manufacturer’s instructions for installation. This may involve attaching the door frame to the walls and securing it with screws.
- Ensure the door is aligned properly and opens and closes smoothly before tightening all the screws.
- If you prefer a curtain rod, measure and mark the desired height for the rod on the shower walls.
- Install the curtain rod brackets, making sure they are level and securely attached to the walls.
- Hang the shower curtain onto the rod and make any necessary adjustments to ensure it hangs straight.
With the shower base, walls, plumbing fixtures, and door or curtain rod installed, you’re now ready to enjoy your newly installed stand-up shower. Follow these steps carefully and take your time to ensure a successful and long-lasting installation.
Testing And Finishing Touches
When it comes to installing a stand-up shower, it’s important to complete the necessary testing and finishing touches to ensure a seamless installation. This phase involves multiple steps to ensure both functionality and aesthetic appeal. In this section, we will cover the crucial aspects of testing for leaks and proper drainage, sealing the joints and plumbing connections, installing the shower fixtures and accessories, and finally, cleaning and conducting a final inspection.
Checking for Leaks and Proper Drainage
Before completing the installation process, it is essential to check for any possible leaks and ensure proper drainage. Here are the steps to follow:
- Inspect all the plumbing connections carefully, including the showerhead, faucet, and drain.
- Turn on the water supply and let the shower run for a few minutes.
- During this time, closely examine the connections for any signs of leaks, such as water drips or puddles.
- If you notice any leaks, tighten the respective connections or use plumber’s tape to create a better seal.
- Recheck the connections to ensure no leaks are present.
- Pay attention to the drainage system. Ensure that water flows smoothly down the drain and doesn’t accumulate or create any blockages.
Sealing the Joints and Plumbing Connections
To prevent any potential water damage or leaks, it is crucial to properly seal the joints and plumbing connections. Follow these steps:
- Use a waterproof sealant, such as silicone caulk, to seal the joints between the walls and shower base.
- Apply the sealant evenly, ensuring complete coverage along the joints.
- Smooth out the sealant with a sealant tool or your finger to achieve a neat and professional look.
- Next, focus on the plumbing connections. Apply a thin layer of pipe joint compound or Teflon tape to the threaded fittings.
- Tighten the connections securely using a wrench or pliers.
Installing the Shower Fixtures and Accessories
Now that the shower area is watertight and secure, it’s time to install the fixtures and accessories. Follow these steps:
- Attach the showerhead by screwing it onto the shower arm.
- Ensure a tight connection but be cautious not to overtighten.
- For the faucet installation, refer to the manufacturer’s instructions as the process may vary depending on the type of faucet.
- Follow the provided guidelines to secure the faucet securely.
- Lastly, install any additional accessories, such as towel bars or shelves, based on your design preferences.
Cleaning and Final Inspection
Following the successful installation of the stand-up shower, take the necessary steps to clean the area and conduct a final inspection. Here’s what you need to do:
- Wipe down all surfaces, including the walls, shower base, fixtures, and accessories, using a mild cleaning agent appropriate for the materials.
- Thoroughly rinse all surfaces to remove any cleaning residue.
- Check for any missed spots, ensuring everything is spotless and free from debris.
- Inspect the shower area, paying attention to the joints, plumbing connections, and fixtures.
- If any issues are detected, such as loose connections or damaged fixtures, address them promptly.
- Ensure that all components are functioning properly and meet your expectations.
By completing these testing and finishing touches, you will have successfully installed a stand-up shower that meets both functionality and aesthetic requirements. This final phase ensures that your shower is both watertight and visually appealing.
Frequently Asked Questions
What Is The Labor Cost To Install A Stand Up Shower?
The labor cost to install a stand-up shower can vary depending on factors like location, size, and complexity. On average, the cost can range from $500 to $2,000, including both professional installation and necessary plumbing work. It’s best to get estimates from local contractors for an accurate cost in your area.
Can You Install A Walk-In Shower Yourself?
Yes, it is possible to install a walk-in shower by yourself. However, it requires careful planning, knowledge of plumbing and electrical work, as well as proper tools. If you have the necessary skills and experience, DIY installation can be a cost-effective option.
Do You Have To Put Mortar Under A Shower Pan?
Yes, it is necessary to put mortar under a shower pan. The mortar helps support and stabilize the shower pan, preventing movement and potential leaks. It also provides a solid base for the pan to rest on, ensuring proper installation and long-term durability.
How Do You Install A Stand Up Shower Drain?
To install a stand-up shower drain, follow these steps: 1. Measure and cut the drainpipe to the correct length. 2. Attach the drain assembly to the pipe, ensuring a tight fit. 3. Apply plumber’s putty around the drain flange and insert it into the drain hole.
4. Secure the drain assembly with screws or bolts. 5. Test the drain by running water to ensure proper installation.
Conclusion
Installing a stand-up shower may seem daunting, but with the right steps, it can be a manageable DIY project. From planning the layout to assembling the plumbing components, we’ve covered all the necessary details. By following our step-by-step guide, you’ll be able to enjoy the convenience and relaxation of a new stand-up shower in no time.
Remember to gather all the necessary tools and materials beforehand, and take your time to ensure a properly installed shower. Happy renovating!