To install a shut off valve on a copper pipe, first, turn off the water supply. Then, use a pipe cutter to cut the copper pipe at the desired location and clean the edges with a deburring tool.
Next, slide a compression ring onto the pipe followed by a compression nut. After that, insert the shut off valve onto the pipe and tighten the compression nut with a wrench. Finally, turn on the water supply to check for any leaks.
Installing a shut off valve on a copper pipe is a vital skill that every homeowner should have. Whether you’re tackling a plumbing project or simply wanting the convenience of isolating the water supply to a specific area, having a shut off valve installed can save you time and hassle. In this guide, we will walk you through the step-by-step process of installing a shut off valve on a copper pipe, so you can confidently tackle this task yourself. With the right tools and a little know-how, you’ll be able to complete this installation in no time. Let’s get started!
Understanding Shut Off Valves And Their Importance
Shut off valves play a crucial role in the plumbing systems of our homes and businesses. They are designed to control and regulate the flow of water through pipes, allowing us to easily shut off the water supply to individual fixtures or an entire area of our plumbing system. Whether you are installing a new shut off valve or replacing an old one, understanding their importance is essential to ensure the smooth functioning and maintenance of your plumbing system.
Importance of shut off valves in plumbing systems
In any plumbing system, shut off valves provide a convenient way to isolate specific fixtures or sections of pipes. Here are some key reasons why shut off valves are important:
- Emergency repairs: Shut off valves allow you to quickly and easily cut off the water supply in case of a leak or burst pipe, minimizing potential water damage and giving you time to fix the issue.
- Preventive maintenance: Shut off valves make it possible to perform routine maintenance or repairs on specific fixtures without shutting off the water supply to the entire building. This saves time and inconvenience.
- Installation flexibility: Shut off valves give you the flexibility to install new fixtures or appliances without shutting off the water supply to the entire plumbing system.
- Water conservation: In case of leaks, shut off valves allow you to isolate the affected area, preventing water wastage until the necessary repairs can be made.
Different types of shut off valves available in the market
There are various types of shut off valves available in the market, each with its own unique features and advantages. Here are some common types:
| Type of Shut off Valve | Description |
|---|---|
| Gate valves | These valves provide full flow when open and are best suited for on/off applications. |
| Ball valves | These valves have a ball with a hole in the center, which can be rotated to control the flow of water. |
| Compression valves | These valves use a threaded compression nut to create a watertight seal, making them great for small spaces. |
| Angle valves | These valves have an L-shaped design and are commonly used for connecting fixtures such as toilets and sinks. |
It is important to choose the right type of shut off valve based on your specific needs and the plumbing system in your home or business. Consult with a professional plumber if you are unsure about the best option for your particular situation.
Now that you understand the importance of shut off valves and the different types available, you are ready to proceed with installing a shut off valve on a copper pipe.
Tools And Materials Required For The Installation
When it comes to installing a shut off valve on a copper pipe, having the right tools and materials is essential for a successful installation. Whether you’re a seasoned DIY enthusiast or a beginner handyman, having a comprehensive list can save you time and ensure the job is done correctly. In this section, we’ll outline the tools and materials you’ll need for a seamless shut off valve installation.
List of Tools Needed for the Installation Process
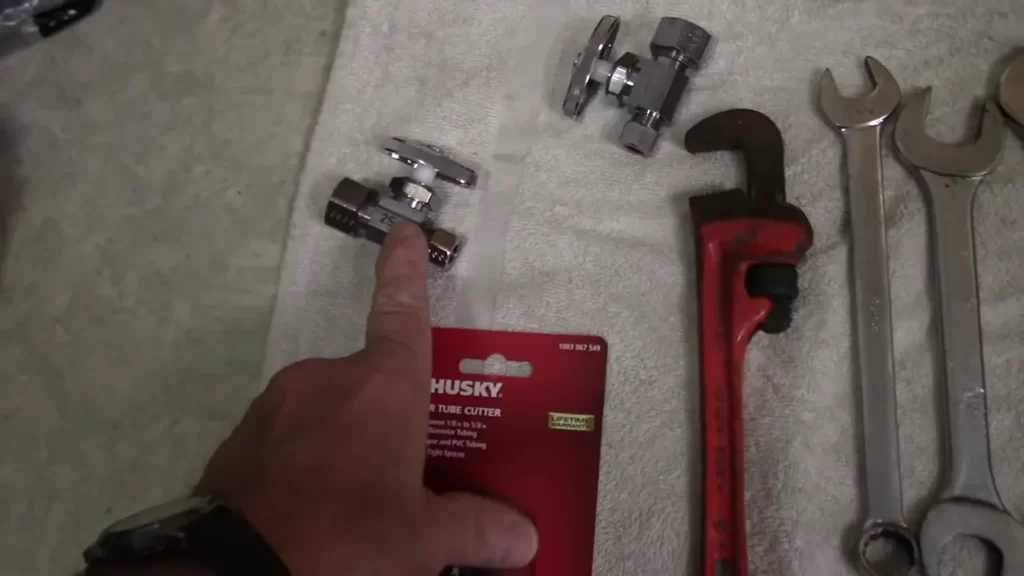
To properly install a shut off valve on a copper pipe, you’ll require the following tools:
- Adjustable wrench: This versatile tool is essential for loosening and tightening bolts and nuts, providing a secure grip and preventing any damage to the shut off valve during installation.
- Pipe cutter: A pipe cutter enables you to make clean and precise cuts on copper pipes, ensuring a snug fit with the shut off valve.
- Emery cloth: This abrasive material is used to clean the surface of the copper pipe, promoting optimal adhesion between the pipe and the shut off valve.
- Soldering torch: A soldering torch is necessary for the soldering process, allowing you to heat and melt the solder to create a watertight seal between the valve and pipe.
- Soldering flux: Applying flux to the copper pipe before soldering ensures proper flow and adherence of the solder, resulting in a leak-free joint.
- Lead-free solder: This specialized solder is necessary for joining the copper pipe and shut off valve, providing a durable and reliable connection.
- Pipe wrench: A pipe wrench helps you grip and rotate the shut off valve during installation, ensuring a tight and secure fit.
- Plumber’s tape: Also known as Teflon tape, plumber’s tape is used to create a tight seal between threaded connections, preventing any leaks or drips.
Materials Needed for a Successful Shut Off Valve Installation
In addition to the essential tools, you’ll also need the following materials to complete your shut off valve installation:
- Shut off valve: Choose a high-quality shut off valve that fits the size and type of your copper pipe, ensuring a proper seal and smooth water flow control.
- Flux brush: A flux brush enables you to apply flux to the surface of the copper pipe accurately, ensuring even coverage and optimal solder flow.
- Emery cloth: Along with the emery cloth mentioned in the tools section, having extra emery cloth on hand is crucial for cleaning any remaining debris or oxidation from the copper pipe.
- Fire extinguisher: Safety should always be a priority when working with soldering torches. Keep a fire extinguisher nearby to promptly extinguish any unexpected flames.
- Safety goggles and gloves: Protect your eyes and hands during the installation process by wearing safety goggles and gloves.
Ensuring you have all the necessary tools and materials before starting your shut off valve installation will make the process smoother and more efficient. With these items at your disposal, you’ll be well-prepared for any challenges that may arise during the installation, ensuring a successful outcome.
Preparation And Safety Measures
Before you start the process of installing a shut off valve on a copper pipe, it is crucial to take the necessary preparation and safety measures. This ensures a smooth installation and reduces the risk of accidents or damage. In this section, we will discuss two essential aspects: shutting off the water supply and proper safety precautions to follow during the installation.
Shutting off the water supply before starting the installation process
Before you begin installing a shut off valve on your copper pipe, it is imperative to shut off the water supply to prevent any leaks or water damage. Follow these steps to safely shut off the water:
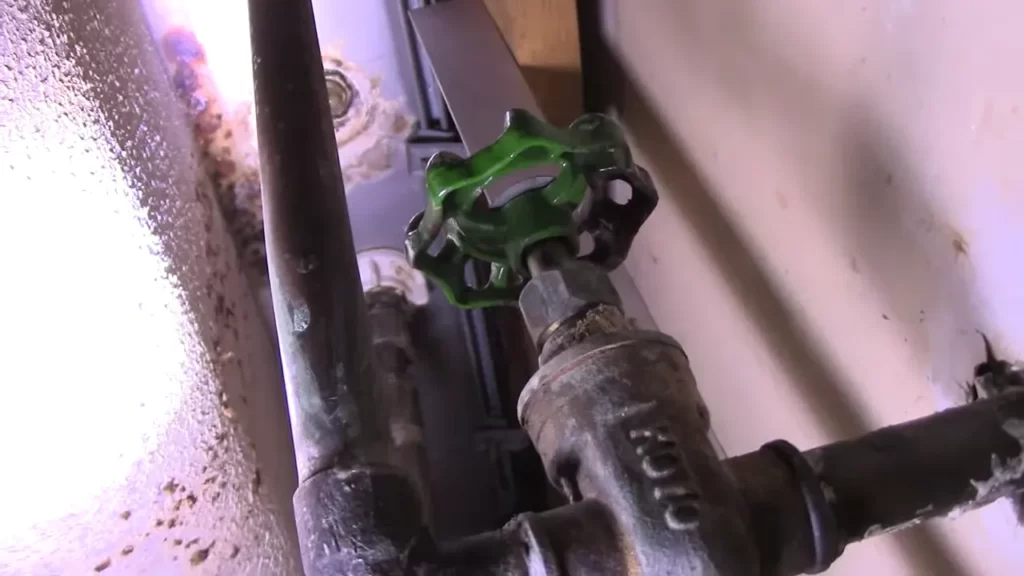
- Locate the main water supply valve in your home.
- Turn the valve clockwise to close it. This will stop the flow of water into your house.
- To ensure that the water is completely shut off, open a faucet in the lowest part of your home, such as a basement or ground floor bathroom. This will allow any remaining water to drain out.
By shutting off the water supply, you eliminate the risk of water pressure interfering with the installation process and causing potential leaks. Remember to keep the faucet open while you install the shut off valve to release any excess water pressure.
Proper safety precautions to follow during the installation
To ensure your safety during the installation process, it is essential to follow these proper safety precautions:
- Put on safety goggles and gloves to protect your eyes and hands from any potential hazards.
- Work in a well-ventilated area to prevent any inhalation of fumes.
- Keep flammable materials away from the installation area to avoid the risk of fire.
- Be cautious when using tools to avoid injury. Ensure you are using the right tools for the job and handle them with care.
By adhering to these safety precautions, you can minimize the risk of accidents or injuries during the installation process. Remember, safety should always be a priority when working with plumbing.
Step 1: Removing The Old Shut Off Valve
Before installing a new shut off valve on a copper pipe, you must first remove the old one. This step-by-step guide will walk you through the process, ensuring a smooth and effective removal. So, let’s get started!
Turning Off the Main Water Supply
In order to safely remove the old shut off valve, the first thing you need to do is turn off the main water supply to your home. This will prevent any water from flowing through the pipes while you work on removing the valve.
To turn off the main water supply, locate the main water valve, which is usually located in the basement, crawl space, or utility room. Once you’ve located it, simply turn the valve clockwise until it is fully closed. This will shut off the water supply to your entire home.
Tools Required to Remove the Old Shut off Valve
Now that the main water supply is turned off, it’s time to gather the necessary tools to remove the old shut off valve from the copper pipe. Here’s a list of tools you’ll need:
- Adjustable wrench
- Pipe cutter
- Emery cloth or sandpaper
- Soldering torch
- Lead-free solder
- Flux
- Fire-resistant cloth or mat
Having these tools ready will ensure that you have everything you need to successfully remove the old shut off valve without any hassle.
Proper Techniques to Remove the Old Shut off Valve
Now that you have the necessary tools, it’s time to remove the old shut off valve from the copper pipe. Follow these steps to ensure a proper and efficient removal:
- Using an adjustable wrench, loosen and remove the compression nut that connects the shut off valve to the copper pipe. Rotate the nut counterclockwise until it is fully removed.
- Next, use a pipe cutter to cut the copper pipe just below the shut off valve. Position the pipe cutter over the pipe, tighten it, and rotate it around the pipe until the cut is complete.
- Once the pipe is cut, use emery cloth or sandpaper to clean the cut end of the copper pipe. This will ensure a proper and secure connection when installing the new shut off valve.
- Prepare the copper pipe for soldering by applying flux to the clean end of the pipe. Flux helps the solder flow smoothly and creates a strong bond between the pipe and the new shut off valve.
- Position the new shut off valve over the clean end of the copper pipe. Make sure it is aligned properly and fits securely. Use an adjustable wrench to tighten the compression nut onto the valve.
- Using a soldering torch, heat the joint where the new shut off valve and the copper pipe meet. Once the joint is heated, touch the tip of the lead-free solder to the joint. The solder will melt and flow around the joint, creating a watertight seal.
- Allow the joint to cool and inspect it to ensure that the solder has evenly flowed around the joint. If needed, apply more solder to any areas that appear incomplete or weak.
By following these proper techniques, you can confidently remove the old shut off valve from your copper pipe and prepare it for the installation of a new one.
Step 2: Measuring And Cutting The Copper Pipe
Measuring the length of the copper pipe for the new shut off valve
In order to install a shut off valve on a copper pipe, you first need to measure the length of the pipe that will be connected to the valve. This is an important step as it ensures that the valve fits properly on the pipe and allows for smooth water flow control.
Here’s how you can accurately measure the length of the copper pipe:
- Step 1: Using a tape measure or ruler, measure the distance between the ends of the pipe where the shut off valve will be installed.
- Step 2: Make sure to account for any additional length required for the shut off valve itself. This can usually be found in the manufacturer’s instructions or specifications.
By accurately measuring the length of the copper pipe, you ensure that the shut off valve will fit properly and function effectively.
Using a pipe cutter to cut the copper pipe to the required length
Once you have measured the length of the copper pipe for the shut off valve, the next step is to cut the pipe to the required length. This is an important step as it allows for a proper fit and ensures a secure connection between the pipe and the valve.
Here’s how you can cut the copper pipe to the required length using a pipe cutter:
- Step 1: Position the pipe cutter around the copper pipe at the measured length mark.
- Step 2: Tighten the pipe cutter’s cutting wheel onto the pipe and rotate it around the pipe. Apply consistent pressure as you rotate the cutter to allow for a clean and precise cut.
- Step 3: Continue rotating the pipe cutter until the copper pipe is completely cut through.
- Step 4: Once the pipe is cut, use a deburring tool or sandpaper to remove any rough or sharp edges from the cut end.
By using a pipe cutter and following these steps, you can confidently cut the copper pipe to the required length for installing the shut off valve. Remember to take necessary precautions, such as wearing protective gloves and eyewear, while working with cutting tools.
Step 3: Preparing The Copper Pipe For The Installation
Before installing the shut off valve on a copper pipe, it is crucial to properly prepare the pipe to ensure a secure and leak-free connection. This step involves removing any burrs and sharp edges from the cut end of the copper pipe and cleaning the surface of the pipe. Follow these simple steps to prepare the copper pipe for the installation:
Removing burrs and sharp edges from the cut end of the copper pipe
When you cut a copper pipe, it often leaves behind sharp edges and burrs that can interfere with the installation process. These rough edges can also potentially damage the rubber seals or O-rings of the shut off valve, leading to leaks.
To eliminate any burrs or sharp edges, simply use a deburring tool. Insert the tool into the cut end of the copper pipe and rotate it in a circular motion. Be sure to apply gentle pressure, gradually removing the burrs until the pipe end feels smooth and even. This step is essential to ensure a tight and secure fit between the shut off valve and the copper pipe.
Cleaning the pipe surface before installing the shut off valve
Before attaching the shut off valve to the copper pipe, it is vital to clean the pipe surface thoroughly. This step helps remove any dirt, grease, or debris that may hinder the proper functioning of the shut off valve or prevent a watertight seal.
You can clean the pipe surface using a wire brush or emery cloth, gently scrubbing the exterior of the pipe. Ensure that all visible impurities are removed, and the surface becomes smooth. This will facilitate optimal adhesion of the shut off valve, minimizing the chances of leaks or other complications.
Pro tip: You can also apply a small amount of flux to the cleaned pipe surface before installing the shut off valve. Flux helps in the soldering process, ensuring a secure and durable connection between the copper pipe and the shut off valve.
Step 4: Installing The New Shut Off Valve
Now that you have prepared the copper pipe and removed the old shut off valve, it’s time to install the new one. Follow these steps to ensure a secure and leak-free installation.
Choosing the appropriate shut off valve for the specific application
Before proceeding with the installation, it is crucial to select the right shut off valve for your specific needs. There are various types of shut off valves available in the market, including ball valves, gate valves, and compression valves. Consider factors such as water pressure, temperature, and intended use when choosing the valve. Ball valves, for example, are commonly used for their reliability and ease of operation. Once you have determined the suitable shut off valve, move on to the next step.
Applying plumber’s tape to the threads of the shut off valve
To create a tight seal between the shut off valve and the copper pipe, it is essential to apply plumber’s tape to the threads. Plumber’s tape, also known as Teflon tape, helps prevent leaks by filling in any gaps between the threads. Begin by wrapping the tape clockwise around the male threads of the shut off valve. Make sure to overlap the tape as you go. Apply sufficient pressure to ensure the tape adheres securely. Once the threads are completely covered, you are ready to attach the shut off valve to the copper pipe.
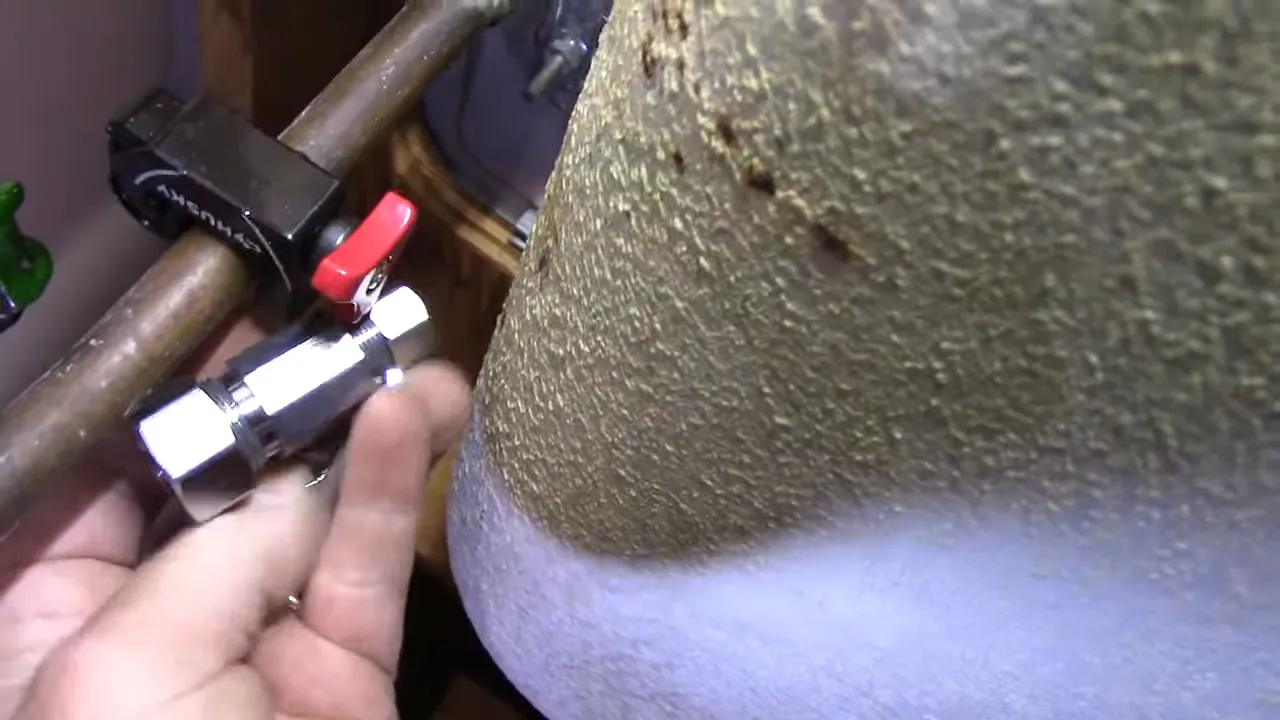
Attaching the shut off valve to the copper pipe using compression fittings
The final step is attaching the shut off valve to the copper pipe using compression fittings. Compression fittings consist of a nut, a compression ring, and a brass insert. These fittings create a tight seal without the need for soldering. Start by sliding the compression ring onto the copper pipe, followed by the brass insert. Next, thread the nut onto the shut off valve, making sure the threaded end is facing the copper pipe. Insert the copper pipe into the valve body, ensuring it is fully seated. While holding the shut off valve steady, tighten the nut with an adjustable wrench until it is snug. Avoid over-tightening, as this may damage the fittings or cause leaks. Once the shut off valve is securely attached, test for any leaks by turning the water supply back on.
Congratulations! You have successfully installed a new shut off valve on your copper pipe. This crucial step ensures you have control over the water supply to specific fixtures or areas of your home, allowing for easy maintenance and repairs in the future.
Step 5: Testing The Shut Off Valve
After successfully installing the shut off valve on your copper pipe, it’s important to test its functionality before calling it a job well done. Testing the shut off valve ensures that it is functioning properly and there are no leaks that could potentially cause damage to your property. In this step, we will go through two important tests: turning on the main water supply and checking for leaks.
Turning on the main water supply
Once the shut off valve is securely in place, it’s time to turn on the main water supply to see if everything is working as it should. This step is crucial in verifying that the shut off valve effectively stops the flow of water when needed. Here’s how you can do it:
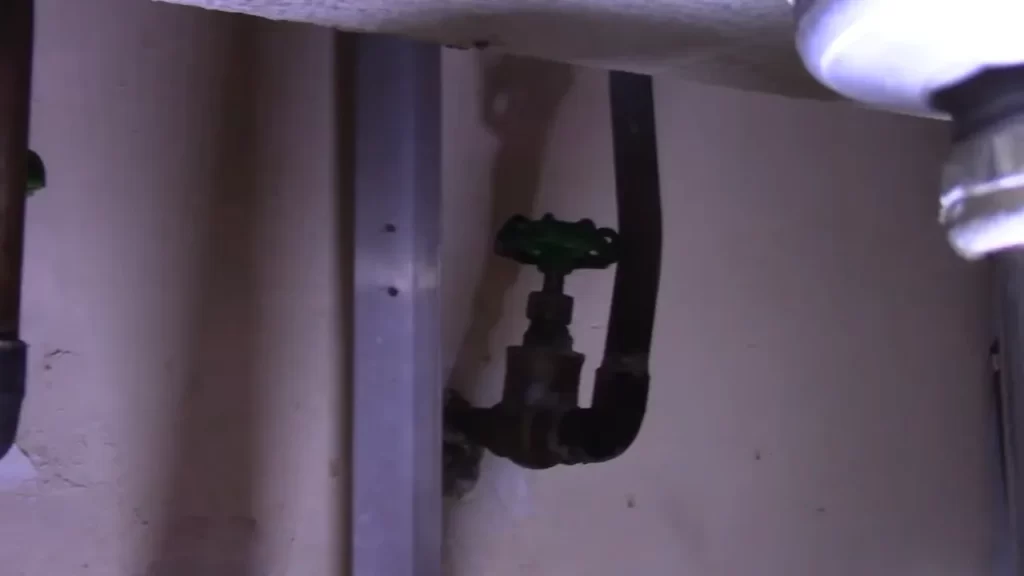
- Locate the main water shut off valve in your house. It is typically found near the water meter or where the main water line enters your property.
- Slowly turn the main water shut off valve in a clockwise direction to open it. The water will start flowing through the pipes.
- Observe the shut off valve you just installed. Ensure that it remains in the “on” position, allowing water to flow through the pipe.
Checking for leaks
After turning on the main water supply, it’s time to check for any possible leaks. Even the smallest leak can lead to serious water damage if left unnoticed. Here’s how you can perform a leak check:
- Inspect the shut off valve, as well as the surrounding area, for any signs of water leakage. Pay close attention to connections, joints, and the valve itself.
- If you notice any leaks, immediately turn off the main water supply and tighten the connections. Recheck for leaks.
- Run your hand along the pipe, feeling for any dampness or moisture. This can indicate a leaking pipe even if there are no visible signs of water.
- If you find any leaks or suspect a leaky pipe, it’s best to contact a professional plumber to fix the issue before it worsens.
By performing these tests, you can ensure that the shut off valve on your copper pipe is working properly and that there are no leaks that could potentially cause water damage to your property. It’s essential to periodically test the shut off valve to ensure its functionality and protect your home or business from potential water-related issues.
Additional Tips And Recommendations
Installing a shut-off valve on copper pipes can be a straightforward process if you follow the right steps. However, there are some common mistakes to avoid and regular maintenance tips to keep in mind for a smooth and efficient installation. In this section, we will discuss these additional tips and recommendations to ensure a successful shut-off valve installation on copper pipes.
Common mistakes to avoid during the installation process
During the installation of a shut-off valve on copper pipes, it is crucial to be aware of common mistakes that can lead to leaks or other issues. By avoiding these mistakes, you can save yourself from potential headaches and ensure a secure and reliable shut-off valve system.
- Improper pipe preparation: One of the most common mistakes is failing to properly prepare the copper pipe before installing the shut-off valve. Make sure to clean the pipe thoroughly with a pipe cleaner or emery cloth to remove any dirt, grease, or corrosion that may hinder the connection.
- Over-tightening fittings: It’s important to find the right balance when tightening fittings. Over-tightening can damage the threads and lead to leaks, while under-tightening can result in loose connections. Use a wrench or pliers to tighten the fittings securely, but avoid excessive force.
- Incorrect positioning of the valve: Another mistake to avoid is installing the shut-off valve in an inaccessible or hard-to-reach area. Ensure that the valve is easily accessible for future maintenance or emergency shut-offs.
- Failure to use thread sealant: To prevent leaks, it is essential to use thread sealant or Teflon tape on the threaded connections. Apply a thin layer of tape clockwise around the male threads before connecting the fittings.
- Ignoring manufacturer instructions: Always refer to the manufacturer’s instructions and guidelines specific to the shut-off valve you are installing. Each valve may have unique requirements and specifications, so following the provided instructions is imperative.
Regular maintenance and inspection of shut off valves
Once the shut-off valve is installed on the copper pipe, regular maintenance and inspections are essential to ensure its longevity and functionality. By performing these simple tasks, you can catch any potential issues early on and prevent costly repairs.
- Check for leaks: Regularly inspect the shut-off valve for any signs of leaks, such as dripping or pooling water. If you notice any leaks, immediately repair or replace the faulty valve.
- Exercise the valve: To prevent the valve from seizing up, periodically open and close it fully. This helps keep the internal components lubricated and ensures smooth operation when needed.
- Remove debris: Over time, debris, sediment, or mineral buildup may accumulate inside the shut-off valve. It is important to flush out any debris regularly to maintain its efficiency. This can be done by turning off the water supply, removing the valve handle, and rinsing it with clean water.
- Inspect the valve body: Check the valve body for any visible signs of wear, corrosion, or damage. If you notice any issues, consider replacing the valve to prevent potential failures.
- Protect from extreme temperatures: If the shut-off valve is exposed to extreme temperatures, such as freezing temperatures, take preventive measures to protect it. Insulate the valve or wrap it with heat tape to avoid damage from freezing or extreme heat conditions.
By following these additional tips and recommendations, you can ensure a successful shut-off valve installation on copper pipes and maintain the functionality and efficiency of your plumbing system for years to come.
Frequently Asked Questions
How To Install Sharkbite Shut Off Valve On Existing Copper Pipe?
To install a SharkBite shut-off valve on an existing copper pipe, simply cut the pipe using a tubing cutter. Then, slide the SharkBite valve onto the cut end of the pipe and push it until fully seated. No soldering or special tools are required.
How Do You Install A Shut Off Valve On An Existing Water Line?
To install a shut off valve on an existing water line, follow these steps: 1. Locate the main water supply and shut it off. 2. Measure and mark the section of the waterline where you want to install the valve.
3. Cut the pipe in the marked area and clean the ends. 4. Connect the valve assembly and tighten the fittings. 5. Turn on the main water supply and check for any leaks.
How Do You Install A Valve In A Copper Pipe?
To install a valve in a copper pipe, follow these steps: 1. Shut off the water supply. 2. Measure and mark the desired location on the pipe. 3. Cut the pipe using a pipe cutter. 4. Use emery cloth to clean both ends of the cut pipe.
5. Apply flux to the pipe and valve, and solder them together using a torch.
Are Compression Shut Off Valves Reliable?
Compression shut off valves are reliable for controlling the flow of liquids or gases in plumbing systems. They use compression fittings to create a secure seal and prevent leaks. These valves are widely used and trusted in residential and commercial applications.
Their durability and effectiveness make them a reliable choice for shutting off the flow of fluids.
Conclusion
Installing a shut off valve on a copper pipe is a relatively simple process that can significantly improve the functionality and convenience of your plumbing system. By following the step-by-step guide outlined in this blog post, you can ensure a successful installation while avoiding any potential leaks or damage.
Remember to carefully shut off the water supply and use the appropriate tools to secure the valve onto the pipe. With these tips in mind, you’ll have a reliable shut off valve in no time.