To install shower wall panels, begin by measuring the dimensions of your shower, then purchase and gather all necessary materials. Follow the manufacturer’s instructions to prepare the walls, apply adhesive to the panels, and carefully position and secure them in place.
Preparing For Installation
Before installing shower wall panels, it’s important to take the time to properly prepare. This will help ensure a smooth and successful installation process. In this section, we will discuss the necessary tools and materials you will need, how to measure and plan the layout, and how to prepare the shower walls for installation.
Gather the necessary tools and materials
Before you begin installing shower wall panels, gather all the necessary tools and materials. Having everything ready beforehand will save you time and frustration during the installation process. Here’s a list of the essential tools and materials you’ll need:
| Tools: | Materials: |
|
|
Measure and plan the layout
Accurate measurements and proper planning are crucial elements of a successful shower wall panel installation. Follow these steps to measure and plan the layout:
- Start by measuring the height and width of your shower walls. Use a measuring tape and make note of these measurements.
- Transfer the measurements onto the shower wall panels, ensuring they are correct.
- Plan the layout by determining the placement of the panels on the walls. Consider factors such as the shower fixtures, plumbing, and any design preferences you may have.
- Use a level and a pencil to mark reference lines on the walls. These will serve as guides during the installation process.
Prepare the shower walls
Properly preparing the shower walls is essential for a successful installation. Here are the steps to follow:
- Clean and dry the walls to remove any dirt, dust, or debris that may interfere with the adhesion of the panels.
- If required, apply a waterproof membrane to the walls. This will provide an additional layer of protection against moisture.
- Apply a primer to the walls. This will create a clean and smooth surface for the adhesive to bond to.
- Using an adhesive spreader, apply a layer of adhesive onto the back of the shower wall panels.
- Place the panels onto the walls, aligning them with the reference lines you previously marked.
- Use a rubber mallet to gently tap the panels into place and ensure a secure bond.
- Repeat this process for each panel, leaving a small gap between each one for expansion.
- Finally, allow the adhesive to dry completely before proceeding with any additional steps.
By gathering the necessary tools and materials, measuring and planning the layout, and properly preparing the shower walls, you’ll be well on your way to a successful installation of shower wall panels. Stay tuned for the next section, where we will discuss the actual installation process.

Installing The First Panel
Installing the first panel is a crucial step in the process of installing shower wall panels. This is where you lay the foundation for the rest of the installation and ensure everything goes smoothly. In this section, we will guide you through the steps to install the first panel correctly. By following these steps, you will be one step closer to having a beautiful and functional shower enclosure.
Begin with the corner panel
The first step in installing the shower wall panels is to start with the corner panel. This panel will act as a reference point for the rest of the installation. It’s important to choose the right corner panel that matches the style and dimensions of your shower enclosure. Place the corner panel in the corner where you want to start the installation.
Apply adhesive to the back of the panel
Once you have positioned the corner panel, it’s time to apply adhesive to the back of the panel. Use a quality adhesive that is suitable for shower wall panels. Apply the adhesive evenly, ensuring that it covers the entire back surface of the panel. This will ensure proper adhesion and prevent any issues in the future.
Position and secure the panel properly
After applying the adhesive, carefully position the panel against the wall. Make sure it is aligned with the corner and level with the floor. You can use a spirit level to ensure that the panel is straight. Once the panel is in the desired position, press it firmly against the wall to secure it. This will help the adhesive bond properly.
When securing the panel, make sure to follow the manufacturer’s instructions. Some panels may require additional steps, such as using special clips or screws to hold them in place. Always refer to the manufacturer’s guidelines to ensure a secure and proper installation.
As you complete the installation of the first panel, double-check that it is properly aligned and secured before moving on to the next panel. This will ensure that the rest of the installation goes smoothly and your shower wall panels are installed accurately.
Remember, taking the time to install the first panel correctly is crucial to the overall success of the project. By following the steps mentioned above and using quality adhesive, you can ensure a solid foundation for the rest of the shower wall panel installation. With each panel securely in place, you’ll be on your way to enjoying a beautiful and durable shower enclosure.
Installing The Remaining Panels
Now that you have successfully installed the first shower wall panel, it’s time to move on to installing the remaining panels. This step-by-step guide will walk you through the process, ensuring a seamless and professional-looking installation.
Measure and Cut Panels to Fit
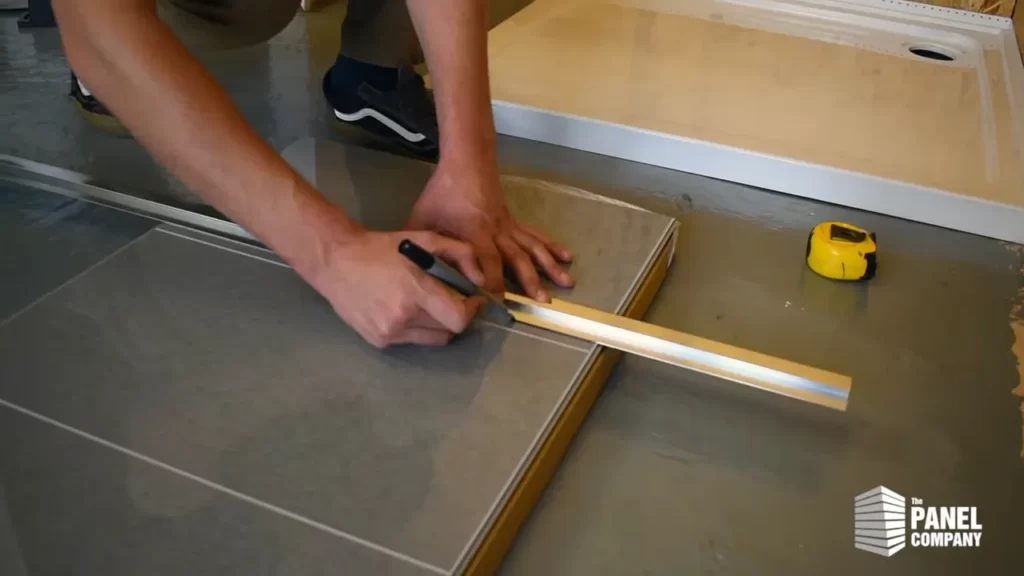
The next step is to accurately measure and cut the panels to fit your shower space. Take precise measurements of the remaining walls and mark the dimensions on the shower wall panels. It’s crucial to double-check your measurements to avoid any errors.
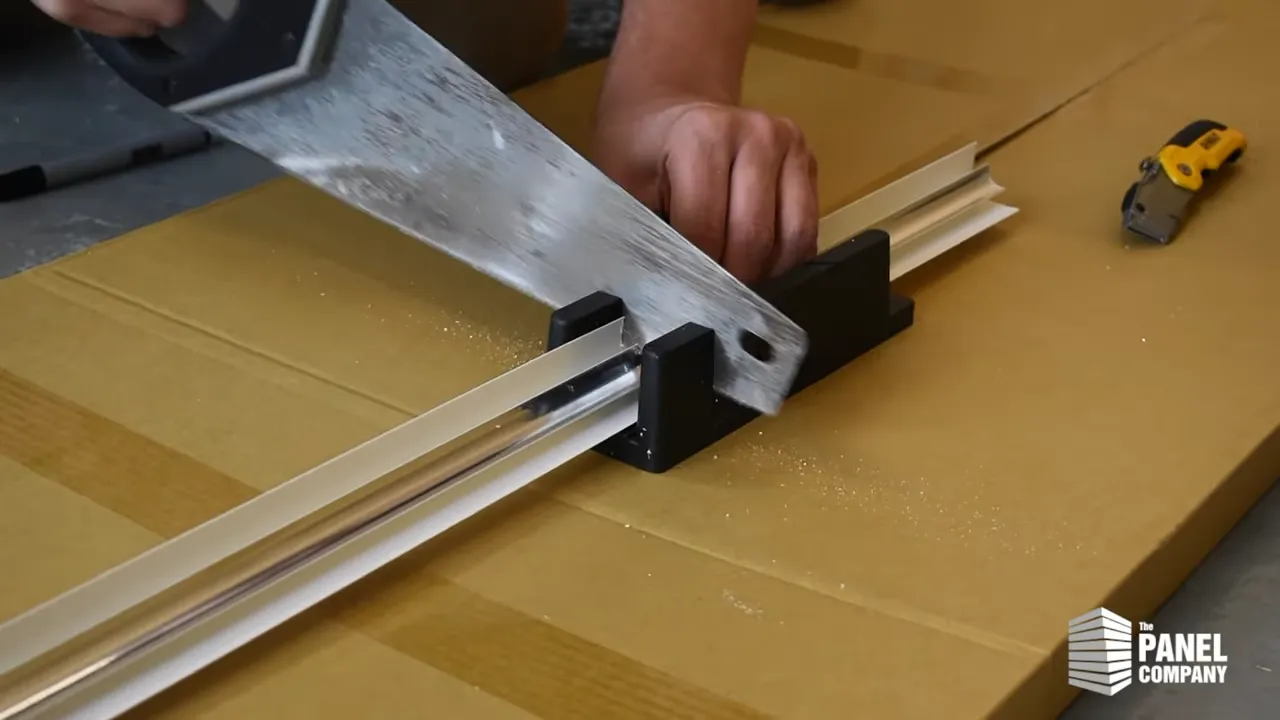
Once you have marked the panels, it’s time to cut them to size. Use a sharp utility knife or a saw specifically designed for cutting shower wall panels. Take your time and cut along the marked lines carefully. Remember to wear appropriate safety equipment, such as gloves and goggles, to protect yourself during this process.
Apply Adhesive and Secure Each Panel
After cutting the panels to fit, it’s time to apply adhesive and secure them to the walls. Start by applying a generous amount of construction adhesive evenly across the back of each panel, ensuring complete coverage.
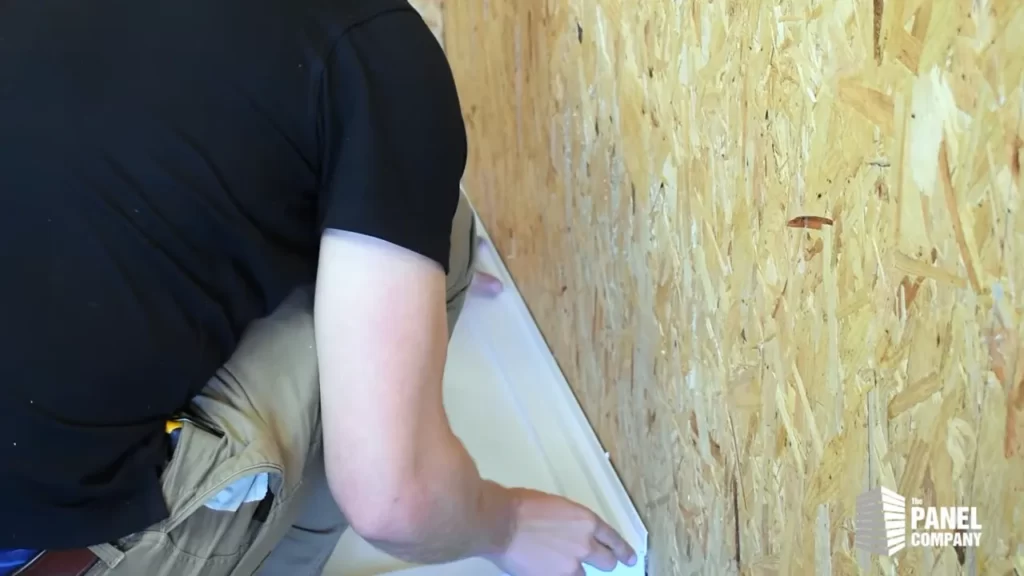
Once the adhesive is applied, carefully place the panel onto the wall, aligning it with the previously installed panel. Apply firm pressure on the panel, making sure it adheres properly to the wall. Use a level to ensure the panel is straight and level. Adjust as necessary before the adhesive dries.
Continue applying adhesive and securing each panel in the same manner until all the remaining panels are installed. Take your time to ensure each panel is aligned correctly and securely attached to the walls.
Ensure Proper Alignment and Levelness
As you install the remaining panels, it’s crucial to ensure proper alignment and levelness for a professional finish. Use a level to check that each panel is straight and level, adjusting as necessary.
Additionally, make sure the panels are aligned perfectly with each other and with any existing tiles or fixtures in the shower. This attention to detail will ensure a visually appealing and cohesive look in your shower space.
By following these steps and taking your time to install each panel correctly, you can achieve a beautiful and functional shower with wall panels. Remember to consult the manufacturer’s instructions for specific installation guidelines and recommendations for your chosen shower wall panel system. With careful planning and execution, your shower wall installation project will be a success!

Sealing And Caulking
When it comes to installing shower wall panels, one crucial step to ensure their longevity and functionality is the sealing and caulking process. The purpose of sealing and caulking is to prevent water from seeping behind the panels, protecting the walls and preventing any potential damage.
Apply sealant between panels and corners
To start the sealing process, it’s essential to apply sealant between the panels and corners. This will create a watertight barrier that prevents any moisture from seeping behind the panels and causing damage. Here’s a simple step-by-step process:
- Clean the area: Before applying the sealant, make sure the surface is clean and free from any dirt, debris, or dust. Use a mild cleanser and a sponge or cloth to remove any residues.
- Prepare the sealant: Depending on the product you choose, read the instructions to determine if any preparation is needed. Some sealants may require mixing, while others can be used straight from the tube.
- Apply the sealant: Using a caulk gun, carefully apply the sealant between the panels and corners. Start from the bottom and work your way up, making sure to fill any gaps or spaces thoroughly.
- Smooth the sealant: Once the sealant is applied, use a caulk smoothing tool or your finger (wearing gloves) to smoothen the surface and remove any excess. This will create a neat and seamless finish.
Caulk the edges and seams
In addition to applying sealant between the panels and corners, caulking the edges and seams is another crucial step in the sealing process. This will further enhance the water resistance and maintain the overall integrity of the shower wall panels. Follow these steps:
- Choose the right caulk: Select a high-quality caulk that is specifically designed for bathroom applications. Look for a caulk that is mildew-resistant and waterproof to ensure maximum durability.
- Clean the area: Before applying the caulk, clean the edges and seams thoroughly to remove any dirt or residue. Dry the area completely to ensure optimal adhesion.
- Apply the caulk: Using a caulk gun, carefully apply the caulk along the edges and seams of the shower wall panels. Squeeze the caulk gun steadily to create an even and continuous line.
- Smooth the caulk: After applying the caulk, use a caulk smoothing tool or a damp finger to smooth and shape the caulk. This will ensure a professional and seamless finish.
Remember, it’s crucial to follow the manufacturer’s instructions for both the sealant and caulk, including information on drying and curing times. Allow sufficient time for the sealant and caulk to dry and cure completely before using the shower. This will ensure the effectiveness of the sealing and caulking process, providing you with a leak-free and long-lasting shower wall panel installation.
Finishing Touches
Once you have successfully installed the shower wall panels, it’s time to put the finishing touches to ensure they not only look great but also stand the test of time. By focusing on two key areas – trimming and finishing the edges, as well as proper cleaning and maintenance – you can have shower walls that are not only visually appealing but also durable and long-lasting.
Trim and finish the edges
Trimming and finishing the edges of your shower wall panels is essential to achieve a polished and professional look. Here’s what you need to do:
- Measure the edges that need to be trimmed.
Proper measurements ensure accuracy and a snug fit. Use a measuring tape to determine the width and height of the edges that require trimming.
- Cut the panels to size.
Using a saw or a utility knife, carefully trim the panels according to your measurements.
- Smooth the cut edges.
After cutting the panels, make sure to smooth the edges using sandpaper or a file. This will remove any rough or jagged edges, resulting in a neat and clean finish.
- Install trim pieces.
To further enhance the appearance and functionality of your shower walls, consider installing trim pieces. These finishes can be applied along the edges to provide a seamless transition between the panels and the rest of the bathroom.
Clean and maintain the shower wall panels
Maintaining cleanliness is crucial to keeping your newly installed shower walls looking fresh and vibrant. Follow these steps for proper cleaning and maintenance:
- Use a mild cleaner.
Avoid harsh chemicals that can potentially damage the panels. Instead, opt for a mild cleaner, specifically formulated for use on shower wall panels. Dilute it according to the manufacturer’s instructions and apply it using a soft cloth or sponge.
- Gently scrub the panels.
Using a circular motion, gently scrub the panels to remove any dirt, soap scum, or grime. Be careful not to apply excessive force, as this may cause scratches or damage to the panels.
- Rinse thoroughly.
After cleaning, rinse the panels thoroughly with warm water. This will ensure that no cleaner residue is left behind, which can dull the appearance of the panels over time.
- Dry the panels.
After rinsing, use a soft, dry cloth to thoroughly dry the panels. This will prevent water spots and streaks from forming, keeping your shower walls looking pristine.
Enjoy your newly installed shower walls
With the finishing touches complete and proper cleaning and maintenance routines in place, you can now sit back, relax, and enjoy your newly installed shower walls. The effort you put into the details will pay off, not only visually but also in the longevity and durability of your shower walls.
Frequently Asked Questions
How Do You Attach Shower Panels To The Wall?
Attach shower panels to the wall by following these steps: 1. Measure and mark where the panels will go. 2. Prepare the wall surface by cleaning it thoroughly. 3. Apply adhesive or mounting brackets to the back of the panels.
4. Press the panels firmly against the wall, ensuring they are level. 5. Allow the adhesive to dry or secure the panels with screws.
What Do You Put Behind Shower Wall Panels?
Shower wall panels are typically installed over a moisture-resistant backing board, such as cement board or drywall. This creates a sturdy and waterproof surface for the panels to adhere to, ensuring a durable and long-lasting shower enclosure.
What Kind Of Adhesive For Shower Wall Panels?
For shower wall panels, it is recommended to use a waterproof adhesive. This type of adhesive is designed to withstand the moisture and humidity in a shower environment, ensuring that the panels stay securely in place. Be sure to choose a high-quality waterproof adhesive for optimal results.
How Do You Prepare A Shower Wall For Panels?
To prepare a shower wall for panels, follow these steps: clean the surface thoroughly, remove any existing wallpaper or fixtures, repair any cracks or damage, apply a moisture barrier, and ensure the wall is level and smooth.
Conclusion
Installing shower wall panels can be a simple and cost-effective way to upgrade your bathroom. With the right tools and steps, you can easily transform the look and feel of your shower space. By following the tips and guidelines mentioned in this blog post, you can confidently install shower wall panels like a pro.
So, don’t wait any longer and give your bathroom a stylish makeover today!