
To install a shower stall, begin by removing the existing fixtures and preparing the space. Then, assemble and secure the shower base and walls according to the manufacturer’s instructions.
Installing a shower stall can be a straightforward process if you follow the necessary steps. Whether you’re renovating your bathroom or simply upgrading your current shower system, the installation of a shower stall can enhance the functionality and aesthetics of your space.
By understanding the key elements and following the manufacturer’s guidelines, you can successfully complete this project. This article will provide you with a comprehensive guide on how to install a shower stall, ensuring a smooth and efficient installation process. So, let’s dive in and learn the step-by-step process to transform your bathroom with a new shower stall.
Factors To Consider When Selecting A Shower Stall
Factors to Consider when Selecting a Shower Stall
When it comes to selecting a shower stall for your bathroom renovation, there are certain key factors that you should take into consideration. By carefully evaluating these factors, you can ensure that you choose a shower stall that not only meets your functional needs but also complements the overall aesthetic of your bathroom. In this article, we will explore three essential factors to consider when selecting a shower stall: size and dimensions, material and construction, and style and design options.
Size and Dimensions
The first factor to consider when selecting a shower stall is the size and dimensions. It is crucial to choose a shower stall that fits comfortably within your bathroom space without overwhelming the room. Measure the area where you plan to install the shower stall, including the width, height, and depth. Consider the number of people who will be using the shower and their individual needs. If you have a small bathroom, you may want to opt for a compact corner shower stall that maximizes the use of the available space. On the other hand, if you have a larger bathroom, you can choose a more spacious shower stall that offers ample room for movement.
Material and Construction
The material and construction of the shower stall are crucial factors that determine its durability and longevity. Shower stalls are typically made from various materials, including fiberglass, acrylic, and tempered glass. Each material has its pros and cons. Fiberglass is cost-effective and easy to install, but it may not be as durable as other materials. Acrylic showers are resistant to stains and scratches and offer a sleek, modern look. Tempered glass shower stalls provide a luxurious and elegant feel to the bathroom but require regular cleaning to prevent watermarks. Consider the maintenance requirements, longevity, and aesthetic appeal of each material before making your decision.
Style and Design Options
The style and design options play a crucial role in determining the overall look of your bathroom. Shower stalls are available in a wide range of designs, from traditional to contemporary, and everything in between. Consider the style and theme of your bathroom and choose a shower stall that complements it seamlessly. You can select from various door options, such as hinged, sliding, or pivot doors, depending on your preferences and the available space. Pay attention to the hardware finishes, such as chrome, brushed nickel, or brass, to ensure they match the existing fixtures in your bathroom. Additionally, consider the accessibility features, such as built-in seats or grab bars, if you have specific mobility needs.
In conclusion, when selecting a shower stall, it is essential to carefully evaluate the size and dimensions, material and construction, and style and design options. By considering these factors, you can ensure that you choose a shower stall that not only meets your functional needs but also enhances the overall aesthetic of your bathroom.
Preparing For The Installation Process
Before installing a new shower stall, it’s important to adequately prepare your bathroom space. Proper planning and organization can help ensure a smooth and successful installation process. In this section, we will outline the key steps involved in preparing for the installation, including measuring the bathroom space, gathering the necessary tools and materials, and removing the existing shower or bathtub.
Measuring the bathroom space
Accurate measurements are essential when installing a new shower stall. They provide crucial information to help you choose the right-sized shower stall and ensure a proper fit. Here’s how you can measure your bathroom space:
- Begin by measuring the width and length of the area where you plan to install the shower stall. Use a tape measure to obtain precise measurements.
- Take note of any existing fixtures or obstructions that may affect the installation, such as plumbing pipes or electrical outlets.
- Consider the height of the shower stall as well. Ensure there is enough headroom to comfortably stand inside the stall without any obstructions.
Once you have accurate measurements, you can confidently proceed to select the right-sized shower stall for your bathroom.
Gathering the necessary tools and materials
Before starting the installation process, it’s important to have all the required tools and materials on hand. This will save you time and prevent unnecessary delays during the installation. Here’s a list of the essential tools and materials you may need:
| Tools | Materials |
|---|---|
| Measuring tape | Shower stall |
| Level | Shower pan |
| Drill | Shower valve |
| Screwdriver | Pipe fittings |
| Adjustable wrench | Plumbing adhesive |
Having these tools and materials ready ensures a smooth installation process and enables you to make any necessary adjustments or repairs without interruption.
Removing the existing shower or bathtub
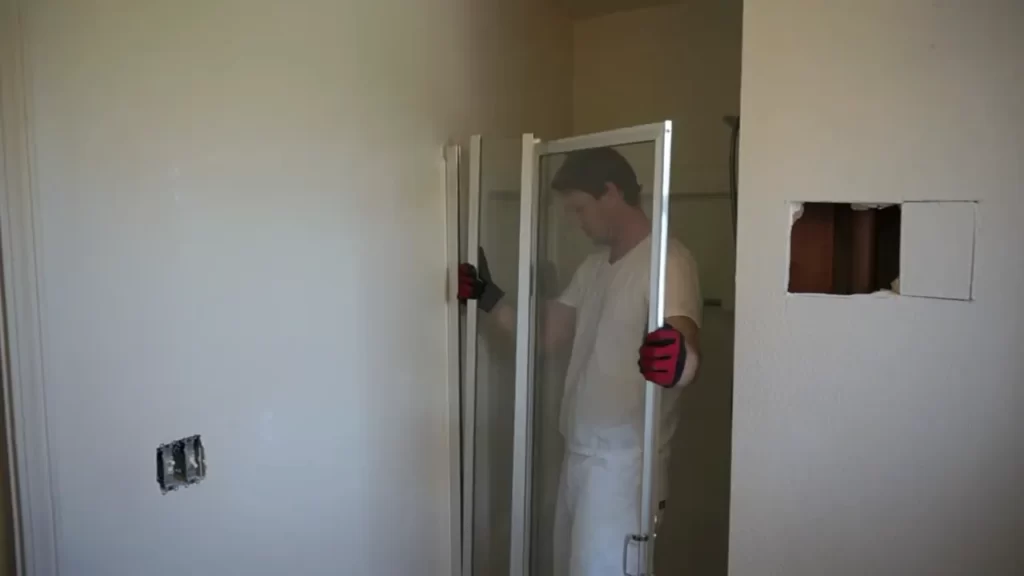
Prior to installing a new shower stall, it’s essential to remove any existing shower or bathtub that is currently in place. Here’s how you can safely and effectively remove the old fixtures:
- Start by shutting off the water supply to the shower or bathtub. Locate the main water valve in your home and turn it off to prevent any accidents or leaks.
- Remove any screws or nails that secure the existing fixtures to the walls or floor. Use a screwdriver or a pry bar to carefully detach the fixtures.
- Disconnect the plumbing connections, including the showerhead, faucet, and drain. Use an adjustable wrench to loosen and remove any connections.
- Once all the connections are detached, carefully lift and remove the old shower or bathtub from the bathroom. Ensure you have assistance if needed, as these fixtures can be heavy.
- Inspect the area for any damages or repairs that may be necessary before installing the new shower stall.
By following these steps, you can safely remove the existing shower or bathtub, leaving the space ready for the installation of your new shower stall.
Disconnecting The Plumbing Fixtures
Before installing a new shower stall, it’s essential to disconnect the existing plumbing fixtures properly. This process involves turning off the water supply and removing the showerhead and faucet. In this section, we will guide you through each step, ensuring a smooth and hassle-free disconnection process.
Turning off the water supply
The first step in disconnecting the plumbing fixtures is turning off the water supply to the shower. By doing this, you prevent any water from flowing out while you work on the installation. Locate the main water shut-off valve, which is typically found near the water meter or outside of your home. Turn the valve in a clockwise direction to shut off the water supply.
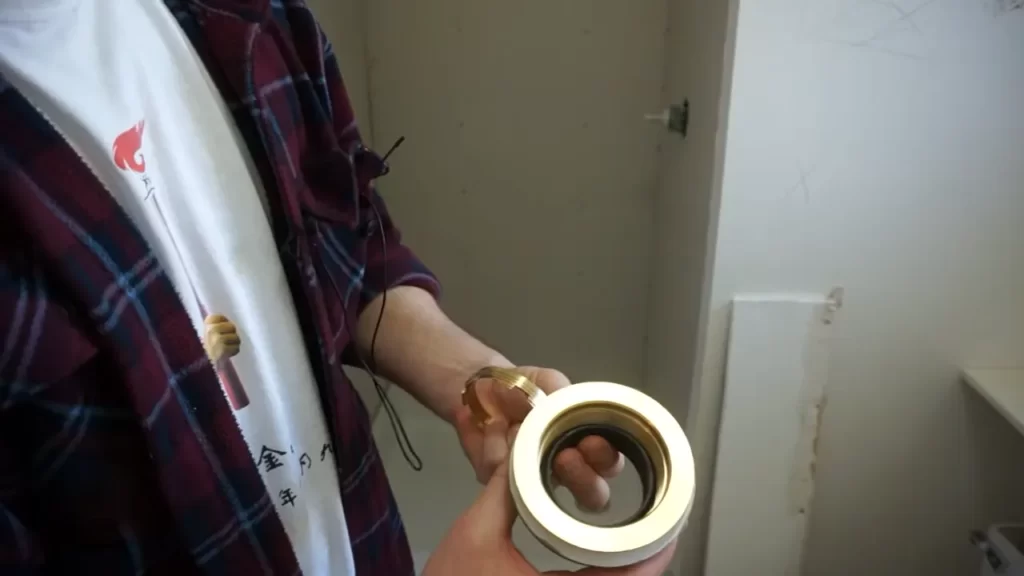
Removing the showerhead and faucet
Once the water supply is turned off, it’s time to remove the showerhead and faucet. Each fixture may have a different removal process, so be sure to follow these instructions:
- Start by unscrewing the showerhead counterclockwise using an adjustable wrench. If the showerhead is tightly secured, wrap a cloth around it to prevent any scratches and provide a better grip. Once loose, continue turning until it can be easily pulled off.
- To remove the faucet, locate the access panel behind the shower wall or underneath the sink. If there is no access panel, you may need to cut a small opening in the drywall to reach the plumbing connections.
- Once you have access to the faucet connections, use a wrench or pliers to disconnect the water supply lines attached to the faucet. Remember to place a bucket or towel beneath the connections to catch any water that may spill out.
- Next, remove any mounting nuts or screws that secure the faucet to the shower wall. Carefully pull the faucet away from the wall, ensuring not to cause any damage to the surrounding fixtures.
- With the showerhead and faucet successfully removed, the plumbing fixtures are now disconnected, and you can proceed with the installation of the new shower stall.
By following these steps to disconnect the plumbing fixtures, you ensure a smooth and efficient installation process for your new shower stall. Remember to turn off the water supply and remove the showerhead and faucet correctly to avoid any complications or water damage. Now that you have completed this crucial step, you can move on to the next phase of the installation process with confidence.
Demolishing The Old Shower Or Bathtub
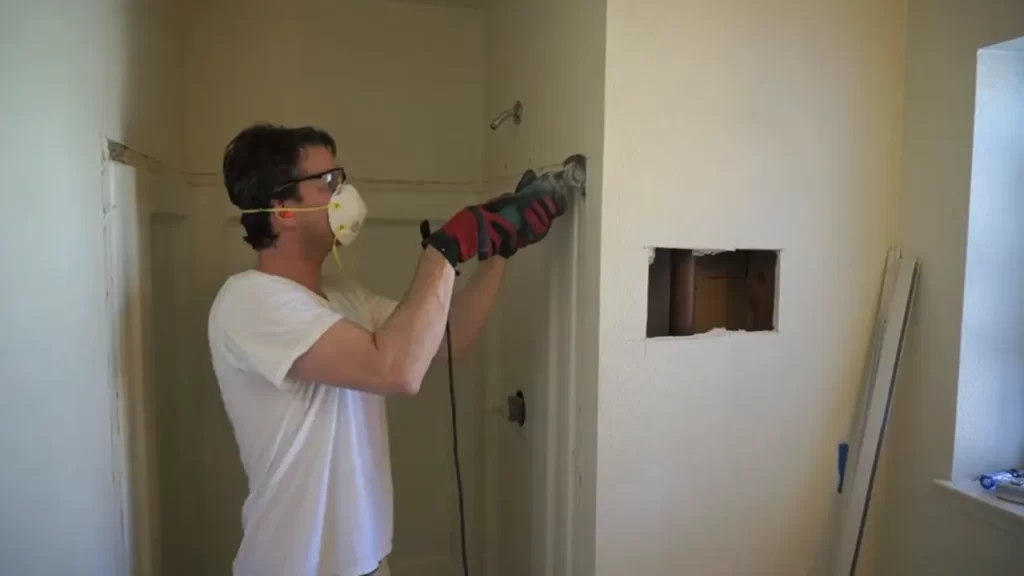
Removing tiles or wall surrounds
When it comes to demolishing an old shower or bathtub, the first step is to tackle the tiles or wall surrounds that are in place. These elements can be quite sturdy and may require some effort to remove, but with the right tools and technique, they can be taken down without causing extensive damage to the surrounding areas.
If you’re dealing with old ceramic or porcelain tiles, you’ll need a few items to make the removal process easier:
| Hammer | To break the tiles into smaller, more manageable pieces. |
| Chisel | To pry the tiles off the wall. Use a wide chisel to prevent damage to the adjacent tiles or walls. |
| Protective gloves and goggles | To keep yourself safe from sharp debris and dust. |
Starting at one corner, carefully strike the tile with the hammer along the grout line. Be sure to strike near the center of the tile to avoid shattering the neighboring tiles. Once the tile is broken, use the chisel to gently pry it off the wall. Repeat this process for each tile until all are removed.
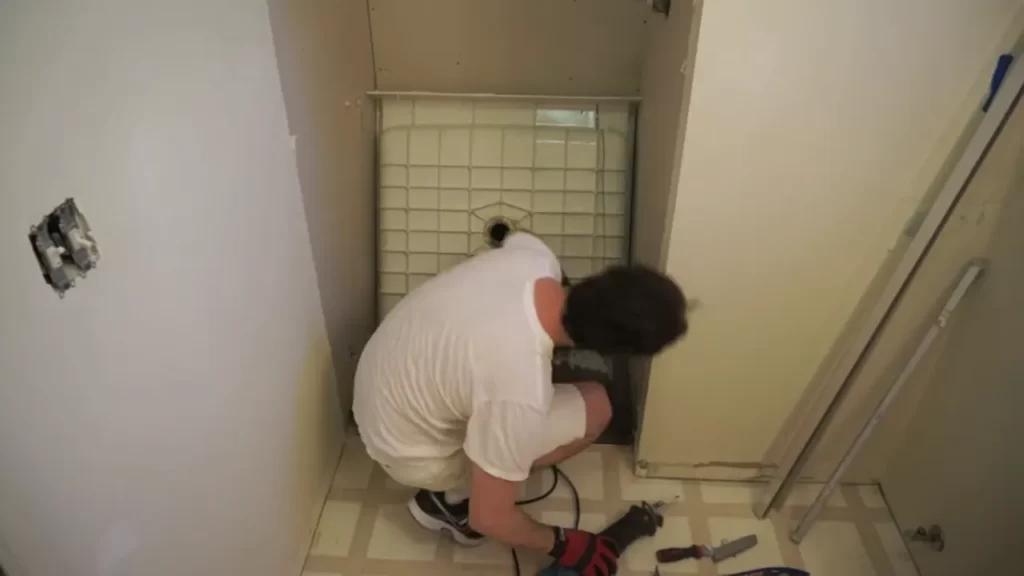
Breaking apart the shower base or tub
After removing the tiles or wall surrounds, it’s time to tackle the shower base or tub. This step requires a bit more effort as it involves breaking apart the larger structure.
Before you start, make sure you have the following tools:
- Reciprocating saw
- Hammer
- Pry bar
- Protective gloves and goggles
Begin by drilling a hole into the plastic or fiberglass shower base or tub using the reciprocating saw. This will provide an entry point for breaking it apart. Next, use the hammer and pry bar to get underneath the edges of the base or tub and start prying it away from the surrounding walls and floor. Work your way around, carefully breaking apart the structure until it’s completely detached.
Remember to exercise caution during this process to avoid damaging the plumbing and electrical components that may be hidden behind the shower base or tub.
With the demolition complete, you’re now ready to move on to the next steps in installing your new shower stall.
Preparing The Bathroom Floor
Ensuring a Level and Stable Surface
Before installing a shower stall, it is crucial to ensure that the bathroom floor is level and stable. An uneven or sloping surface can cause water to pool or drain improperly, leading to potential damage and leaks. To ensure a level and stable surface, follow these steps:
- Inspect the floor: Begin by thoroughly inspecting the bathroom floor for any sagging, cracks, or weakened areas. These issues must be addressed and repaired before proceeding with the installation.
- Remove existing flooring: If there is any existing flooring in the bathroom, such as tiles or vinyl, remove it to access the bare subfloor. This will allow you to properly assess the condition of the floor and make necessary adjustments.
- Check for levelness: Use a level tool to check the levelness of the subfloor. Place the level in multiple locations across the floor, both horizontally and vertically, to ensure an accurate assessment.
- Adjust as needed: If you notice any areas that are not level, you will need to make adjustments. This can be done by adding or removing shims, which are thin wedges that will help level the floor.
- Secure the floor: Once the floor is level, secure it by applying construction adhesive or screws to any loose or squeaky areas. This will ensure a stable and sturdy surface for the shower stall.
Waterproofing the Area
After ensuring a level and stable surface for your shower stall, the next step is to waterproof the area to prevent water damage. Here’s how you can efficiently waterproof the bathroom floor:
- Apply a waterproof membrane: Start by applying a waterproof membrane to the entire floor surface. This can be done using a brush or roller, ensuring complete coverage. The membrane will act as a barrier, preventing any water leakage.
- Seal the joints and corners: Pay special attention to the joints and corners of the shower stall area, as these are potential areas for water seepage. Use a waterproof sealant or caulk to seal these areas and create a watertight seal.
- Consider a shower pan liner: For added protection, you may want to consider installing a shower pan liner. This liner will further enhance the waterproofing of the floor, ensuring a secure and leak-free shower stall installation.
- Allow proper drying time: After completing the waterproofing process, allow the area to dry completely before proceeding with the shower stall installation. This will ensure that the waterproofing materials have properly cured and will provide optimal protection against water damage.
By ensuring a level and stable surface, as well as properly waterproofing the bathroom floor, you can create the perfect foundation for your shower stall installation. Taking the time to prepare the floor correctly will not only protect against potential water damage but also ensure the longevity and functionality of your shower stall.
Placing And Securing The Shower Base
Installing a shower stall is an important part of any bathroom renovation project. One of the key steps in this process is placing and securing the shower base. The shower base serves as the foundation for your shower and it’s crucial to ensure it is aligned with the drain and securely fastened in place. In this article, we will guide you through the process of aligning the base with the drain and securing it using adhesive or screws.
Aligning the base with the drain
To begin with, it is essential to align the shower base with the drain properly. This will ensure efficient water drainage and prevent any potential issues in the long run. Here are the steps to align the base:
- Measure the dimensions of the shower stall and locate the center point of the space.
- Place the shower base over the center point and ensure it is centered and level. You can use a carpenter’s level to check the alignment.
- Adjust the position of the base if needed, making sure the drain hole is directly aligned with the drainpipe.
- Double-check the alignment by measuring the distances between the base and the surrounding walls. They should be equal on all sides.
Securing it in place with adhesive or screws
Once you have aligned the base with the drain, the next step is to secure it in place. There are two common methods for doing this – using adhesive or screws. Here’s how you can do it:
Using adhesive:
- Apply a generous amount of waterproof adhesive to the bottom of the shower base.
- Using a trowel, spread the adhesive evenly over the surface of the base.
- Press the base firmly onto the floor, ensuring it is aligned with the drain.
- Allow the adhesive to dry and set according to the manufacturer’s instructions before moving on to the next steps of the installation process.
Using screws:
- Position the base in the desired location and mark the screw holes on the floor.
- Drill pilot holes at the marked positions to prevent the floor from splitting.
- Place the base back in position and secure it by driving screws through the pre-drilled holes.
- Ensure the screws are tightened securely, but be careful not to overtighten and damage the base or floor.
By properly aligning the shower base with the drain and securing it in place using adhesive or screws, you can ensure a sturdy and leak-free shower stall installation. Taking the time to do this step correctly will provide a solid foundation for your shower and help you enjoy a comfortable and functional bathing experience.
Preparing The Walls
Before installing a shower stall, it is crucial to properly prepare the walls to ensure a solid and water-resistant foundation. This involves ensuring a clean and level surface, as well as applying a waterproofing membrane or backer board. By taking the time to properly prepare the walls, you can prevent future damage and ensure a long-lasting and leak-free shower stall installation.
Ensuring a clean and level surface
Before beginning any wall preparation, it is essential to ensure that the surface is clean and free from any debris or existing materials that could hinder the installation process. Use a damp cloth or sponge and mild detergent to wipe down the walls and remove any dirt, grease or soap scum.
Next, inspect the walls for any imperfections or uneven areas. Use a level or straight edge to identify any high or low spots. If you notice any unevenness in the surface, it is important to address and correct it before proceeding with the installation. This can be done by sanding down high spots or applying a leveling compound to fill in low areas and create a smooth and level surface.
Applying waterproofing membrane or backer board
Once you have ensured a clean and level surface, it is time to apply a waterproofing membrane or backer board. This step is crucial in preventing water damage and protecting the underlying structure of the walls.
There are two main options for waterproofing the walls: a waterproofing membrane or a backer board. A waterproofing membrane is a liquid or sheet-based material that is applied directly to the walls. It acts as a barrier to prevent water from seeping through and causing damage. Backer boards, on the other hand, are rigid panels made of cement or fiber reinforced gypsum. They provide a stable and waterproof surface for tile installation.
To apply a waterproofing membrane, follow the manufacturer’s instructions. Start by mixing the membrane according to the specified ratios, then use a brush or roller to apply it evenly to the walls. Ensure that you cover the entire surface, including corners and seams, to create a complete waterproof barrier. Allow the membrane to dry completely before proceeding with the installation.
If you choose to use a backer board, begin by measuring and cutting the panels to size. Then, secure the boards to the walls using screws or nails, making sure to follow the manufacturer’s guidelines for proper installation. Once the boards are securely in place, apply a waterproofing sealant or tape to the seams and corners to prevent water infiltration.
By properly preparing the walls through cleaning and leveling the surface, as well as applying a waterproofing membrane or backer board, you are setting the stage for a successful shower stall installation. This critical step will ensure a durable and watertight shower that will stand the test of time.
Installing The Shower Walls
Installing the shower walls
During the process of installing a shower stall, attaching the shower walls is a crucial step. Properly secured walls ensure stability and water resistance, creating a reliable and long-lasting shower enclosure. This section will guide you through the process of attaching the panels or tiles to the wall studs and sealing the joints and edges for water resistance.
Attaching the panels or tiles to the wall studs
Before attaching the panels or tiles, make sure the wall studs are clean and in good condition. Remove any dirt or debris and repair any damage to ensure a smooth and solid surface for installation.
Once the wall studs are prepped, you can start attaching the shower panels or tiles. Follow these steps:
- Measure the dimensions of your shower walls to determine the size of the panels or tiles needed. Cut them accordingly using a saw or tile cutter, ensuring a precise fit.
- Apply a generous amount of acrylic adhesive to the back of each panel or tile. Spread the adhesive evenly, covering the entire surface to ensure proper adhesion.
- Starting at the bottom, press each panel or tile firmly against the wall studs. Use a level to ensure they are perfectly vertical and straight. If using tiles, place tile spacers between them for even spacing and allow for grouting later.
- Repeat this process for each panel or tile, working your way up from the bottom. Make sure to leave a small gap at the top for the final row or border tiles, which will be installed later.
- Leave the adhesive to dry and cure according to the manufacturer’s instructions. This typically takes a few hours to overnight.
By following these steps, you can securely attach the shower panels or tiles to the wall studs, ensuring a strong and durable shower enclosure.
Sealing the joints and edges for water resistance
Once the panels or tiles are securely attached, it’s important to seal the joints and edges to prevent water leakage and moisture damage. This can be done by following these steps:
- Prepare a high-quality silicone sealant suitable for bathroom and shower applications.
- Carefully apply a thin and even bead of silicone sealant along all the joints and edges between the panels or tiles. Use a caulk gun for precise application.
- Smooth the sealant with a caulk smoothing tool or your finger, ensuring a clean and uniform finish. Remove any excess sealant to achieve a neat appearance.
- Allow the sealant to dry and cure according to the manufacturer’s instructions. This usually takes 24 to 48 hours.
By sealing the joints and edges with silicone sealant, you create a waterproof barrier that protects your shower walls and prevents water from seeping through. Regularly inspect and maintain the sealant to ensure its effectiveness over time.
Installing The Showerhead And Faucet
Once you have successfully installed the shower stall and ensured that it is sturdy and watertight, it is time to move on to the next step: installing the showerhead and faucet. This is an important step that requires careful attention to detail to ensure proper functionality and a relaxing shower experience. In this section, we will guide you through the process of mounting the fixtures onto the shower walls and connecting them to the water supply lines.
Mounting the fixtures onto the shower walls
Before you begin mounting the fixtures, it is crucial to determine the correct placement and height for the showerhead and faucet. Consider factors such as the height of the intended users and the distance from the shower floor. To mount the fixtures onto the shower walls, follow these steps:
- Using a pencil, mark the desired location for the showerhead and faucet on the shower walls. Ensure that the marks are level and aligned.
- Check the manufacturer’s instructions for specific guidelines on installing the fixtures. Some may require drilling holes, while others may come with adhesive backings for easy installation.
- If drilling is necessary, use a drill bit suitable for the material of your shower walls. Start with a smaller drill bit and gradually increase the size until it matches the diameter required for your fixtures.
- Remove any excess dust or debris from the drilled holes.
- Gently insert the screws or anchors provided with your fixtures into the holes. Make sure they are secure and stable.
- Carefully attach the showerhead and faucet to the mounting brackets or screws, ensuring they are tightly fastened.
- Give the fixtures a gentle tug to ensure they are properly secured.
Connecting them to the water supply lines
Once the fixtures are securely mounted onto the shower walls, the next step is to connect them to the water supply lines. This process requires precision and attention to detail to prevent any leaks or water damage. Follow these steps to connect the fixtures to the water supply lines:
- Locate the water supply lines running behind the shower walls. These are typically connected to the plumbing system of your house.
- Turn off the main water supply to avoid any water flow during the installation process.
- Using an adjustable wrench, carefully loosen the nuts connecting the water supply lines to the old fixtures, if applicable. Remove the old fixtures.
- Inspect the water supply lines for any damage or leaks. If necessary, replace them with new lines.
- Apply plumber’s tape to the threaded ends of the water supply lines. This will help create a tight and waterproof seal.
- Attach the showerhead and faucet to the water supply lines, ensuring the connections are tight and secure. Use the adjustable wrench to tighten the nuts, if needed.
- Turn on the main water supply and check for any leaks. If you notice any, tighten the connections or call a professional plumber for assistance.
By following these steps, you can successfully install the showerhead and faucet, completing the installation process of your shower stall. Take the time to check for any leaks or functionality issues before fully enjoying your new shower experience.
Testing For Leaks And Proper Functionality
Turning on the water supply
Before proceeding with the testing of your newly installed shower stall, it is essential to first turn on the water supply. Locate the shut-off valve, usually found near the water heater or main water line, and ensure it is fully open. This will allow water to flow freely into the shower system, enabling you to check for any leaks or issues.
Checking for any leaks or issues
Once the water supply is turned on, carefully inspect the shower stall for any signs of leakage. Take note of any damp spots, water droplets, or unusual sounds coming from the plumbing pipes. It is important to address any leaks as soon as possible to prevent long-term damage to your bathroom and water wastage.
To systematically check for leaks, start by running the water at a low pressure. Observe the connections between the showerhead, knobs, and shower arm, ensuring there are no visible leaks. If any leaks or drips are present, tighten the connections as needed, using a wrench or pliers if necessary. Be cautious not to overtighten the fittings, as this can cause damage.
Another critical area to inspect is the base of the shower stall. Ensure there are no puddles or water seeping out from the sides. If you notice any leaks, it may indicate a problem with the caulking or the shower pan. Address these issues promptly to prevent water damage to the subfloor or surrounding walls.
In addition to checking for leaks, it is equally important to test the proper functionality of the shower stall. Run the water at various pressures and temperatures to ensure smooth operation of the knobs and valves. Test the diverter valve, if applicable, to make sure water is properly redirected between the shower and bathtub.
Pro tip: You can also use a handheld showerhead or hose to assist in testing the water flow and check for any leaks or functional issues.
By following these troubleshooting steps, you can ensure your newly installed shower stall is leak-free and functioning properly. Addressing any leaks or issues promptly will help maintain the integrity of your bathroom and prevent costly repairs down the line.
Applying A Waterproof Sealant And Caulk
One of the most crucial steps in installing a shower stall is applying a waterproof sealant and caulk. This process ensures that your shower remains watertight, preventing any water damage or mold growth. By properly sealing any gaps or joints and using the right caulk, you can ensure a durable and long-lasting shower stall.
Sealing any Gaps or Joints
Before applying the sealant and caulk, carefully inspect your shower stall for any gaps or joints that need to be sealed. These areas include the corners, seams, and edges where the shower walls meet the floor and the surrounding walls. Use a waterproof sealant, specially designed for bathrooms, to seal these gaps and joints effectively. It’s essential to choose a sealant that is compatible with your shower stall material, whether it’s acrylic, fiberglass, or tile.
If you find any gaps or cracks during the inspection, use a putty knife to remove any old caulk or sealant. Clean the area thoroughly with a mild detergent and warm water to ensure proper adhesion. Once the area is clean and dry, apply the waterproof sealant using a caulking gun to fill in the gaps and joints. Be sure to apply enough sealant to create a continuous, watertight barrier.
Preventing Water Damage and Mold Growth
Properly sealing any gaps or joints in your shower stall is vital for preventing water damage and mold growth. When water seeps into these gaps, it can cause structural damage to your shower walls and floor. It can also create a breeding ground for mold and mildew, which can be harmful to your health and difficult to remove.
By applying a waterproof sealant and caulk, you create a barrier that prevents water from penetrating the gaps and joints. This barrier keeps your shower stall watertight, preventing any leaks or moisture from causing damage. It also inhibits the growth of mold and mildew, ensuring a clean and healthy shower environment. Regularly inspect your sealant and caulk for any signs of wear or damage and make necessary repairs to maintain the integrity of your shower stall’s waterproofing.
In Conclusion
Applying a waterproof sealant and caulk is a crucial step in installing a shower stall. By properly sealing any gaps or joints, you can prevent water damage and mold growth, ensuring a durable and long-lasting shower. Take the time to carefully inspect your shower stall and choose a suitable waterproof sealant for your shower material. Regular maintenance and repairs of your sealant and caulk will prolong the lifespan of your shower stall and keep it looking pristine for years to come.
Adding Accessories And Features
Installing shelves or niches
Adding shelves or niches to your shower stall can not only provide extra storage space but also enhance the aesthetics of your bathroom. Whether you need a place to keep your shampoo, conditioner, and body wash or want to display decorative items, installing shelves or niches is a great solution. To do this, follow these steps:
- First, determine the desired location and size of the shelves or niches. Consider the height and accessibility for convenience.
- Using a spirit level, mark the outline of the shelf or niche on the shower wall. Ensure it is level and centered.
- Next, carefully cut out the marked section of the wall using a reciprocating saw or a similar tool.
- Clean the exposed edges of the wall and ensure there are no rough or uneven surfaces.
- If you are installing a shelf, secure it to the wall using screws or brackets designed for wet environments. Make sure to follow the manufacturer’s instructions.
- For a niche, insert a waterproof backer board into the opening and secure it with screws. This will provide a sturdy base for tiling.
- Apply a waterproofing membrane over the backer board and extend it to the surrounding shower wall area.
- Finish the shelf or niche by tiling it, using a suitable tile adhesive and grout. Ensure that the tiles are properly aligned and spaced.
- Once the tiles have set, seal the edges and corners with a waterproof silicone caulk to prevent water damage.
Incorporating a bench or grab bars for convenience
If you want to make your shower stall more accessible and convenient, consider incorporating a bench or grab bars. These features can provide support, stability, and comfort during your showering experience. Follow these steps to install them:
- For a bench, choose a location that allows comfortable seating without obstructing the showerhead or drain. Ensure that it is securely anchored to the wall.
- Use a spirit level to mark the desired height and position of the bench or grab bars on the shower wall.
- Using a drill and appropriate screws, attach the bench or grab bars to the wall. Make sure to locate and secure them into wall studs for maximum stability.
- Check that the bench or grab bars are securely installed by applying pressure and gently pulling on them. They should not wobble or come loose.
- For grab bars, consider using textured grips for improved grip and safety.
- Regularly inspect the bench or grab bars to ensure they remain secure and in good condition.
By adding these accessories and features to your shower stall, you can transform it into a functional and stylish space that meets your specific needs. Enhance your showering experience with ample storage, added comfort, and improved accessibility.
Frequently Asked Questions
Is It Difficult To Install A Shower Stall?
Installing a shower stall is relatively easy. With the right tools and instructions, you can easily complete the installation process. It involves assembling the stall, connecting the plumbing, and sealing the edges. Overall, it can be a straightforward DIY project for most people.
Can I Install A Shower Myself?
Yes, you can install a shower yourself. Just make sure to closely follow the instructions provided, use proper tools, and have some basic plumbing knowledge. It’s important to ensure the shower is installed correctly to avoid any potential leaks or other problems.
How Much Does It Cost To Install A Stall Shower?
The cost of installing a stall shower depends on various factors such as materials, size, and labor. On average, it can range from $500 to $5,000. However, it is recommended to get a personalized quote from a professional contractor for an accurate estimate.
Do You Put Drywall Behind A Shower Stall?
Yes, drywall is commonly used as the backing material behind a shower stall.
Conclusion
To sum up, installing a shower stall may seem like a daunting task, but with the right tools and steps, it can be done efficiently and successfully. By carefully following our guide and taking into account the necessary precautions, you can transform your bathroom into a refreshing oasis in no time.
Remember to double-check your measurements, use high-quality materials, and seek professional assistance if needed. Now, go ahead and embark on your shower stall installation journey with confidence!