
To install shower shelves, measure the desired location, mark the screw holes, drill pilot holes, attach the mounting brackets, and secure the shelves to the brackets. This process ensures a secure and sturdy installation for your shower shelves.
Adding shower shelves to your bathroom can provide valuable storage space for your toiletries and bath products. Whether you have a small shower or a spacious one, installing shower shelves can help keep your shower organized and free of clutter.
We will guide you through the process of installing shower shelves, step by step. By following these instructions, you’ll have stylish and functional shelves in no time. So let’s get started and learn how to install shower shelves in your bathroom.
Assessing Your Shower Space
Before diving into the exciting project of installing shower shelves, it’s crucial to assess your shower space to ensure a smooth and successful installation. By taking the time to measure the available space and determine the desired shelf height, you can create a functional and aesthetically pleasing storage solution that perfectly suits your needs.
Measuring the Available Space
The first step in assessing your shower space is measuring the area where you plan to install the shelves. Grab a tape measure and carefully determine the width and height of the wall you intend to mount the shelves on. Make sure to measure both the overall space as well as any specific sections you may want to allocate for each shelf. This will give you a clear idea of how much surface area you have to work with and help you choose the right size and number of shelves.
Determining the Desired Shelf Height
Once you have measured the available space, you can move on to determining the desired shelf height. Consider the items you plan to store on the shelves and how easily accessible you want them to be. For example, if you have tall bottles or containers that you use frequently, you may want to place the shelves at a height that allows for easy reach. On the other hand, if you have smaller items that you don’t use as often, you might choose to place the shelves at a higher or lower height to maximize space efficiency.
When deciding the shelf height, it’s important to also consider the height of the tallest person in your household. You want to ensure that the shelves are within comfortable reach for everyone who will be using them. Additionally, take into account any shower fixtures or obstructions that may limit the available height for the shelves.
Take your time to assess your shower space thoroughly, and don’t be afraid to experiment with different shelf layouts and heights before finalizing your decision. By doing so, you can create an organized and functional shower area that not only enhances your daily routine but also adds a touch of style to your bathroom.

Choosing The Right Shower Shelves
When it comes to upgrading your shower, adding shelves is a practical and stylish solution. Not only do shower shelves provide a convenient place to store your toiletries, they also help to keep your shower organized and clutter-free. However, to ensure that your shower shelves are both functional and durable, it’s important to choose the right ones that suit your specific needs. In this article, we will discuss the factors you should consider when selecting shower shelves, including the different materials used and their pros and cons, as well as evaluating the weight capacity and durability of the shelves.
Considering different materials and their pros and cons
Shower shelves are available in a variety of materials, each with their own advantages and disadvantages. It’s essential to understand these factors to make an informed decision. Here are some commonly used materials for shower shelves:
| Material | Pros | Cons |
|---|---|---|
| 1. Glass | – Sleek and modern appearance – Easy to clean – Doesn’t rust or corrode |
– Fragile and can break if not handled carefully – Requires regular maintenance to prevent water spots |
| 2. Ceramic | – Durable and long-lasting – Resistant to stains and water damage – Wide range of styles and designs |
– Heavier and may require professional installation – Can chip or crack if heavy objects are dropped on them |
| 3. Stainless steel | – Highly durable and resistant to corrosion – Easy to clean and maintain – Can support heavy items without warping or bending |
– Prone to fingerprints and water stains – May not suit all bathroom styles |
By considering the pros and cons of each material, you can determine which one best fits your bathroom aesthetics, maintenance preferences, and durability requirements.
Evaluating the weight capacity and durability of the shelves
When choosing shower shelves, it’s crucial to assess their weight capacity and durability. After all, you want shelves that can safely hold your shower essentials without bending or breaking under the weight. Here are some factors to consider:
- Weight capacity: Different shelves have varying weight limits, so it’s important to check the specifications provided by the manufacturer. Consider the combined weight of your toiletries and choose shelves that can comfortably accommodate them.
- Durability: Look for shelves that are made from sturdy materials and have a solid construction. They should be able to withstand the humid and damp environment of the shower without deteriorating over time.
- Mounting options: Consider the installation method of the shelves. Some shelves require drilling, while others come with adhesive or suction cup attachments. Choose the option that best suits your needs and bathroom layout.
By carefully evaluating the weight capacity and durability of the shelves, you can ensure a reliable and long-lasting addition to your shower.
When it comes to choosing the right shower shelves, considering the different materials and their pros and cons is essential. Additionally, evaluating the weight capacity and durability of the shelves ensures that you make the right decision. By taking these factors into account, you can select shower shelves that not only meet your functional needs but also enhance the overall aesthetic of your bathroom.
Gathering The Necessary Tools And Materials
Before you start installing shower shelves, it’s essential to have all the necessary tools and materials on hand. Without the right tools, the installation process can become more complicated and time-consuming. To help you get organized, we’ve created a checklist of the required tools and steps you need to take before diving into the installation process.
Creating a checklist of required tools
Having a checklist can save you time and ensure you don’t forget any vital items. Here’s a handy checklist of tools you’ll need:
| Tools | Materials |
|---|---|
|
|
Once you have collected all the necessary tools and materials, you can proceed to the next step of selecting the appropriate shelf mounting hardware.
Selecting the appropriate shelf mounting hardware
Choosing the right shelf mounting hardware is crucial for a successful installation. The type of hardware you select depends on various factors, such as the material of your shower walls and the weight capacity you require. Here are a few factors to consider:
- Wall Material: Determine whether your shower walls are made of tile, fiberglass, or another material. Different wall materials require different types of mounting hardware.
- Weight Capacity: Consider the items you plan to store on the shelves. If you intend to place heavy bottles or objects, make sure the mounting hardware can support the expected weight.
- Installation Method: Some mounting hardware requires drilling into the wall, while others utilize adhesive or tension-based systems. Choose a method that suits your preferences and the condition of your shower walls.
Take your time to research and find the mounting hardware that fits your needs. Properly selected hardware ensures the stability and durability of your shower shelves.

Preparing The Shower Area
Before installing shower shelves, it is essential to prepare the shower area properly. This involves cleaning the shower tiles and ensuring a dry surface, as well as removing any existing shelves or accessories in the area.
Cleaning the Shower Tiles and Ensuring a Dry Surface
The first step in preparing the shower area is to clean the shower tiles. Use a gentle cleanser that is suitable for your specific type of tiles. This will help remove any soap scum, mold, or mildew that may have accumulated over time. Pay special attention to the corners and grout lines, as these areas tend to collect dirt and grime.
After cleaning the tiles, it is crucial to ensure that the surface is completely dry. This will help the adhesive to adhere properly to the tiles. Use a clean, dry cloth or towel to remove any moisture from the shower walls and floor. Allow the area to air dry for a few minutes, or use a hairdryer on a low setting to speed up the drying process.
Removing Any Existing Shelves or Accessories in the Area
If there are any existing shelves or accessories in the shower area, they need to be removed before installing new shower shelves. Start by inspecting the current shelves or accessories and determining how they are attached to the wall. Some shelves may be secured with screws or brackets, while others may be adhered with adhesive.
If the shelves are held in place with screws or brackets, use a screwdriver or wrench to remove them. Take care not to damage the tiles or the surrounding area. Once the shelves are removed, clean the area where they were attached to the wall to remove any residual adhesive or debris.
If the shelves are adhered with adhesive, carefully pry them off the wall using a putty knife or similar tool. Take your time and work slowly to avoid damaging the tiles. Once the shelves are removed, clean the area to ensure a smooth surface for the new shower shelves.
By thoroughly cleaning the shower tiles and ensuring a dry surface, as well as removing any existing shelves or accessories in the area, you are now ready for the next step in installing your new shower shelves.
Marking The Shelf Locations
Before installing shower shelves, it is important to determine their ideal placement. By marking the shelf locations properly, you can ensure they are both functional and visually appealing in your bathroom. This blog post will guide you through the process step-by-step, so you can confidently install your shower shelves.
Determining the ideal placement of the shelves
The first step in marking the shelf locations is determining the ideal placement. Consider the height and accessibility of the shelves, as well as the overall design of your bathroom. You want the shelves to be within easy reach and to complement the other fixtures and accessories in the shower area.
When deciding on the placement, think about what items you plan to store on the shelves. If you have large bottles or tall bath accessories, you may need to leave enough space between the shelves to accommodate them. Take into account the size and shape of the items you want to store to ensure the shelves are spaced appropriately.
Using a level and measuring tape to mark the positions accurately
Once you have determined the ideal placement of your shower shelves, it’s time to mark the positions accurately. To ensure a level installation, use a level and measuring tape. These tools will help you establish the correct height and spacing for the shelves.
Start by measuring the height at which you want the first shelf to be installed. Use the measuring tape to mark this height on the wall. Then, use the level to ensure the mark is perfectly horizontal. This will serve as your reference point for the rest of the shelves.
Next, measure and mark the desired spacing between each shelf. Again, use the level to ensure the marks are straight and even. This will ensure that your shelves are aligned and visually appealing.
After marking the positions, take a step back and double-check if everything looks symmetrical and balanced. Adjust the marks if necessary to achieve the desired aesthetic and functionality.
With the positions accurately marked, you are now ready to move on to the next step – installing the shower shelves.
Installing The Shelf Brackets
Drilling pilot holes for the brackets
Before you start installing the shelf brackets, it is essential to drill pilot holes to ensure a secure and long-lasting installation. Pilot holes are small holes that you drill into the wall, serving as a guide for the screws or anchors that will be used to attach the brackets. Here’s a step-by-step guide:
- Measure and mark the desired location for your shelf brackets on the wall. Use a level to ensure they are perfectly aligned.
- Choose an appropriate drill bit size for the pilot holes. It should be slightly smaller than the screws or anchors you will be using.
- Put on your safety goggles and start drilling the pilot holes at the marked locations. Make sure to drill straight and to the desired depth.
- Remove any dust or debris from the pilot holes using a small brush or a can of compressed air. This will ensure a clean surface for attaching the brackets.
Attaching the brackets securely to the wall studs
Once you have drilled the pilot holes, it’s time to attach the brackets securely to the wall studs. Wall studs are vertical wooden frames within the wall that provide stability and support. Attaching the brackets to the studs will ensure that your shower shelves can bear a significant amount of weight without any risk of falling. Follow these steps:
- Locate the wall studs using a stud finder. Mark their positions on the wall to ensure that you attach the brackets directly to them.
- Align the holes in the brackets with the pilot holes you drilled earlier. Make sure they are level and properly aligned.
- Insert the screws or anchors into the pilot holes and tighten them using a screwdriver or a drill. Be careful not to overtighten, as it may cause damage to the brackets or the wall.
- Repeat the process for each bracket, ensuring that they are evenly spaced and securely attached to the wall studs.
By drilling pilot holes and attaching the brackets securely to the wall studs, you can ensure a strong and durable installation for your shower shelves. Now that you have completed this step, you can move on to the next phase of installing the actual shelves. Stay tuned for our next blog post on that topic!
Mounting The Shelves
Once you have gathered all the necessary materials and prepared the shower area, it’s time to mount the shelves. This process involves two steps: placing the shelves onto the brackets and securing them in place with screws or other mounting mechanisms. Let’s dive into each step in detail.
Placing the shelves onto the brackets
Begin by carefully placing the shelves onto the brackets. Ensure that the brackets are properly attached to the wall, as they serve as the foundation for the shelves. To do this, follow these simple steps:
- Hold the shelf horizontally and align it with the brackets.
- Gently slide the shelf onto the brackets, making sure it fits securely.
- Adjust the shelf to ensure it is level and aligned with any existing shelves or fixtures.
Safety tip: If the brackets have adjustable arms or clips, make sure they are properly positioned to hold the shelves in place. This will help prevent any accidental slips or falls.
Securing the shelves in place with screws or other mounting mechanisms
To ensure the shelves stay securely in place, you’ll need to secure them using screws or other mounting mechanisms. Follow these steps for a sturdy and reliable installation:
- Using a pencil, mark the areas where the screws or mounting mechanism will be inserted.
- Pre-drill holes at each marked spot to ensure a smooth and secure installation. Be sure to use a drill bit that matches the size of the screws or mounting hardware.
- Place the shelf back onto the brackets, making sure it is level and aligned correctly.
- Using a screwdriver or appropriate tool, insert the screws or mounting hardware through the pre-drilled holes and tighten them securely.
Safety tip: If you are unsure about the stability of your installation, it’s always a good idea to consult a professional or contact the manufacturer for additional guidance.
Overall, mounting shower shelves can be a straightforward process if you follow these steps carefully. Remember to take your time, use the appropriate tools and hardware, and double-check the stability of your installation. With your new shower shelves securely mounted, you’ll have a convenient and organized space for all your shower essentials.
Finishing Touches And Safety Measures
After successfully installing the shower shelves, it’s important to double-check the stability of the shelves to ensure that they are securely attached to the wall. This step is crucial for the safety of everyone using the shower. Here’s how you can do it:
- Give the shelves a gentle but firm shake to check if they wobble or feel loose. If you notice any movement, it’s essential to address it immediately. Unstable shelves can lead to accidents and injuries.
- Inspect the mounting brackets or screws holding the shelves in place. Make sure they are tightened properly and haven’t come loose during the installation process.
- If you find any issues with the stability of the shelves, reinforce them by adding extra screws or brackets to provide additional support. It’s better to be safe than sorry.
Once you’ve confirmed the stability of the shelves, it’s time to take the next step in ensuring the longevity of your beautifully installed shower shelves. Adding caulk or sealant for a waterproof seal is an essential measure to prevent water leakage and damage. Here’s what you need to do:
- Clean and dry the area where the shelves meet the shower wall. Use a mild cleaner and ensure that there is no residue or moisture left behind.
- Apply a thin and even layer of caulk or sealant along the edges of the shelves where they come into contact with the wall. This creates a watertight seal that protects against water intrusion and prevents mold and mildew growth.
- Smooth out the caulk or sealant using a caulk finishing tool or your finger, ensuring a neat and tidy finish. This step also helps to remove any excess product.
- Allow the caulk or sealant to dry completely before using the shower. Follow the manufacturer’s recommendations for the drying time to ensure maximum effectiveness.
By following these finishing touches and safety measures, you can ensure that your shower shelves not only look great but also provide a functional and safe storage solution for your shower essentials. Don’t forget to regularly inspect the shelves, especially after installation, to address any potential issues promptly.
Cleaning And Preventing Mold Or Mildew
One of the most important aspects of installing shower shelves is ensuring that they stay clean and free from mold or mildew. With constant exposure to water and moisture in the bathroom, it’s crucial to implement effective cleaning solutions and regular maintenance routines to prevent mold or mildew buildup. By following these steps, you can ensure that your shower shelves stay clean, fresh, and free from any potential health hazards.
Using appropriate cleaning solutions for different materials
When it comes to cleaning shower shelves, it’s important to consider the material they are made of. Different materials require specific cleaning solutions to prevent damage while effectively removing mold or mildew. Here’s a guide on selecting the appropriate cleaning solutions for common shower shelf materials:
| Shower Shelf Material | Recommended Cleaning Solution |
|---|---|
| Glass | A mixture of vinegar and water or a glass cleaner specifically designed for removing soap scum and mildew. |
| Plastic | A mild dish soap solution or a non-abrasive bathroom cleaner that is safe for use on plastic surfaces. |
| Stainless Steel | Avinegar and water solution or a stainless steel cleaner specifically formulated for removing water stains and fingerprints. |
| Ceramic or Porcelain | A bleach-based cleaner or a mixture of baking soda and water for removing stubborn stains and preventing mold growth. |
Be sure to follow the instructions provided by the manufacturer of your shower shelves and the cleaning solution to ensure effective and safe cleaning.
Implementing regular maintenance routines to prevent buildup
In addition to using appropriate cleaning solutions, implementing regular maintenance routines is crucial for preventing mold or mildew buildup on your shower shelves. By following these simple steps, you can ensure that your shower shelves remain clean and free from any potential health hazards:
- After each shower, use a squeegee or a clean towel to wipe down the shelves, removing any excess water or moisture.
- Once a week, thoroughly clean the shelves using the appropriate cleaning solution mentioned above.
- Avoid leaving damp or wet items on the shelves for an extended period to prevent mold or mildew growth.
- Ensure proper ventilation in the bathroom by using exhaust fans or opening windows to minimize the moisture levels.
- Regularly inspect the shelves for any signs of mold or mildew and take immediate action if necessary.
By incorporating these maintenance routines into your shower shelf care, you can effectively prevent mold or mildew growth, keeping your bathroom clean and healthy.
Avoiding Overloading And Damage
When it comes to installing shower shelves, it’s important to not only choose the right shelves for your needs but also make sure you avoid overloading them and causing any accidental damage. By following a few simple steps, you can ensure that your shower shelves are installed correctly, and that they stay in great condition for years to come.
Sticking to the weight limits specified by the manufacturer
Before you start installing your shower shelves, it’s crucial to check the weight limits specified by the manufacturer. Each shelf is designed to hold a certain amount of weight, and exceeding these limits can lead to structural damage or even complete failure of the shelves. Make sure to read the product manual or check the manufacturer’s website for the weight limit information.
Here’s an example of how you can display the weight limits in a table format:
| Shelf Model | Weight Limit |
|---|---|
| Shower Shelf A | Up to 10 lbs |
| Shower Shelf B | Up to 15 lbs |
| Shower Shelf C | Up to 20 lbs |
Taking precautions to prevent accidental damage to the shelves
Accidental damage can occur if the shelves are not properly installed or if they are not handled with care. To prevent damage to your shower shelves, consider the following precautions:
- Properly clean and dry the installation area: Before installation, make sure the area where the shelves will be installed is clean and dry. This will ensure a good adhesive bond and prevent any moisture-related issues.
- Use the right tools and materials: Make sure you have all the necessary tools and materials before you start the installation process. This includes adhesive or screws, a level, measuring tape, and a pencil.
- Follow the manufacturer’s instructions: Carefully read and follow the installation instructions provided by the manufacturer. This will ensure that the shelves are installed correctly and securely.
- Avoid placing heavy or sharp objects: To prevent damage to the shelves, avoid placing heavy objects or objects with sharp edges on them. This can lead to cracking or breakage of the shelves.
By adhering to these precautions, you can minimize the risk of damaging your shower shelves and ensure they remain in excellent condition for a long time.
Addressing Common Issues And Troubleshooting
Installing shower shelves can greatly enhance the functionality and organization of your bathroom space. However, like any home improvement project, you may encounter a few common issues or run into some troubleshooting situations along the way. In this section, we will discuss how to handle loose or wobbly shelves and how to deal with rust or corrosion on metal shelves. By addressing these issues, you can ensure a sturdy and durable installation that will stand the test of time.
Handling Loose or Wobbly Shelves
If you notice that your newly installed shower shelf feels loose or wobbly, it’s essential to rectify the problem to prevent any accidents or damage. Here are a few steps you can take to address this issue:
- Tighten the Screw: Check the mounting screws or brackets that hold the shelf in place. Using a screwdriver, make sure all the screws are securely tightened. This can help stabilize the shelf and eliminate any wobbling.
- Reposition the Shelf: If tightening the screws doesn’t solve the problem, try repositioning the shelf. Sometimes, the shelf may not be aligned properly on the brackets, leading to instability. Gently lift the shelf and adjust its position to ensure a snug fit.
- Use Additional Support: For shelves that still wobble after tightening and repositioning, consider adding additional support. This can be done by installing extra brackets or using adhesive strips to reinforce the shelf against the wall. Consult the manufacturer’s instructions to ensure you are using the appropriate methods for your specific shelf.
Dealing with Rust or Corrosion on Metal Shelves
Over time, metal shower shelves may develop rust or corrosion due to constant exposure to water and moisture. To prevent further damage and maintain the appearance of your shelves, follow these steps:
- Clean the Surface: Start by removing any loose debris or dirt from the shelves using a soft cloth. Then, mix a solution of mild dish soap and warm water. Gently scrub the shelves with the solution using a non-abrasive sponge or brush. Rinse thoroughly and dry the metal surface to remove any remaining moisture.
- Remove Rust or Corrosion: If you notice rust or corrosion spots on your shelves, you can try removing them using some household items. For light rust, use a mixture of baking soda and water. Apply the mixture to the affected areas and scrub gently with a toothbrush. Alternatively, for more stubborn rust, use white vinegar or lemon juice. Apply the vinegar or lemon juice to the rusted areas and let it sit for a few minutes before scrubbing.
- Apply Protective Coating: Once the metal shelves are clean and free of rust or corrosion, it’s crucial to apply a protective coating to prevent future damage. You can use a rust-resistant spray paint or a clear sealant specifically designed for metal surfaces. Apply the coating evenly according to the manufacturer’s instructions and allow it to dry completely before putting your shelves back into use.
By following these troubleshooting tips, you can address common issues such as loose or wobbly shelves and solve problems like rust or corrosion on metal shelves. These steps will ensure a secure and functional shower shelving installation that will last for years to come.
Frequently Asked Questions
Can You Add A Shelf To An Existing Shower?
Yes, it is possible to add a shelf to an existing shower. A professional can install a shelf that matches the design of your shower and provides convenient storage for your toiletries.
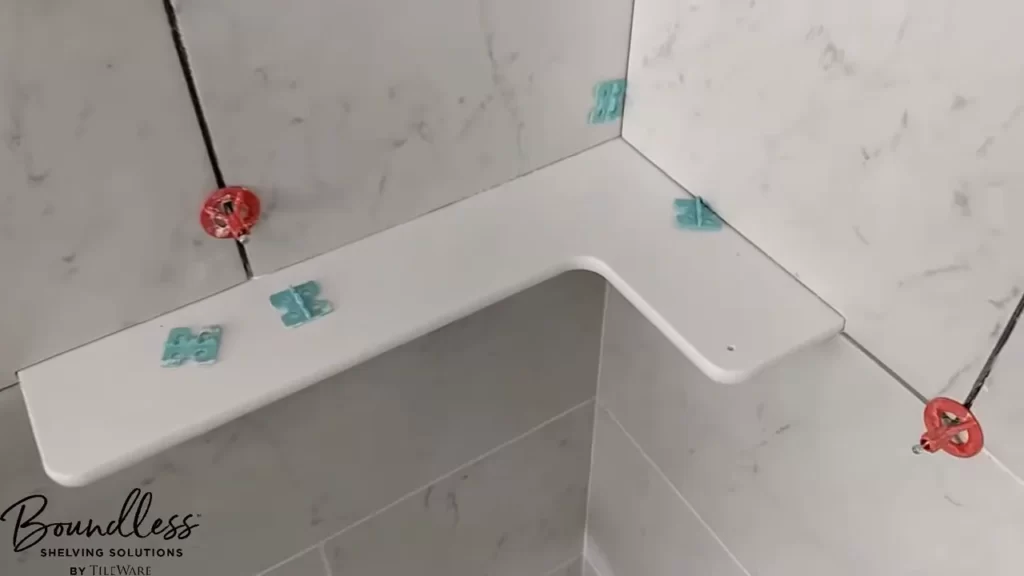
How Do You Install A Shower Shelf In A Tile Shower?
To install a shower shelf in a tile shower, follow these steps: 1. Measure and mark the desired location for the shelf. 2. Use a tile drill bit to carefully drill holes into the marked spots. 3. Insert wall anchors into the holes and secure them.
4. Attach the shelf brackets to the anchors. 5. Place the shelf on the brackets and secure it in place. That’s it, your shower shelf is installed!
What Kind Of Adhesive For Shower Shelves?
For shower shelves, you need a waterproof adhesive. It should be able to withstand the moisture and humidity of the shower environment. Look for adhesives labeled specifically for shower use. Make sure to follow the manufacturer’s instructions for proper application.
Where Is The Best Place To Put Shelves In A Shower?
The best place to install shelves in a shower is at a height that is convenient for storage and usage, such as within reach while standing or bathing. Ideally, place them within arm’s length, next to the shower walls or in any unused corner to maximize space.
Conclusion
In this post, we have explored the step-by-step process of installing shower shelves. By following these instructions, you can add storage space to your bathroom and keep your shower essentials organized. Remember to choose the right materials, measure accurately, and securely install the shelves to ensure their longevity.
With a little effort and patience, you can transform your shower into a functional and stylish space. So get ready to enhance your bathroom with this DIY project!