To install shower panel walls, measure and mark the desired height, align the panel, secure it with screws, and seal the edges with caulking for a watertight finish. When it comes to revamping your bathroom, replacing your old shower walls with sleek and functional shower panel walls can instantly elevate its appearance and functionality.
Shower panel walls come in various designs and materials, making it easy to find one that suits your style and requirements. In this guide, we will walk you through the step-by-step process of installing shower panel walls, ensuring that you have a beautiful and durable shower space in no time.
So let’s get started with the installation process of shower panel walls.
Choosing The Right Shower Panel Walls
When it comes to upgrading your bathroom, installing shower panel walls is a great way to add style and functionality. Not only do these walls protect your bathroom from water damage, but they also give your shower area a sleek and modern look. However, with so many options available in the market, choosing the right shower panel walls can be overwhelming. To help you make an informed decision, consider the following factors when selecting shower panel walls:
Factors to consider when selecting shower panel walls
1. Budget: Before starting your search, it is important to determine your budget. This will help you narrow down your options and avoid overspending.
2. Aesthetic Appeal: Choose shower panel walls that complement the overall style of your bathroom. Whether you prefer a contemporary, minimalist, or traditional look, there are options available to suit every taste.
3. Water Resistance: Since shower panel walls are constantly exposed to water, it is essential to select a material that is highly water-resistant. This will ensure the longevity of the walls and prevent any damage caused by moisture.
4. Installation: Consider the ease of installation when choosing shower panel walls. Some materials, such as acrylic and PVC, are relatively simple to install, while others may require professional assistance.
5. Maintenance: Evaluate the maintenance requirements of different materials. Some materials, like tile and natural stone, may require regular sealing or special cleaning products, while others can be easily cleaned with regular household cleaners.
Exploring different types of materials for shower panel walls
When it comes to selecting shower panel walls, you have various material options to choose from. Each material has its own unique characteristics and aesthetic appeal. Here are a few popular choices:
| Material | Advantages | Disadvantages |
|---|---|---|
| Acrylic | • Affordable • Easy to clean and maintain • Lightweight |
• Less durable compared to other materials • Can scratch easily |
| PVC | • Affordable • Resistant to moisture and mold • Easy to install |
• Prone to scratches • May fade over time |
| Tile | • Endless design options • High durability • Resistant to stains |
• Requires regular maintenance • Grout can stain or develop mold |
| Natural Stone | • Luxurious and elegant • Durable and long-lasting • Unique natural patterns |
• Expensive • Requires regular sealing |
Evaluating the durability and maintenance requirements of different materials
When selecting shower panel walls, it is crucial to evaluate the durability and maintenance requirements of different materials. This will ensure that your chosen walls not only withstand the test of time but also fit your lifestyle. Here are some key points to consider:
- Acrylic and PVC walls are affordable and easy to maintain, but they may lack the durability of tile or natural stone.
- Tile walls offer a wide range of design options and high durability, but they require regular maintenance to keep the grout clean and in good condition.
- Natural stone walls provide a luxurious and unique look, but they require regular sealing to protect them from stains and moisture.
By considering factors like budget, aesthetic appeal, water resistance, installation, and maintenance, as well as exploring different material options and evaluating their durability, you can confidently choose the right shower panel walls for your bathroom. Remember, finding the perfect walls not only enhances the appearance of your bathroom but also ensures a long-lasting and enjoyable shower experience.

Measuring And Preparing The Shower Area
The first step in installing shower panel walls is to measure and prepare the shower area. This ensures that the panels fit perfectly and are installed smoothly. In this section, we will cover important aspects such as taking accurate measurements of the shower area, assessing the condition of the existing walls, and preparing the surface for installation. Let’s dive into the details below:
Taking Accurate Measurements of the Shower Area
The key to a successful installation is to start with accurate measurements. This ensures that the shower panels fit perfectly and minimize the chances of gaps or misalignments. To take accurate measurements, follow these steps:
- Use a measuring tape to measure the height and width of the shower area. Start at one corner and measure to the other, ensuring that you account for any unevenness in the walls.
- Measure the height from the base of the shower tray or bathtub to the desired height where you want the panels to end. This will give you the panel height required for your installation.
- Measure the width of any alcoves or recessed areas within the shower area, as these may require custom-cut panels.
Assessing the Condition of the Existing Walls
Before installing shower panel walls, it’s crucial to assess the condition of the existing walls. This step helps identify any issues that may affect the installation, such as moisture damage, mold, or loose tiles. Follow these guidelines to assess the condition of the walls:
- Inspect the walls for any signs of water damage, cracks, or uneven surfaces. Ensure that the walls are in good condition and can support the weight of the panels.
- If you notice any moisture or mold, it’s important to address these issues before proceeding with the installation. Consult a professional if necessary.
- Ensure that any loose tiles or grout lines are repaired or replaced, as these can affect the installation and overall durability of the shower panel walls.
Preparing the Surface for Installation
Preparation is key to achieving a seamless and long-lasting installation of shower panel walls. Here’s how to prepare the surface:
- Clean the walls thoroughly to remove any dirt, grease, or soap scum. This ensures proper adhesion of the panels to the surface.
- Repair any imperfections in the walls, such as holes or dents, using a suitable filler. Allow the filler to dry completely before proceeding.
- If necessary, sand the walls lightly to create a smooth and even surface. This step helps the panels adhere properly and ensures a professional finish.
- Lastly, apply a primer to the walls. This promotes better adhesion and helps the panels stick securely to the surface.
By following these steps and properly preparing the shower area, you’ll lay a strong foundation for the installation of shower panel walls. Next, we’ll guide you through the process of actually installing the panels, so stay tuned!
Step-By-Step Guide For Installing Shower Panel Walls
If you’re looking to upgrade your bathroom and create a sleek, modern look, installing shower panel walls is a great option. These panels not only add style to your space but also provide a functional and easy-to-clean surface. In this step-by-step guide, we will walk you through the process of installing shower panel walls, from gathering the necessary tools and materials to sealing and finishing the installation. Let’s get started!
Gathering the necessary tools and materials
Before diving into the installation process, it’s essential to gather all the necessary tools and materials. Here’s a list of what you’ll need:
| Tools | Materials |
|---|---|
|
|
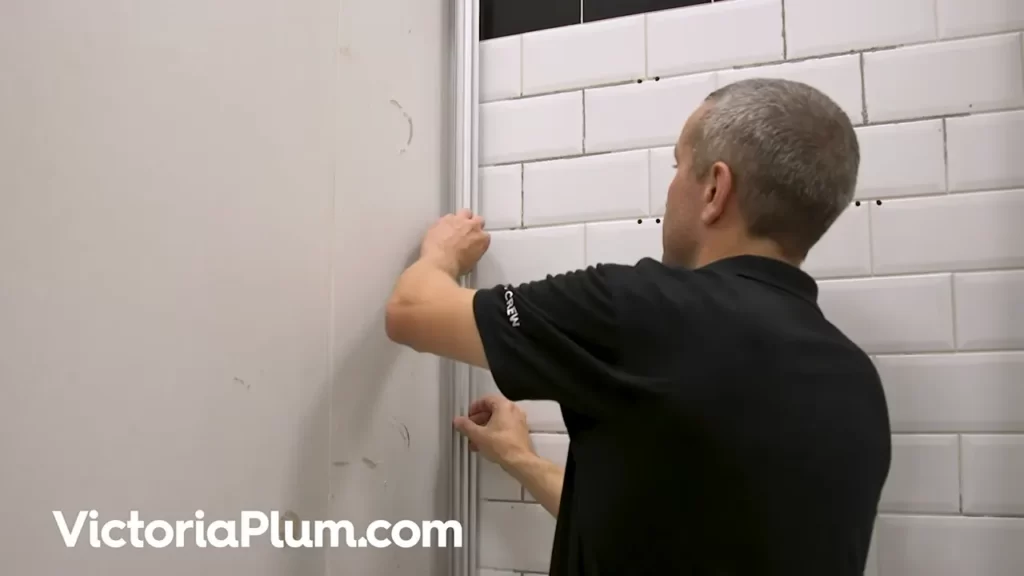
Installing the shower panel wall framework
Once you have all the tools and materials ready, it’s time to start installing the shower panel wall framework. Follow these steps:
- Measure and mark the desired height of the shower panel walls on the existing wall. Use a level and a chalk line to create a straight and level guideline.
- Cut the aluminum profiles to size using a hacksaw, ensuring that they fit within the marked guideline.
- Attach the profiles to the wall using screws and a drill, making sure they are securely fastened.
Mounting the panels onto the framework
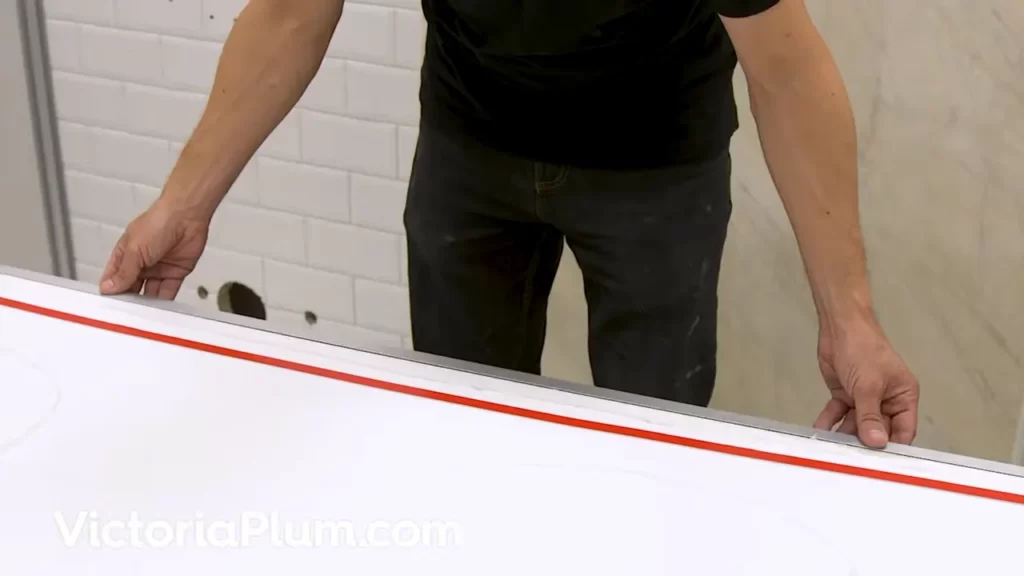
With the framework in place, it’s time to mount the shower panels onto it. Here’s how:
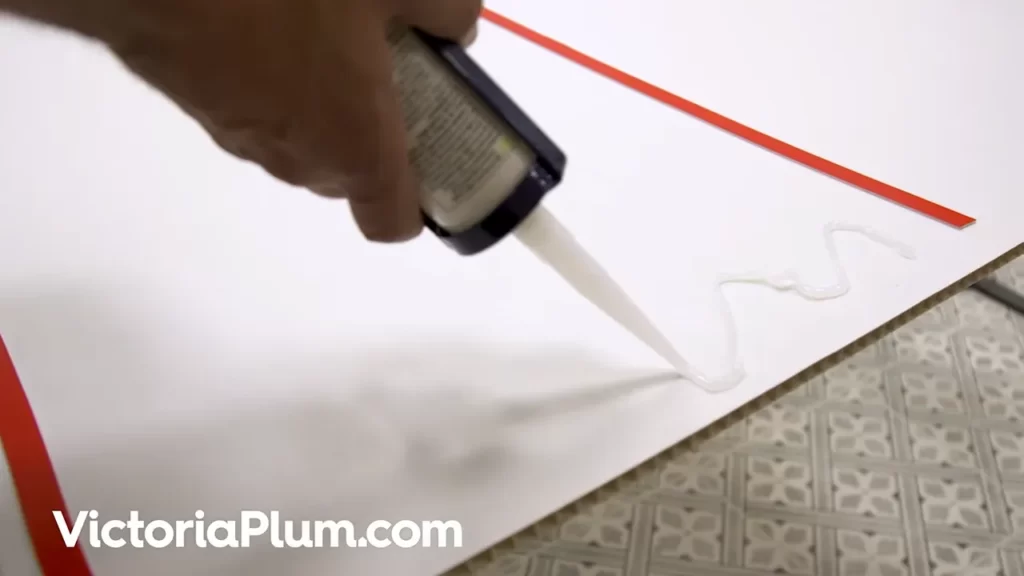
- Apply adhesive to the back of the shower panels, following the manufacturer’s instructions.
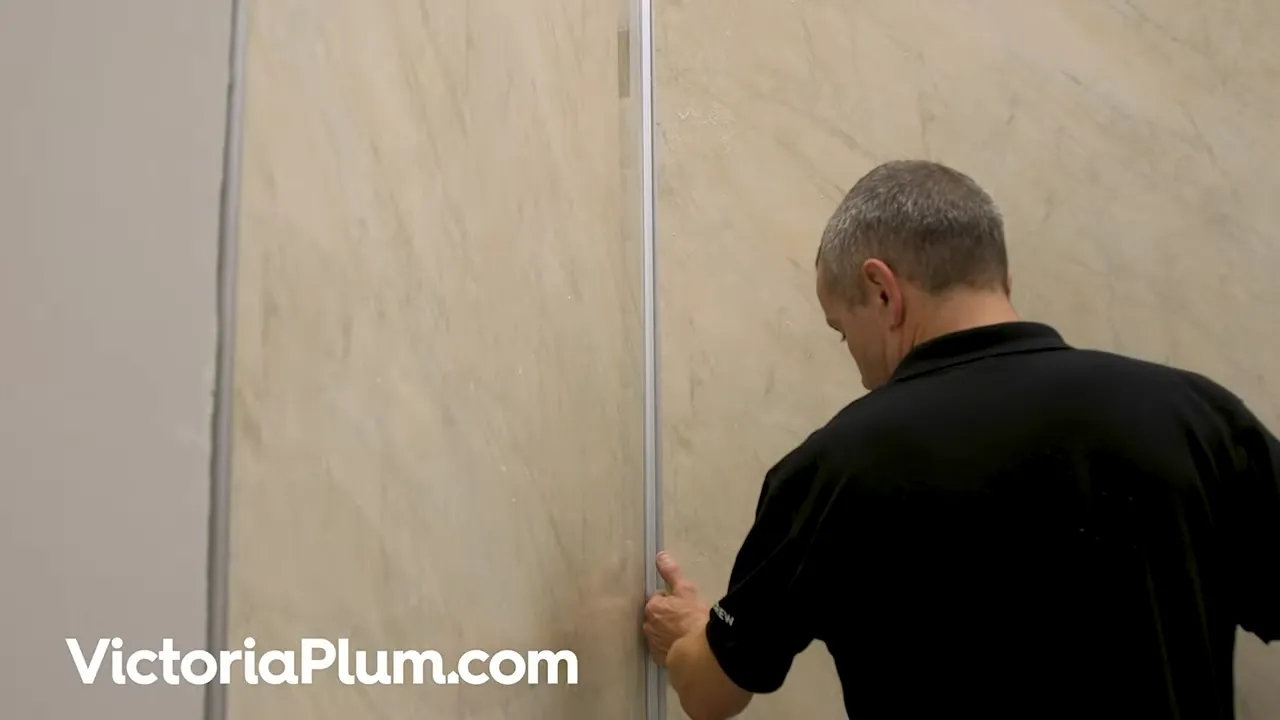
- Press the panels firmly onto the framework, starting from one corner and working your way across.
- Use a level to ensure that each panel is perfectly vertical and aligned with the others.
Sealing and finishing the installation
To complete the installation and ensure a watertight seal, follow these final steps:
- Apply sealant to any gaps between the panels and the framework, as well as the corners and edges.
- Smooth out the sealant using a caulk gun or your finger.
- Allow the sealant to dry according to the manufacturer’s instructions.
With these steps completed, you have successfully installed shower panel walls in your bathroom. Take a step back and admire your new and improved space!
Expert Tips For A Successful Installation
Expert Tips for a Successful Installation
If you are considering installing shower panel walls, proper installation is crucial to ensure a durable and visually appealing result. Here are some expert tips to guide you through the process:
Ensuring Proper Alignment and Levelness of the Panels
Before starting the installation, it is essential to check for proper alignment and levelness of the panels. This step is crucial to achieve a seamless and professional look. Here’s how you can ensure accurate alignment:
- Use a level to check that the first panel is plumb, both vertically and horizontally. Adjust if necessary.
- When installing subsequent panels, make sure they align seamlessly with the first panel. Use spacers or shims to maintain even spacing between panels.
- Regularly check the levelness of each panel as you progress to avoid any deviations.
- Remember to account for any slope or pitch in the shower area to ensure proper drainage.
Dealing with Corners and Edges Effectively
X
Xyou come across corners and edges during the installation process, it’s important to handle them effectively to maintain a polished finish. Follow these tips to tackle corners and edges:
- Measure and mark the desired height and width of each panel to fit the corner.
- Use a jigsaw or other suitable tool to carefully cut the panels to the correct size.
- Apply adhesive to the backside of the cut panels and press them firmly into place, ensuring they are level and align with the adjacent panels.
- Use silicone or caulk to seal the edges to prevent water seepage and ensure a watertight finish.
Handling Cutouts for Fixtures and Accessories
x
xDuring the installation of shower panel walls, you will likely encounter the need to create cutouts for fixtures and accessories. Here’s how to handle this step effectively:
- Measure the precise location and dimensions of the fixtures or accessories that require cutouts.
- Use a jigsaw or appropriate cutting tool to carefully cut out the necessary shape in the panel.
- Ensure the cutout fits the fixture or accessory snugly, leaving no gaps.
- Apply adhesive or silicone to secure the panel with the cutout in place.
Adhering to Manufacturer Instructions and Recommendations
x
xFinally, one of the most vital tips for a successful installation is to adhere to the manufacturer’s instructions and recommendations explicitly. These instructions may include specific adhesive types, curing times, and other crucial details for a proper installation.
By following the manufacturer’s guidelines, you can avoid potential issues and ensure optimal performance and longevity of your shower panel walls.
Remember, a successful installation is not only about achieving an aesthetically appealing result but also about creating a functional and durable shower space. By following these expert tips, you can install your shower panel walls with confidence, knowing you’ve taken the necessary steps for a successful outcome.
Common Challenges And Troubleshooting
Installing shower panel walls can be a great way to upgrade your bathroom and create a luxurious shower experience. However, like any home improvement project, there can be some common challenges and troubleshooting that you may face during the installation process. Addressing potential issues during installation, troubleshooting problems with panel fit or adhesion, and fixing leaks and ensuring waterproofing are important steps to ensure a successful installation. Let’s delve into these common challenges and their solutions:
Addressing potential issues during installation
During the installation of shower panel walls, there are a few potential issues that you may encounter. It’s important to address these issues promptly to ensure a smooth installation:
- Poor surface preparation: Before installing the shower panel walls, make sure the wall surface is clean, dry, and smooth. Remove any old adhesives, wallpaper, or loose paint to create a solid base for panel adhesion.
- Inaccurate measurements: Double-check your measurements before cutting the shower panels. Inaccurate measurements can lead to ill-fitting panels and result in a less than desirable finish.
- Uneven or out-of-plumb walls: If your shower walls are not perfectly plumb or level, it can make the installation challenging. You may need to use shims or adjust the panel cuts to ensure a snug fit.
Troubleshooting problems with panel fit or adhesion
Even with careful preparation, you may run into issues with panel fit or adhesion. Here are a few troubleshooting tips to help you overcome these problems:
- Ill-fitting panels: If you find that the shower panels do not fit correctly, carefully measure and trim them according to the wall’s dimensions. Use a jigsaw or circular saw with a fine-toothed blade for a precise cut.
- Adhesion failure: If the panels do not adhere properly to the wall, it could be due to inadequate surface preparation or the wrong adhesive. Ensure the wall is clean and dry, and use a high-quality waterproof adhesive recommended by the manufacturer.
- Uneven panel joints: If the panel joints are not aligned smoothly, you can use a silicone caulk to fill in the gaps. Apply the caulk in a steady motion and use a caulk smoothing tool to achieve a professional-looking finish.
Fixing leaks and ensuring waterproofing
One of the most crucial aspects of installing shower panel walls is to ensure water-tightness and prevent leaks. Here’s how you can fix leaks and achieve proper waterproofing:
- Inspect for leaks: After the installation, carefully inspect the panel seams, corners, and joints for any signs of leaks. Use a flashlight to check for water seepage and address any leaks immediately.
- Seal the seams: Apply a bead of silicone caulk along the panel seams to create a watertight seal. Smooth the caulk with a caulk smoothing tool to ensure a seamless finish.
- Test for waterproofing: Once the caulk has cured, perform a water test by running the shower at full pressure to check for any leaks. Observe the panel walls closely and address any leaks promptly.
By addressing these common challenges and troubleshooting any issues that arise during the installation process, you can ensure a successful installation and enjoy the benefits of your new shower panel walls. Remember to follow the manufacturer’s instructions and consult with a professional if needed.
Maintenance And Care For Shower Panel Walls
In order to keep your shower panel walls looking pristine and functioning properly for years to come, it is essential to provide regular maintenance and care. By following a few simple steps, you can easily clean and maintain the panels, prevent mold and mildew growth, and repair any minor damages or scratches that may occur over time.
Cleaning and maintaining the panels regularly
To ensure the longevity of your shower panel walls, regular cleaning is crucial. Here are some tips to keep them looking their best:
- Remove any soap scum: Soap scum can build up on the panels, making them appear dull and dirty. Regularly wipe them down with a mild soap and water solution to remove any residue.
- Avoid abrasive materials: When cleaning, be sure to use non-abrasive materials such as a soft cloth or sponge. Abrasive materials can scratch the surface of the panels and make them more susceptible to damage.
- Dry the panels: After cleaning, it is important to thoroughly dry the panels. Excess moisture can lead to mold and mildew growth, so use a clean, dry cloth to ensure they are completely dry.
- Apply a protective sealant: Consider applying a protective sealant to the panel walls. This will help repel water and prevent stains from forming. Be sure to follow the manufacturer’s instructions when applying the sealant.
- Regularly inspect for any damage: Take the time to inspect the panels for any signs of damage or wear. Catching minor issues early on can prevent them from becoming more significant problems.
Preventing mold and mildew growth
Mold and mildew thrive in moist environments, making your shower panel walls a prime breeding ground. To prevent their growth, follow these preventative measures:
- Keep the panels dry: After each use, wipe down the panels with a dry cloth to remove any moisture. Additionally, ensure proper ventilation in your bathroom to allow excess moisture to escape.
- Use a mildew-resistant cleaner: Regularly clean the panels with a mildew-resistant cleaner to prevent the growth of mold and mildew. This will help preserve the appearance and integrity of the panels.
- Monitor humidity levels: Use a hygrometer to monitor the humidity levels in your bathroom. Ideally, the humidity should be kept below 50% to discourage mold and mildew growth.
Repairing minor damages and scratches
Over time, your shower panel walls may develop minor damages or scratches. Here’s how you can repair them:
- Fill in scratches: For small scratches, use a filler specifically designed for your panel surface. Apply according to the product instructions and gently buff the area until the scratch is no longer visible.
- Fix minor damages: If a panel becomes cracked or damaged, use a repair kit that matches the material of your shower panels. Follow the kit’s instructions to restore the panel to its original condition.
- Seek professional help if needed: If the damage is extensive or you are unsure of how to proceed, it is best to seek professional assistance. They can assess the damage and provide the appropriate repairs.
By following these maintenance and care tips, your shower panel walls will remain in excellent condition, providing a stylish and functional addition to your bathroom for years to come.
Enhancing The Aesthetics Of Shower Panel Walls
When it comes to designing a stylish and visually appealing shower space, the walls serve as a blank canvas just waiting to be transformed. With the right design ideas, decorative elements, and complementary fixtures and accessories, you can elevate the aesthetics of your shower panel walls to create an inviting and luxurious space. In this article, we will explore some innovative ideas to inspire you in enhancing the beauty of your shower panel walls.
Innovative design ideas for a stylish shower space
To make your shower panel walls stand out, you can incorporate innovative design ideas that add a touch of elegance and sophistication to your bathroom. Here are a few design ideas to consider:
- Geometric patterns: Incorporate geometric patterns into your shower panel walls for a modern and trendy look. Whether you choose hexagonal tiles or a chevron pattern, geometric designs can instantly elevate the aesthetics of the space.
- Contrasting colors: Create a dramatic effect by using contrasting colors on your shower panel walls. Consider pairing light-colored tiles with a bold and vibrant accent color to make a statement.
- Textured finishes: Add depth and visual interest to your shower panel walls with textured finishes. Options such as stone or brick-effect tiles provide a luxurious and natural look, while maintaining functionality.
- Mosaic tiles: For a unique and eye-catching design, consider using mosaic tiles on your shower panel walls. The intricate patterns and variety of colors available with mosaic tiles allow you to create a personalized and artistic look.
Incorporating decorative elements and accents
Enhancing the aesthetics of your shower panel walls can be achieved by incorporating decorative elements and accents that add visual interest and personality to the space. Here are some ideas to consider:
| Decorative Elements: | Accents: |
| Planters with greenery or flowers | Artwork or framed photographs |
| Wall-mounted shelves for displaying decorative items | Decorative mirrors |
| Decorative tiles in strategic locations | Stylish shower curtains |
Choosing complementary fixtures and accessories
In addition to the shower panel walls, focusing on choosing complementary fixtures and accessories can further enhance the aesthetics of your shower space. Consider the following:
- Lighting: Install task lighting to highlight the design of your shower panel walls and create a soothing ambiance.
- Hardware: Choose fixtures, such as faucets, showerheads, and towel hooks, that complement the overall style and color scheme of your shower panel walls.
- Bath accessories: Select bath accessories, such as soap dispensers, toothbrush holders, and towel racks, that match the aesthetic of your shower panel walls.
- Storage solutions: Incorporate stylish storage solutions, such as built-in niches or floating shelves, to keep the shower area organized and clutter-free.
By incorporating these design ideas, decorative elements, and complementary fixtures and accessories, you can transform your shower panel walls into a visually stunning and inviting space that enhances the overall aesthetics of your bathroom.
Frequently Asked Questions
How Do You Attach Shower Panels To The Wall?
Attach shower panels to the wall by following these steps: 1. Measure and mark the desired height and position on the wall. 2. Use a stud finder to locate the wall studs. 3. Drill pilot holes into the studs at the marked locations.
4. Align the panels with the holes and secure them using screws or anchors. 5. Seal the edges and joints with silicone caulk for a watertight seal.
What Do You Put Behind Shower Wall Panels?
Shower wall panels are typically secured to a sturdy backing, such as drywall or cement board. The backing provides support and stability for the panels and ensures a smooth and long-lasting installation.
How Do You Prepare A Shower Wall For Panels?
To prepare a shower wall for panels, follow these steps: 1. Start by cleaning the wall thoroughly and removing any old caulk or adhesive. 2. Repair any holes or cracks with a suitable filler or patching compound. 3. Ensure the wall is smooth and even by sanding if necessary.
4. Apply a waterproofing membrane to protect the wall from moisture. 5. Finally, use a panel adhesive to securely attach the panels to the prepared wall.
What Kind Of Adhesive To Use On Shower Panels?
For shower panels, it is best to use an adhesive specifically designed for wet areas, like a waterproof construction adhesive or a silicone adhesive. These types of adhesives offer strong and durable bonds that can withstand the moisture and humidity in a shower environment.
Conclusion
Updating your bathroom with a shower panel walls can be a game-changer. By following these step-by-step instructions, you can easily install the shower panels and transform your bathroom into a modern oasis. Make sure to gather the necessary tools, measure accurately, and take your time during the installation process.
With a little patience and effort, you’ll have beautiful shower panel walls that will enhance the look and functionality of your bathroom. Start your bathroom renovation today and enjoy the benefits of a stylish and functional shower space.