To install a shower pan, first, remove the existing shower base and clean the area thoroughly. Place the new shower pan in position and secure it to the subfloor before sealing and connecting the drain.
Installing a shower pan requires careful preparation and precise execution. Follow the steps below to ensure a successful installation. Begin by removing the existing shower base and cleaning the area to create a clean slate. Next, position the new shower pan securely on the subfloor.
Once in place, fasten it securely to the subfloor to prevent any movement. Afterward, seal the edges of the shower pan to prevent leaks and connect the drain carefully. By following these steps, you can successfully install a shower pan for your bathroom renovation project.
Gathering The Necessary Tools And Materials*
Before starting the installation of a shower pan, it’s essential to gather all the tools and materials you’ll need. By having everything prepared in advance, you’ll save time and avoid interruptions during the process. By following this comprehensive list of tools and materials, you’ll be fully equipped and ready to proceed with confidence. So, let’s dive into what you’ll need:
List of tools
Here is a list of essential tools you’ll need to install a shower pan:
| Tools |
|---|
| Power drill |
| Tape measure |
| Pencil |
| Utility knife |
| Level |
| Chisel |
| Hammer |
| Screwdriver |
| Caulking gun |
Having these tools at your disposal will ensure a smooth and efficient installation process. Make sure they are all in good working condition before you begin.
List of materials
Aside from the necessary tools, there are specific materials you’ll need to complete the shower pan installation. These include:
- Prefabricated shower pan
- Shower pan liner
- PVC cement
- Screws
- Tiles or stone for the shower floor
- Grout
- Tile adhesive
- Waterproofing membrane
- Shims
- Plumbing putty
- Plumbing tape
These materials are essential for ensuring a reliable and long-lasting shower pan installation. Double-check your inventory to ensure you have everything needed before starting the project.
Once you have gathered all the necessary tools and materials, you are ready to move on to the next steps of the shower pan installation process.

Measuring And Marking The Shower Pan Area
Properly measuring and marking the shower pan area is a crucial step in ensuring a successful installation. Accuracy is key to ensure that the shower pan fits seamlessly into the designated space. In this section, we will guide you through the process of taking accurate measurements and marking the area for installation.
Taking accurate measurements
Before you begin the installation process, take precise measurements of the shower space. This will help you choose the right size shower pan and ensure a proper fit. Follow these steps to take accurate measurements:
- Clear out the shower area by removing any existing fixtures or obstructions.
- Using a measuring tape, measure the length, width, and depth of the shower space. Measure from wall to wall for the length and width, and from the floor to the height of the shower walls for the depth.
- Make note of any irregularities in the measurements, such as sloping floors or uneven walls. These factors will affect the installation process and may require additional adjustments during the installation.
- Double-check your measurements to ensure accuracy. Mistakes in measurement can lead to improper installation and costly rework.
Marking the area for installation
Once you have taken accurate measurements, it’s time to mark the area for the shower pan installation. This will serve as a guide during the installation process. Follow these steps to mark the area:
- Using a pencil or a marker, mark the floor of the shower space at the corners where the shower pan will be placed.
- Measure and mark the distance from the wall to the marked corners on all sides. This will help ensure that the shower pan is centered and aligned with the walls.
- If your shower area has uneven walls, use a level to determine the highest point along each wall. Mark this point on the wall to ensure that the shower pan is properly leveled during installation.
- For better visualization, consider placing painter’s tape along the marked lines. This will give you a clear outline of the shower pan area.
By taking accurate measurements and marking the shower pan area properly, you are setting a solid foundation for a successful installation. This ensures that the shower pan fits perfectly and reduces the chances of any complications during the installation process.
Assessing The Condition Of The Old Shower Pan
Inspecting for signs of damage or wear
Before installing a new shower pan, it is crucial to assess the condition of the old one. Inspecting for signs of damage or wear is the first step in this process. By thoroughly examining the shower pan, you can determine whether it needs to be replaced or if it can still be salvaged.
Here are some key points to consider when inspecting your old shower pan:
- Look for any visible cracks or chips on the surface of the pan. These can lead to leaks and water damage if left unchecked.
- Examine the corners and edges of the pan. Pay close attention to any signs of deterioration, such as crumbling or discoloration.
- Check for any soft spots or sponginess when you apply pressure to different areas of the pan. This could indicate water damage or rotting beneath the surface.
- Inspect the drain area for any signs of rust or corrosion. A damaged drain can cause water to seep into the subfloor, leading to more extensive problems.
- Take note of any foul odors or mold growth around the shower pan. These are clear indications of water leakage and should not be ignored.
Determining if a replacement is necessary
After assessing the condition of the old shower pan, the next step is to determine if a replacement is necessary. While repairs may be possible in some cases, it is essential to weigh the pros and cons of replacement versus repair.
Consider the following factors when deciding whether to replace the shower pan:
- The extent of the damage: If the shower pan has significant cracks, extensive rotting, or other severe issues, it may be more cost-effective and practical to replace it entirely.
- The age of the shower pan: Older shower pans are more prone to deterioration and may not be as reliable as newer models. If your pan is showing signs of wear and tear due to age, it is wise to opt for a replacement.
- Long-term cost considerations: While repairs might seem like a more economical choice in the short term, constant maintenance and potential water damage can quickly add up. Investing in a new shower pan can provide peace of mind and save you money in the long run.
Ultimately, the decision to replace the old shower pan depends on the severity of the damage, the longevity of the existing pan, and your budget. If you are unsure, consulting with a professional can help you make an informed decision.
Removing The Old Shower Pan
Disconnecting the drain
Before you can remove the old shower pan, you’ll need to disconnect the drain. This is a crucial step in the process, as it allows you to remove the pan without damaging the plumbing. To disconnect the drain, follow these steps:
- Locate the access panel to the shower drain. This is typically found on the bottom side of the shower pan or in the adjacent wall.
- Use a screwdriver or wrench to remove the screws or bolts securing the access panel. Set the screws or bolts aside as you will need them later.
- Once the access panel is removed, you should see the drain pipe and any connections. Use a wrench to loosen the connections and disconnect the drain pipe from the shower pan. Be sure to catch any water that may drain out by placing a bucket or towel beneath the pipe.
- Once the drain pipe is disconnected, use a wrench or pliers to remove the drain strainer from the shower pan. Set it aside, as you may need it for the new installation.
Removing the tile or flooring around the pan
Once the drain is disconnected, the next step is to remove the tile or flooring around the shower pan. This will allow you to access the edges of the pan and remove it more easily. Follow these steps:
- If the shower pan is tiled, use a grout saw or utility knife to carefully remove the grout between the tiles surrounding the pan.
- Once the grout is removed, use a pry bar or chisel to carefully remove the tiles around the edges of the pan. Start at one corner and work your way around, being careful not to damage the surrounding tiles or flooring.
- If the shower pan is installed under flooring, you may need to remove the flooring around the edges of the pan. Use a utility knife or flooring saw to carefully cut and remove the flooring, working your way around the pan.
- Once the tiles or flooring are removed, you should have access to the edges of the shower pan. This will allow you to proceed with removing the old pan.
Removing the old pan
With the drain disconnected and the surrounding tiles or flooring removed, you’re now ready to remove the old shower pan. Follow these steps:
- Inspect the shower pan for any screws or bolts securing it to the subfloor or walls. Use a screwdriver or wrench to remove these fasteners.
- Once any fasteners are removed, carefully lift and remove the old shower pan. It may be heavy, so be sure to have a helper if needed.
- Set the old shower pan aside, and clean the area where it was installed. Remove any remaining debris or adhesive to ensure a clean surface for the new pan installation.
- Dispose of the old shower pan properly, following your local waste disposal guidelines.
With the old shower pan removed, you’re now ready to install the new shower pan. Stay tuned for our next blog post on how to properly install a new shower pan!
Inspecting The Subfloor
The subfloor is the foundation of your shower, and it’s essential to inspect it before installing a shower pan to ensure a sturdy and leak-free base. Here are some crucial steps to follow when inspecting the subfloor before installing a shower pan.
Checking for any signs of damage or rot
Before proceeding with installing a shower pan, carefully examine the subfloor for any signs of damage or rot. Start by removing the existing flooring to gain access to the subfloor. Look for any soft spots, sagging, or discoloration, as these may indicate water damage or rotting wood. It’s important to address these issues before installing the shower pan to prevent further damage or leaks.
Repairing or replacing damaged areas
If you come across any damaged areas or signs of rot during your inspection, it’s crucial to repair or replace those sections of the subfloor before proceeding. Ignoring such issues can compromise the structural integrity of your shower and lead to more significant problems down the line. To repair small areas of damage, consider using a wood filler or epoxy resin to fill in any cracks or holes. However, if the damage is extensive or the subfloor is severely rotted, it’s best to replace the affected sections entirely.
When replacing damaged subfloor sections, ensure that the new plywood or OSB boards are of the same thickness as the existing subfloor. Additionally, make sure to use exterior-grade plywood or waterproofing membrane to protect the subfloor from moisture and potential water damage.
Once the repairs or replacements are complete, take the time to double-check that the subfloor is level and securely fastened to the floor joists. You can use a level and screws or nails to ensure stability and prevent squeaky floors.
Remember, a solid and properly inspected subfloor is crucial for the successful installation of a shower pan. By carefully examining for any signs of damage or rot and addressing these issues promptly, you can create a strong foundation for your shower that will provide years of reliable use.
Installing A Vapor Barrier
In this section, we will discuss the importance of a vapor barrier during the installation of a shower pan, as well as the step-by-step process of installing it on the subfloor. A vapor barrier is a crucial component of creating a watertight seal, preventing moisture from seeping into the subfloor and causing damage over time. By understanding its significance and following these installation guidelines, you can ensure a successful and long-lasting shower pan installation.
Understanding the Importance of a Vapor Barrier
Before delving into the installation process, it’s essential to grasp why a vapor barrier is necessary when installing a shower pan. Essentially, the vapor barrier acts as a protective layer that prevents moisture from penetrating the subfloor. Bathrooms are inherently humid environments, with water splashing, steam from hot showers, and occasional leaks. Without a vapor barrier, this moisture can seep into the subfloor, causing it to weaken, warp, or develop mold and mildew. By installing a vapor barrier, you are to protect your subfloor from these potential hazards, ultimately extending the lifespan of your shower pan.
Installing the Vapor Barrier on the Subfloor
Now that you understand the importance of a vapor barrier let’s move on to the step-by-step installation process on the subfloor:
- Clean the subfloor: Before installing the vapor barrier, it is vital to ensure that the subfloor is clean and free from any debris or unwanted materials. Use a broom or vacuum cleaner to remove any dust, dirt, or debris from the surface.
- Measure and cut the vapor barrier: Measure the dimensions of the subfloor and carefully cut the vapor barrier to fit the entire area. It’s crucial to have a precise fit to ensure complete coverage.
- Lay the vapor barrier: Starting from one corner of the subfloor, gently unroll the vapor barrier. Ensure that it is completely flat and extends to the edges of the subfloor. Overlapping the seams of the vapor barrier by at least 6 inches will provide additional protection against moisture.
- Secure the vapor barrier: Use a staple gun or adhesive to secure the vapor barrier to the subfloor. Place staples or apply adhesive along the edges and in the center, ensuring that the vapor barrier is firmly attached and will not move or shift during the installation process.
By following these steps, you have successfully installed the vapor barrier on the subfloor. Now, you are ready to proceed with the next steps of your shower pan installation, knowing that your subfloor is effectively protected against moisture.
Remember, a properly installed vapor barrier is crucial for maintaining the integrity and durability of your shower pan. Taking the time to install it correctly will save you from future headaches and costly repairs due to subfloor damage. Now that you have successfully installed the vapor barrier, you can confidently move forward with the rest of your shower pan installation process!
Understanding The Types Of Shower Pans
When it comes to installing a new shower, one of the most important components is the shower pan. A shower pan is the base of the shower that collects and drains water. It provides a sturdy foundation for the shower floor and ensures that water doesn’t leak out onto the surrounding floor. However, with so many different types of shower pans available on the market, it can be overwhelming to choose the right one for your needs.
Overview of Different Shower Pan Materials and Types
Shower pans can be made from various materials, each with its own advantages and considerations. Here’s an overview of the different types of shower pans you can choose from:
| Type | Material | Description |
|---|---|---|
| Fiberglass Shower Pan | Fiberglass reinforced plastic | Affordable, lightweight, and easy to install. Can be prone to cracking over time. |
| Acrylic Shower Pan | Acrylic | Durable, easy to clean, and resistant to stains and scratches. Available in various colors and sizes. |
| Cultured Marble Shower Pan | Cultured marble | Luxurious and elegant appearance. Resistant to mold and mildew. Requires professional installation. |
| Tiled Shower Pan | Mosaic tiles on a mortar bed | Highly customizable and provides a wide range of design options. Requires skilled installation. |
Choosing the Appropriate Shower Pan for Your Needs
When choosing a shower pan, it’s important to consider your specific needs and preferences. Here are a few factors to keep in mind:
- Your budget: Determine how much you are willing to spend on a shower pan.
- Style and design: Consider the overall aesthetic of your bathroom and choose a shower pan that complements it.
- Durability: Assess the longevity and durability of different materials to find a shower pan that will last.
- Maintenance: Consider the cleaning and maintenance requirements of each type of shower pan.
- DIY vs. professional installation: Evaluate your skills and time availability to decide whether you can install the shower pan yourself or if you need professional assistance.
By carefully considering these factors, you can choose the appropriate shower pan that meets your needs and preferences. Don’t forget to measure the dimensions of your shower space accurately to ensure a proper fit.
Now that you have a better understanding of the types of shower pans available, you can confidently proceed with your shower installation project. Keep these considerations in mind and enjoy a functional and stylish shower in your bathroom.
Installing The Shower Pan Liner
Installing the shower pan liner is an essential step in the process of building a shower. The shower pan liner serves as a waterproof barrier that prevents water from seeping into the subfloor and causing damage. By following the proper steps for installing the shower pan liner, you can ensure that your shower remains leak-free and durable for years to come.
Preparing the shower pan liner
Before installing the shower pan liner, you need to ensure that the shower pan area is properly prepared. Here’s what you need to do:
- Clean the shower pan area thoroughly to remove any debris or dirt.
- Inspect the subfloor to ensure it is structurally sound and free from any damage. If necessary, repair or replace any damaged sections.
- Apply a layer of mortar to the subfloor, creating a smooth and level surface for the shower pan liner to adhere to.
Placing the liner in the shower pan area
Once the shower pan area is prepared, it’s time to place the shower pan liner. Follow these steps:
- Measure the dimensions of your shower pan and cut the shower pan liner accordingly. Ensure that you leave an overhang of a few inches on each side.
- Carefully place the shower pan liner into the shower pan area, ensuring that it covers the entire surface and overlaps the edges.
- Smooth out any wrinkles or folds in the liner to ensure a proper fit.
Securing the liner properly
Securing the liner properly is crucial to prevent any water leakage. Follow these steps for a secure installation:
- Starting from one side, fold the shower pan liner over the shower curb.
- Nail or staple the folded section of the liner to the shower curb, ensuring a tight fit.
- Repeat the process on the opposite side, folding and securing the liner to the shower curb.
- Continue securing the liner along the remaining sides, overlapping the corners to create a watertight seal.
By following these steps and properly installing the shower pan liner, you can ensure a waterproof and durable shower base. Completing this crucial step will bring you one step closer to enjoying a functional and beautiful shower in your home.
Creating The Shower Pan Slope
Understanding the importance of proper drainage
One of the most crucial aspects of installing a shower pan is creating the right slope for proper drainage. Without a proper slope, water can accumulate in the shower and cause a host of issues such as leaks, mold growth, and damage to the surrounding walls and floors. Understanding the importance of proper drainage ensures a functional and long-lasting shower installation.
When it comes to creating the slope, there are two main methods you can choose from – using mortar or pre-sloped pans. Both approaches have their advantages and it’s important to select the one that best suits your needs and skill level.
Building the slope using mortar
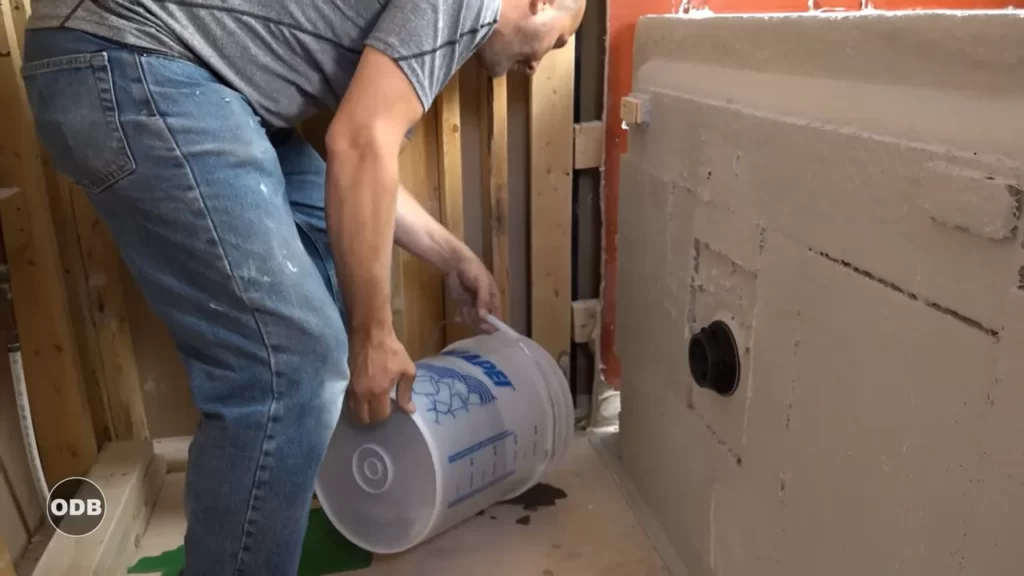
Building the slope using mortar is a traditional and widely used method. To begin, you’ll need to mix the mortar according to the manufacturer’s instructions. Once the mortar is ready, start applying it to the shower subfloor, gradually building the slope towards the drain. Use a trowel or screed to smooth out the mortar and ensure a consistent angle.
Next, it’s crucial to verify the slope is accurate. You can use a level or a slope measurement tool to check if the angle is correct. Adjust the mortar as needed to achieve the desired slope. Keep in mind that the slope should typically be around 1/4 inch per foot towards the drain.
Allow the mortar to cure for the recommended time before proceeding with the installation of the shower pan. This ensures that the mortar is fully set and provides a sturdy base for the pan. Remember to follow the manufacturer’s guidelines for curing time.
Using pre-sloped pans
If you’re looking for a quicker and easier option, using pre-sloped pans can be a convenient choice. Pre-sloped pans are designed with a slope built-in, eliminating the need to manually create the angle using mortar. These pans come in various sizes and are available in different materials such as acrylic, fiberglass, or composite.
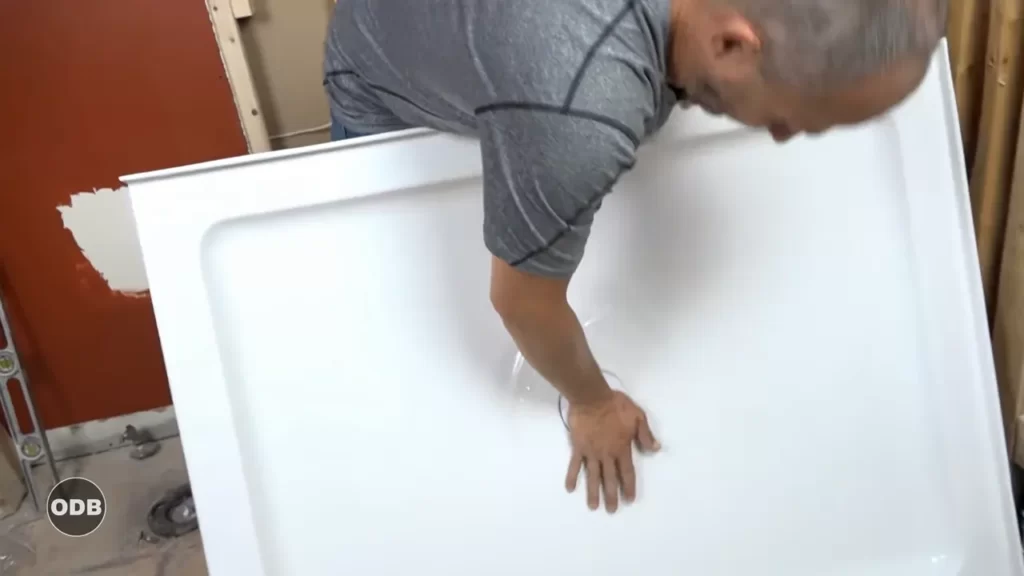
Before installing the pre-sloped pan, make sure to carefully read and follow the manufacturer’s instructions. This ensures a proper fit and proper waterproofing. The pan is placed directly on the subfloor, ensuring that the pre-built slope directs water towards the drain.
Once the pan is securely in place, it’s important to check for any gaps or uneven areas. Use a level to verify that the pan is flat and adjust if necessary. This step ensures that the shower pan is stable and properly aligned with the drain.
After confirming the proper fit and alignment, you can proceed with the remaining steps of the shower installation, such as waterproofing, tiling, and sealing. Follow the manufacturer’s guidelines and local building codes to ensure a complete and watertight shower installation.
Choosing between mortar and pre-sloped pans greatly depends on your preferences and skill level. While mortar offers more flexibility and control over the slope angle, pre-sloped pans provide convenience and ease of installation. Whichever method you choose, it’s essential to create a proper slope to ensure efficient drainage and prevent any potential water damage in your shower.
Installing The Shower Pan Drain
Installing the shower pan drain is a crucial step in the process of creating a durable and functional shower. The drain assembly ensures proper water drainage, preventing any potential leaks or water damage. In this section, we will guide you through the steps of connecting the drain assembly and ensuring a watertight seal, so you can enjoy a worry-free shower experience.
Connecting the drain assembly
The first step in installing the shower pan drain is to connect the drain assembly to the plumbing system. This involves attaching the drain body to the drainpipe.
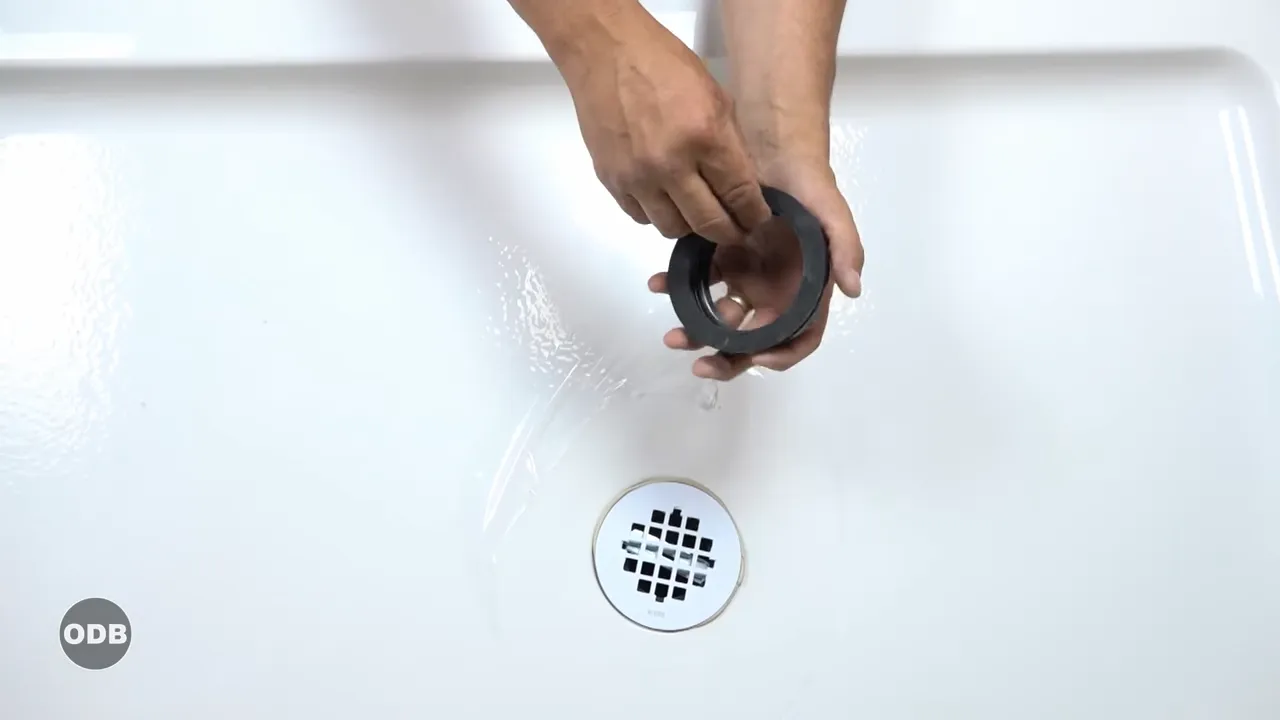
- Start by applying plumber’s putty or silicone caulk to the underside of the drain flange.
- Insert the drain flange into the drain hole on the shower pan, ensuring a snug fit.
- From underneath the shower pan, secure the drain body to the drainpipe using a wrench or pliers.
- Tighten the connections until they are secure, but be careful not to over-tighten and risk damaging the drain or shower pan.
- Once the drain assembly is connected, check for any signs of leakage by pouring water into the drain and observing if any water escapes.
Ensuring a watertight seal
A watertight seal is essential to prevent water from seeping through the shower pan and causing damage to the subfloor or surrounding areas. Here, we’ll outline steps to ensure a secure seal for your shower pan drain.
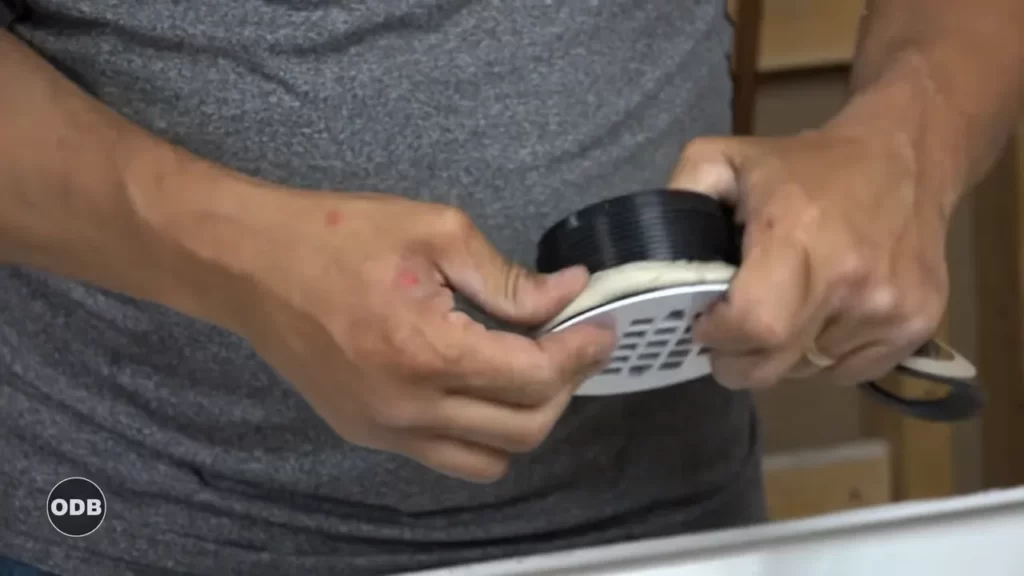
- Apply a generous amount of plumber’s putty or silicone caulk to the underside of the drain flange, creating a seal between the flange and the shower pan.
- Press the drain flange firmly against the shower pan to ensure a tight bond.
- Wipe away any excess putty or caulk using a clean cloth or sponge.
- Next, apply a bead of silicone caulk around the outer edge of the drain flange, where it meets the shower pan surface.
- Using a caulk gun, squeeze the caulk along the edge in a smooth and continuous motion.
- Smooth out the caulk with a caulk smoother or your finger to create an even seal.
- Allow the caulk to dry according to the manufacturer’s instructions before testing the shower pan for any leaks.
By following these steps to connect the drain assembly and ensure a watertight seal, you can have confidence in the durability and functionality of your newly installed shower pan. Remember to always double-check for any leaks or loose connections before proceeding with the rest of your shower installation.
Applying Waterproofing Membrane
Understanding the Purpose of Waterproofing
Before diving into the process of installing a shower pan, it’s important to understand why waterproofing is essential. The purpose of waterproofing is to create a barrier that prevents water from seeping into the underlying structure, thereby protecting the integrity of your shower walls and preventing potential water damage.
By applying a high-quality waterproofing membrane, you can effectively seal the shower pan and surrounding walls, ensuring that water remains where it belongs – inside the shower area. This not only extends the lifespan of your shower but also prevents costly repairs down the line.
Applying the Membrane to the Shower Pan and Surrounding Walls
To ensure a watertight shower installation, it’s crucial to follow the correct process for applying the waterproofing membrane to the shower pan and surrounding walls. Here’s a step-by-step guide:
- Prepare the surface: Make sure the shower pan and walls are clean, dry, and free from any debris or contaminants. This will help the membrane adhere better and provide a more effective seal.
- Choose the right waterproofing membrane: There are various types of waterproofing membranes available, such as liquid membranes, sheet membranes, and fabric membranes. Select one that suits the specific requirements of your shower installation.
- Apply the primer: Before applying the membrane, it’s essential to apply a primer to the shower pan and walls. This helps improve adhesion and enhances the effectiveness of the waterproofing system.
- Cut and shape the membrane: Measure the dimensions of your shower pan and walls, and cut the waterproofing membrane accordingly. Ensure that the membrane extends slightly above the shower curb to create a proper seal.
- Apply the membrane: Start by applying the membrane to the shower pan, using a trowel or brush to spread it evenly. Work your way up the walls, making sure to overlap the membrane and press it firmly into place. Pay extra attention to corners and seams, as these areas are prone to leakage.
- Allow for drying and curing: Allow the waterproofing membrane to dry and cure as per the manufacturer’s instructions. This typically takes a few hours or overnight, depending on the product used.
Remember, proper installation of the waterproofing membrane is essential for the long-term durability and reliability of your shower. It’s always a good idea to consult the manufacturer’s guidelines and seek professional advice if needed. By taking the time to apply the waterproofing membrane correctly, you can enjoy a worry-free shower experience without the fear of water damage.
Sealing The Seams And Corners
Sealing the seams and corners
When it comes to installing a shower pan, sealing the seams and corners is crucial to ensure a watertight and durable result. Without proper sealing, water can seep through the gaps and cause damage to the surrounding walls and floors.
Ensuring a waterproof barrier
To create a waterproof barrier, you will need to apply sealant and use waterproofing tape on the seams and corners of the shower pan. Follow these steps to ensure a proper seal:
- Clean the surfaces: Before applying sealant, make sure the surfaces are clean and free from any debris or dust. Use a mild cleaner and a scrub brush to clean the seams and corners thoroughly.
- Apply sealant: Using a caulking gun, apply a generous amount of waterproof sealant along the seams and corners of the shower pan. Make sure to fill any gaps or cracks completely.
- Smooth the sealant: After applying the sealant, use a putty knife or your finger to smooth it out, ensuring an even and seamless finish. This step helps to improve the adhesion and prevent water from seeping through.
- Use waterproofing tape: To further enhance the waterproofing, apply waterproofing tape over the sealant. This self-adhesive tape acts as an extra layer of protection and reinforcement. Use your finger or a roller to smooth out any air bubbles and ensure proper adhesion.
By following these steps and ensuring a waterproof barrier, you can prevent any water leakage and maintain the integrity of your shower pan. Remember to allow sufficient drying time for the sealant and waterproofing tape before using the shower.
Conducting A Water Test
Before completing the installation of a shower pan, it is crucial to conduct a water test to identify any leaks or drainage issues. This step ensures that the shower pan is properly sealed and functioning correctly. It is advisable to follow these guidelines to perform the water test effectively.
Checking for Any Leaks or Drainage Issues
To begin, it is essential to check for any leaks or drainage issues in the shower pan. This can be done by filling the shower base with water to a reasonable level, making sure not to overflow. It is recommended to use a hose or a container to pour the water. Allow the water to stay for about 10 to 15 minutes, **ensuring** the shower pan is completely filled.
Next, observe the shower pan closely for any signs of leakage. Pay attention to areas where the pan meets the walls and the drain opening. Leakage might manifest as water seeping through gaps or pooling in specific spots. If leakage is detected, it is important to identify the source and address it accordingly.
Making Necessary Adjustments and Repairs
If any leaks or drainage issues are discovered during the water test, it is crucial to make the necessary adjustments and repairs. **To do this**, carefully inspect the areas where the leaks are occurring and determine the cause.
If the leaks are happening at the joints where the pan meets the walls, it might be necessary to apply a waterproof sealant or caulk. Ensure that **you select** a high-quality sealant suitable for use in wet environments. Apply the sealant along the joints and let it cure as per the manufacturer’s guidelines.
In the case of leaks or drainage issues near the drain opening, it might be necessary to adjust the drain connection. This can be done by loosening the drain and repositioning it, ensuring a proper fit. It is advisable to seek professional assistance if you are unsure about making these adjustments yourself.
After addressing the leaks and making necessary repairs, it is crucial to repeat the water test to ensure that the issues have been successfully resolved. **Conduct** the test by filling the shower base with water again and observing for any signs of leakage. **If** no leaks are detected and the water drains properly, it indicates a successful installation of the shower pan.
By conducting a thorough water test, you can identify and address any leaks or drainage issues ensuring that your shower pan installation is sound and reliable.
Tiling The Shower Pan Area
Preparing the surface for tiling:
Now that you have successfully installed the shower pan, it’s time to move on to the next crucial step: tiling the shower pan area. Before you begin, it’s important to prepare the surface properly to ensure a smooth and long-lasting tile installation.
1. Clean the shower pan: Start by thoroughly cleaning the shower pan to remove any dust, dirt, or debris that may interfere with the tile adhesive. Use a mild detergent and warm water to wash the surface, and make sure to rinse it thoroughly afterwards. Let it dry completely before moving on to the next step.
2. Check for any imperfections: Inspect the shower pan for any cracks, chips, or uneven surfaces. These imperfections can affect the adhesion of the tiles and jeopardize the overall integrity of your installation. If you notice any issues, now is the time to address them. Fill in any cracks or holes with an appropriate patching compound and allow it to dry completely before proceeding.
3. Sand the surface: Use sandpaper to roughen up the surface of the shower pan slightly. This step helps create a better bond between the tile adhesive and the pan. Be sure to wear protective gloves and a mask to avoid inhaling any dust particles while sanding. Once you’re done, wipe away any dust residue with a clean, damp cloth.
4. Apply a waterproofing membrane: To prevent moisture from penetrating through the shower pan and causing damage, it’s crucial to apply a waterproofing membrane. This protective layer acts as a barrier and ensures that your tiled shower pan remains leak-free. Follow the manufacturer’s instructions carefully to apply the membrane evenly and allow it to dry completely before proceeding.
Applying the tile and grout:
You’re now ready to apply the tile and grout to your shower pan. Here’s how to do it properly:
1. Plan the layout: Before you start laying the tiles, take some time to plan the layout. Consider factors such as the size and shape of your tiles, any patterns or designs you want to create, and how the tiles will align with the rest of the bathroom. This step will help you determine where to begin and ensure a visually appealing result.
2. Apply the tile adhesive: Using a notched trowel, spread the tile adhesive evenly on the surface of the shower pan. Work in small areas to ensure that the adhesive remains workable while you lay the tiles. Press each tile firmly into the adhesive, making sure they are level and evenly spaced. Use tile spacers if necessary to maintain consistent gaps between the tiles.
3. Grouting the tiles: Once the tiles are firmly in place, it’s time to grout the gaps between them. Prepare the grout according to the manufacturer’s instructions, and then use a grout float to spread it over the tiled surface, working at a 45-degree angle. Make sure to fill all the gaps completely and remove any excess grout with a damp sponge. Allow the grout to dry for the recommended time.
4. Seal the grout: To protect the grout from moisture and stains, it’s important to apply a grout sealer. This step will help prolong the lifespan of your shower pan and keep it looking clean and fresh. Follow the manufacturer’s instructions on how to apply the sealer, and make sure to allow it to dry completely before using the shower.
Congratulations! You have successfully tiled your shower pan, and now it’s time to sit back and admire your hard work. With proper care and maintenance, your beautifully tiled shower pan will provide a functional and visually pleasing addition to your bathroom for years to come.
Sealing The Tiles And Completing The Installation
Applying a tile sealer for added protection
Once the shower pan is properly installed and the tile work is complete, it’s important to take the necessary steps to seal the tiles. Applying a tile sealer not only enhances the appearance of the tiles but also provides an additional layer of protection against moisture, stains, and grime.
Before starting the sealing process, make sure the tiles are clean and free from any dust or debris. Use a mild cleaner or warm water to remove any dirt or grime. Allow the tiles to dry completely before proceeding with the application of the sealer.
There are different types of tile sealers available in the market, including water-based sealers and solvent-based sealers. Consult the manufacturer’s instructions for the specific type of sealer you have chosen and follow them carefully to ensure proper application.
To apply the sealer, you can use a brush, roller, or sprayer. Start by evenly applying the sealer in a thin coat over the entire surface of the tiles. Make sure to cover the grout lines as well. Allow the sealer to penetrate the tiles for the recommended time mentioned by the manufacturer.
After the recommended time has passed, use a clean cloth or sponge to wipe off any excess sealer. Take care not to leave any streaks or smudges on the tiles. Allow the sealer to dry completely, which usually takes a few hours.
It’s important to note that sealing the tiles is not a one-time process. Depending on the type of sealer used, it may need to be reapplied periodically to maintain its effectiveness. Consult the manufacturer’s instructions or a professional for guidance on how often to reseal the tiles.
Finalizing the installation with trim and finishing touches
Once the tiles are sealed and dry, it’s time to put the finishing touches on the shower pan installation. This includes adding trim pieces to cover any exposed edges and creating a clean, polished look.
There are various types of trim pieces available, such as bullnose tiles, edge trims, and decorative borders. Choose the trim that complements the overall design and style of your shower. Measure and cut the trim pieces to fit the specific dimensions of your shower pan.
Using a suitable adhesive or thinset mortar, apply the trim pieces along the edges of the tiles, ensuring a snug and secure fit. Take care to align the trim pieces properly to maintain a consistent and seamless appearance.
After the trim pieces are securely in place, inspect the overall installation for any gaps or imperfections. Use a grout float to apply grout along the edges of the tiles, filling in any gaps or joints. Wipe off any excess grout using a damp sponge, taking care not to disturb the surrounding tiles.
Allow the grout to dry for the recommended time mentioned by the manufacturer. Once dry, use a grout sealer to protect the grout lines from staining and discoloration. Apply the sealer in a thin and even coat, following the manufacturer’s instructions.
Finally, give the entire shower pan a thorough cleaning. Remove any debris or residue using a non-abrasive cleaner and a soft cloth. Take a step back and admire your completed shower pan installation, knowing that it’s not only visually appealing but also properly sealed and protected against moisture.
Frequently Asked Questions
Do You Need To Put Anything Under A Shower Pan?
Yes, it is necessary to put something under a shower pan. This helps to provide support, prevent leaks, and create a stable foundation for the shower. It is recommended to use a mortar bed or a waterproof underlayment for this purpose.
What Is The Proper Way To Install A Shower Pan?
To properly install a shower pan: 1. Begin by ensuring that the subfloor is level and clean. 2. Apply a layer of waterproof membrane to the subfloor. 3. Position the shower pan and secure it using appropriate fasteners. 4. Connect the drain properly to prevent leaks.
5. Test the pan for any leaks before proceeding with further installation.
Do You Install Shower Pan Before Drywall?
Yes, the shower pan is typically installed before the drywall. It provides a waterproof base for the shower and is crucial for preventing water damage.
Does A Shower Pan Go Under Tile?
Yes, a shower pan goes under tile. It acts as a waterproof barrier to prevent water from leaking into the underlying floor. This ensures a sturdy and durable base for your tile installation, protecting the integrity of your bathroom.
Conclusion
Installing a shower pan may seem like a daunting task, but with the right guidance, it can be a smooth and successful process. By following the step-by-step instructions provided in this blog post, you can confidently tackle the installation yourself.
Remember to thoroughly prepare the area, use quality materials, and follow industry best practices. With the right tools and careful execution, you can achieve a professional-looking shower pan that will last for years to come. So, don’t hesitate to give it a try and enjoy a beautifully installed shower pan in your bathroom!