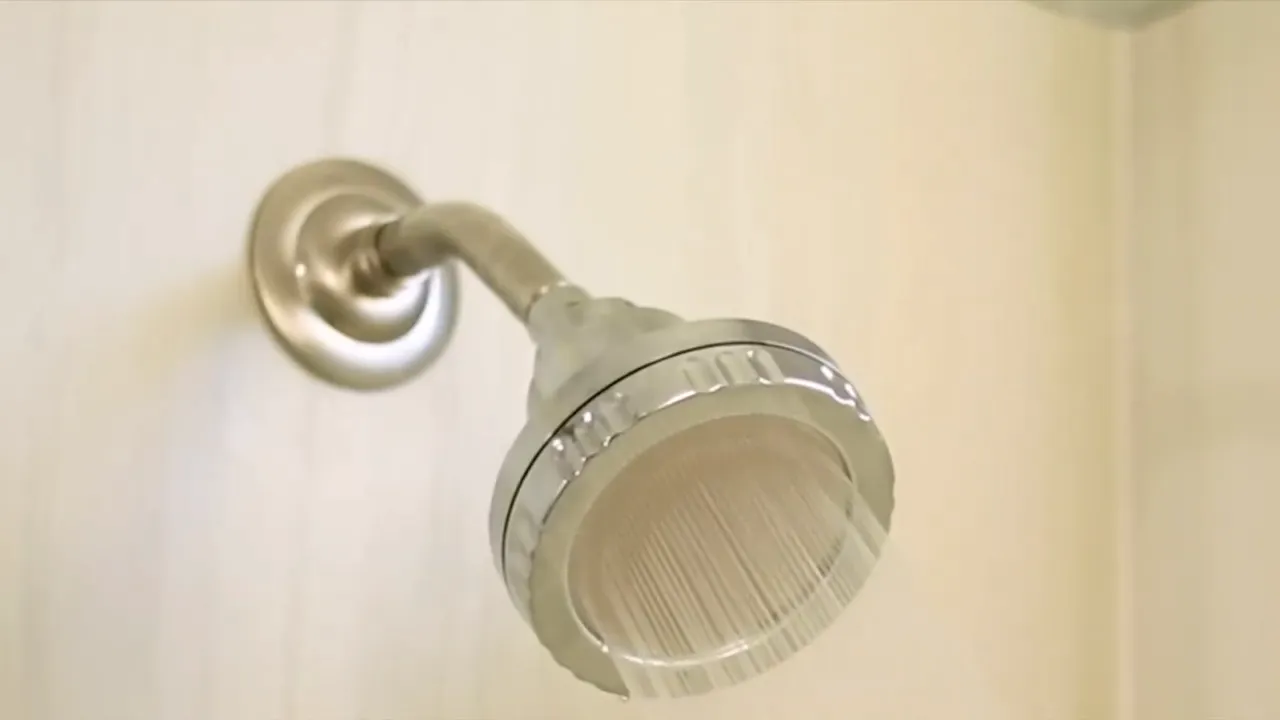
To install a shower head in the wall, follow these steps: Locate the stud behind the shower wall, mark the desired location, drill a hole, attach a shower arm and flange, wrap plumber’s tape, and connect the shower head. Are you tired of your old shower head and want to upgrade to a more convenient and stylish option?
Installing a shower head in the wall can be a great solution. Whether you need to save space or simply want a sleeker look for your bathroom, this installation method offers several benefits. In this guide, we will take you through the process of installing a shower head in the wall, step by step.
By following these instructions, you will be able to enjoy a new shower experience in no time. So, let’s get started and transform your shower into a luxurious oasis.
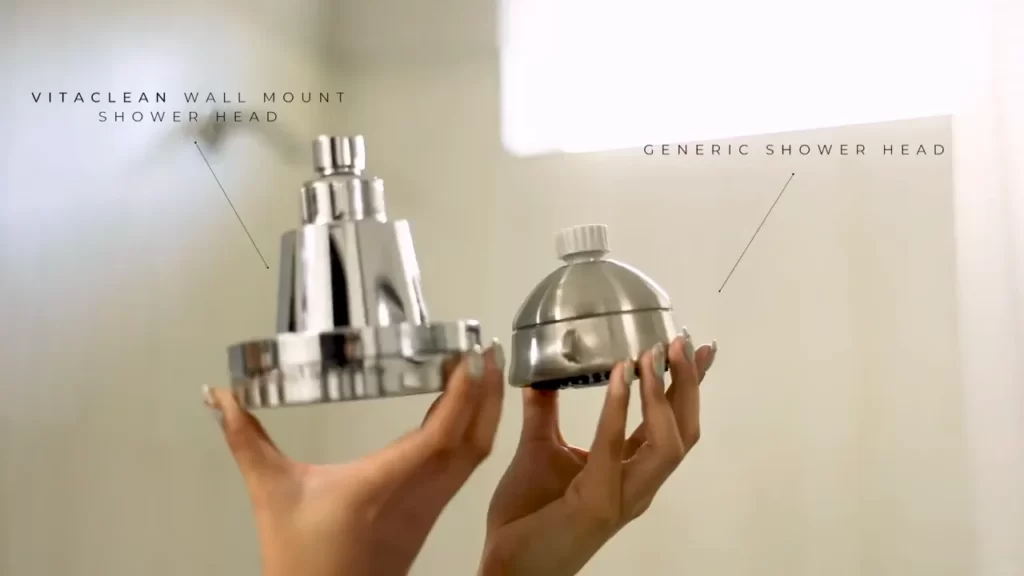
Benefits Of An In-Wall Shower Head
Installing a shower head in the wall can have numerous advantages, enhancing not only the overall aesthetics of your bathroom but also improving the functionality and maintenance. In this section, we will delve into the benefits of an in-wall shower head and why it might be the perfect choice for your bathroom upgrade.
Enhanced aesthetics
An in-wall shower head can instantly elevate the visual appeal of your bathroom. By eliminating the traditional shower arm that protrudes from the wall, your shower area will have a sleek and uncluttered look. This clean and modern design can give your bathroom a more polished and sophisticated appearance, making it a focal point that leaves a lasting impression on anyone who enters the space.
Increased space in the shower
One of the major advantages of installing a shower head in the wall is the increased space it provides within the shower area. With no shower arm to contend with, you’ll have more freedom of movement and a more spacious shower experience. This is especially beneficial if you have a smaller bathroom or a compact shower stall, as it maximizes the available space and creates a more open and inviting atmosphere.
Improved functionality
An in-wall shower head offers improved functionality, allowing you to customize your shower experience to suit your preferences. With various adjustments and settings available, such as different spray patterns and water pressure options, you can create a personalized and luxurious showering experience. Additionally, some in-wall shower heads feature additional features like rainfall or massage functions, further enhancing the overall comfort and enjoyment of your showers.
Easy cleaning and maintenance
Maintaining and cleaning a shower head installed in the wall is a breeze compared to traditional shower heads. With no exposed components or intricate joints, an in-wall shower head eliminates the need for frequent scrubbing and descaling. The smooth and seamless design makes it easy to wipe away any residue or mineral buildup, ensuring your shower head remains clean and functioning optimally for a longer period. This effortless cleaning and maintenance routine not only saves you time and effort but also ensures a hygienic and refreshing shower experience every time.
Overall, the benefits of installing a shower head in the wall are undeniable. From the improved aesthetics and increased space in the shower to the enhanced functionality and easy cleaning, it’s a worthwhile investment that can transform your bathroom into a luxurious retreat.
Gather The Necessary Tools And Materials
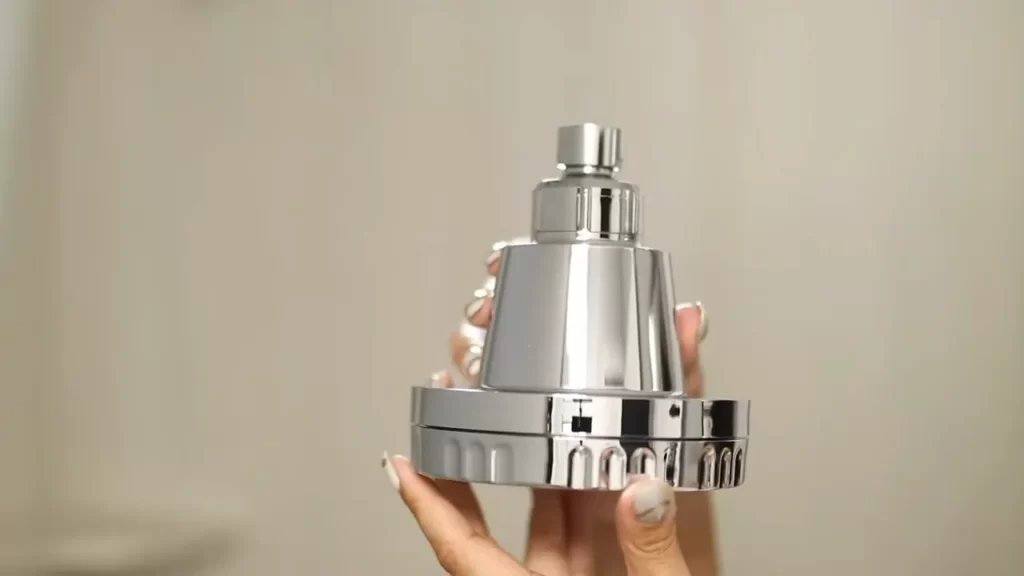
Shower head
Shower arm
Wall-mounted shower head valve
Teflon tape
Adjustable wrench
Screwdriver
Plumber’s putty
Pipe cutter or hacksaw
Before you begin the process of installing a shower head in the wall, it is important to gather all the necessary tools and materials. Having everything at hand will make the installation process much smoother and more efficient. Below, we have listed the tools and materials that you will need to complete the installation:
| Tools | Materials |
|
|
Gathering these tools and materials before starting the installation will save you time and ensure that you have everything you need to complete the project. This will minimize any potential interruptions or delays as you won’t have to search for missing items midway through the installation process.
Remember, proper installation is crucial for the performance and longevity of your shower head. So, take your time to gather all the necessary tools and materials listed above before proceeding to the next steps.
Choose The Ideal Location For Installation
Installing a shower head in the wall can provide a sleek and modern look to your bathroom. Not only does it save space, but it also ensures a luxurious showering experience. However, before diving into the installation process, it’s essential to choose the ideal location. This step is crucial as it determines the convenience and functionality of your new shower head. In this section, we’ll explore three key factors to consider when choosing the perfect location for your shower head.
Assessing the Water Supply
When it comes to deciding the location for installing a shower head in the wall, one of the first things to consider is the water supply. You need to identify the proximity of the water pipes to the desired installation location. Trust us, you don’t want to face any plumbing challenges later on.
If possible, examine the existing water supply lines in your bathroom and determine the closest pipes to the intended installation area. This will simplify the installation process and reduce the need for extensive modifications to your plumbing system. Remember to take accurate measurements and make sure there is enough space around the water supply lines for easy connection to the shower head later.
Considering the Height and Angle
The height and angle at which your shower head is installed greatly impact the overall showering experience. To make sure you find the perfect balance, take a moment to consider your specific needs and preferences. Think about the height of the people using the shower the most, as well as any potential restrictions such as a shower bench or other fixtures in the shower area.
Once you have determined the optimal height, you need to ensure the shower head is angled correctly. The angle should allow for sufficient water flow and avoid any water accumulation or splashing in the shower area. Consider installing the shower head at a slight angle downward to prevent water from spraying outside the designated shower space.
Ensuring Proper Clearance
Proper clearance is another vital aspect to keep in mind when choosing the ideal location for your new shower head. You want to ensure there is enough space between the shower head and any surrounding walls, furniture, or fixtures. This is important not only for aesthetic purposes but also for the functionality and convenience of using the shower.
When determining the clearance, take into account factors such as the size of the shower head, the direction of the water flow, and any potential obstacles that may hinder your movement in the shower. Providing ample clearance guarantees a comfortable and enjoyable shower experience without any unnecessary limitations.
By taking the time to assess the water supply, considering the height and angle, and ensuring proper clearance, you can choose the ideal location for installing your shower head in the wall. Keep these factors in mind to ensure an effective installation process and enjoy a satisfying shower experience for years to come.
Shut Off The Water Supply
Before you start installing a shower head in the wall, it is essential to shut off the water supply. This step ensures that you can work safely and without any potential water damage. To get started with this process, you need to follow two crucial steps:
1. Locate the home’s main water shut-off valve
The first step is to locate the main water shut-off valve in your home. The location of this valve may vary depending on different households. Typically, you can find it in the basement, utility room, or near the water meter. It’s a good idea to familiarize yourself with its location beforehand so that you can shut off the water quickly if needed. If you’re not sure where it is, you can refer to your home’s blueprint or contact a professional plumber for assistance.
2. Turn off the water supply to the bathroom
Once you have located the main water shut-off valve, you need to turn off the water supply to the bathroom. This step ensures that water won’t flow while you install the shower head. To do this, simply turn the valve clockwise until it is fully closed. Remember, the valve may be in a horizontal or vertical position, so ensure you turn it in the correct direction based on its design. If there are multiple bathrooms in your home, make sure to turn off the water supply specifically to the bathroom where you’re installing the shower head.
By shutting off the water supply before installing a shower head in the wall, you can proceed with the installation process confidently and avoid any unnecessary water damage. Make sure to follow the next steps carefully to ensure a successful installation.
Remove The Existing Shower Head And Arm
Gently unscrew the shower head from the shower arm
When it comes to installing a shower head in the wall, the first step is to remove the existing shower head and arm. This process requires a few simple tools and can be done in just a few minutes. Follow the steps below to remove the shower head and arm with ease:
- Gently unscrew the shower head from the shower arm. Start by gripping the shower head firmly with one hand and using your other hand to turn it counterclockwise. Apply gentle pressure to loosen the shower head until you can unscrew it completely. Be cautious not to damage the shower arm during this process.
Use an adjustable wrench to disconnect the shower arm from the wall
Once you have removed the shower head, it’s time to disconnect the shower arm from the wall. An adjustable wrench is the ideal tool for this task. Here’s how to do it:
- Locate the shower arm where it connects to the wall. This is usually a threaded connection.
- Place the adjustable wrench on the flat sides of the shower arm.
- Turn the wrench counterclockwise to loosen the shower arm from the wall.
- Continue to turn the wrench until the shower arm is completely disconnected from the wall.
By following these simple steps, you can easily remove the existing shower head and arm in preparation for installing a new shower head in the wall. Remember to use caution and take your time to ensure a successful removal process without causing any damage.
Prepare The Wall And Apply Teflon Tape
Properly installing a shower head in a wall ensures a seamless and functional experience. One crucial step in this process is preparing the wall and applying Teflon tape to create a watertight seal. By following these steps, you’ll have a sturdy foundation and a leak-free shower head installation.
Clean the area where the new shower head will be installed
Before starting the installation process, it’s essential to clean the area where your new shower head will be placed. Use a mild detergent or bathroom cleaner to remove any dirt, grime, or remnants of the previous shower head. Ensure that the surface is dry before proceeding to the next step.
Wrap Teflon tape around the threaded end of the shower arm
Applying Teflon tape is crucial for creating a secure and watertight connection between the shower arm and the shower head. Teflon tape, which is also known as plumber’s tape, acts as a sealant by preventing water leaks. Follow these steps to wrap Teflon tape correctly:
- Take the Teflon tape roll and find the starting point at the threaded end of the shower arm.
- Hold the tape firmly against the threads and begin wrapping it clockwise around the shower arm. Ensure that each wrap slightly overlaps the previous one.
- Continue wrapping the Teflon tape until you reach the end of the threads. You should wrap the tape at least three to four times to ensure a tight seal.
- Once you reach the end, tear the tape from the roll and press it against the shower arm to secure it in place.
Remember, it’s important not to wrap the Teflon tape too loosely or too tightly. The tape should be snug enough to create a seal but not so tight that it causes thread damage or leaks. With the Teflon tape in place, you can now move on to the next steps of installing your shower head.</p
Install The Wall-Mounted Shower Head Valve
Installing a wall-mounted shower head valve is an essential step in creating a stylish and functional shower space in your bathroom. This valve connects the shower head to the plumbing system behind the wall, providing a secure and seamless installation. To ensure a successful installation, follow the step-by-step instructions below and learn how to insert the wall-mounted shower head valve into the wall and tighten it securely using an adjustable wrench.
Insert the wall-mounted shower head valve into the wall
To begin the installation process, locate the area where you intend to install the wall-mounted shower head valve. Make sure to choose a spot that is easily accessible and at a convenient height for showering. Using a pencil or marker, mark the desired location on the wall.
Next, carefully measure and cut a hole in the marked area using a drywall saw or a hole saw, making sure to follow the manufacturer’s guidelines for the size of the opening. Take caution not to cut any existing plumbing or electrical lines behind the wall.
Once the hole has been cut, take the wall-mounted shower head valve and insert it into the opening. Make sure the valve is properly aligned and centered within the hole. Use a level to ensure it is perfectly vertical.
Tighten it securely using an adjustable wrench
With the wall-mounted shower head valve in place, it’s time to secure it tightly using an adjustable wrench. This will ensure a leak-free connection between the valve and the plumbing system.
First, wrap the threaded portion of the valve with plumber’s tape. This will provide an additional layer of protection against leaks. Then, carefully insert the wrench onto the valve’s fitting and tighten it in a clockwise motion.
Be sure not to overtighten, as this can damage the valve or cause leaks. Use firm but gentle pressure to achieve a secure fit. Check for any signs of leakage around the valve and make adjustments if necessary.
Once properly tightened, your wall-mounted shower head valve is ready to connect to the shower head. Follow the manufacturer’s instructions for attaching the shower head to the valve and enjoy your newly installed shower with ease and confidence.
Summary:
By following these simple steps, you can easily install a wall-mounted shower head valve in your bathroom. Remember to insert the valve into the wall, align it properly and tighten it securely using an adjustable wrench. With the valve in place, you can now proceed to connect the shower head and create a beautiful and functional shower space. Enjoy the convenience and comfort of a wall-mounted shower head and embrace the transformative power of a well-designed bathroom.
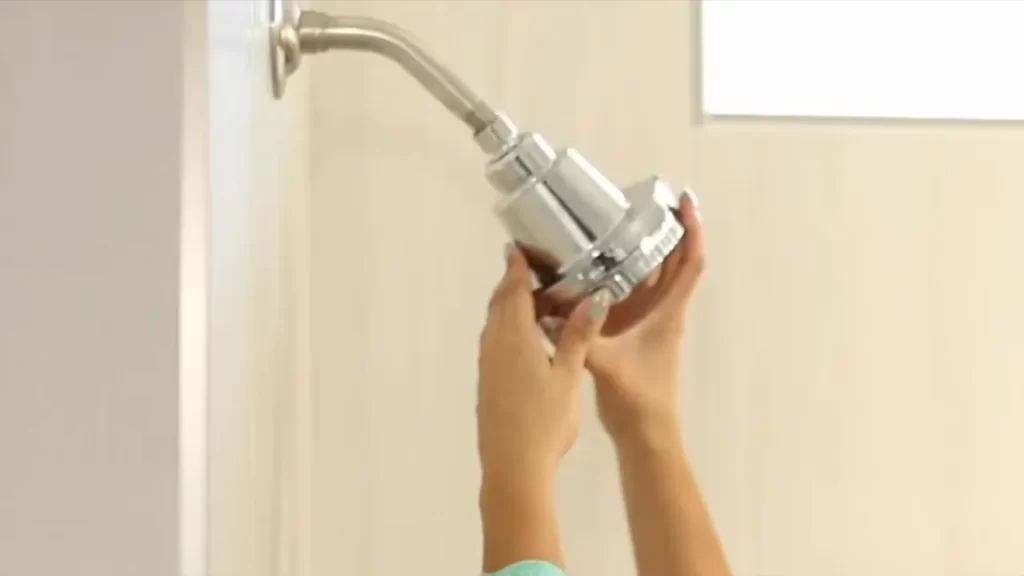
Attach The New Shower Arm And Shower Head
After successfully removing the old shower arm and shower head, it’s time to install the new ones. By following these simple steps, you can have a refreshed and functional shower in no time.
Apply plumber’s putty to the threaded end of the new shower arm
To ensure a watertight seal, it’s important to apply plumber’s putty to the threaded end of the new shower arm. Plumber’s putty is a versatile, waterproof material that helps prevent leaks and provides added durability. Take a small amount of putty and roll it between your hands to create a thin, uniform rope.
Once you have your putty ready, carefully apply it to the threaded end of the shower arm. Make sure to cover the entire threaded surface evenly, leaving no gaps or excess putty. This step creates a reliable seal that prevents any water from leaking through the connection.
Screw the arm into the wall-mounted shower head valve
Once the plumber’s putty is applied, position the new shower arm at the wall-mounted shower head valve. Ensure that the threading on the arm aligns with the valve, creating a smooth connection. With gentle pressure, start screwing the arm into the valve clockwise, using your hand.
Continue tightening the arm until it is securely attached to the valve. It’s important not to overtighten, as this may lead to damage or leaks. A firm and snug connection is sufficient to ensure a stable and functional shower arm.
Attach the shower head to the end of the shower arm
With the shower arm securely in place, it’s time to attach the shower head. Begin by removing any protective covers or packaging from the shower head, ensuring a clean and ready-to-use unit.
Next, align the shower head with the threaded end of the shower arm, making sure the grooves match for a proper fit. With a clockwise motion, carefully screw the shower head onto the shower arm. You can initially use your hand to tighten it, ensuring a proper connection.
Once the shower head is attached, gently tighten it using a wrench. Be cautious not to overtighten, preventing any potential damage to the shower head or arm. Now, your new shower head is securely installed and ready to provide a refreshing bathing experience.
By following these straightforward steps, you can easily attach the new shower arm and shower head, transforming your shower into a revitalizing oasis. Enjoy the benefits of a functional and aesthetically pleasing shower that enhances your daily routine.
Test For Leaks And Make Adjustments
Once you have successfully installed your shower head in the wall and made all the necessary connections, it’s time to test for leaks and make any adjustments. Follow these steps to ensure a proper installation:
Turn on the water supply
Before you start testing for leaks, ensure that the water supply to the shower head is turned off. This will prevent any water from flowing while you make adjustments.
Once the water supply is off, gently turn on the water valve. Gradually increase the water flow to the shower head. Watch closely for any leaks or drips during this process.
Check for any leaks around the connections
Carefully inspect the area around the connections between the shower head and the wall. Look for any signs of water leakage, such as drips or puddles. If you notice any leaks, it’s important to take immediate action to prevent water damage.
If you see water leakage, try tightening the connections by hand. Use a cloth or wrench for a firmer grip if necessary. Remember to avoid overtightening, as it may cause damage to the plumbing or fittings.
Adjust the angle and height of the shower head if necessary
Every person has their own preference when it comes to the angle and height of the shower head. If you feel that the current position does not suit your needs, you can make adjustments easily.
To adjust the angle of the shower head, hold the shower neck or arm firmly and twist it gently in the desired direction. Check the angle by turning on the water supply and observing the water flow.
If you want to change the height of the shower head, you may need to adjust the length of the shower arm. Unscrew the shower arm from the wall fitting, and replace it with a longer or shorter arm as per your requirements.
Once you have made the necessary adjustments, turn on the water supply again and observe if everything is working properly. Check for any leaks or drips one more time to ensure a watertight installation.
By testing for leaks and making necessary adjustments, you can ensure a successful installation of your shower head in the wall. Enjoy the comfort and relaxation of your newly installed shower head!
Regular Cleaning And Descaling
Maintaining the cleanliness and functionality of your shower head is essential to ensure a refreshing and invigorating shower every time. Over time, mineral deposits and limescale can accumulate, causing reduced water flow and potentially affecting the performance of your shower head. Regular cleaning and descaling is the key to keeping your shower head in optimal condition. In this section, we will explore two simple yet effective methods to clean and descale your shower head: removing mineral deposits with a vinegar solution and cleaning the shower head and arm with mild soap and water.
Remove Mineral Deposits with Vinegar Solution
Vinegar, a common household ingredient, is a natural and effective solution for removing mineral deposits from your shower head. Here’s a step-by-step guide:
- Prepare a vinegar solution by mixing equal parts of white vinegar and water in a bowl or container.
- Remove the shower head from the wall. Unscrew it gently, ensuring not to damage any parts.
- Submerge the shower head in the vinegar solution, ensuring it is completely covered.
- Allow the shower head to soak in the solution for at least 30 minutes. This will help dissolve the mineral deposits.
- After the soak, use a brush or toothbrush to scrub away any remaining deposits or build-up.
- Rinse the shower head thoroughly with water to remove any vinegar residue.
- Finally, reattach the shower head to the wall following the installation instructions.
By regularly removing mineral deposits with a vinegar solution, you will restore the water flow and maintain the performance of your shower head.
Clean the Shower Head and Arm with Mild Soap and Water
In addition to removing mineral deposits, it is essential to clean the shower head and arm periodically to remove dirt and grime. Here’s how:
- Mix mild soap and water in a bowl or container to create a gentle cleaning solution.
- Remove the shower head from the wall, if not already done.
- Dip a soft cloth or sponge into the soap solution and gently scrub the shower head and arm to remove any dirt or residue.
- Rinse the shower head and arm thoroughly with water to remove any soap residue.
- Once clean, dry the shower head and arm with a soft cloth to prevent water spots.
- Reattach the shower head to the wall, ensuring it is securely fastened.
Regularly cleaning the shower head and arm will not only keep them looking fresh but also contribute to a hygienic and enjoyable shower experience.
Checking For Leaks And Proper Functioning
Inspect the connections regularly for any signs of leakage
Inspecting the connections of your shower head for signs of leakage is an essential part of maintaining a properly functioning installation. Regular checks will ensure that any potential issues are identified and resolved in a timely manner, preventing further damage. Here are some steps you can follow to inspect the connections for leaks:
1. Start by visually examining the area around the shower head and the wall. Look for any signs of water stains, mold, or mildew. These are clear indicators of a leak and should be addressed immediately.
2. Next, carefully inspect the connection between the shower head and the wall. This is where leaks are most likely to occur. Pay close attention to the junction where the shower arm and the shower head meet. Feel around for any dampness or water droplets.
3. Additionally, check the shower arm connection to the wall. Ensure that it is tightly secured and there are no visible gaps or cracks. Use a flashlight if necessary to get a clear view of the connection.
4. If you notice any leaks or loose connections, it’s important to take action promptly. Tighten any loose fittings using a wrench or pliers, making sure not to overtighten and cause damage. If there are visible cracks or damage to the connections, consider replacing them to prevent further leakage.
5. Finally, turn on the shower and observe the flow of water from the shower head. Make sure it is consistent and steady, with no sudden drops or fluctuations. If you notice any issues with the water flow, it may indicate a problem with the connections or the shower head itself.
By regularly inspecting the connections of your shower head for leaks, you can ensure its proper functioning and avoid costly repairs down the line. Remember to be thorough and meticulous in your examination to catch any potential leaks early on. Taking preventative measures will not only save you money but also ensure a pleasant and hassle-free showering experience.
Preventing Mold And Mildew Growth
Wipe down the shower head and arm after each use
Mold and mildew thrive in damp environments, making the bathroom an ideal breeding ground for these unwanted guests. To prevent their growth, it’s essential to take proactive measures after each shower. One of the most effective ways to combat mold and mildew is to wipe down the shower head and arm after each use. This simple practice helps remove any lingering moisture, preventing it from accumulating and fostering mold and mildew growth.
Keep the bathroom well-ventilated to reduce moisture buildup
In addition to wiping down the shower head and arm, ensuring proper ventilation in your bathroom is crucial in preventing mold and mildew. When moisture builds up in a confined space, it creates the perfect environment for these undesirable fungi to thrive. Implementing good ventilation practices such as using an exhaust fan or opening a window can help combat this issue.
Adequate air circulation not only helps to remove excess humidity created during a shower but also aids in drying out any moisture that may have accumulated on the walls, ceiling, and shower area. By reducing the overall humidity levels in the bathroom, you make it less welcoming for mold and mildew to settle in and multiply.
Moreover, if you have a window in your bathroom, make sure to open it after each shower to allow fresh air to circulate and help evacuate any steam or moisture. Natural ventilation is an effective and eco-friendly way to prevent mold and mildew growth.
Implementing additional preventive measures
Aside from wiping down the shower head and keeping the bathroom well-ventilated, there are a few more preventive measures you can incorporate into your routine to further reduce the risk of mold and mildew growth.
- Regular cleaning: Take the time to clean your bathroom regularly, paying special attention to the areas prone to moisture accumulation. This includes scrubbing the walls, ceiling, and grout lines with an appropriate bathroom cleaner or a mixture of vinegar and water.
- Using mold-resistant materials: When renovating your bathroom or installing a new shower head, opt for mold-resistant materials such as tile, grout, or paint specifically formulated to inhibit mold growth.
- Addressing any leaks: A leaky shower head or pipe can create excess moisture, fueling mold and mildew growth. Promptly fix any leaks to maintain a dry and mold-free environment.
- Using a dehumidifier: If your bathroom consistently struggles with high humidity levels, consider using a dehumidifier to help control the moisture content in the air.
By adopting these preventive measures and incorporating them into your regular bathroom maintenance routine, you can effectively reduce the risk of mold and mildew growth. Prioritizing cleanliness, proper ventilation, and regular checks for leaks will contribute to a healthier and more enjoyable showering experience while keeping your bathroom mold and mildew-free.
Frequently Asked Questions
How Do You Attach A Shower Head To The Wall?
To attach a shower head to the wall, follow these steps: 1. Remove the existing shower head if there is one. 2. Wrap plumber’s tape around the threaded pipe end. 3. Screw the new shower head onto the pipe and tighten it by hand.
4. Use pliers or a wrench to give it an extra snug twist. 5. Turn on the water to check for any leaks.
What Is The Pipe That Comes Out Of The Wall For A Shower Head?
The pipe that comes out of the wall for a shower head is called a shower arm. It connects the plumbing to the shower head, allowing water to flow through and be directed towards you.
How Do You Secure A Shower Head Flange To The Wall?
Secure a shower head flange to the wall by following these steps: 1. Clean the wall surface. 2. Mark the desired position. 3. Drill pilot holes. 4. Insert wall anchors. 5. Attach the flange using screws. Ensure it is tight and secure.
How Much Plumbers Tape To Use On Shower Head?
Use approximately 2 to 3 wraps of plumber’s tape on the threaded parts of the shower head. This helps create a tight seal and prevent leaks.
Conclusion
Installing a shower head in the wall is a simple and convenient way to enhance your bathing experience. By following the step-by-step instructions provided in this blog post, you can easily complete the installation process without any professional help. Taking the time to install a shower head in the wall will not only save you space but also add a modern and stylish touch to your bathroom.
So, why wait? Start enjoying a refreshing shower with your new installed shower head today!