Install a shower head extension arm by unscrewing the existing shower arm, applying plumber’s tape to the new extension arm, and attaching it to the shower outlet. Now, you can enjoy an extended reach and a more comfortable shower experience.
Welcome to our guide on how to install a shower head extension arm. Sometimes, a standard shower arm doesn’t provide the desired water flow or positioning. In such cases, a shower head extension arm can be a solution. Whether you want to raise the height of your shower head or create a rainfall effect, installing a shower head extension arm is a simple process that can be done without the help of a professional plumber.
We will walk you through the step-by-step instructions for installing a shower head extension arm, so you can enjoy a more customized and enjoyable shower experience.
Tools And Materials Needed For The Installation
Before you begin installing a shower head extension arm, it’s important to gather all the necessary tools and materials. This ensures a smooth and efficient installation process, allowing you to enjoy your new shower head extension arm in no time.
Adjustable Wrench
An adjustable wrench is an essential tool for this installation. It allows you to tighten and loosen nuts and bolts with ease. Make sure you have a wrench that fits the size of the fittings on your shower head extension arm.
Pipe Thread Seal Tape
Pipe thread seal tape, also known as PTFE tape or plumber’s tape, is used to create a watertight seal between threaded pipes and fittings. It helps prevent leaks and ensures a secure connection. Wrap the tape clockwise around the threads of the shower arm to ensure a tight seal.
Shower Head Extension Arm
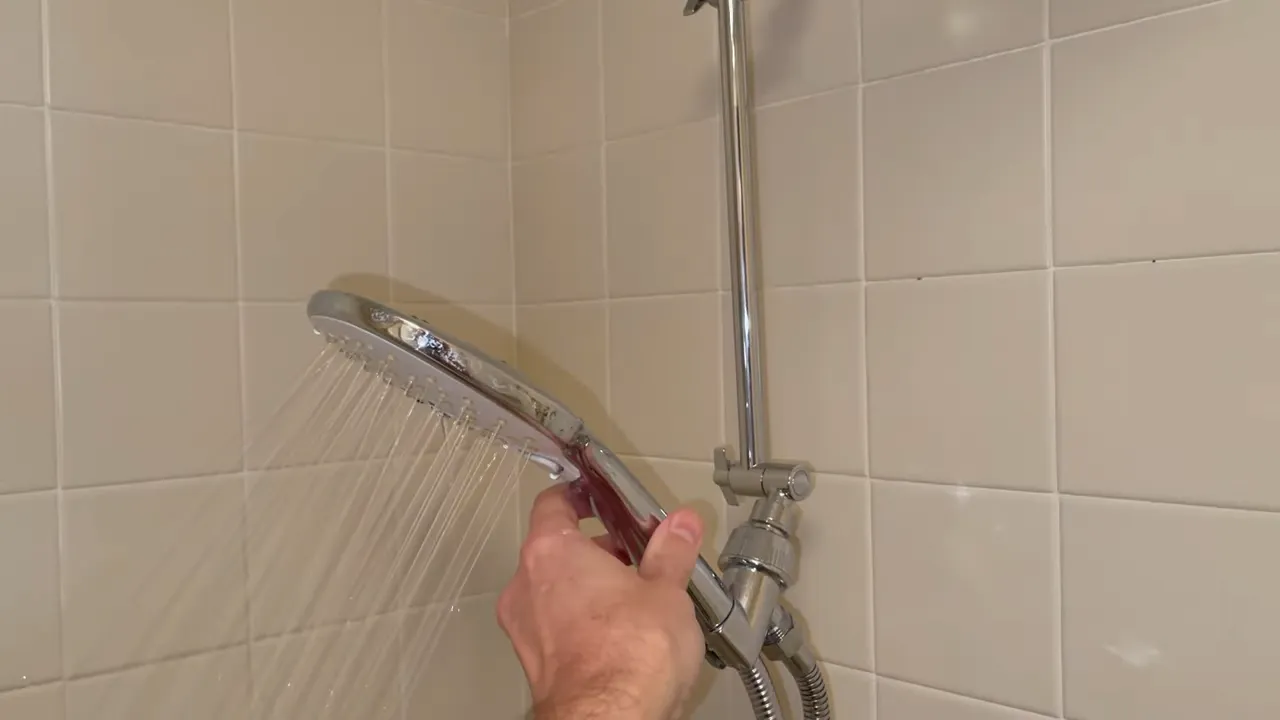
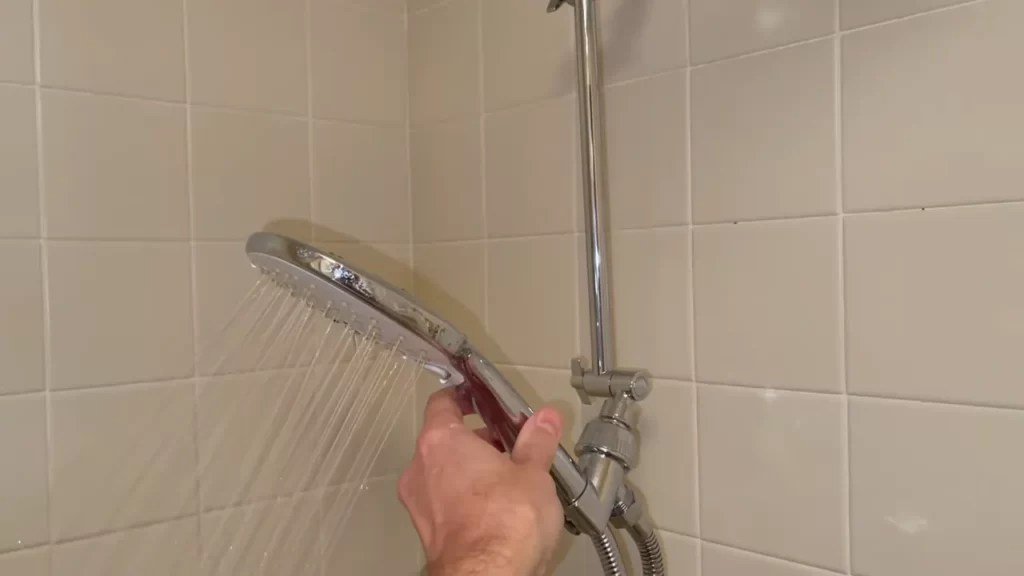
The shower head extension arm is the main component of this installation. It extends the reach of your shower head, allowing you to adjust it to a desired height and angle for a more comfortable shower experience. Choose an arm that suits your needs and preferences.
Plumber’s Tape
Plumber’s tape, also known as Teflon tape, is a thin white tape used to seal threaded plumbing connections. It helps prevent leaks and ensures a tight seal. Apply plumber’s tape to the threads of the shower head extension arm before attaching it to the shower pipe.
Towel or Rag
Having a towel or rag handy during the installation process is always helpful. It allows you to wipe away any excess water or debris that may arise during the installation. Additionally, it helps protect the surface of your shower fixtures from scratches or damage.
By having these essential tools and materials on hand, you’ll be well-prepared to tackle the installation of a shower head extension arm. Now that you’re familiar with what you’ll need, let’s move on to the step-by-step installation process.
Preparing For The Installation
Before you begin the installation process of a showerhead extension arm, it is important to properly prepare. This involves shutting off the water supply to the shower, removing the existing shower head (if applicable), and cleaning the shower arm. By following these steps, you can ensure a smooth and successful installation.
Shut off the water supply to the shower
To avoid any potential water damage or accidents during the installation process, it is essential to shut off the water supply to the shower. Locate the shut-off valve, which is typically positioned near the shower area or in the basement. Turn the valve clockwise to completely close the water supply.
Remove the existing shower head (if applicable)
If you already have a shower head in place, you will need to remove it before installing the extension arm. Begin by placing a cloth or towel around the shower arm to protect it from scratches or damage. Then, use a wrench or pliers to loosen and unscrew the shower head from the arm. Be careful not to apply too much force to avoid any potential damage.
Clean the shower arm and check for any damages
Once the existing shower head is removed, take this opportunity to clean the shower arm. Use a gentle cleaning solution and a soft cloth to remove any dirt, grime, or mineral deposits that may have accumulated over time. Ensure that the arm is thoroughly clean and free from any debris before proceeding with the installation.
While cleaning, also inspect the shower arm for any damages. Look for signs of corrosion, leaks, or cracks. If you notice any issues, it is advisable to replace the shower arm before installing the extension. A damaged arm can compromise the installation and lead to future problems.
By following these steps and properly preparing for the installation, you can ensure a smooth and hassle-free process. Remember to shut off the water supply, remove the existing shower head (if applicable), and clean the shower arm before moving forward. These initial steps can make a significant difference in the success of your showerhead extension installation.
Choosing The Right Shower Head Extension Arm
When it comes to upgrading your shower experience, installing a shower head extension arm can make a world of difference. Not only does it extend the reach of your shower head, but it also allows you to adjust the position to suit your preferences. However, with so many options available in the market, choosing the right shower head extension arm can be a daunting task. In this article, we will guide you through the key considerations to help you make an informed decision.
Length and Reach Considerations
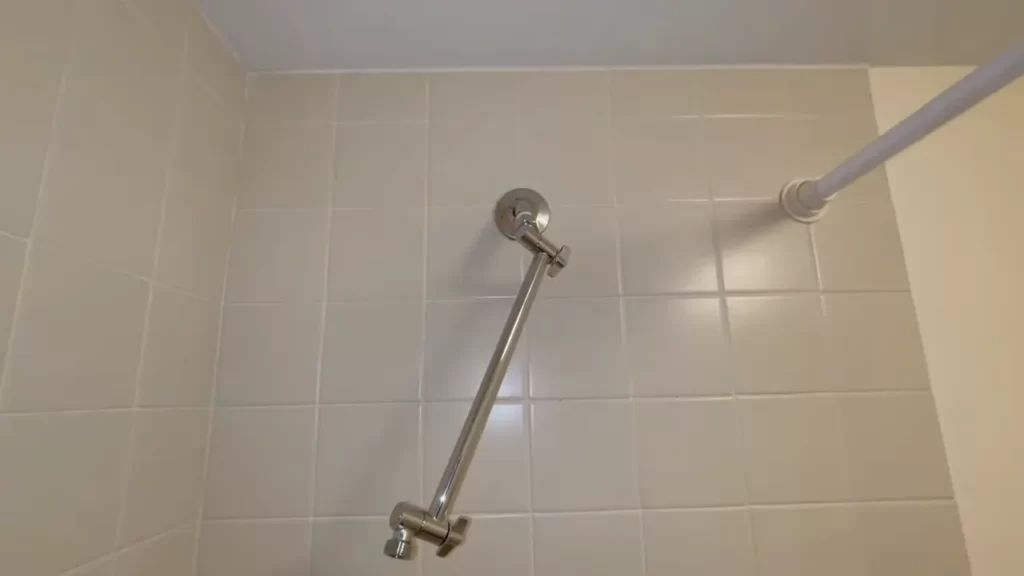
When selecting a shower head extension arm, one of the first things you need to consider is the length and reach. The standard length of a shower arm is around 8 to 12 inches, but it can vary depending on your specific needs. If you have a high shower ceiling or if you prefer a rainfall shower experience, you may want to opt for a longer extension arm. It’s important to measure the distance between your existing shower arm and the desired height of your shower head to ensure a proper fit.
Material and Durability
The material and durability of the shower head extension arm are crucial factors to consider. Most extension arms are made from metal, such as brass or stainless steel, which offers excellent durability and resistance to corrosion. These materials also provide stability and support for your shower head, ensuring it stays in place even with frequent use. Avoid opting for lower-quality materials like plastic, as they may not be as sturdy and can easily break or leak over time.
Design and Aesthetics
Not only should your shower head extension arm be functional, but it should also blend seamlessly with your bathroom decor. Consider the design and aesthetics of the extension arm, ensuring it complements the style and theme of your bathroom. Whether you prefer a sleek and modern look or a more traditional design, there are plenty of options available to suit your personal taste. Don’t forget to check if the finish of the extension arm matches the existing fixtures in your bathroom to maintain a cohesive and visually pleasing appearance.
Compatibility with Existing Plumbing
Before making a final decision, it’s essential to ensure that the shower head extension arm you choose is compatible with your existing plumbing. Check the threading and diameter of both the extension arm and your shower head to ensure they will fit together seamlessly. Additionally, consider whether the extension arm requires any additional tools or adapters for installation. If you’re uncertain about compatibility, consult a professional plumber who can guide you through the process and recommend the best option for your specific setup.
In conclusion, choosing the right shower head extension arm involves considering factors such as length and reach, material and durability, design and aesthetics, and compatibility with your existing plumbing. By taking these key considerations into account, you’ll be able to find the perfect extension arm that enhances your shower experience and adds a touch of style to your bathroom.
Installing The Shower Head Extension Arm
Installing a shower head extension arm can be a simple and effective way to enhance your shower experience. By extending the reach of your shower head, you can achieve a more comfortable and customizable showering experience. In this guide, we will walk you through the process of installing a shower head extension arm step by step.
Applying pipe thread seal tape to the shower arm
Before attaching the shower head extension arm, it is important to apply pipe thread seal tape to the shower arm to ensure a tight and leak-free connection. This tape is designed to prevent water leakage and create a secure seal. Here’s how to do it:
- Start by wrapping the pipe thread seal tape in a clockwise direction around the threads of the shower arm.
- Wrap the tape around the threads until they are completely covered, overlapping the tape slightly as you go.
- Ensure that the tape is applied evenly and tightly to create a reliable seal.
Attaching the shower head extension arm to the shower arm
Once the pipe thread seal tape is applied to the shower arm, it’s time to attach the shower head extension arm. Follow these simple steps:
- Take the shower head extension arm and screw it onto the shower arm, turning it in a clockwise direction.
- Start by hand-tightening the connection until it is snug and secure.
- Ensure that the shower head extension arm is aligned properly with the shower arm to prevent any leaks.
Hand-tightening the connection
After attaching the shower head extension arm to the shower arm, it’s important to hand-tighten the connection to ensure a proper seal. Follow these steps:
- Using your hand, firmly hold the shower head extension arm and twist it clockwise.
- Continue twisting until the connection is hand-tightened and secure.
- Do not overtighten, as this may cause damage to the shower arm or the shower head extension arm.
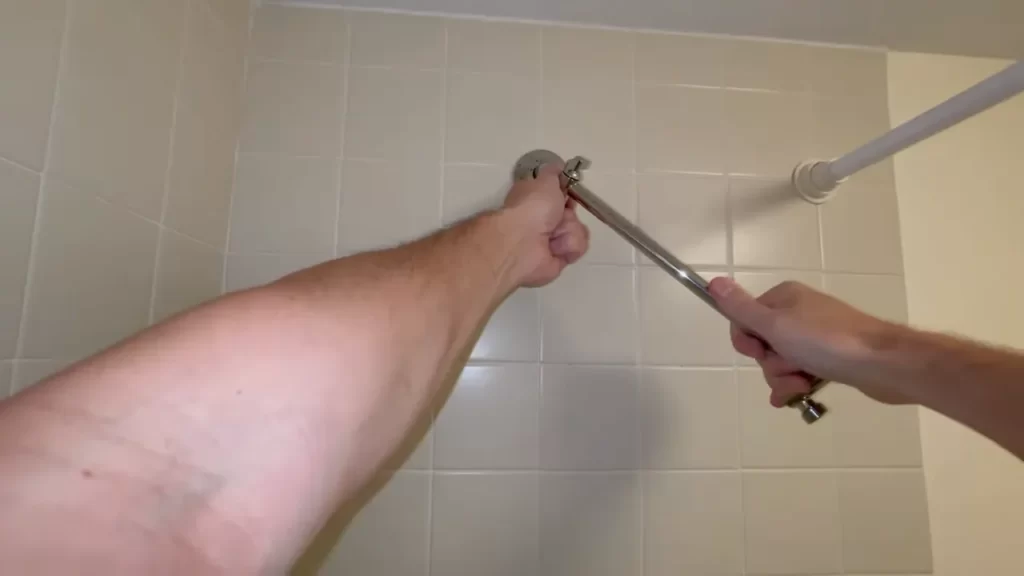
Using an adjustable wrench to secure the connection
If you want to further secure the connection and ensure a leak-free installation, you can use an adjustable wrench to tighten the connection. Here’s how:
- Place the adjustable wrench around the shower head extension arm, close to the connection with the shower arm.
- Turn the wrench clockwise to apply gentle pressure and tighten the connection.
- Be cautious not to apply excessive force, as overtightening can lead to damage.
- Stop tightening once the connection feels firm and secure.
By following these simple steps, you can easily install a shower head extension arm and enjoy a more enjoyable and customizable shower experience. Remember to test the connection for leaks before fully finishing the installation and adjust as needed. Now you’re ready to step into your new and improved shower!
Testing For Leaks And Adjusting The Position
Once you have successfully installed your shower head extension arm, it is important to thoroughly test for any leaks and make any necessary adjustments to its position and angle. This will ensure that you have a seamless and enjoyable shower experience. In this section, we will walk you through the process of turning on the water supply, checking for leaks, and adjusting the position of the shower head extension arm.
Turning on the water supply
To begin, locate the water supply valve in your bathroom. This valve is typically located near the shower area and can be identified by its knob or lever. Turn the water supply valve on by turning the knob or lever in a clockwise direction. As you do this, listen for the sound of rushing water and be ready to observe any leaks that may occur.
Checking for any water leaks
Once the water supply is turned on, carefully inspect the area around the shower head extension arm for any signs of water leaks. Look for dripping or running water, as well as any wet spots on the walls or floor. It is important to fix any leaks immediately to prevent water damage and ensure the longevity of your shower head extension arm.
If you notice any leaks, start by tightening the connections between the shower head extension arm and the existing shower pipe or wall outlet. Use an adjustable wrench to ensure a secure fit, taking care not to overtighten or strip the connections. If the leaks persist, you may need to disassemble the components and reapply plumber’s tape or thread sealant before reassembling. This will create a watertight seal and prevent any further leaks.
Adjusting the position and angle of the shower head extension arm
Once you have confirmed that there are no leaks, it’s time to adjust the position and angle of the shower head extension arm to your desired preference. Start by loosening the mounting bracket that holds the shower head extension arm in place. This bracket is typically adjustable, allowing you to move the arm up and down or side to side.
Experiment with different positions and angles to find the optimal configuration that suits your height and showering preferences. A good rule of thumb is to aim the shower head extension arm slightly downward to prevent water from splashing outside of the shower area. Remember to tighten the mounting bracket securely once you have achieved the desired position.
It’s important to note that the position and angle of the shower head extension arm can be adjusted even after installation, so don’t be afraid to fine-tune it as you go. The goal is to provide you with the best showering experience possible.
In conclusion, testing for leaks and adjusting the position of your shower head extension arm are crucial steps in the installation process. By following these steps, you can ensure a leak-free shower and customize the position and angle to your liking. So go ahead, turn on the water supply, check for leaks, and make those necessary adjustments for an upgraded shower experience!
Tips And Tricks For A Professional Installation
When it comes to installing a shower head extension arm, it’s important to follow these tips and tricks to ensure a professional and trouble-free installation. By taking the necessary steps and precautions, you can successfully enhance your shower experience with a new extension arm without any leaks or damage.
Applying Plumber’s Tape for Enhanced Sealing
One essential step in a professional installation is to apply plumber’s tape to the threaded fittings. Plumber’s tape, also known as Teflon tape, helps to create a tight and reliable seal to prevent any leaks at the connection points.
To apply plumber’s tape, simply wrap it clockwise around the threads of the shower arm and the extension arm, ensuring that it doesn’t overlap with the opening. This will provide an added layer of protection against water seepage and ensure a secure and leak-free connection.
Using a Towel or Rag to Protect the Finish
To avoid damaging the finish of your shower arm or extension arm during installation, it’s recommended to use a towel or rag as a protective barrier. This will prevent scratches or scuff marks on the surface, ensuring your shower arm maintains its aesthetic appeal.
Simply wrap the towel or rag around the shower arm or extension arm before using any tools or applying force. This small precaution can go a long way in preserving the appearance of your newly installed shower head extension arm.
Following the Manufacturer’s Instructions
Every shower head extension arm may have its own specific installation instructions provided by the manufacturer. It’s crucial to carefully read and follow these instructions to ensure a proper and successful installation.
From the tools required to the steps involved, the manufacturer’s instructions will provide detailed guidance on the particular model you have chosen. By adhering to these instructions, you can avoid any unnecessary mistakes that may lead to leaks or other issues.
Seeking Professional Assistance if Needed
If you’re unsure about any aspect of the installation or if you’re facing difficulties, don’t hesitate to seek professional assistance. Calling a plumber or a qualified professional can give you peace of mind and ensure that the installation is done correctly.
A professional will have the expertise and experience to handle any challenges that may arise during the installation process. It’s important not to force any connections or make guesses if you’re unsure, as this may result in damage or improper installation.
Frequently Asked Questions
How Do You Replace A Shower Head Extension Arm?
To replace a shower head extension arm, follow these steps: remove old arm by loosening and unscrewing it, clean and dry shower pipe threads, apply plumber’s tape clockwise, attach new extension arm by tightening it clockwise until secure. Enjoy your new shower head extension!
How Do You Install An Adjustable Shower Arm?
To install an adjustable shower arm, follow these steps: 1. Remove the old arm by twisting it counterclockwise. 2. Apply plumber’s tape to the threads of the new arm. 3. Screw the new arm onto the shower pipe by rotating it clockwise.
4. Adjust the height and angle of the arm according to your preference. 5. Tighten any connections and test the shower for leaks.
Can The Shower Arm Be Extended?
Yes, the shower arm can be extended to provide a longer reach or adjust the height of the showerhead. It allows for customization and flexibility to suit your needs and preferences.
Do Shower Arms Fit All Shower Heads?
Shower arms do not fit all shower heads. Compatibility may vary based on the design and connections. Consider the size and type of your shower head before purchasing a shower arm to ensure proper fit and installation.
Conclusion
To sum it up, installing a shower head extension arm is a simple task that can greatly enhance your shower experience. By following the steps outlined in this blog post, you’ll be able to effortlessly extend the reach of your shower head and enjoy a more comfortable bathing experience.
Whether you’re looking to add more convenience or customize your shower setup, this easy DIY project is worth considering. So why wait? Grab the necessary tools and get started today!