
To install shower faucets, turn off the water supply, remove the old faucet, install the new faucet, and turn on the water supply. Shower faucets are an essential part of a functional and comfortable bathroom.
Whether you are replacing an old faucet or installing a new one, it is important to know the correct process. This article will guide you through the steps required to install shower faucets. By following these instructions, you can easily complete the installation and enjoy a refreshing shower experience in your bathroom.
So, without further ado, let’s get started!
Gathering The Required Tools And Materials
Before you begin installing shower faucets, it’s important to gather all the necessary tools and materials. Having everything you need at hand will streamline the installation process and ensure a smooth experience. In this section, we will discuss the tools needed for the installation and the materials required to complete the job.
Tools needed for the installation
To successfully install shower faucets, you will require the following tools:
- Adjustable wrench
- Phillips-head screwdriver
- Pipe wrench
- Plumber’s tape
- Bucket or container
- Caulking gun
- Utility knife
- Teflon tape
These tools will come in handy during different stages of the installation process, from dismantling the old faucet to tightening the connections and ensuring a leak-free installation. Make sure to have them readily available before you begin.
Materials required for the installation
In addition to the tools mentioned above, you will also need the following materials:
- New shower faucet
- Showerhead
- Pipe cement
- Plumber’s putty
- Silicone caulk
- Plumbing tape
These materials are essential for replacing the old faucet and ensuring proper functionality of the new one. The new shower faucet and showerhead will be the centerpiece of your shower, while the pipe cement, plumber’s putty, and silicone caulk will help you create watertight seals and prevent leaks. Plumbing tape is crucial for securely connecting pipes and preventing leaks as well.
Having all the necessary tools and materials gathered before you begin the installation process will make your job much easier and ensure a successful installation. With everything at hand, you’ll be ready to move on to the next step of the installation process.
Choosing The Right Type Of Shower Faucet
When it comes to updating your bathroom, one of the most important decisions you’ll make is choosing the right type of shower faucet. The shower faucet not only controls the water flow but also adds a stylish touch to your bathroom decor. With so many options available in the market, it’s crucial to consider the different types of shower faucets and the factors that can influence your decision. In this article, we will explore the various types of shower faucets and the factors you should keep in mind to make an informed choice.
Different types of shower faucets available
Before you start shopping for a new shower faucet, it’s essential to understand the different types available in the market. Let’s take a look at some popular options:
| Type of Shower Faucet | Description |
|---|---|
| Single-Handle Faucet | This type of faucet has a single handle that controls both water temperature and flow. It provides ease of use and a sleek look. |
| Double-Handle Faucet | With separate handles for hot and cold water, this traditional style faucet offers precise temperature control. |
| Thermostatic Shower Faucet | A thermostatic shower faucet ensures a consistent water temperature, even if there are fluctuations in the overall water pressure. |
| Pressure-Balancing Shower Faucet | This type of faucet balances the water pressure between hot and cold water, preventing sudden temperature changes. |
| Rain Shower Faucet | A rain shower faucet features a broad showerhead that mimics rainfall, delivering a luxurious and soothing shower experience. |
Factors to consider when selecting a shower faucet
When choosing a shower faucet, it’s essential to consider various factors. These factors can help you ensure that the faucet you choose not only matches your preferences but also meets your specific needs. Here are some crucial factors to consider:
- Bathroom Decor: Consider the style and design of your bathroom. Ensure that the faucet you choose complements the overall aesthetics.
- Functionality: Decide if you prefer a single-handle or double-handle faucet. Single-handle faucets offer convenience, while double-handle faucets allow precise temperature control.
- Water Pressure: Check your current water pressure and ensure that the faucet you select is compatible with it.
- Budget: Determine your budget and look for options that offer the best value for your money.
- Durability: Invest in a high-quality faucet that will withstand daily use and last for years to come.
- Installation: Consider the ease of installation. If you’re a DIY enthusiast, you may opt for a faucet that’s easy to install.
By considering these factors, you can make an informed decision and choose a shower faucet that not only enhances the functionality of your bathroom but also adds a touch of style. Remember to take your time, do thorough research, and select the shower faucet that fits perfectly with your bathroom’s needs.
Preparing The Shower Area
Before you start installing a new shower faucet, it’s crucial to prepare the shower area properly. This involves shutting off the water supply and removing the existing shower faucet. By following these steps, you’ll ensure a smooth installation process and enjoy a well-functioning shower in no time.
Shutting off the water supply
The first step in preparing the shower area for a new faucet installation is to shut off the water supply. You don’t want water gushing out while you work, causing unnecessary mess and potential damage. Here’s how to do it:
- Locate the main water valve in your home. It’s typically found near the water meter or where the main water line enters the house.
- Turn the valve clockwise to shut off the water supply. This will stop the flow of water to the entire house.
- Open a faucet on a lower floor to relieve any remaining water pressure in the pipes.
Shutting off the water supply is an essential step to prevent accidents and ensure a safe installation process.
Removing the existing shower faucet
Once the water supply is shut off, it’s time to remove the existing shower faucet. Follow these steps:
- Use a screwdriver or Allen wrench to remove the screws or nuts that hold the faucet trim plate in place.
- Gently pry off the trim plate to reveal the valve assembly behind it.
- Turn off any additional valves connected to the faucet, such as a separate hot and cold water valve.
- Using a wrench, carefully loosen and remove the nuts that secure the faucet valve to the water supply pipes.
- Once the nuts are removed, pull the old faucet assembly out of the wall, taking care not to damage any surrounding tiles or plumbing connections.
Removing the existing shower faucet can be a bit challenging, but with the right tools and a careful approach, you’ll be able to do it smoothly.
By following these instructions and properly preparing the shower area, you’re one step closer to installing your new shower faucet. Stay tuned for the next part of this tutorial, where we’ll cover the installation process in detail.

Inspecting The Plumbing System
When it comes to installing shower faucets, one crucial step is inspecting the plumbing system. This is essential to ensure that everything is in proper working condition and to prevent any potential issues down the line. Inspecting the plumbing system involves checking for any leaks or damages and ensuring proper water pressure. Let’s take a closer look at each of these aspects.
Checking for any leaks or damages
Before proceeding with the installation of a new shower faucet, it’s important to inspect the existing plumbing system for any leaks or damages. This step is necessary to identify and fix any issues before they cause further damage or affect the performance of the new faucet. Here are a few things to keep in mind:
- Inspect all visible pipes and fittings for any signs of leaks, such as water droplets or moisture.
- If you notice any leaks, use a wrench or pliers to tighten the connections. If the leak persists, consider replacing the affected plumbing component.
- Check for any visible damages, such as cracks or corrosion, on the pipes or fittings. Damaged components should be replaced to ensure a secure and leak-free installation.
Ensuring proper water pressure
Having adequate water pressure is essential for a satisfying shower experience. Here’s how you can check and ensure proper water pressure:
- Turn on the shower and observe the water pressure. If it feels weak, there might be an issue with the water supply or the plumbing system.
- Check the water pressure from other faucets in your home to determine if the problem is isolated to the shower or if it’s a broader issue.
- If the water pressure is low in multiple faucets, it could be a problem with the main water supply or a larger plumbing issue. In such cases, it’s advisable to seek professional help.
- If the water pressure is only low in the shower, you can try removing the showerhead and cleaning it to remove any mineral deposits or debris that may be causing the reduced flow.
By thoroughly inspecting the plumbing system and addressing any leaks, damages, or water pressure issues beforehand, you can ensure a smoother installation process and a more reliable shower faucet. Take the time to conduct these inspections, and you’ll enjoy a fully functioning shower for years to come.
Measuring And Marking The Installation Area
Introduction
Measuring and marking the installation area is a crucial step when it comes to installing shower faucets. By determining the correct height for the faucet and marking the positions for the shower handle and spout, you can ensure that your shower installation is not only functional but also aesthetically pleasing. In this section, we will guide you through these important steps, providing you with the knowledge you need to successfully install your shower faucets.
Determining the Correct Height for the Faucet
When installing a shower faucet, it is essential to determine the correct height for optimal use and accessibility. The ideal height for the faucet may vary depending on your personal preference and the height of the individuals using the shower. However, there are some general guidelines that you can follow to determine the proper height.
First, consider the average height of the users. It is recommended to install the faucet at a height that allows easy access for most individuals, which is typically around 36 to 48 inches from the shower floor. This range provides a comfortable reach for both tall and shorter people.
In addition to the height considerations, take into account the design of the shower and the location of other fixtures. You want to ensure that the faucet is positioned in a way that allows for smooth operation without any obstructions. If you have a shower bench or other features in the shower, make sure the faucet is conveniently placed for easy accessibility.
Marking the Positions for the Shower Handle and Spout
Once you have determined the correct height for the faucet, it’s time to mark the positions for the shower handle and spout. To ensure proper alignment and functionality, follow these steps:
- Start by measuring the distance between the faucet’s center and the desired position for the shower handle. Typically, the handle is placed about 8 to 10 inches below the faucet. Use a tape measure to get an accurate measurement and mark this location on the wall.
- Next, measure the distance between the faucet’s center and the desired position for the shower spout. The standard height for the shower spout is around 36 inches above the shower floor. Again, use a tape measure to determine the precise location and mark it on the wall.
- Ensure that both marks are level by using a level tool. This will guarantee that the handle and spout are aligned correctly and provide a visually pleasing appearance.
By measuring and marking the positions for the shower handle and spout accurately, you can proceed with confidence to the next step of your shower faucet installation.
In conclusion, the process of measuring and marking the installation area for your shower faucet is a vital step in ensuring a successful and visually appealing installation. By determining the correct height for the faucet and marking the positions for the shower handle and spout, you are well on your way to creating a functional and stylish shower space. Remember to take into account the specific needs of the users and consider the design of the shower area to achieve the best results.
Installing The Shower Faucet
The shower faucet is an essential component of your shower system that controls the flow and temperature of the water. Proper installation of the faucet ensures a smooth and enjoyable shower experience. In this guide, we will walk you through the steps of installing the shower faucet, from attaching the faucet valve to the plumbing to connecting the water supply lines.
Attaching the faucet valve to the plumbing
The first step in installing the shower faucet is to attach the faucet valve to the plumbing. This requires some basic plumbing skills but can be easily accomplished with the right tools and materials. Follow these steps:
- Begin by turning off the water supply to the shower. This can usually be done by shutting off the main water valve for your home.
- Next, remove the old faucet trim and valve if you have not done so already. This may require the use of a screwdriver or adjustable wrench. Ensure that the old valve is completely removed before proceeding.
- Inspect the plumbing connections to ensure they are clean and free from debris. Use a pipe cleaner or small brush to remove any dirt or residue.
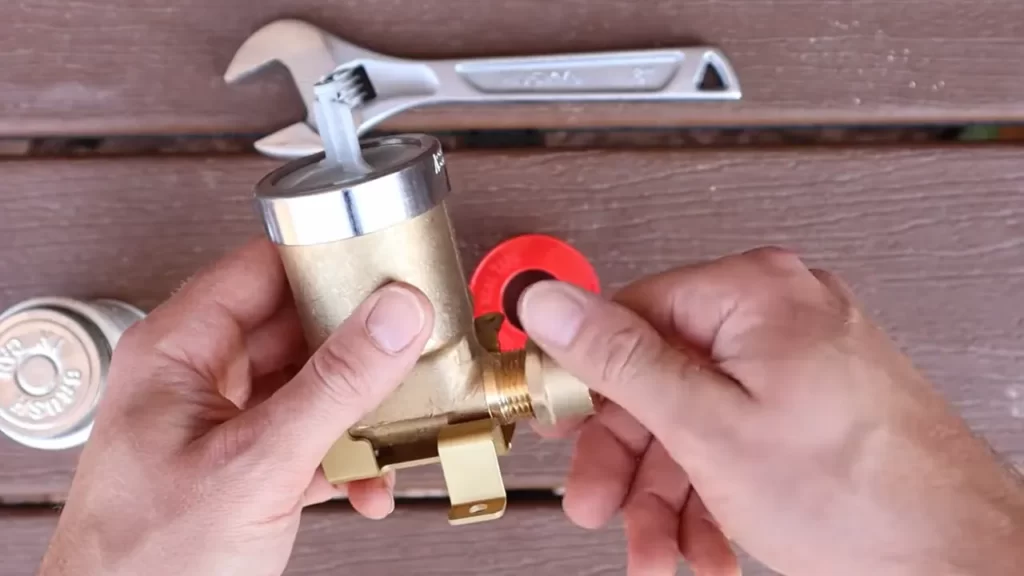
- Apply plumber’s tape to the threads of the plumbing connections. This will help create a watertight seal when the faucet valve is attached.
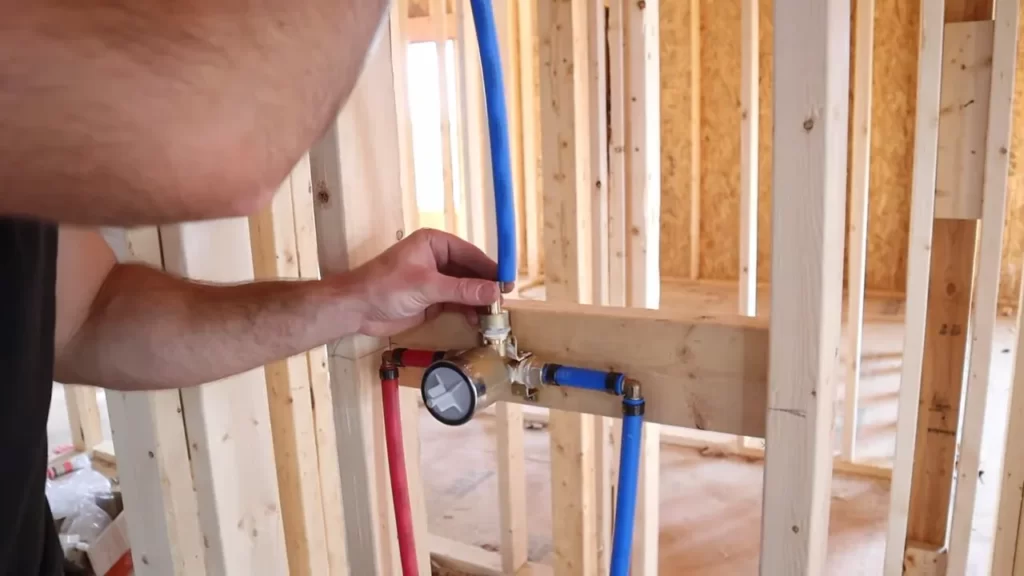
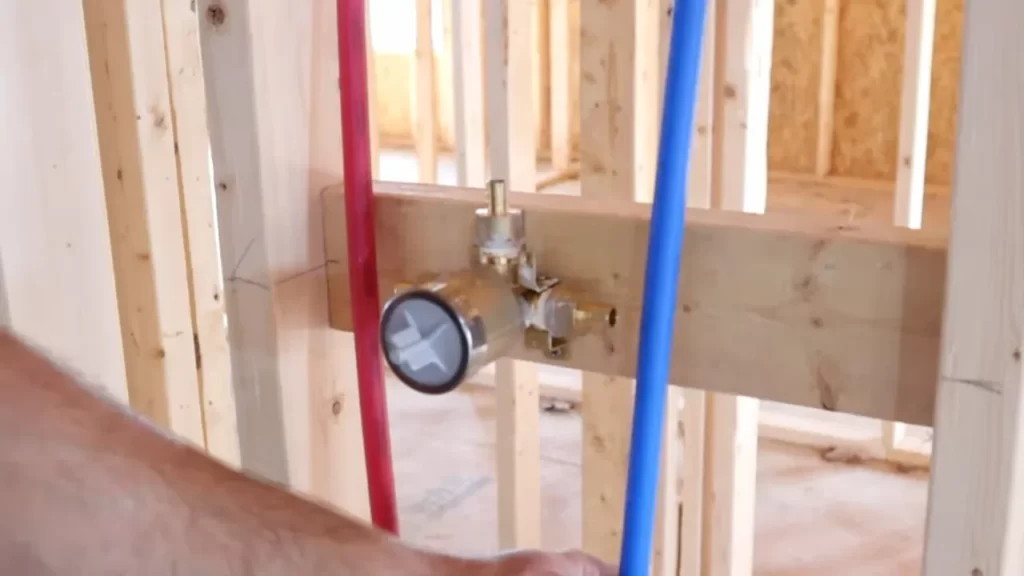
- Carefully align the faucet valve with the plumbing connections. Gently hand-tighten the valve, making sure not to overtighten.
- Once the valve is in place, use a wrench to secure it firmly. Be cautious not to overtighten as it may cause damage to the valve or plumbing.
- With the valve securely attached, reassemble the faucet trim according to the manufacturer’s instructions.
Connecting the water supply lines
After attaching the faucet valve to the plumbing, the next step is connecting the water supply lines. This ensures that water can flow freely to the faucet and that all connections are leak-free. Follow these steps:
- Locate the water supply lines. These are usually located behind the shower wall or under the sink.
- Measure and cut the supply lines to the appropriate length if needed. Use a pipe cutter or sharp knife to make clean cuts.
- Attach one end of the supply lines to the corresponding hot and cold water ports on the faucet valve. Ensure that the connections are tight but not overtightened.
- Connect the other end of the supply lines to the water shut-off valves. Again, ensure that the connections are tight but not overtightened.
- Turn on the water supply to the shower and check for any leaks. If you spot any leaks, tighten the connections further. If the leaks persist, you may need to replace the supply lines or consult a professional plumber.
Once the faucet valve is securely attached and the water supply lines are connected, your shower faucet installation is complete. Take a moment to admire your work and then get ready to enjoy a refreshing and relaxing shower experience!
Securing The Faucet Trim
Installing the handle and escutcheon plate
Now that you have successfully installed the valve and pressure balancing unit, it’s time to secure the faucet trim. The faucet trim consists of the handle and the escutcheon plate, both of which play a crucial role in not only the functionality but also the overall aesthetics of your shower.
Let’s start by installing the handle. Begin by aligning the handle with the valve stem, making sure that it sits flush against the wall. Once aligned, secure the handle onto the stem by tightening the set screw using an Allen wrench. This will ensure that the handle remains firmly in place and doesn’t come loose over time.
Next, it’s time to attach the escutcheon plate. The escutcheon plate acts as a decorative cover for the valve and provides a clean, finished look to your shower. Place the escutcheon plate over the valve and ensure that it aligns perfectly with the handle. Once the alignment is correct, secure the plate onto the wall by screwing it into place, using the provided screws. Make sure to tighten the screws adequately so that the plate is securely fastened.
Mounting the showerhead and tub spout
With the handle and escutcheon plate securely in place, it’s time to mount the showerhead and tub spout. These components are what will ultimately deliver the water to you during your shower.
To mount the showerhead, start by applying a layer of plumber’s tape to the threads of the shower arm. This tape will help create a watertight seal and prevent any leaks. Once the tape is applied, screw the showerhead onto the shower arm, making sure to tighten it firmly. Ensure that the showerhead is facing the correct direction, allowing for an optimal shower experience.
Similarly, for mounting the tub spout, apply plumber’s tape to the threads of the spout and screw it onto the designated outlet on the wall. Tighten the spout securely to prevent any water leakage.
Once both the showerhead and tub spout are securely mounted, give them a quick test run to ensure that water is flowing properly and that there are no leaks. If everything looks and feels good, congratulations! You have successfully secured the faucet trim, and your shower is now ready to be enjoyed!
Testing The Faucet For Leaks
After successfully installing your new shower faucet, it’s crucial to test it for any leaks or drips. This helps ensure that your showering experience is seamless and free from any unwanted water wastage. By following a few simple steps, you can quickly check if your faucet is functioning efficiently.
Turning on the water supply
Before testing for leaks, it’s essential to turn on the water supply. Locate the main shut-off valve for your shower and open it fully. This will allow water to flow into the faucet and help in detecting any potential leaks or drips.
Checking for any leaks or drips
Now that the water supply is on, it’s time to inspect the faucet for any leaks or drips. Start by carefully observing the area around the faucet handles, spout, and showerhead. Look for water droplets, moisture, or any signs of a leak. If you notice any leakage, even a small drip, it’s crucial to address it promptly to prevent further damage.
In addition to a visual inspection, it’s recommended to physically feel for moisture around the faucet. Gently run your hand along the surface and check for any wetness. Even a minor leak can lead to water damage over time, so don’t overlook even the slightest signs.
If you notice a leak or drip, you might need to tighten the connections or replace faulty components. Consult the manufacturer’s instructions or seek professional assistance to fix the issue appropriately. Taking immediate action can help save water, avoid costly repairs, and maintain a drip-free shower faucet.
In conclusion, testing your shower faucet for leaks is a critical step in the installation process. By following these simple steps, you can identify and address any leaks or drips before they cause significant damage. It’s always better to be proactive and prevent any unnecessary wastage or repairs. So, take the time to test your faucet for leaks and enjoy a worry-free showering experience.
Finalizing The Installation
Finalizing the installation of your new shower faucets is an important step to ensure their proper functioning and longevity. After successfully connecting the faucet trim and adjusting the water temperature, it’s time to focus on the finishing touches. This includes caulk around the faucet trim and giving the entire area a thorough clean. Let’s dive into the details of these final steps to complete your shower faucet installation!
Caulking around the faucet trim
One crucial aspect of finalizing the installation is applying caulk around the faucet trim. Caulking not only enhances the aesthetic appeal of your shower but also prevents water from seeping behind the trim, which can lead to mold and water damage. Here’s a step-by-step guide to help you properly caulk around the faucet trim:
- Use a silicone-based caulk specifically designed for bathroom use. This type of caulk is more resistant to moisture and mold.
- Carefully cut the tip of the caulk tube at a 45-degree angle.
- Insert the caulk tube into a caulk gun and squeeze a small amount of caulk onto an old towel or disposable surface to ensure a smooth flow.
- Starting from the bottom of the faucet trim, gently apply a thin and continuous line of caulk along the edges.
- Smooth the caulk with your finger or a caulk finishing tool to create a neat and uniform appearance.
- Wipe away any excess caulk using a damp cloth or sponge.
Cleaning and finishing touches
Once you’ve successfully caulked around the faucet trim, it’s time to give the entire shower area a thorough clean and add those final finishing touches. Follow these steps for a sparkling and polished look:
- Start by removing any construction debris or dust that may have accumulated during the installation process. A vacuum cleaner or soft brush can help with this.
- Wipe down the shower walls, tub, and faucet trim using a mild bathroom cleaner and a non-abrasive sponge or cloth. Rinse thoroughly with warm water afterwards.
- Dry the area completely with a clean towel.
- Inspect the entire installation for any scratches, stains, or smudges. If necessary, use a gentle abrasive cleaner or a mixture of baking soda and water to remove stubborn stains.
- Finally, polish the faucet trim and other metal parts with a non-abrasive metal polish. This will restore their shine and protect them from tarnish and corrosion over time.
By following these steps and paying attention to the final details of caulking and cleaning, your shower faucet installation will be complete and ready for use. Now, it’s time to sit back, relax, and enjoy your refreshed and functional shower space!
Adjusting And Fine-Tuning The Shower Faucet
Once you have successfully installed your new shower faucet, the next step is to adjust and fine-tune it to ensure the perfect water temperature and flow. Making sure your shower faucet is properly adjusted not only enhances your showering experience but also helps conserve water and energy. In this section, we will discuss how to adjust the water temperature and flow and address any issues or adjustments that may be required.
Adjusting the Water Temperature and Flow
Adjusting the water temperature and flow of your shower faucet is essential for achieving a comfortable and enjoyable shower. Follow these steps to get it just right:
- Locate the temperature control handle: The temperature control handle is usually located on the faucet. It allows you to adjust the temperature of the water. Turn the handle clockwise to decrease the temperature and counterclockwise to increase it.
- Test the water temperature: Turn on the shower and let the water run for a few minutes. Depending on your preference, you may prefer a hotter or cooler shower. Adjust the temperature control handle accordingly until you find the desired temperature.
- Consider using a thermostatic valve: If you want precise control over the water temperature, consider installing a thermostatic valve. This valve helps maintain a steady water temperature even if there are fluctuations in the water supply.
- Adjust the flow rate: Alongside adjusting the temperature, you may also want to fine-tune the flow rate of your shower faucet. This can be done by turning the flow control handle, which is usually located adjacent to the temperature control handle. Turning the handle clockwise will reduce the flow, while turning it counterclockwise will increase it.
Addressing Any Issues or Adjustments Required
While installing a shower faucet, you may come across some issues or find the need for further adjustments. Here are a few common scenarios and how to address them:
| Issue/Adjustment | Solution |
|---|---|
| Inconsistent water temperature | Check if the hot and cold water supply lines are properly connected and tightened. If there are no issues with the connections, you may need to adjust the temperature control valve or consider installing a thermostatic valve. |
| Low water pressure | Make sure the water supply valves are fully open. Check for any clogs or debris in the showerhead, as this can restrict water flow. You may also want to check the pressure regulating valve if your home has one. |
| Leaking faucet | Inspect the faucet for any loose or worn-out parts. Tighten any loose connections and replace any damaged or faulty components. If the issue persists, it may be necessary to contact a professional plumber for further assistance. |
Remember, adjusting and fine-tuning your shower faucet may require some trial and error. Take your time, be patient, and don’t hesitate to seek professional help if needed. By ensuring your shower faucet is properly adjusted, you can enjoy a refreshing and satisfying showering experience every time.
Maintaining The Shower Faucet
Tips for Proper Maintenance and Cleaning
Proper maintenance and regular cleaning of your shower faucet are essential to ensure its longevity and optimal performance. By following these tips, you can keep your shower faucet in excellent condition for years to come.
1. Inspect for Leaks:
Regularly check your shower faucet for any leaks. Even a small drip can lead to water wastage and potentially damage your bathroom fixtures. If you notice any leaks, take immediate action to repair or replace the necessary parts.
2. Clean the Faucet:
Cleaning your shower faucet regularly helps to prevent the buildup of mineral deposits, soap scum, and grime. Use a mild cleaning solution and a soft cloth or sponge to gently clean the faucet. Avoid using harsh chemicals or abrasive materials, as they can cause damage to the faucet’s finish.
3. Prevent Hard Water Deposits:
If you live in an area with hard water, you may notice the buildup of mineral deposits on your shower faucet. To prevent this, consider installing a water softener or using a vinegar solution to dissolve the deposits. Regularly wiping the faucet dry after use can also help minimize the accumulation of hard water stains.
4. Lubricate Moving Parts:
To ensure smooth operation, it is important to lubricate the moving parts of your shower faucet. Apply a small amount of silicone-based lubricant to the O-rings, threads, and other movable components. This will help reduce friction and prevent potential leaks or stiffness.
5. Maintain Water Pressure:
To maintain an optimal shower experience, it is necessary to keep the water pressure at an appropriate level. Excessively high water pressure can put strain on the faucet and may lead to leaks. Consider installing a pressure-regulating valve if your water pressure is consistently too high.
6. Keep Grout and Caulk in Good Condition:
Properly sealed grout and caulk around your shower faucet will help prevent water damage and mold growth. Regularly inspect the grout and caulk for cracks or gaps and repair them promptly to maintain a tight seal.
Troubleshooting Common Problems
Despite regular maintenance, you may encounter some common issues with your shower faucet. Here are a few troubleshooting tips to help resolve these problems:
1. Low Water Pressure:
If you are experiencing low water pressure, check for any clogs or debris in the faucet aerator. Remove the aerator and rinse it thoroughly to remove any obstructions. If the problem persists, you may need to clean or replace the cartridge inside the faucet.
2. Dripping Faucet:
A dripping faucet can be caused by a worn-out washer or cartridge. Disassemble the faucet and inspect the washer or cartridge for any signs of wear or damage. Replace the faulty part to eliminate the drip.
3. Temperature Fluctuations:
If your shower faucet is causing temperature fluctuations, the issue may lie with the thermostatic valve or the pressure-balancing valve. It is best to consult a professional plumber to diagnose and fix this problem.
4. Malfunctioning Diverter Valve:
If you have a tub and shower combination, a malfunctioning diverter valve can prevent water from properly flowing between the tub spout and showerhead. In such cases, the diverter valve may need to be replaced.
By following these maintenance tips and troubleshooting common problems, you can ensure that your shower faucet remains in top-notch condition. Regular upkeep and prompt repairs will not only extend the lifespan of your faucet but also enhance your overall showering experience.
https://www.youtube.com/watch?v=j_tF5cLruew&pp=ygUXSW5zdGFsbCBTaG93ZXIgRmF1Y2V0cyA%3D
Frequently Asked Questions
How Do You Install A Shower Spout?
To install a shower spout, follow these steps: First, turn off the water supply. Next, remove the old spout by unscrewing it. Then, clean the pipe threads and apply plumber’s tape. Finally, attach the new spout by screwing it onto the pipe.
Turn on the water supply to test the installation.
How Do You Attach A Shower Head To A Faucet?
To attach a shower head to a faucet, follow these steps: 1. Unscrew the existing shower head. 2. Apply plumber’s tape to the faucet threads. 3. Screw on the shower head tightly by hand. 4. Use pliers to make it secure.
5. Turn on the faucet to test for leaks.
Do You Have To Cut A Hole In A Wall To Replace A Shower Valve?
No, you don’t have to cut a hole in the wall to replace a shower valve. The valve can often be accessed from the front or back of the shower wall, avoiding the need for any major wall modifications.
How Do You Replace A Shower Faucet With No Access Panel?
To replace a shower faucet with no access panel, follow these steps: 1. Turn off the water supply. 2. Remove the handle and trim plate. 3. Unscrew and remove the old faucet. 4. Install the new faucet in reverse order.
5. Test for leaks before completing the process.
Conclusion
Installing shower faucets is a straightforward process that can be easily done by following these simple steps. From choosing the right faucet to preparing the installation area, securing the fittings, and testing for leaks, the guide has covered all the necessary information.
By following these guidelines, anyone can successfully install a shower faucet and enjoy a refreshing and functional bathroom experience. So, don’t hesitate to give it a try and upgrade your shower today!