
To install a shower drain for tile, first, locate the position of the drain in the shower pan and mark it. Then, create a hole in the subfloor using a drill and cut the hole for the drain in the shower pan liner.
Next, apply a layer of waterproof membrane adhesive on the shower pan and place the drain assembly. Finally, connect the drain to the waste pipe, secure it tightly, and test for leaks. Proper installation of a shower drain for tile is essential in ensuring a functional and leak-free shower.
By following these steps, you can easily install a shower drain for tile in your bathroom.
Choosing The Right Shower Drain For Tile Installation
When it comes to installing a tile shower, choosing the right drain is essential for ensuring proper drainage and maintaining the aesthetics of your bathroom. With various options available in the market, it can be overwhelming to decide which shower drain is best suited for your tile installation project. In this article, we will discuss the factors to consider when selecting a shower drain and the different types of drains available.
Factors to consider when selecting a shower drain for tile installation
Before diving into the different types of shower drains, it is important to understand the key factors to consider when making your selection. By keeping these factors in mind, you can ensure that the shower drain you choose is compatible with your tile installation:
- Drain Location: The location of the drain in your shower plays a crucial role in determining the type of drain you should choose. Whether it is a center drain, a linear drain, or a corner drain, make sure to select a drain that aligns with the desired location to avoid costly modifications down the line.
- Drain Size: Another important consideration is the size of the drain. The size will depend on various factors such as the water flow and the size of the tiles you plan to install. Ensuring a compatible drain size will help prevent any issues with water drainage and clogging.
- Material: The material of the shower drain is not only important for its durability but also for its compatibility with your tile. Some popular materials include stainless steel, brass, and PVC. Consider the aesthetic appeal and functionality of each material before making your decision.
- Installation Method: Different shower drain types require different installation methods. Some drains are designed for traditional mortar beds, while others are suitable for modern waterproofing systems like the popular Schluter system. Understanding the installation process will ensure that you choose a drain that is compatible with your intended installation method.
—
Different types of shower drains available in the market
Now that you are aware of the factors to consider, let’s explore the different types of shower drains available:
| Type | Description |
|---|---|
| Center Drain | This is the traditional type of shower drain that is typically located in the center of the shower floor. It is available in various materials and sizes to suit your installation needs. |
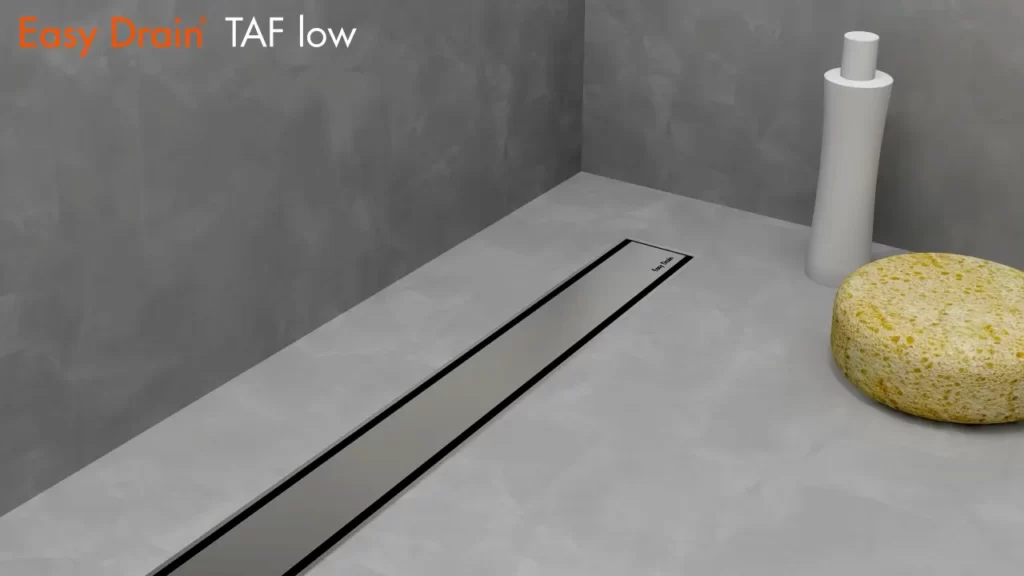
| Linear Drain | A linear drain, also known as a trench drain, is a long, narrow drain that is positioned against the wall or at the entry of the shower area. It offers a sleek and modern look and can accommodate larger format tiles. |
| Corner Drain | As the name suggests, a corner drain is installed in one of the corners of the shower. It is an excellent choice for showers with limited space or those that feature a custom design. |
| Tile-In Drain | If you prefer a minimalist look, a tile-in drain is a great option. It allows you to seamlessly integrate the drain into your tile design, creating a visually appealing and functional shower. |
| Point Drain | A point drain, also known as a round drain, is a traditional drain that can be installed in the center or at any desired location. It is a versatile option that can accommodate various tile sizes and designs. |
By understanding the different types of shower drains available and considering the aforementioned factors, you can select the right shower drain that not only enhances the functionality of your shower but also complements the overall design of your bathroom.
Preparing The Shower Base For Drain Installation
Before installing a shower drain for tile, it is crucial to properly prepare the shower base. This involves removing the existing drain and ensuring that the shower base is clean and free from any debris. By following these steps, you can ensure a seamless and leak-free installation.
Removing the existing drain
The first step in preparing the shower base for drain installation is to remove the existing drain. This can be done by carefully unscrewing or removing the drain cover using the appropriate tools. Make sure to keep track of any screws or fittings that may be removed during this process, as they will be needed later.
Cleaning the shower base and ensuring it’s free from debris
Once the drain has been removed, it is important to thoroughly clean the shower base to ensure that there is no debris or dirt that could interfere with the installation. Begin by gently scrubbing the surface with a mild cleaner and a soft brush. Pay close attention to the area around the drain hole, as this is where most debris tends to accumulate.
After cleaning, rinse the shower base with water to remove any remaining cleaner. Use a sponge or cloth to dry the surface completely before proceeding with the installation. This step will help to ensure a proper seal and prevent any water leakage in the future.
Remember, a clean and debris-free shower base is essential for a successful drain installation. Taking the time to properly prepare the base will save you from potential headaches down the road.

Installing The Shower Drain For Tile
When it comes to installing a shower drain for tile, there are several crucial steps you need to follow to ensure a proper and durable installation. In this guide, we will walk you through the process of measuring and marking the position of the drain, cutting the hole in the shower base, and attaching the drain flange. By following these steps, you’ll be on your way to enjoying a leak-free and stylish shower in no time.
Measuring and marking the position of the drain
Before you begin installing the shower drain, it’s essential to accurately measure and mark the position of the drain. This ensures that the drain will be located correctly and centered within the shower base. To do this, follow these steps:
- Make sure the shower base is clean and free from any debris.
- Locate the center of the shower base by measuring the width and length and marking the midpoint.
- Use a level to ensure that the shower base is level in all directions.
- Using the drain assembly as a guide, mark the outline of the drain on the shower base.
Cutting the hole for the drain in the shower base
Once you have marked the position of the drain, the next step is to cut the hole in the shower base. Here’s how you can do it:
- Put on safety goggles and gloves to protect yourself.
- Drill a hole inside the marked outline using a hole saw or jigsaw. Make sure to follow the manufacturer’s instructions for the specific tool you are using.
- Carefully cut along the marked outline to create the hole for the drain. Take your time and make sure the cut is clean and accurate.
- Remove any excess material and clean the area thoroughly.
Attaching the drain flange to the shower base
With the hole cut, it’s time to attach the drain flange to the shower base. Here are the steps to follow:
- Apply a thin layer of plumber’s putty or silicone caulk around the underside of the drain flange.
- Insert the drain flange into the hole, making sure it fits snugly.
- Tighten the drain flange screws according to the manufacturer’s instructions. Be careful not to overtighten, as it may cause damage to the shower base.
- Wipe away any excess putty or caulk.
Congratulations! You’ve successfully installed the shower drain for tile. Now, you can proceed with tiling the shower base, knowing that the drain is securely in place. Remember to always follow the manufacturer’s instructions for your specific shower drain and consult a professional if you’re unsure about any step.

Connecting The Drain Pipe To The Shower Drain
Connecting the drain pipe to the shower drain is a crucial step in the installation process. It ensures proper drainage and prevents any leaks or water damage. In this section, we will discuss how to prepare the drain pipe for connection and how to join it to the shower drain.
Preparing the drain pipe for connection
Before connecting the drain pipe to the shower drain, it is important to ensure that the drain pipe is properly prepared. Here’s what you need to do:
- Measure and cut the drain pipe to fit the height of the shower drain. Use a hacksaw or a PVC cutter to make a clean and precise cut.
- Smooth out the cut edges of the drain pipe using sandpaper or a file. This will ensure a tight and secure connection.
- Clean the inside of the drain pipe and the outside of the shower drain using a pipe cleaner or a similar cleaning tool. This will remove any dirt, debris, or grease that may prevent a proper connection.
Joining the drain pipe to the shower drain
Once the drain pipe is prepared, it’s time to join it to the shower drain. Follow these steps:
- Apply PVC primer to the outside of the drain pipe and the inside of the shower drain. This primer will help create a strong and durable bond.
- Apply PVC cement to the primed areas of both the drain pipe and the shower drain.
- Insert the drain pipe into the shower drain, making sure it goes all the way in. Twist the pipe slightly to ensure an even distribution of the cement.
- Hold the pipe in place for a few seconds to allow the cement to set.
- Wipe away any excess cement using a clean cloth or paper towel.
And that’s it! Your drain pipe is now successfully connected to the shower drain. Make sure to double-check for any leaks and test the drainage before proceeding with tiling the shower floor.
Remember, a proper connection between the drain pipe and the shower drain is essential for the longevity and efficiency of your shower. Take your time and follow the steps carefully to ensure a secure and leak-free installation.

Securing The Shower Drain For Tile Installation
One crucial step in installing a shower drain for tile is ensuring that it is properly secured. This involves applying a waterproof membrane around the drain and ensuring a tight seal between the drain and the shower base. In this section, we will walk you through how to accomplish these tasks to ensure a stable and durable shower drain installation.
Applying a waterproof membrane around the drain
Before installing the shower drain, it is essential to create a watertight barrier by applying a waterproof membrane around the drain. This will help prevent any potential water leakage that could damage the subfloor or surrounding areas.
To apply the waterproof membrane, follow these steps:
- Clean the area around the drain thoroughly, removing any dirt or debris that could hinder proper adhesion of the membrane.
- Cut strips of waterproofing membrane that are long enough to cover the area around the drain.
- Apply a layer of waterproofing primer to the drain base and the surrounding area, ensuring good coverage.
- Stick the strips of waterproofing membrane onto the primed surfaces, starting from the drain base and working your way outward.
- Use a roller or a trowel to press down the membrane firmly, ensuring it sticks tightly to the surfaces.
- Overlap the strips of membrane by a few inches to ensure a continuous barrier.
- Allow the waterproof membrane to dry completely before proceeding with the tile installation.
Ensuring a tight seal between the drain and the shower base
After applying the waterproof membrane, the next step is to ensure a tight seal between the drain and the shower base. This is crucial to prevent any water from seeping through the gaps and causing damage.
Here are the steps to follow for a secure seal:
- Place the rubber gasket onto the drain base, ensuring it fits snugly.
- Position the drain onto the drain base, aligning it properly.
- Tighten the screws or bolts on the drain flange to secure it to the shower base.
- Check the tightness of the seal by applying slight pressure around the edge of the drain. There should be no movement or gaps.
- If needed, use a wrench or pliers to make any necessary adjustments to ensure a tight fit.
By following these steps, you can ensure that your shower drain is securely and properly installed, ready for the tile installation process. A solid and watertight drain will provide peace of mind, knowing that your shower will function well and withstand the test of time.
Testing The Shower Drain For Proper Functionality
Checking for any leaks or drainage issues
Before proceeding with the installation process, it is crucial to check for any leaks or drainage issues that could cause problems in the future. This step is necessary to ensure the shower drain functions properly and prevents any water damage.
To begin, inspect the area around the shower drain. Look for any signs of water leaks, such as dampness or discoloration on the floor or walls. Run water through the drain and observe if there are any visible leaks or if the water is draining slowly or not draining at all. These signs could indicate a potential issue with the drain that needs to be addressed before proceeding with the installation.
In addition to visual inspection, perform a leak test by sealing the drain with a plug or tape and filling the shower base with water. Leave the water in the base for a few minutes and observe for any water leaks or changes in water level. If there is any sign of leakage, it is essential to identify the source and fix it promptly.
Making necessary adjustments to ensure proper functioning of the drain
Once the initial inspection is complete and any leaks or drainage issues have been addressed, it may be necessary to make adjustments to the shower drain to ensure proper functionality. This step is crucial to prevent future problems and maintain a well-functioning shower system.
Begin by checking the alignment of the drain with the shower base. Use a level to ensure that the drain is perfectly horizontal and not tilted in any direction. This proper alignment is critical in allowing water to flow freely and prevent any pooling or blockages.
Next, examine the connections between the drain components. Ensure that there are no loose or ill-fitting parts that could cause leaks or ineffective drainage. Tighten any loose connections and replace any damaged or worn-out parts as needed. This attention to detail will contribute to the overall reliability of the shower drain.
Furthermore, apply a high-quality waterproofing sealant around the edges of the drain to create a watertight seal. This sealant will prevent any water from seeping through the gaps and protect the underlying structure from potential water damage.
Lastly, thoroughly test the drain’s functionality by running water through it at various flow rates. Observe the drainage speed and check for any signs of blockage or slow water movement. This test will provide confirmation that the adjustments made have successfully improved the drain’s functionality.
By taking the time to thoroughly inspect and test the shower drain for proper functionality, you can ensure a reliable and efficient drainage system for your tiled shower. Addressing any leaks, making necessary adjustments, and performing thorough testing will contribute to a hassle-free experience in the future.
Installing Tile Around The Shower Drain
Installing tile around the shower drain is the final step in creating a functional and visually appealing shower. It’s important to ensure that the tile is properly installed around the drain to maintain a watertight seal and prevent any leaks or water damage. In this section, we will discuss the proper process for installing tile around the shower drain, starting with applying tile adhesive to the shower base and then laying the tiles around the drain area.
Applying tile adhesive to the shower base
Before laying the tiles around the shower drain, it’s essential to apply tile adhesive to the shower base. This adhesive will help secure the tiles in place and create a strong bond. To apply the tile adhesive, follow these steps:
- Clean the shower base thoroughly to remove any dirt, dust, or debris. A clean surface will ensure better adhesion.
- Prepare the tile adhesive according to the manufacturer’s instructions. Different types of tile adhesive may require different ratios of adhesive to water, so make sure to follow the guidelines.
- Using a notched trowel, spread a thin layer of tile adhesive onto the shower base. Ensure that the adhesive is evenly distributed and covers the entire area where the tiles will be placed.
- Hold the trowel at a 45-degree angle and run the notched side over the adhesive. This will create ridges or grooves in the adhesive, which will help the tiles adhere better.
Laying the tiles around the drain area
Once the tile adhesive has been applied to the shower base, it’s time to lay the tiles around the drain area. Follow these steps to properly lay the tiles:
- Start by placing the first tile near the drain, making sure to leave a small gap between the edge of the tile and the drain. This gap will allow for proper drainage.
- Press the tile firmly into the adhesive, ensuring that it is level and securely in place. Use a tile spacer if necessary to maintain consistent spacing between tiles.
- Continue laying the tiles in a pattern of your choice, working your way outwards from the drain. Be mindful of the alignment and ensure that each tile is level with the adjacent ones.
- Once all the tiles have been laid, allow the adhesive to dry completely according to the manufacturer’s instructions. This drying period is crucial to ensure a strong bond between the tiles and the shower base.
By following these steps and taking the time to properly install the tile around the shower drain, you can create a beautiful and functional shower that will stand the test of time. Properly installed tile will not only enhance the aesthetic appeal of your shower but also provide a durable and waterproof surface for years to come.
Grouting And Finishing The Shower Drain Installation
Now that we have successfully installed the shower drain for our tile, it’s time to move on to the final steps: grouting and finishing. Grouting not only fills in the gaps between the tiles but also adds strength and stability to the installation. Cleaning the excess grout and giving those finishing touches will ensure a polished and professional look for your shower floor.
Filling the gaps between the tiles with grout
Start by preparing the grout mixture according to the manufacturer’s instructions. Choose a grout color that complements your tiles’ design. Using a grout float or a rubber grout float, apply the grout mixture diagonally across the tiles, making sure to push it into the gaps.
Work in small sections, as the grout tends to dry quickly. Hold the grout float at a 45-degree angle and use a sweeping motion to spread the grout evenly. Be generous with the amount of grout applied, ensuring each gap is completely filled.
Once the gaps are filled, use the edge of the grout float or a grout smoothing tool to remove excess grout from the tile surface. This will help create a smooth and seamless finish while preventing any grout haze from forming.
| Tip: | To achieve a professional finish, keep a bucket of clean water nearby and rinse the grout float regularly. This will help prevent the grout from sticking to the float and ensure a smooth application. |
|---|
Cleaning the excess grout and giving finishing touches to the tile installation
After allowing the grout to set for about 10 to 15 minutes, use a damp sponge to gently wipe away any excess grout from the tile surface. Be careful not to scrub too hard, as this may dislodge the freshly applied grout.
Continue to clean the tiles until they are free from any grout residue or haze. Rinse the sponge frequently and wring out any excess water to avoid saturating the grout lines. This will help ensure a clean and well-defined appearance.
- Once you are satisfied with the grout cleanup, let it dry for at least 24 to 48 hours. This will ensure proper curing and the strength of the grout.
- After the grout has completely dried, give the tile surface a final wipe-down with a clean, dry cloth or towel. This will remove any remaining residue and leave your tiles looking polished and ready for use.
Congratulations! You have now successfully grouted and finished your shower drain installation. Take a step back and admire your work – a beautiful and functional shower ready to provide you with many refreshing experiences!
Final Steps For A Successful Shower Drain Installation
After carefully installing the shower drain for your tile, there are a few essential final steps to ensure a successful installation. These final steps will ensure that your shower drain is fully functional and ready for use. Let’s take a closer look at these important steps.
Allowing Sufficient Curing Time for the Grout and Adhesive
Once you have installed the shower drain and laid the tile, it’s crucial to allow sufficient curing time for the grout and adhesive. This step is essential to ensure that the tile and drain are securely bonded and waterproof. Rushing this step may result in water leakage or damage to your newly installed shower.
When it comes to curing time, it’s important to follow the manufacturer’s recommendations for the specific grout and adhesive products you are using. Typically, this can range between 24 to 48 hours, but it’s always best to refer to the product guidelines for accuracy.
Testing the Shower Drain Again to Ensure It’s Working Properly
Before you consider the shower installation complete, it’s crucial to test the shower drain once again to ensure it’s working properly. This step will help identify any potential issues or leaks that need to be addressed before you start using your shower.
To effectively test the shower drain, you can follow these simple steps:
- Firstly, cover the drain with a plastic bag or any suitable waterproof material to prevent water from flowing into the drain.
- Fill the shower pan with water, ensuring it reaches a sufficient level.
- Observe the shower drain area closely for any signs of water leakage or seepage.
- If any leaks are spotted, it’s crucial to identify the source and make the necessary repairs before proceeding.
- If no leaks are present, you can remove the plastic bag or material covering the drain and proceed with confidence.
By performing this simple yet crucial test, you can rest assured that your shower drain is functioning correctly and that your installation is a success.
Maintaining The Shower Drain For Longevity
Maintaining the shower drain is essential for ensuring its longevity and preventing any potential issues that may arise over time. Regular cleaning and proper maintenance can save you from expensive repairs and replacements. In this section, we will discuss some key tips for keeping your shower drain in top condition and troubleshoot common problems that you may encounter.
Regular Cleaning and Maintenance Tips for the Shower Drain
Regular cleaning of your shower drain is crucial to prevent clogs and maintain its optimal functionality. Here are some simple yet effective tips to keep your shower drain clean and clog-free:
- Remove debris: Remove any visible debris or hair that may be clinging to the drain cover. You can use a pair of gloves or tweezers to safely remove these obstructions.
- Flush with hot water: Once you’ve removed the visible debris, flush the drain with hot water. This will help dissolve any soap scum or oils that may be accumulating within the pipes.
- Use a drain cleaner: Periodically, you can use a drain cleaner specifically designed for removing buildup from shower drains. Follow the instructions on the product label and flush the drain with hot water afterward.
- Install a drain cover: Consider installing a drain cover or strainer to trap hair and other debris before they enter the drain. This will help prevent clogs and prolong the lifespan of your shower drain.
Troubleshooting Common Issues with the Shower Drain
Despite regular cleaning and maintenance, you may still encounter some common issues with your shower drain. Here are a few troubleshooting tips to help you address these problems:
- Clogs: If you notice the water is draining slowly or not at all, it may indicate a clog in your shower drain. Try using a plunger or a drain snake to clear the blockage. Avoid using chemical drain cleaners, as they can cause damage to the pipes.
- Unpleasant odors: If your shower drain emits a foul smell, it could be due to the buildup of bacteria or mold. Clean the drain thoroughly with a mixture of vinegar and baking soda, followed by hot water.
- Leakage: If you notice any water leakage around the shower drain, it’s important to address it promptly. Check if the drain components are properly tightened and sealed. If the problem persists, seek professional help to fix the issue and prevent further damage.
By following these regular cleaning and maintenance tips, as well as troubleshooting common drain issues, you can ensure the longevity of your shower drain and enjoy a hassle-free showering experience for years to come.
Frequently Asked Questions
How High Should Shower Drain Be For Tile?
The shower drain height for tile should be set at least 1/4 inch above the finished tile surface to allow proper water drainage and prevent pooling. This ensures a safe and efficient shower experience.
What Kind Of Drain Do You Need For A Tile Shower?
For a tile shower, you need a specific type of drain known as a linear or trench drain. This design allows for efficient water drainage and helps prevent any build-up or clogging. It is recommended to install a drain with a removable cover for easy cleaning and maintenance.
How Do You Install A Walk In Shower Drain?
To install a walk-in shower drain, follow these steps: 1. Determine the correct location for the drain. 2. Prepare the subfloor by cutting a hole for the drain. 3. Install the drain base and secure it tightly. 4. Connect the drain pipe to the base using PVC cement.
5. Test the drain for leaks before tiling the shower floor.
How Do You Tile Around A Shower Drain?
To tile around a shower drain, follow these steps: 1. Measure and mark the layout of the tiles around the drain. 2. Use a wet saw or tile cutter to cut the tiles to fit the marked layout. 3. Apply thinset mortar to the floor and press the tiles into place, ensuring they are aligned correctly.
4. Use tile spacers to maintain consistent spacing between the tiles. 5. Allow the mortar to dry, then apply grout and clean off any excess.
Conclusion
To successfully install a shower drain for tile, follow the step-by-step guide outlined in this blog post. By ensuring a proper installation, you can avoid potential issues such as leaks and water damage. Remember to choose the right drain and take into account the design and functionality you desire.
With the right tools and a little patience, you’ll be able to enjoy a beautiful, functional shower for years to come.