To install a shower drain flange, first, remove the old drain flange and clean the area thoroughly. Then, apply silicone adhesive around the drain opening and insert the new flange.
Tighten the screws to secure the flange in place, ensuring a watertight seal. When replacing a shower drain flange, proper installation is essential to prevent leaks and ensure effective drainage. This requires removing the old flange and installing the new one correctly.
In this guide, we will explain the step-by-step process for installing a shower drain flange in a concise and straightforward manner. Follow these instructions to complete the installation efficiently and effectively.
Understanding The Anatomy Of A Shower Drain Flange
When it comes to installing a shower drain flange, understanding its anatomy is crucial. The shower drain flange is an essential component of your shower system that helps to collect and drain water effectively. It ensures that water is directed towards the drain and prevents any damage caused by water accumulation. In this section, we will explore the components of a shower drain flange and emphasize the importance of a properly installed flange.
Components of a Shower Drain Flange
A shower drain flange consists of several important components that work together to create a watertight seal and allow for effective drainage. These components include:
- Base: The base of the shower drain flange is the section that is attached to the shower floor. It provides a stable foundation for the rest of the components.
- Flange Body: The flange body is the central part of the drain flange. It typically has small gaps or openings that allow water to flow into the drain while capturing debris, preventing clogs.
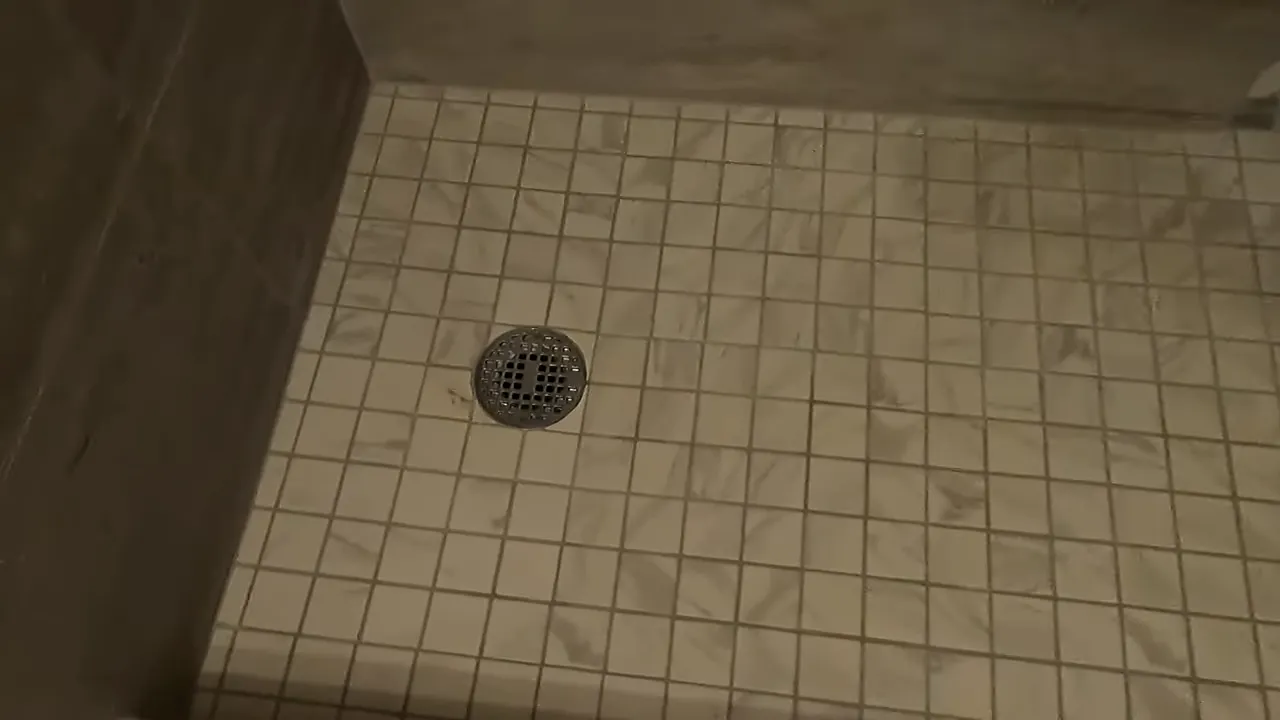
- Strainer: The strainer is the visible part of the drain flange that you see when standing in the shower. It is usually designed with small holes or slots to allow water to enter while catching larger objects like hair.
- Gasket: The gasket is a crucial component that provides a watertight seal between the drain flange and the shower floor. It prevents water from seeping through and causing damage.
- Locking Nut: The locking nut secures the shower drain flange to the drain pipe, ensuring it remains firmly in place. It prevents any movement or leakage.
Importance of a Properly Installed Flange
A properly installed shower drain flange is essential for the overall functionality of your shower system. It offers several important benefits:
- Effective Drainage: A properly installed flange ensures that water flows smoothly towards the drain, preventing any pooling or standing water in your shower.
- Prevention of Water Damage: By collecting and draining water effectively, a properly installed flange helps to prevent water damage to your shower floor, walls, and surrounding areas.
- Prevention of Mold and Mildew: Standing water in your shower can create a breeding ground for mold and mildew. A properly installed flange reduces the risk by facilitating proper drainage and minimizing water accumulation.
- Longevity of Your Shower System: When installed correctly, the flange provides stability and a secure connection between the drain and the shower floor. This helps to extend the lifespan of your shower system.
- Easier Maintenance: A well-installed flange is easier to clean and maintain, as it minimizes the chances of clogs and debris accumulation.
In conclusion, understanding the anatomy of a shower drain flange is crucial for its proper installation. By familiarizing yourself with its components and recognizing the importance of a properly installed flange, you can ensure efficient drainage, prevent water damage, and extend the longevity of your shower system. Take the time to install your shower drain flange correctly, and you will enjoy a functional and worry-free shower experience for years to come.

Tools And Materials You’Ll Need
Before you begin installing a shower drain flange, it’s important to gather all the necessary tools and materials. This will ensure that you have everything you need at hand and can complete the installation smoothly. In this section, we will list the tools you need and the materials and supplies required.
List of necessary tools
Here is a list of essential tools you will need to install a shower drain flange:
- Adjustable wrench
- Plumber’s putty knife
- Screwdriver (both Phillips and flathead)
- Hacksaw
- Tubing cutter
- Plumbers tape
- Measuring tape
- Marker or pencil
- Pipe wrench
- Plumbers’ Pliers
- Level
Materials and supplies required
Alongside the necessary tools, there are several materials and supplies you need to have ready. These include:
- Shower drain flange (make sure it’s the correct size and type for your installation)
- Rubber gasket
- Plumber’s putty
- Plastic washers
- Screws
- Silicone caulk
- Plumbing adhesive
- PVC pipe (if necessary)
- Primer and cement for PVC pipes (if necessary)
- Clean rags or towels
With these tools and materials ready, you’ll have everything you need to install your shower drain flange. Now, let’s move on to the next section.

Preparing For Installation
Assessing the Existing Drain and Flange
Before you begin the installation process, it’s crucial to assess the condition of your existing drain and flange. This step will help you determine whether you need to replace the entire drain system or if a few repairs will do the trick. It’s always wise to address any issues before installing a new drain flange to ensure proper functionality and prevent water leaks in the future.
Begin by examining the drain and flange for any signs of damage such as cracks, rust, or corrosion. Pay close attention to the sealant around the edges and ensure it isn’t loose or crumbling. If you notice any of these red flags, it’s best to replace both the drain and flange altogether to guarantee a secure and long-lasting installation.
Removing the Old Drain and Flange
Once you have assessed your existing drain and flange, it’s time to remove them to make way for the new installation. To accomplish this, follow these simple steps:
- Start by loosening any screws or bolts that connect the drain to the shower floor. Check for any hidden clips or fasteners that may secure the drain and remove them as well.
- Next, gently lift the old drain and flange out of the shower floor. Be cautious not to damage surrounding tiles or plumbing pipes.
- After removing the old components, clean the area thoroughly to ensure a clean surface for the new drain flange. Use a mild detergent and warm water to remove any grime or residue. Rinse the area with clean water and allow it to dry completely before proceeding with the installation.
Cleaning the Drain Area
Properly cleaning the drain area is essential for a successful installation of the new drain flange. Follow these steps to ensure a clean and debris-free surface:
- Using a small brush or toothbrush, scrub the inside of the drain pipes to remove any dirt, hair, or soap scum buildup. You may also use a drain cleaning solution for stubborn clogs but remember to rinse the pipes thoroughly afterwards.
- Inspect the drain opening for any obstructions and remove them with a pair of tweezers or pliers. Be careful not to push any debris further into the pipes.
- Lastly, wipe down the drain area with a clean cloth to eliminate any remaining dirt or moisture. This will ensure a secure and snug fit for the new drain flange, preventing any potential leaks or blockages in the future.
By properly assessing the existing drain and flange, removing the old components, and thoroughly cleaning the drain area, you will be fully prepared for the installation of your new shower drain flange. Stay tuned for the next section, where we will guide you through the step-by-step process of installing the new flange and ensuring a watertight connection.
Installing The Shower Drain Flange
When it comes to installing a shower drain flange, it’s essential to have a solid understanding of the process. Installing the flange correctly ensures the proper functioning of your shower and prevents any leaks or drainage issues. In this guide, we will walk you through the steps of installing a shower drain flange, from choosing the right flange type to securing it onto the shower floor.
Choosing the right flange type for your shower
Before you begin the installation process, it’s crucial to select the right flange type for your shower. The flange is available in various materials, such as plastic, brass, or stainless steel. Consider factors like the durability, compatibility with your shower drain, and your personal preference when choosing the flange type.
Here is a list of popular shower drain flange types:
| Flange Type | Description |
|---|---|
| Plastic flange | Affordable and easy to install, but less durable |
| Brass flange | Sturdy and long-lasting, ideal for high traffic showers |
| Stainless steel flange | Durable and corrosion-resistant, suitable for wet environments |
Positioning the flange in the drain hole
Once you have chosen the appropriate flange type, the next step is to position it correctly in the drain hole. To do this, follow these steps:
- Remove the old flange (if present) by unscrewing it or prying it gently using a flathead screwdriver.
- Clean the drain hole to ensure there is no debris or residue that might obstruct the new flange’s installation.
- Apply a layer of waterproof adhesive or silicone caulk around the inner rim of the drain hole.
- Insert the flange into the drain hole and press it firmly to create a watertight seal.
Securing the flange to the shower floor
Securing the flange onto the shower floor is the final step of the installation process. Follow these instructions to ensure a secure installation:
- Flip the shower drain flange upside down, exposing the screw holes located on the outer rim.
- Align the screw holes with the corresponding holes on the shower floor.
- Insert screws through the holes and tighten them until the flange is securely attached to the shower floor.
- If necessary, use a screwdriver or drill to tighten the screws further. Take care not to over-tighten and damage the flange or the shower floor.
By following these steps and guidelines, you can successfully install a shower drain flange. Remember to choose the right flange type based on your needs, position it correctly in the drain hole, and securely fasten it to the shower floor for a leak-free and functional shower drain.
Connecting The Plumbing
Attaching the drain pipe to the flange is a crucial step in installing a shower drain. This connection ensures that water flows smoothly from the shower drain to the plumbing system, preventing any leaks or water damage. In this section, we will walk you through the process of connecting the plumbing, ensuring a leak-proof connection, and testing the flow of water to ensure a properly functioning shower drain.
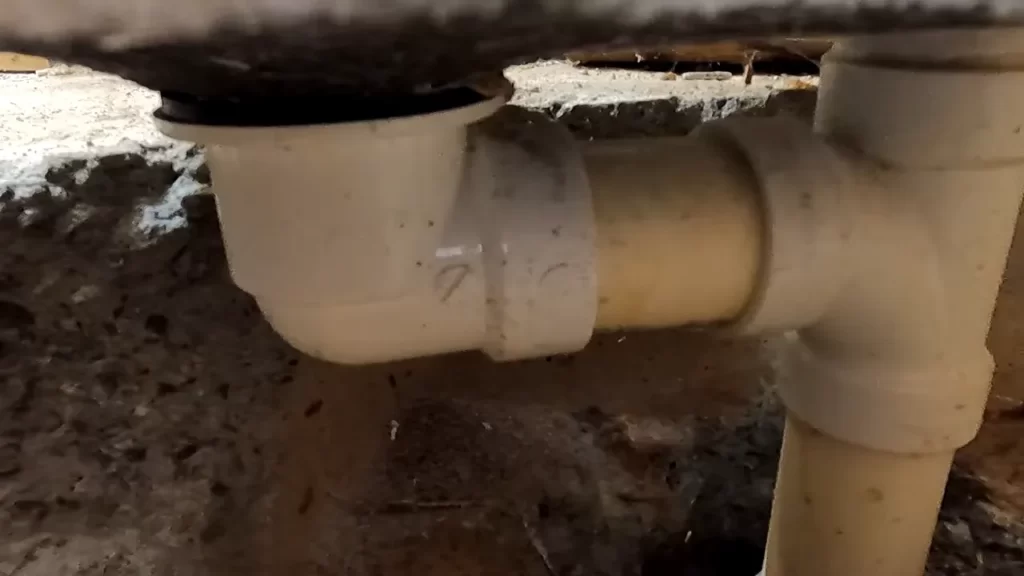
Attaching the drain pipe to the flange
To connect the drain pipe to the flange, you will need a few tools and materials such as a wrench, plumber’s tape, and PVC glue. Follow these steps:
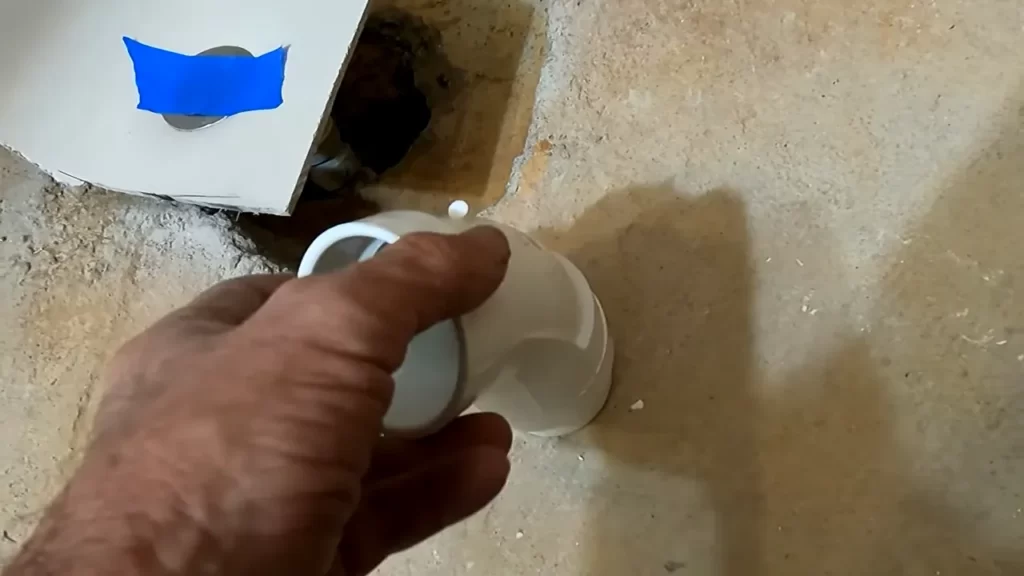
- First, make sure that the shower drain flange is securely in place, positioned correctly over the drain hole.
- Apply plumber’s tape to the threaded end of the drain pipe. This will help create a tight seal and prevent any leaks.
- Insert the drain pipe into the flange, turning it clockwise to secure it tightly.
- Once the drain pipe is connected, use a wrench to tighten it further, ensuring a secure and stable connection.
Ensuring a leak-proof connection
Preventing leaks is essential to maintain the integrity of your shower drain and avoid water damage. Here are a few steps to help ensure a leak-proof connection:
- Inspect the connection between the drain pipe and the flange. Look for any gaps or loose fittings, which may cause leaks.
- If you notice any gaps or loose fittings, tighten them using a wrench or apply additional plumber’s tape for a better seal.
- Apply PVC glue to the joint between the drain pipe and the flange. This will create a strong bond and further prevent leaks.
- Allow the PVC glue to dry completely before testing the connection. This will ensure a secure and leak-proof connection.
Testing the flow of water
Once the drain pipe is securely connected to the flange and you have ensured a leak-proof connection, it is important to test the flow of water to ensure everything is working properly. Here’s how:
- Plug the drain with a suitable stopper or cloth to prevent water from flowing down the drain.
- Fill the shower pan or basin with water, ensuring a sufficient amount to test the flow.
- Remove the stopper or cloth and observe if the water flows freely through the drain pipe and into the plumbing system.
- If there are any signs of slow drainage or blockages, check the connection between the drain pipe and the flange to ensure it is not the cause of the issue.
By following these steps and ensuring a secure and leak-proof connection, you can install a shower drain flange confidently, knowing that your plumbing is connected correctly and your shower will function smoothly.
Finishing Touches And Additional Tips
Completing the installation of your shower drain flange involves a few key steps to ensure that everything is sealed and aligned correctly. Paying attention to these finishing touches will help you achieve a professional and leak-free result. In this section, we will cover how to install the shower pan liner, apply waterproofing membrane around the flange, and provide tips for maintaining and troubleshooting common issues.
Installing the Shower Pan Liner
Before installing the shower pan liner, make sure the subfloor is clean and free from any debris. Here’s how to proceed:
- Cut the shower pan liner according to the shape and size of your shower floor, making sure to leave ample material to go up the walls.
- Place the liner in the shower floor, ensuring the drain hole aligns perfectly with the shower drain flange.
- Smooth out any wrinkles or folds in the liner and attach it to the shower walls using adhesive or nails, depending on the type of liner you are using.
- Trim off any excess liner material, leaving a few inches of overlap on the walls.
Applying Waterproofing Membrane around the Flange
To prevent water leaks and ensure a watertight seal around the shower drain flange, it’s crucial to apply a waterproofing membrane. Here’s how to do it:
- Clean the area around the flange to remove any dirt or debris.
- Apply a layer of waterproofing membrane evenly around the flange, extending it a few inches onto the shower pan liner and the surrounding wall.
- Use a paintbrush or roller to spread the membrane, making sure to follow the manufacturer’s instructions for application and drying time.
- Allow the membrane to dry thoroughly before proceeding with the installation of the shower drain.
Maintaining and Troubleshooting Common Issues
Proper maintenance and troubleshooting can extend the lifespan of your shower drain flange and prevent potential problems. Here are some tips:
- Regularly inspect the flange and surrounding areas for any signs of wear, damage, or water leaks.
- Keep the flange clean and free from hair, soap scum, and other debris that can clog the drain.
- If you notice any leaks or water seepage, check the tightness of the flange screws or bolts and reseal with waterproofing membrane if necessary.
- Consider using a drain strainer or hair catcher to prevent clogs and minimize maintenance.
By following these steps and taking proper care of your shower drain flange, you can enjoy a reliable and functional shower while minimizing the risk of water damage and leaks.
Frequently Asked Questions
How Do You Install A Shower Pan Flange?
To install a shower pan flange, follow these steps: 1. Clean and prepare the shower base surface. 2. Apply waterproofing membrane to the flange and shower base edge. 3. Align the flange with the drain hole and press firmly to secure it.
4. Screw the flange to the subfloor, ensuring a tight fit. 5. Apply sealant around the flange edges to prevent leaks. Remember to consult the manufacturer’s instructions for specific installation details.
Where Does The Rubber Gasket Go On A Shower Drain?
The rubber gasket goes under the shower drain to create a watertight seal.
Do You Need A Flange For A Linear Shower Drain?
Yes, a flange is needed for a linear shower drain to provide a secure and watertight installation. The flange helps to direct water into the drain and prevent leaks, ensuring proper drainage for your shower.
How High Should Shower Drain Flange Be?
The shower drain flange should be installed at a height that allows water to flow properly. It is typically recommended to position the flange about 1/4 inch above the finished floor level. This ensures sufficient drainage and prevents water from pooling.
Conclusion
Installing a shower drain flange may seem daunting at first, but with the right tools and steps, it can be easily done. By following the instructions provided in this blog post, you can ensure a proper and efficient installation process.
Remember to carefully measure and cut the necessary materials, properly align and secure the flange, and test for any leaks or issues before completing the installation. With these tips, you’ll have a functioning and well-installed shower drain flange in no time.