To install a shower door frame, measure and mark the desired location, attach the hinges to the frame, position the frame on the shower enclosure, secure the frame with screws, and install the door. Installing a shower door frame involves multiple steps, including measuring, attaching hinges, positioning the frame, and finally installing the door.
By following these steps carefully, you can successfully install a shower door frame and enhance the functionality and aesthetics of your bathroom.
Getting Started With Shower Door Frame Installation
Installing a shower door frame is a crucial step in creating a functional and visually appealing shower enclosure. A properly installed shower door frame not only enhances the overall aesthetics of your bathroom but also ensures that water is contained within the designated area. Whether you are a seasoned DIY enthusiast or a beginner, this guide will walk you through the process of installing a shower door frame, starting with understanding its importance and gathering the necessary tools and materials.
Understanding the Importance of a Properly Installed Shower Door Frame
A properly installed shower door frame plays a vital role in maintaining the structural integrity of your shower enclosure. It not only prevents water leakage but also protects the surrounding walls and floors from potential damage caused by splashing water. Moreover, a sturdy frame provides support to the glass panels, ensuring they are securely in place, promoting longevity and reducing the risk of accidents. By investing time in understanding the importance of a well-installed shower door frame, you are setting the foundation for a reliable and aesthetically pleasing bathroom space.
Gathering the Necessary Tools and Materials
Before you begin installing the shower door frame, it is essential to gather all the necessary tools and materials to streamline the installation process. Having everything readily available will not only save you time but also prevent any unnecessary interruptions. Take a look at the table below to ensure you have everything you need before starting the installation:
| Tools | Materials |
|---|---|
|
|
Make sure that each tool is in good working condition, and the materials are of high quality to ensure a successful installation.
Now that you understand the importance of a properly installed shower door frame and have gathered all the necessary tools and materials, you are ready to move on to the actual installation process. Stay tuned for the next section, where we will guide you through the step-by-step procedure to install a shower door frame like a pro.

Measuring And Preparing The Shower Door Opening
Before you can install your new shower door frame, it’s essential to accurately measure and prepare the shower door opening. Taking the time to do this correctly will ensure that your shower door fits properly and functions optimally. In this section, we will guide you through the process of measuring the dimensions of the shower door opening and preparing it for installation.
Measuring the dimensions of the shower door opening
Step 1: To begin, gather the necessary tools for measuring. You will need a tape measure, a level, and a pencil.
Step 2: Carefully measure the width of the shower door opening from wall to wall at the top, middle, and bottom. Take note of the smallest measurement as this will be the width you will use when selecting your shower door. Repeat the same process to measure the height of the shower door opening from the top of the base or tub to the top of the opening.
Step 3: It’s always a good idea to re-measure the width and height to ensure accuracy. Once you have the correct measurements, record them in a notebook or your smartphone for easy reference when selecting and purchasing your shower door.
Preparing the shower door opening for installation
Step 1: Before installing the shower door frame, remove any existing shower door, hardware, and caulking. Ensure the shower door opening is clean and free from any debris or obstructions that may interfere with the installation process.
Step 2: Check the walls surrounding the shower door opening for any signs of damage or water leaks. If you notice any issues, it’s crucial to address them before proceeding with the installation. Repairing or waterproofing the walls will help prevent future damage and ensure the longevity of your shower door.
Step 3: If necessary, apply a layer of waterproofing material, such as silicone caulk, to the edges of the shower door opening. This will create a watertight seal and prevent any moisture from seeping out or causing damage to the surrounding area.
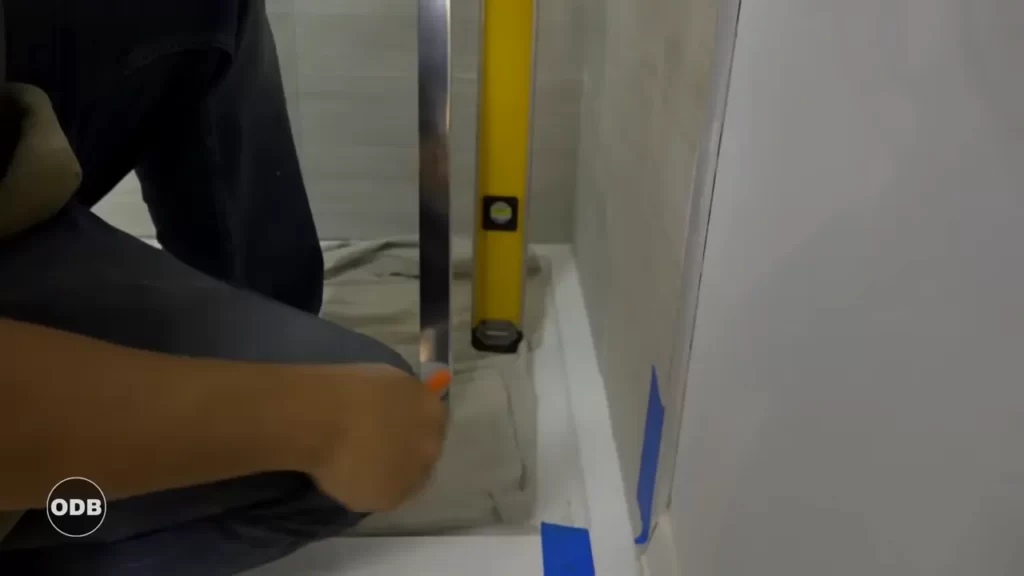
Step 4: Use a level to ensure that the shower door opening is plumb and level. Adjust as needed by shimming or aligning the shower door opening with the help of a friend or family member.
By following these simple steps to measure and prepare the shower door opening, you’ll be well on your way to a successful installation. Remember, accuracy and attention to detail are key in ensuring a snug fit and a beautiful, functional shower door.
Installing The Shower Door Frame
Installing a shower door frame is an essential step in creating a functional and stylish shower enclosure. It not only helps to contain water within the shower area but also adds a touch of elegance to your bathroom. The installation process may seem daunting at first, but with the right tools and proper guidance, you can complete it successfully. In this article, we will guide you through the step-by-step process of installing a shower door frame, ensuring a secure and lasting installation.
Applying adhesive or sealant to the shower door tracks
Before you begin attaching the shower door frame, it is crucial to apply adhesive or sealant to the shower door tracks. This creates a watertight seal and prevents any leaks. Start by cleaning the shower door tracks thoroughly to remove any dirt or debris. Once the tracks are clean and dry, apply a generous amount of adhesive or sealant along the inside of the tracks. Make sure to spread it evenly using a caulk gun or a putty knife. Allow the adhesive or sealant to dry completely before moving on to the next step.
Attaching the shower door frame to the wall and the shower curb
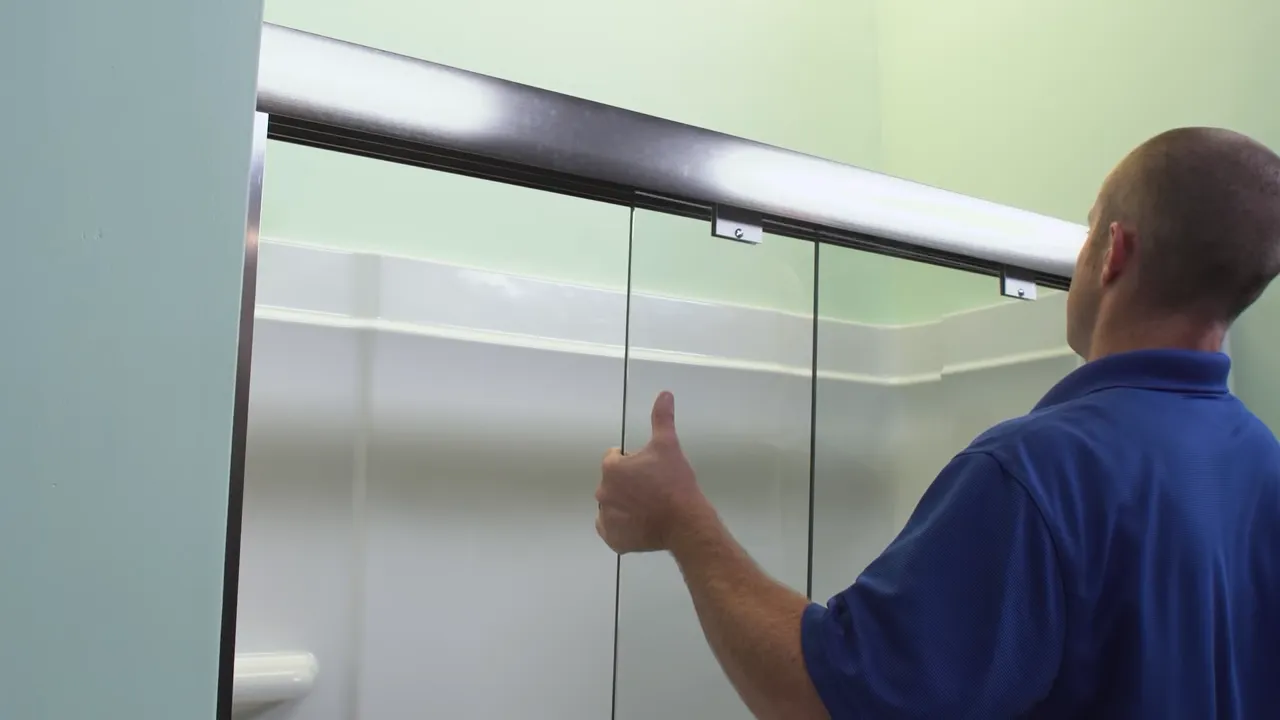
After the adhesive or sealant has dried, it’s time to attach the shower door frame to the wall and the shower curb. Begin by positioning the frame in the desired location, ensuring that it is level and plumb. Use a level to check this, adjusting as necessary. Once aligned, mark the locations where the frame will be attached to the wall and the shower curb.
Now, apply a small amount of adhesive or sealant to the marked locations on the wall and the shower curb. This will provide extra stability and create a stronger bond. Carefully place the shower door frame back into position, pressing it firmly against the wall and the shower curb. Make sure that it is aligned with the marks you made earlier. Allow the adhesive or sealant to dry before proceeding.
Securing the frame with screws or fasteners
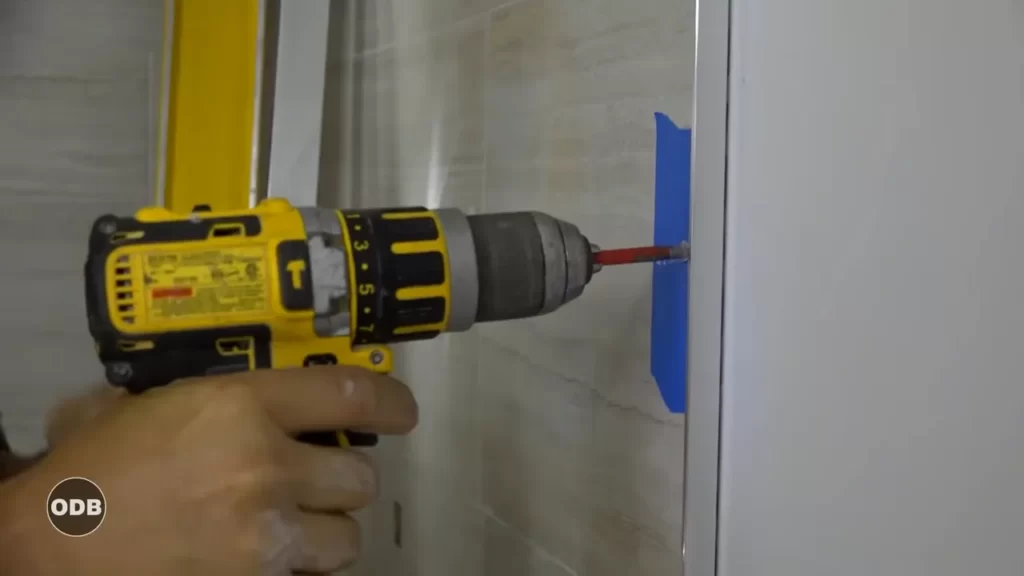
With the shower door frame in place, it’s time to secure it using screws or fasteners. Determine the appropriate locations for securing the frame and mark them accordingly. Pre-drill holes into the marked locations to prevent any splitting or cracking. Then, using a screwdriver or a drill, attach the frame to the wall and the shower curb by inserting screws or fasteners into the pre-drilled holes. Be sure to tighten the screws or fasteners securely, but avoid overtightening to prevent damaging the frame or the surrounding materials.
Repeat this process for all the marked locations along the shower door frame. Once all the screws or fasteners are in place, double-check the alignment and stability of the frame. If any adjustments are needed, make them accordingly.
And there you have it! By following these steps, you can successfully install a shower door frame. Remember to take your time and ensure each component is properly attached. Once the frame is secure, you can proceed with installing the shower doors, completing your beautiful and functional shower enclosure.

Adjusting The Shower Door Frame For Proper Alignment
When installing a shower door frame, achieving proper alignment is crucial for a seamless and functional installation. To ensure that your shower door frame is aligned properly, you need to check for level and plumb and make necessary adjustments. In this article, we will discuss the step-by-step process of adjusting the shower door frame for proper alignment, ensuring a professional-looking installation.
Checking the frame for level and plumb
Before making any adjustments, it’s important to ensure that the shower door frame is level and plumb. A level frame ensures that your shower door opens and closes smoothly, while a plumb frame guarantees a visually pleasing and secure installation.
To check the frame for level, place a level vertically against the sides of the frame. If the bubble on the level is centered, then the frame is level. However, if the bubble is off-center, you will need to make adjustments to achieve a level frame.
To check the frame for plumb, place a level horizontally on the top and bottom edges of the frame. Again, if the bubble is in the center, your frame is plumb. If not, you need to make adjustments to ensure a plumb frame.
Adjusting the frame to ensure proper alignment
Once you have determined that the frame is not level or plumb, it’s time to make the necessary adjustments. Here are the steps to follow:
- Loosen the screws: Begin by loosening the screws on the hinges or brackets that attach the shower door frame to the wall. This will allow you to adjust the frame more easily.
- Shim the frame: To adjust for level or plumb, you may need to insert shims between the frame and the wall. Shims are small, wedge-shaped pieces that help level or plumb the frame.
- Tighten the screws: Once the frame is properly aligned, tighten the screws in the hinges or brackets. This will secure the frame in its new position.
- Recheck for level and plumb: After making adjustments, recheck the frame for level and plumb using a level. This step ensures that your adjustments were successful and the frame is now properly aligned.
By following these steps, you can easily adjust the shower door frame for proper alignment. Remember to take your time and make precise adjustments to achieve a flawless installation. With a level and plumb frame, your shower door will operate smoothly and enhance the overall aesthetic of your bathroom.
Installing The Shower Door Panels
Now that you have successfully framed your shower door, it’s time to move on to the next step: installing the shower door panels. This crucial part of the process will determine the functionality and aesthetic appeal of your shower door, so it’s important to get it right. In this section, we will guide you through the steps of inserting the shower door panels into the frame and aligning them for smooth operation.
Inserting the shower door panels into the frame
The first step in installing the shower door panels is to carefully insert them into the frame. Start by measuring the height and width of your frame to ensure that the panels are the right size. If needed, trim the panels using a hacksaw or a suitable cutting tool before proceeding.
Next, place the bottom edge of the panel into the bottom track of the frame. Gradually tilt the panel towards the frame until the top edge slides into the top track. Make sure the panel is aligned properly and fully inserted into the frame. Repeat this process for each panel until all sides are enclosed within the frame.
Aligning and adjusting the panels for smooth operation
Once all the shower door panels are inserted into the frame, it’s time to align and adjust them for smooth operation. Start by checking if the panels are level and plumb. Use a level to ensure that they are perfectly horizontal and vertical. If necessary, make adjustments by loosening the screws or fasteners and repositioning the panels.
Next, check the gap between the panels and make sure they are evenly spaced. You can use shims or spacers to achieve the desired gap. Ensure that the gaps are consistent along the entire length of the panels.
After aligning the panels, carefully check if they open and close smoothly. Ensure that there are no obstructions or interference that may hinder their operation. If needed, make slight adjustments to the panels to ensure effortless movement.
Finally, check the waterproofing of the shower door. Make sure that the panels fit snugly against each other and the frame to prevent any water leakage. Apply a waterproof sealant along the edges if necessary.
By following these steps, you can install the shower door panels securely and ensure optimal functionality. Take your time, pay attention to details, and soon you’ll be able to enjoy your beautifully installed shower door.
Sealing And Caulking The Shower Door Frame
Applying silicone caulk to create a watertight seal
Applying silicone caulk is an essential step in sealing and protecting your shower door frame from water damage. Silicone caulk is a flexible and durable material that creates a watertight barrier, ensuring that no water leaks through the gaps. Follow these simple steps to apply silicone caulk effectively:
- Clean the surface: Before applying caulk, make sure the surface of the shower door frame is clean and dry. Remove any dirt, grime, or old caulk using a scraper or a putty knife.
- Prepare the caulk gun: Load the silicone caulk tube into the caulk gun and cut the nozzle at a 45-degree angle. This angle will make it easier to control the flow of caulk.
- Apply the caulk: Start by applying a thin bead of caulk along the joint between the shower door frame and the adjacent wall or enclosure. Use a steady and even pressure on the caulk gun to ensure a smooth application. Make sure to fill all the gaps and cracks completely.
- Smooth the caulk: Once you have applied the caulk, use a caulk smoothing tool or your finger dipped in soapy water to smooth the caulk. This step helps to create a professional-looking finish and ensures that the caulk adheres properly.
- Let it cure: Allow the caulk to dry and cure as per the manufacturer’s instructions. This process usually takes around 24 hours, but it’s essential to check the specific drying time mentioned on the caulk tube.
Smoothing and finishing the caulk for a professional look
Smoothing and finishing the caulk not only enhances the aesthetics of your shower door frame but also ensures a proper seal. Follow these tips to achieve a professional-looking finish:
- Use a caulk smoothing tool: A caulk smoothing tool helps to create a smooth and even surface by flattening and shaping the caulk. Gently glide the tool along the caulk line, applying light pressure, until the caulk looks neat and well-distributed.
- Use a wet finger: If you don’t have a caulk smoothing tool, you can use your finger to smooth the caulk. Wet your finger with soapy water or rubbing alcohol to prevent the caulk from sticking. Run your finger along the caulk line, applying gentle pressure to achieve a clean finish.
- Wipe off excess caulk: After smoothing the caulk, use a damp cloth or sponge to wipe off any excess caulk from the surface. This step helps to eliminate any smudges or smears and gives a polished look to your shower door frame.
- Check for gaps: Once the caulk is dry, inspect the shower door frame for any missed spots or gaps. If you find any, reapply the caulk to ensure complete coverage and a watertight seal.
Keep in mind that proper sealing and caulking of the shower door frame is crucial for preventing water damage and maintaining the integrity of your shower. By following these simple steps, you can ensure a professional and long-lasting installation.
Testing And Finishing Touches
After successfully installing the shower door frame according to the previous steps mentioned in this guide, it’s time to move on to testing and adding those final finishing touches. This is an important step to ensure the functionality and longevity of your shower door, as well as the overall satisfaction of your showering experience.
Checking the functionality of the shower door
Once the shower door frame is securely installed, it’s crucial to check its functionality. Start by opening and closing the door a few times to make sure it moves smoothly along the tracks. Pay attention to any squeaking or sticking and address these issues immediately.
If the door doesn’t close properly, it may require some adjustments to achieve optimum performance. This brings us to the next step.
Making any necessary adjustments for optimum performance
If the shower door doesn’t close properly or has difficulty aligning with the frame, some adjustments may be necessary. Begin by checking the alignment of the door hinges. If they seem misaligned, try tightening or loosening the screws until the door sits correctly.
Additionally, check the levelness of the track. If it’s not level, you may need to adjust the positioning of the track to ensure smooth sliding of the door. Use a level tool to assist you in this process, ensuring the track is perfectly horizontal.
Once you have made any necessary adjustments and the door is functioning well, it’s time to move on to the final step.
Cleaning and inspecting the installed shower door frame
Now that your shower door frame is fully installed and functioning properly, it’s important to clean and inspect it. Use a mild cleaning solution and a soft cloth to wipe down all visible surfaces of the frame, removing any dirt or residue.
Inspect each component of the installed shower door frame, including the hinges, track, and glass panels. Look for any signs of damage or wear and tear. If you notice anything concerning, it’s best to address it promptly to prevent further issues down the line.
Taking the time to clean and inspect your shower door frame not only keeps it looking its best, but it also helps maintain its functionality for years to come.
Following these testing and finishing touches will ensure that your installed shower door frame performs optimally and provides you with a seamless showering experience. Now, you can confidently enjoy your newly installed shower door!
Frequently Asked Questions
How Do You Install A Shower Screen Frame?
Installing a shower screen frame is easy. Start by measuring and marking the wall where the frame will be installed. Then, drill pilot holes and attach the frame securely to the wall using screws. Lastly, fit the glass panels into the frame and ensure they are secure.
Enjoy your new shower screen!
Can You Replace Shower Door Frame?
Yes, you can replace a shower door frame.
How Do You Install A Framed Shower Door Bottom Seal?
To install a framed shower door bottom seal, follow these steps: 1. Measure and trim the seal to fit your shower door. 2. Clean the door and the bottom edge thoroughly. 3. Apply a thin layer of adhesive along the bottom edge.
4. Press the seal onto the adhesive, ensuring a secure fit. 5. Allow the adhesive to dry completely before using the shower.
Should There Be A Gap Between Shower Door And Frame?
Yes, there should be a small gap between the shower door and frame. This helps prevent water from leaking out and allows proper ventilation to prevent mold and mildew buildup. The gap also helps accommodate any expansion or contraction of the materials due to temperature changes.
Conclusion
Installing a shower door frame may seem like a daunting task, but with the right tools and step-by-step instructions, it can be a manageable DIY project. By following the tips outlined in this guide, you can ensure a successful installation that will enhance the functionality and aesthetics of your bathroom.
Remember to measure accurately, use the proper materials, and take your time to achieve the best results. Happy DIY-ing!