To install self stick vinyl plank flooring, start by cleaning the subfloor, removing any dust or debris. Then, peel off the backing of the planks and press them firmly onto the subfloor, one at a time, ensuring a tight bond.
Preparing For Installation
Before installing self-stick vinyl plank flooring, it’s important to properly prepare the area to ensure a successful and long-lasting installation. This includes gathering the necessary tools and materials, as well as measuring and preparing the floor. By taking the time to prepare the space, you can avoid potential issues and create a smooth foundation for your new flooring.
Tools and Materials Needed
To prepare for the installation process, you will need the following tools and materials:
| Tools: | Materials: |
|
|
Measuring and Preparing the Floor
Once you have gathered all the necessary tools and materials, it’s time to measure and prepare the floor. Follow these steps to ensure a proper installation:
- Start by cleaning the floor thoroughly to remove any dust, dirt, or debris. Use a damp cloth to wipe away any stains or spills. Allow the surface to dry completely before proceeding.
- Next, measure the dimensions of the room to determine how much vinyl plank flooring you will need. Measure both the length and width of the room, and multiply these values to calculate the square footage. Add an additional 5-10% for waste and cutting.
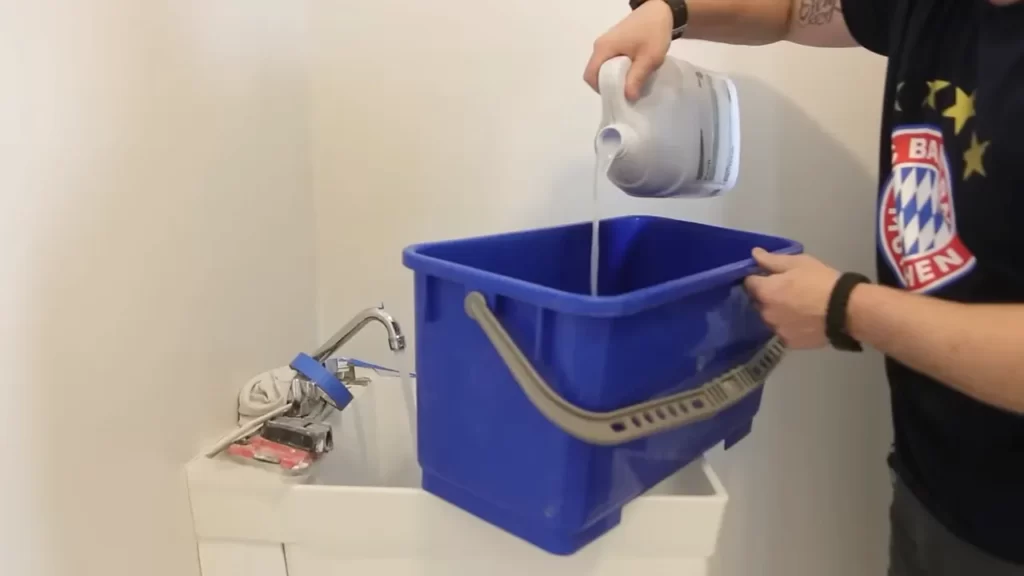
- If your subfloor is uneven or has imperfections, consider using a self-leveling compound to create a smooth surface. Follow the manufacturer’s instructions for mixing and applying the compound.
- Before installing the vinyl plank flooring, it’s important to let it acclimate to the room temperature for at least 48 hours. Lay the planks out flat in the room, ensuring they are not exposed to direct sunlight or extreme temperatures.
- If needed, apply an adhesive primer to the floor to enhance adhesion. Use a roller or brush to evenly distribute the primer, following the manufacturer’s instructions.
By taking the time to gather the necessary tools and materials, as well as properly measuring and preparing the floor, you can ensure a smooth and successful installation of self-stick vinyl plank flooring. Following these steps will help create a beautiful and durable result that will transform your space.

Step-By-Step Installation Process
Installing self stick vinyl plank flooring can be a great way to update the look of your home or business. It is a relatively easy process that can be completed by DIY enthusiasts without professional help. To guide you through the installation, we have outlined a step-by-step process below:
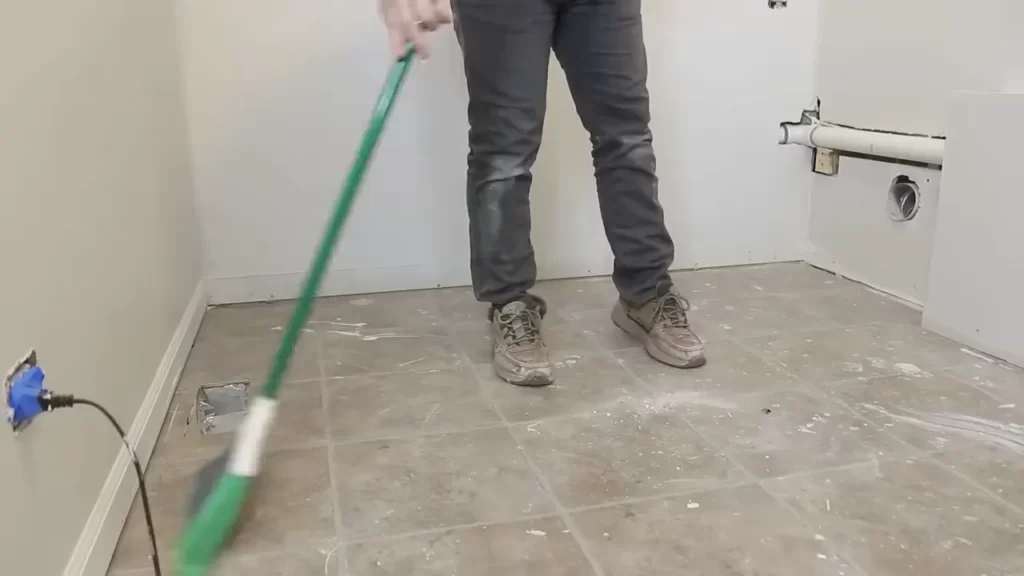
Cleaning the floor surface
Before you start installing the self stick vinyl plank flooring, it is important to ensure that the floor surface is clean and free from dust, dirt, and any other debris. Dust and debris can prevent the adhesive from properly bonding with the floor, leading to loose or uneven installation. Clean the floor thoroughly using a broom or vacuum cleaner, and make sure to remove any stubborn stains or sticky residue with a suitable floor cleaner.
Starting the installation from the corner
Once the floor surface is clean and dry, it’s time to start the installation process. Begin by identifying the corner of the room where you want to start laying the vinyl planks. Starting from the corner ensures a more seamless and professional-looking installation. Measure the width of the first row of planks to make sure it will fit evenly across the room. You may need to cut the first plank to the appropriate size using a utility knife or a vinyl plank cutter.
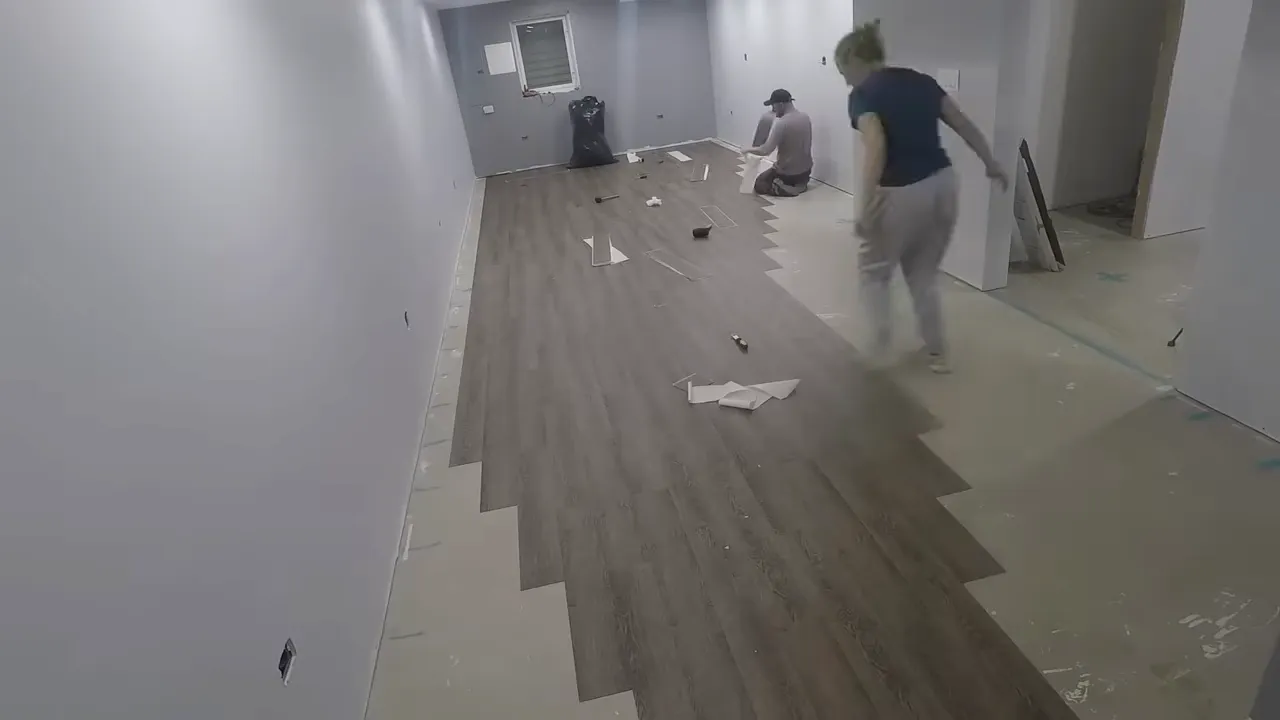
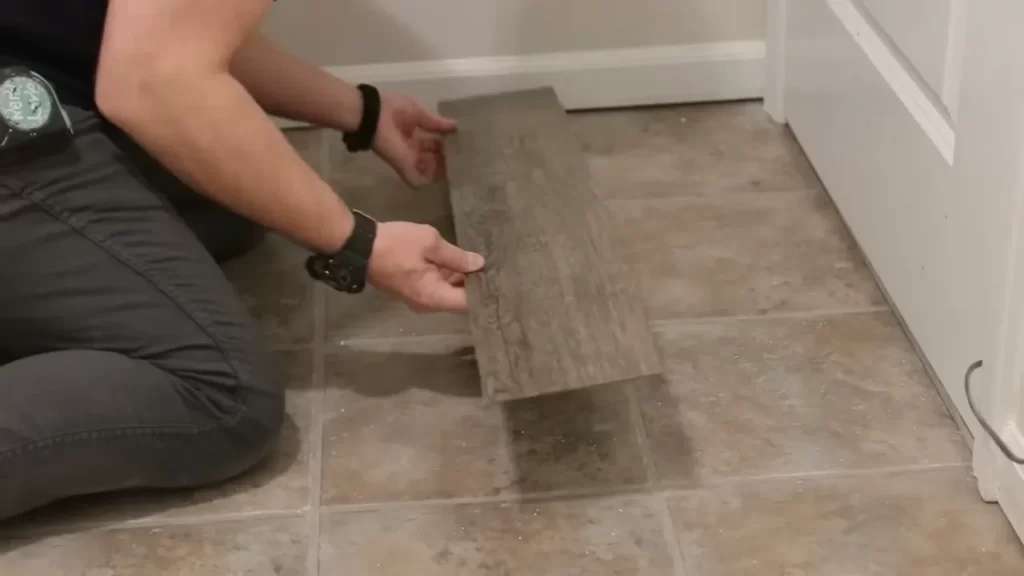
Positioning the first plank
With the first plank cut to size, it’s time to position it on the floor. Remove the backing on the self stick adhesive side of the plank and carefully place it along the starting wall, leaving a small gap between the plank and the wall for expansion. Press down firmly on the plank to ensure it sticks securely to the floor. Repeat this process with the next plank, aligning the short edge with the previous plank’s long edge, creating a tight and seamless fit. Continue laying the planks row by row until you cover the entire floor area.
Remember to leave a small gap between each plank and the wall, as well as around any fixed objects in the room, such as pipes or cabinets. This gap allows the vinyl planks to expand and contract with temperature and humidity changes, preventing buckling or warping.
After completing the installation, use a floor roller to firmly press down on the planks, ensuring optimal adhesion to the floor. Trim any excess or overlapping plank edges using a utility knife or a vinyl plank cutter for a neat and finished look.
In conclusion, installing self stick vinyl plank flooring is a simple and rewarding DIY project. By following the step-by-step process outlined above, you can achieve a professional-looking installation that will enhance the aesthetics of any space. Remember to take your time during the cleaning and installation process, ensuring a clean and smooth surface to work on. Enjoy your new vinyl plank flooring!
Ensuring Proper Alignment And Secure Installation
Proper alignment and secure installation are crucial steps in the process of installing self-stick vinyl plank flooring. By following these steps, you can achieve a visually appealing and long-lasting result. In this section, we will discuss the importance of using spacers, checking for alignment before proceeding to the next plank, and applying pressure to secure the planks.
Using Spacers
Spacers play a key role in maintaining the correct spacing between planks. By using spacers, you ensure that there is enough room for the flooring to expand and contract with temperature changes. Additionally, spacers help to create a consistent and professional-looking finish. When installing self-stick vinyl plank flooring, place the spacers tightly against the wall or the previous row of planks. This will help to ensure straight and even lines throughout the installation process.
Checking for Alignment Before Proceeding to the Next Plank
Checking for alignment before moving on to the next plank is an essential step in achieving a seamless installation. To do this, carefully observe the seams between planks to ensure they are flush and tight. Misaligned planks can create visual inconsistencies and compromise the overall integrity of the installation. Take your time to adjust the positioning if necessary, making sure that each plank is correctly aligned before proceeding.
Applying Pressure to Secure the Planks
Once you have confirmed proper alignment, it’s crucial to apply sufficient pressure to secure the planks in place. This step guarantees a strong bond between the adhesive and the subfloor. Start by using a floor roller or a hand roller to apply even pressure across the surface of each plank. This will help to ensure the adhesive is activated and that the planks firmly adhere to the subfloor. By taking the time to apply pressure throughout the installation process, you can be confident in the longevity and stability of your self-stick vinyl plank flooring.
Dealing With Obstacles And Tricky Areas
When installing self-stick vinyl plank flooring, you may come across various obstacles and tricky areas that require some extra attention and effort. However, with the right techniques and a little patience, you can overcome these challenges and achieve a seamless and professional-looking installation. In this section, we will discuss two common obstacles: cutting the planks to fit around doorways and architectural features, and addressing irregular floor shapes and corners.
Cutting the Planks to Fit Around Doorways and Architectural Features
Dealing with doorways and architectural features like pillars or cabinets can be a bit challenging when installing self-stick vinyl plank flooring. However, with the right tools and techniques, you can achieve a clean and precise fit for a polished end result.
Here’s how you can tackle this task:
- Measure the width of the doorway or architectural feature using a tape measure.
- Transfer the measurement onto a vinyl plank using a pencil or marker.
- Using a straight edge or a square, draw a straight line on the plank to guide your cutting.
- Place the plank on a stable surface, such as a sawhorse or workbench, and cut along the marked line using a utility knife or a vinyl plank cutter.
- Once the plank is cut, carefully fit it around the doorway or architectural feature, making sure it sits snugly and aligns with the surrounding planks.
- If needed, use a heat gun or hairdryer to soften the plank for easier bending and molding.
By following these steps, you can ensure a precise fit and a seamless transition around doorways and architectural features.
Addressing Irregular Floor Shapes and Corners
Irregular floor shapes and corners are another obstacle you may encounter during the installation of self-stick vinyl plank flooring. Whether it’s a curved edge or an angled corner, it’s important to handle these areas carefully for a professional-looking finish.
Here are some tips to address irregular floor shapes and corners:
- Prioritize accurate measurements by using a measuring tape to assess the dimensions of the irregular area.
- Transfer the measurements to the vinyl plank and use a straight edge or square to draw cutting lines that match the irregular shape.
- Cut the plank along the marked lines using a utility knife or vinyl plank cutter.
- For curved edges, you can gradually make small cuts along the marked line until the plank bends and conforms to the desired shape.
- To address angled corners, you may need to make miter cuts to ensure a flush and precise fit.
Remember to always double-check your measurements and make small adjustments as needed. Taking your time in these tricky areas will pay off in the end with a visually pleasing and professionally installed self-stick vinyl plank flooring.
Maintaining And Caring For Self Stick Vinyl Plank Flooring
Caring for your self stick vinyl plank flooring not only enhances its longevity but also keeps it looking new and fresh for years to come. By following a few simple maintenance and cleaning tips, you can easily protect your floors from scratches and damage, ensuring they remain in top condition.
Cleaning and maintaining the floor
Regular cleaning is essential to maintain the beauty of your self stick vinyl plank flooring. Here are some effective cleaning methods:
- Start by sweeping or vacuuming the floor to remove any loose dirt and debris. This prevents scratches and damage caused by abrasive particles.
- Use a damp mop or a soft cloth and a mild detergent to clean the floor. Avoid using harsh chemicals or abrasive cleaners as they may damage the surface of the vinyl. It’s also important to avoid excessive water, as this can seep into the seams and cause the adhesive to weaken.
- For stubborn stains or spills, gently scrub the affected area with a non-abrasive cleaner specifically designed for vinyl flooring. Be sure to rinse the area thoroughly with clean water and dry it completely.
Regularly maintaining your self stick vinyl plank flooring will help prevent dirt and stains from accumulating and keep your floor looking its best.
Protecting the floor from scratches and damage
Protecting your self stick vinyl plank flooring from scratches and damage is crucial for maintaining its appearance and durability. Here are some tips to keep in mind:
- Place doormats or rugs at entrances to trap dirt and prevent it from being tracked onto the floor. This helps minimize the risk of scratches caused by grit and debris.
- Avoid dragging heavy furniture or appliances across the floor. Instead, use furniture pads or felt protectors under the legs to prevent scratches and marks.
- Take care when moving heavy objects on the floor, using a dolly or lifting them instead of dragging them.
- Use protective mats or coasters under items prone to spills, such as potted plants or drinkware, to prevent moisture from seeping into the floor.
By taking these simple precautions, you can safeguard your self stick vinyl plank flooring and maintain its pristine condition for years to come.
Frequently Asked Questions
How Do You Prepare A Floor For Peel And Stick Vinyl?
To prepare a floor for peel and stick vinyl, follow these steps: 1. Clean the floor thoroughly, removing any dirt, dust, or debris. 2. Fill any cracks or holes in the floor with a suitable filler and sand it smooth. 3.
Ensure the floor is level by using a leveling compound if necessary. 4. Prime the floor with a suitable primer to improve adhesion. 5. Allow the floor to dry completely before applying the peel and stick vinyl.
Do You Need Underlayment For Peel And Stick Vinyl Plank Flooring?
Yes, you need underlayment for peel and stick vinyl plank flooring. Underlayment helps to provide cushioning, insulation, and sound reduction, while also providing a smooth and stable surface for the vinyl planks to adhere to. It is an important step to ensure the longevity and durability of your flooring.
How Do You Install Peel And Stick Lvp Flooring?
To install peel and stick LVP flooring, follow these steps: 1. Begin by thoroughly cleaning the subfloor and ensuring it is level. 2. Remove any baseboards or trim that may interfere with the installation. 3. Start in a corner of the room and peel off the backing of the first plank.
4. Press the plank firmly onto the subfloor, repeating the process for each subsequent plank. 5. Use a roller to ensure the planks are securely adhered. Finish by replacing baseboards and trim.
Do I Need To Prime Before Peel And Stick Flooring?
Yes, it is recommended to prime the surface before installing peel and stick flooring. Priming ensures better adhesion and helps the flooring stick securely. It also helps to create a smooth and even surface for installation. Follow the manufacturer’s instructions for the specific primer to use.
Conclusion
Installing self stick vinyl plank flooring is a simple and cost-effective way to enhance the look of your space. With the step-by-step instructions provided in this blog post, you now have the knowledge to tackle this DIY project with confidence.
Remember to thoroughly clean and prepare your subfloor before installation and take your time to ensure each plank is properly aligned. By following these tips, you’ll have beautiful new flooring in no time. Begin transforming your space today!