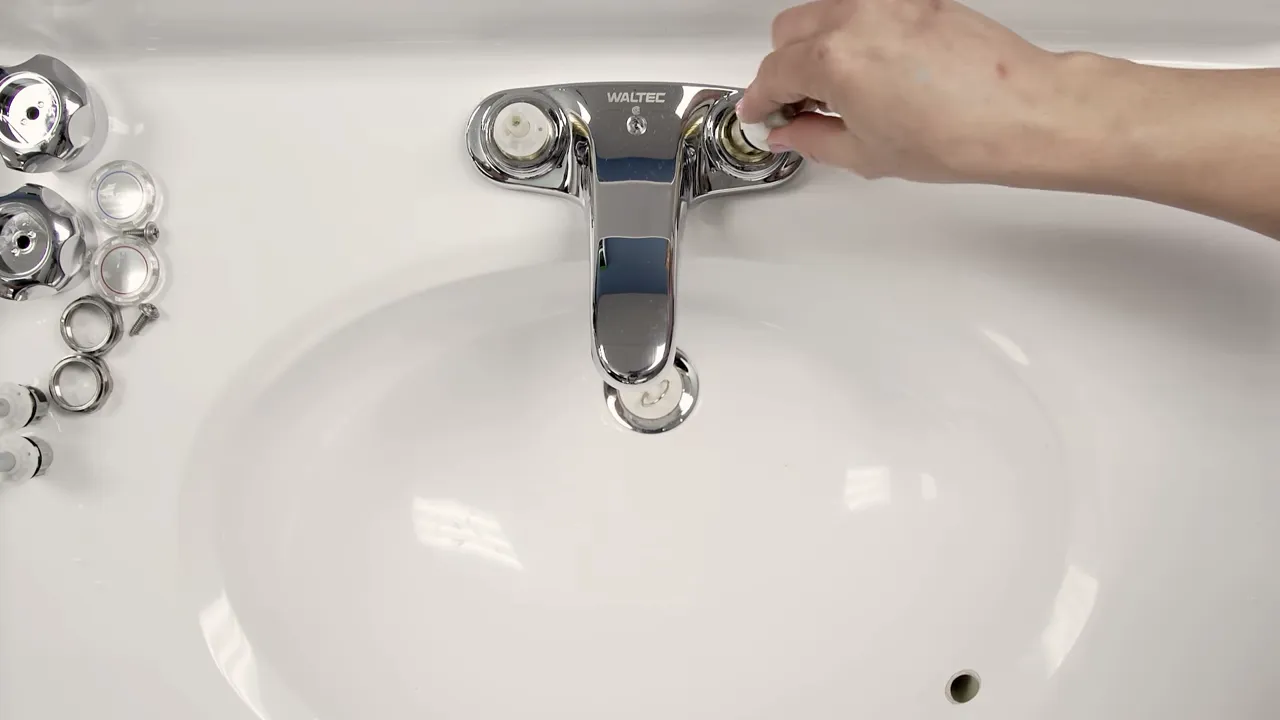
To install seats and springs in a shower, first, turn off the water supply. Then, remove the handle, cap, and bonnet to access the seats and springs.
Installing Seats And Springs: The Basics
When it comes to maintaining and repairing your shower, one of the most common issues you may encounter is a leaky faucet. This problem is often caused by faulty seats and springs within the faucet assembly. Properly installing seats and springs is crucial in ensuring a leak-free shower experience. In this article, we will discuss the importance of properly installing seats and springs, the tools and materials needed for the installation, and provide a step-by-step guide to help you successfully complete the task.
Importance of properly installing seats and springs
Proper installation of seats and springs is of utmost importance to prevent leaks in your shower. The seats and springs sit within the faucet assembly and are responsible for controlling the flow of water. If not installed correctly, they can cause water to seep through and result in a constant drip or even a steady stream of water, leading to wasted water and increased utility bills.
Additionally, leaks can cause damage to your bathroom fixtures or even lead to mold and mildew growth. Therefore, taking the time to properly install seats and springs is essential for both the functionality and longevity of your shower.
Tools and materials needed for the installation:
To ensure a successful installation, you will need the following tools and materials:
| Tools | Materials |
|---|---|
| wrench | replacement seats and springs |
| screwdriver | plumber’s grease |
| adjustable pliers | clean cloth |
Step-by-step guide for a successful installation:
- Turn off the water supply. Begin by turning off the water supply to your shower. This can usually be done by shutting off the water valves located beneath the sink or behind the shower wall.
- Remove the faucet handle. Use a screwdriver or wrench to remove the faucet handle. Depending on the type of faucet you have, there may be a screw securing the handle or a cap that needs to be popped off before accessing the screw.
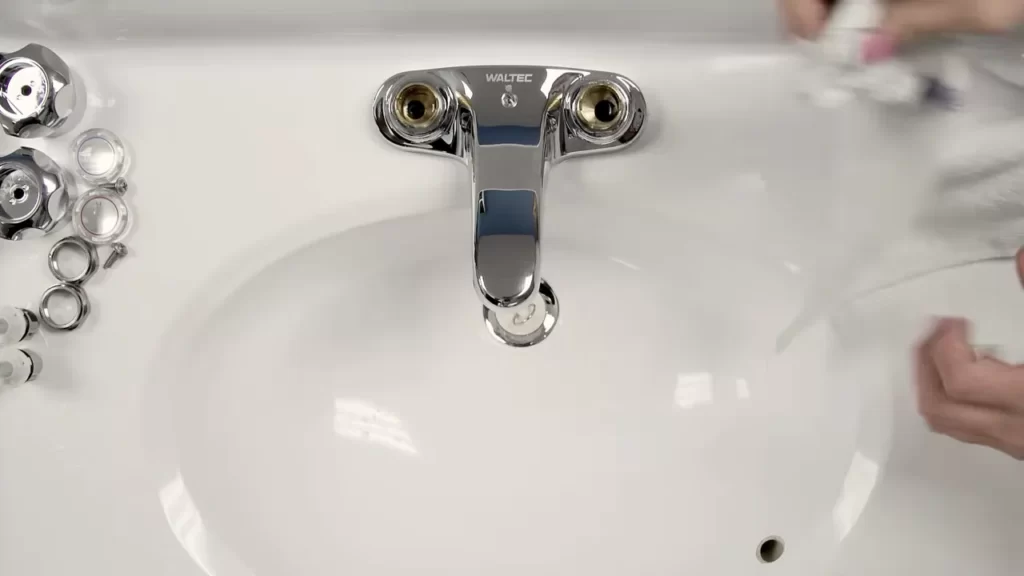
- Access the seat and spring. Once the handle is removed, you will be able to access the seat and spring. They are typically located inside the faucet body.
- Replace the old seats and springs. Use adjustable pliers to carefully remove the old seats and springs. Clean the area and apply plumber’s grease to the new seats and springs.
- Reassemble the faucet. Carefully insert the new seats and springs into the faucet body. Make sure they are properly aligned and seated. Reattach the faucet handle, ensuring a secure fit.
- Turn on the water supply. Once everything is reassembled, turn on the water supply and check for any leaks. If there are no leaks, you have successfully installed the seats and springs in your shower.
By following these steps and properly installing seats and springs, you can enjoy a leak-free shower and avoid potential damages or repair costs. Remember to periodically check and replace the seats and springs to ensure the continued functionality of your shower.
Preparing For Installation
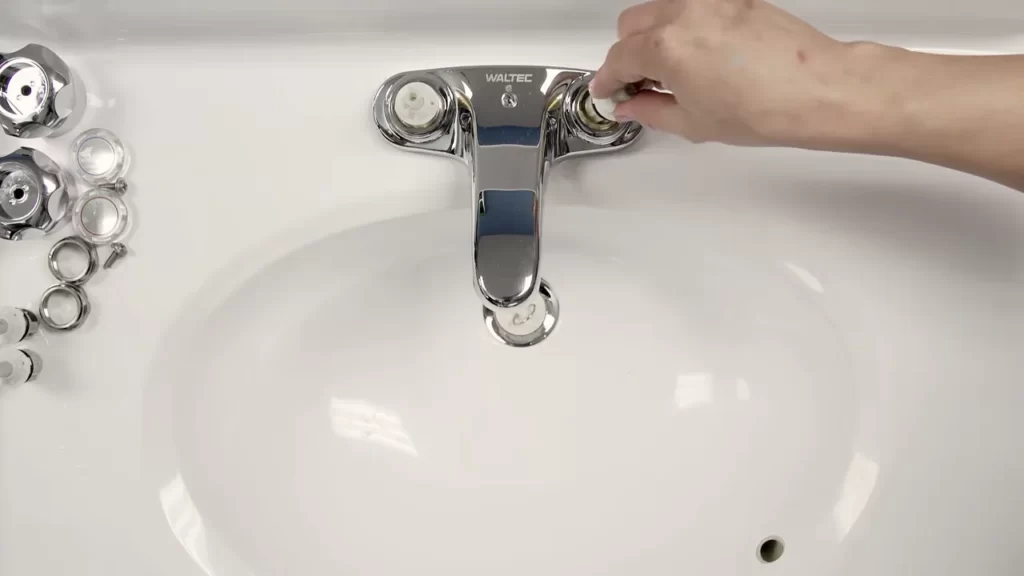
Before you begin installing seats and springs in your shower, it’s essential to prepare properly. Taking the necessary steps to shut off the water supply, remove the shower handle, and identify the seat and spring components will streamline the installation process and ensure a successful outcome. In this section, we will guide you through each of these steps in detail.
Shutting off the water supply
The first step in preparing for the installation of seats and springs is to shut off the water supply to your shower. This will prevent any leaks or unwanted water flow during the process. To do this, locate the main water valve for your shower, which is usually found in the utility room or basement. Turn the valve clockwise until it is securely closed. This simple step will minimize water damage and make the installation much easier.
Removing the shower handle
Once the water supply is turned off, the next step is to remove the shower handle. The handle may be held in place with screws or other fasteners. Use a screwdriver or the appropriate tools to carefully remove any screws and detach the handle from the shower wall. Be mindful not to damage the surrounding fixtures or tiles. Removing the shower handle will provide clear access to the seat and spring components, ensuring a smooth installation process.
Identifying the seat and spring components
Before you proceed with the installation, it is vital to identify the seat and spring components. These components are typically located behind the shower handle and are responsible for controlling the flow of water. The seat is a small rubber or plastic piece that sits within the valve body, while the spring is a coiled metal piece that works in conjunction with the seat. Locate these components and make note of their condition. If they appear worn or damaged, it is recommended to replace them during the installation process for optimal performance.
By following these steps and taking the time to prepare for the installation of seats and springs, you will ensure a smooth and successful process. Next, we will guide you through the step-by-step instructions for installing the new seat and spring components in your shower. Stay tuned!
Removing Old Seats And Springs
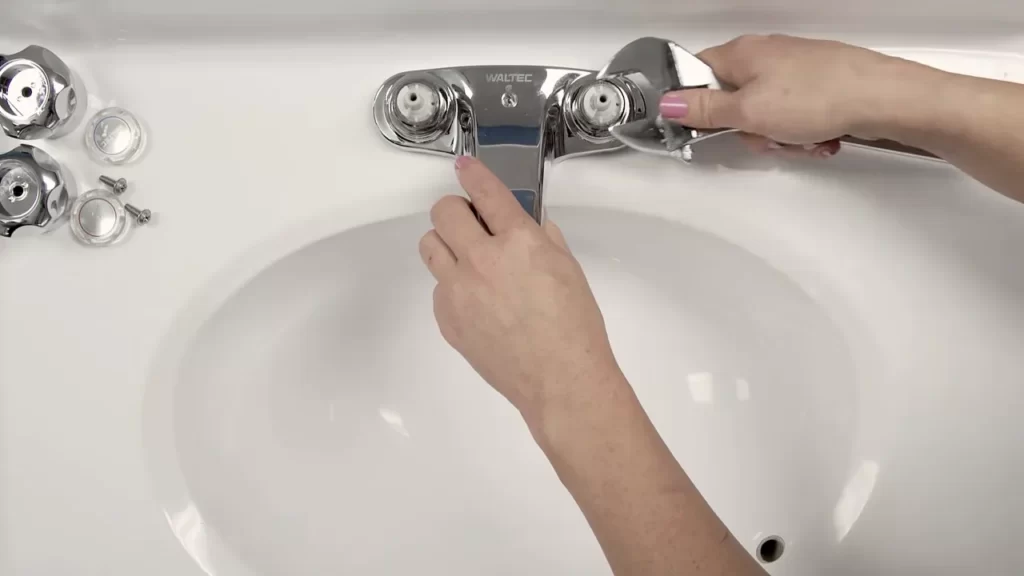
Removing old seats and springs from your shower is an essential step in maintaining its functionality and preventing leaks. Over time, these small parts can become worn out or corroded, affecting the performance of your shower. In this section, we will guide you through the process of safely removing the old seats and springs, as well as provide some useful tips for dealing with stubborn or corroded parts.
Ways to Determine if Seats and Springs Need Replacing
Before embarking on the removal process, it’s important to assess whether or not your seats and springs actually need to be replaced. Here are a few ways to determine if it’s time for an update:
- Leaks: If you notice any water seeping out around the faucet handle when your shower is turned off, it could be a sign that the seats and springs are worn out and in need of replacement.
- Inconsistent Water Temperature: A faulty seat or spring can cause fluctuations in water temperature, making your shower experience less than ideal. If you’re experiencing sudden changes in water temperature, it may be time to replace these parts.
- Difficulty in Turning the Handle: If you find it increasingly difficult to turn the faucet handle, it could be due to worn-out seats and springs. This can be caused by corrosion or general wear and tear over time.
- Visible Damage: Inspect the seats and springs for any signs of damage, such as cracks or chips. Any visible signs of wear can indicate that these parts should be replaced.
Removing the Old Seats and Springs Safely
To remove the old seats and springs from your shower, follow these steps:
- Turn off the water supply to your shower. This can usually be done by closing the water shut-off valves located either in the shower or near the main water supply for your home.
- Remove the faucet handle by unscrewing the screw that holds it in place. You may need to use a screwdriver or an Allen wrench, depending on the type of handle.
- Once the handle is removed, you will see the valve stem. Use a pair of pliers to grip the top of the valve stem and carefully unscrew it in an anticlockwise direction.
- With the valve stem removed, you can now access the old seats and springs. Typically, they are located inside the valve housing.
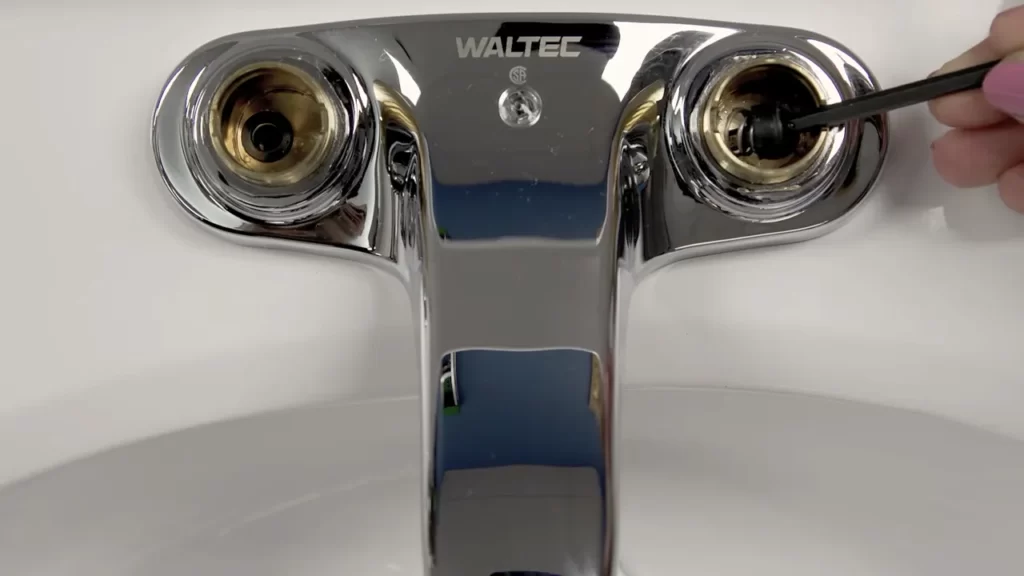
- Use a seat and spring removal tool or a small flat-head screwdriver to carefully pry out the old seats and springs. Be gentle to avoid causing any damage to the surrounding parts.
- Once the old seats and springs are removed, clean the valve housing to ensure there are no debris or mineral buildup.
Tips for Dealing with Stubborn or Corroded Parts
If you encounter stubborn or corroded seats and springs during the removal process, here are a few tips to help you tackle the challenge:
- Apply penetrating oil: If the seats and springs are stuck due to corrosion, applying a penetrating oil can help loosen them. Allow the oil to sit for a few minutes before attempting to remove the parts.
- Use a seat and spring removal tool: These specially designed tools can provide better leverage and grip, making it easier to remove stubborn seats and springs.
- Heat the valve housing: If the seats and springs are exceptionally stubborn, you can try using a heat source, such as a hairdryer, to warm up the valve housing. The heat can help expand the metal and make the removal process easier.
- Seek professional help: If all else fails or if you’re uncomfortable tackling the task on your own, it’s best to seek the assistance of a professional plumber. They have the necessary tools and expertise to handle even the most challenging seat and spring removals.
By following these steps and tips, you can safely remove the old seats and springs from your shower, paving the way for the installation of new, reliable parts. Regular maintenance and replacement of these small components can go a long way in ensuring a leak-free and enjoyable shower experience.
Selecting And Installing New Seats And Springs
When it comes to keeping your shower functioning properly, one of the key components to consider is the seats and springs. These small but important parts help to regulate the flow of water and ensure a consistent and comfortable shower experience. Over time, seats and springs can wear out or become damaged, leading to leaks and other issues. If you’re experiencing any problems with your shower, it may be time to select and install new seats and springs.
Understanding the Different Types of Seats and Springs Available
Before you dive into the installation process, it’s important to understand the different types of seats and springs that are available for your shower. This will allow you to choose the right ones that are compatible with your shower system. Here are some common types:
| Type | Description |
|---|---|
| Compression seats and springs | These are the most common types found in showers. They work by compressing the spring against the seat to control water flow. |
| Cartridge seats and springs | These types are used in cartridge-style showers. They offer easy replacement and tend to have better durability. |
| Ball seats and springs | These are typically used in ball valve showers and feature a ball-shaped component that controls the flow of water. |
| Metering seats and springs | These types are designed to regulate the flow rate of water in institutional and commercial showers. |
Choosing the Right Seats and Springs for Your Shower
Once you have a good understanding of the different types available, it’s time to choose the right seats and springs for your shower. Consider the following factors:
- The type of shower system you have
- The brand and model of your shower components
- The material and durability of the seats and springs
- Any specific features or specifications required for your shower
By taking these factors into account, you can ensure that you select the right seats and springs that will fit and function correctly in your shower.
Step-by-Step Installation Process for the New Seats and Springs
Now that you have your new seats and springs ready, it’s time to install them. Follow these step-by-step instructions:
- Turn off the water supply to your shower to prevent any accidents.
- Remove the handle and trim plate to access the valve body.
- Take out the old seats and springs using a seat wrench or a specially designed tool.
- Clean any debris or buildup in the valve body using a soft brush or cloth.
- Apply a small amount of plumber’s grease to the new seats and springs for smooth operation.
- Insert the new seats and springs into the valve body, making sure they are properly aligned and seated.
- Reassemble the handle and trim plate, ensuring everything is securely tightened.
- Turn on the water supply and test the shower for any leaks or issues.
By following these steps, you can easily and effectively install new seats and springs in your shower. Remember to refer to the manufacturer’s instructions if you have any specific guidelines or recommendations for your shower model.
Troubleshooting Common Issues
Identifying common issues with seat and spring installation
Installing seats and springs in a shower may seem like a straightforward task, but it’s not uncommon to encounter a few hiccups along the way. By familiarizing yourself with common issues, you’ll be better prepared to troubleshoot and resolve any problems that may arise. Here are some common issues to watch out for:
- Leaking faucet: A leaky faucet is one of the most common issues that can occur after installing seats and springs. This may indicate that the rubber seals are not properly seated or that the springs are not aligned correctly.
- Reduced water flow: If you notice a decrease in water flow after seat and spring installation, it could be due to debris or mineral buildup. Over time, sediment can accumulate and restrict the flow of water, affecting the performance of your shower.
- Dripping handle: Another issue you may come across is a dripping handle, even after the installation of new seats and springs. This can occur if the handle is not tightened securely or if the cartridges are damaged and in need of replacement.
Tips for troubleshooting leaks or malfunctions
If you encounter leaks or malfunctions after installing seats and springs, don’t panic. There are a few troubleshooting steps you can take to address the issue:
- Inspect the rubber seats: Remove the faucet handle and inspect the rubber seats for any signs of damage or deterioration. If necessary, replace them with new ones to ensure a proper seal.
- Check the springs: Verify that the springs are correctly positioned and aligned with the seat. Misalignment can cause issues such as leaks or reduced water flow. Adjust them if needed.
- Clean the cartridge: If you’re experiencing reduced water flow, it may be due to mineral or debris buildup in the cartridge. Remove the cartridge and clean it thoroughly before reinstalling it.
- Tighten the handle: A dripping handle can be caused by loose connections. Ensure that the handle is tightened securely to prevent any water leakage.
Additional steps for resolving persistent problems
If you’ve followed the troubleshooting tips above and are still experiencing persistent issues, there are a few additional steps you can take to resolve them:
- Replace the cartridges: If the seats, springs, and cartridges are in good condition but issues persist, it may be necessary to replace the entire cartridge assembly. This can help address any underlying issues that may be causing leaks or malfunctions.
- Consider professional help: If DIY troubleshooting doesn’t solve the problem, it may be time to seek assistance from a professional plumber. They have the knowledge and experience to diagnose and fix more complex issues with seat and spring installations.
- Maintain regular maintenance: To prevent future issues with seat and spring installations, make a habit of regular maintenance. This can involve periodic cleaning, inspecting and replacing parts as needed, and addressing any leaks or malfunctions promptly.
By identifying common issues, troubleshooting leaks or malfunctions, and taking additional steps as necessary, you can ensure that your seat and spring installation in the shower is functioning optimally, allowing you to enjoy a leak-free and refreshing shower experience.
Preventing Future Problems
Proper installation of seats and springs in your shower is essential for its long-term functionality. However, it is equally important to take proactive measures to prevent future issues from arising. By maintaining and cleaning the seats and springs, regularly checking and replacing them, and considering a few important factors, you can ensure that your shower operates smoothly for years to come.
Maintaining and Cleaning the Seats and Springs
To keep your seats and springs in top condition, it is crucial to establish a regular maintenance routine. This involves cleaning them thoroughly on a periodic basis to remove any accumulated dirt, debris, or mineral build-up that may hinder their performance. Here are some simple steps to follow:
- Start by turning off the water supply to the shower and removing the faucet handle using an appropriate screwdriver.
- Once the handle is removed, locate the seats and springs inside the valve housing.
- Gently remove the old seats and springs, making sure not to damage the surrounding components.
- Using a soft brush or cloth, clean the seats and springs by scrubbing away any residue or deposits.
- Inspect the seats and springs for signs of wear or damage. If necessary, replace them with new ones.
- Before reassembling the faucet, apply a thin layer of plumber’s grease to the seats and springs to lubricate them and ensure smooth operation.
- Reinstall the faucet handle, turn on the water supply, and test the functionality of the seats and springs.
Regular Checks and Replacements for Long-Term Functionality
While proper maintenance is crucial, it is also important to regularly check the condition of the seats and springs. Over time, these components may become worn out or damaged, affecting the performance of your shower. By conducting periodic inspections, you can identify any potential issues early on and replace the seats and springs as needed. It is recommended to check them at least once every six months or sooner if you notice any signs of leakage or reduced water flow. This proactive approach will help maintain the long-term functionality of your shower.
Important Considerations for Preventing Future Issues
In addition to maintenance and regular checks, there are a few important considerations to keep in mind to prevent future problems:
- Water Quality: The quality of your water can impact the longevity of the seats and springs. Hard water, for example, can cause mineral deposits to accumulate, which can affect their performance. Consider using a water softener or installing a filtration system to mitigate this issue.
- Usage Habits: Be mindful of how you use your shower and avoid excessive force when turning the handles. Gentle handling can help prolong the lifespan of the seats and springs.
- Professional Assistance: If you are unsure about installing or maintaining the seats and springs yourself, it is advisable to seek the help of a professional plumber. They can ensure proper installation and offer expert guidance on maintenance practices.
By following these guidelines, you can prevent future problems with your shower seats and springs, ensuring that your shower functions optimally and providing you with a pleasant bathing experience for years to come.
Expert Tips And Recommendations
Expert Tips And Recommendations
Installing seats and springs in a shower is an essential task that can ensure the smooth operation and longevity of your faucet. However, it can be a bit tricky if you don’t have the right knowledge and tools. To help you navigate through this process successfully, we have gathered some expert tips and recommendations that will make your installation hassle-free.
Expert Advice for a Successful Seat and Spring Installation
Getting the installation right from the start is crucial for optimal functioning of your shower. Here are some expert tips to ensure a successful seat and spring installation:
- Prepare the area: Prior to starting the installation process, make sure to prep the area by turning off the water supply to the shower. This will prevent any unwanted water flow and potential accidents.
- Use quality products: When it comes to seats and springs, reliability is key. It is highly recommended to choose trusted brands and products that offer reliable performance, ensuring the longevity of your shower faucet.
- Pay attention to the details: During the installation, it’s important to be mindful of the small details. Take care not to damage any of the components and ensure that each piece fits snugly and securely.
- Follow the manufacturer’s instructions: Every faucet and shower system can have slightly different installation requirements. To avoid any mishaps or complications, always refer to the manufacturer’s instructions and follow them carefully.
Recommended Brands and Products for Reliable Performance
Choosing the right brands and products can make a significant difference in the performance and durability of your shower. Here are some recommended brands that offer reliable seats and springs:
| Brand | Product |
|---|---|
| Kohler | Mixet Shower Faucet Set |
| Moen | Posi-Temp Shower Valve Kit |
| Delta | Universal Seats and Springs Kit |
Note: Ensure that the specific product you choose is compatible with your shower system.
Additional Tips and Tricks for Optimizing Your Shower’s Functionality
Improved functionality: Installing new seats and springs presents the perfect opportunity to optimize your shower’s functionality. Consider following these additional tips:
- Regular maintenance: Schedule regular maintenance for your shower to prevent any potential issues before they arise. This includes cleaning the showerhead and checking for any leaks or drips.
- Upgrade your showerhead: If you’re looking for an enhanced shower experience, consider upgrading your showerhead. This can improve water pressure and enhance your overall experience.
- Invest in a water filter: Depending on your location, the water in your area may contain minerals or impurities. Installing a water filter can help improve the water quality for a more refreshing and clean shower.
- Consider a shower valve upgrade: If you’re planning to upgrade your shower system, consider installing a thermostatic mixing valve. This will allow for precise temperature control and prevent sudden temperature fluctuations.
By following these expert tips and recommendations, you can ensure a smooth installation process and optimize the functionality of your shower for a satisfying and refreshing experience.
Frequently Asked Questions
How To Install Delta Seats And Springs?
To install Delta seats and springs, follow these steps: 1. Turn off the water supply. 2. Use a screwdriver to remove the handle. 3. Use pliers to remove the old seat and spring. 4. Install the new seat and spring with pliers.
5. Reassemble the handle and turn on the water supply.
Do You Have To Cut A Hole In A Wall To Replace A Shower Valve?
No, you do not need to cut a hole in the wall to replace a shower valve. The valve can typically be accessed behind the shower wall through an access panel or by removing the handle and trim to reach the valve.
How Do You Install A Shower Cartridge?
To install a shower cartridge, follow these steps: 1. Turn off the water supply to the shower. 2. Remove the handle and trim plate. 3. Take out the old cartridge by unscrewing it or pulling it out. 4. Insert the new cartridge and secure it in place.
5. Reassemble the handle and trim plate.
How Do I Know If My Shower Cartridge Is Bad?
If your shower cartridge is bad, you may experience low water pressure, leaking, or difficulty adjusting the temperature. Look for these signs and consider replacing the cartridge if needed.
Conclusion
To sum up, installing seats and springs in a shower is a relatively simple process that can greatly improve the functionality of your shower. By following the step-by-step instructions outlined in this blog post, you can ensure a smooth installation experience.
Remember to gather all necessary tools and materials beforehand, and take your time to complete each step accurately. With the right approach, you’ll have your shower functioning at its best in no time. Happy DIY-ing!
