
To install a rubber shower pan, first, remove the existing shower pan and clean the area thoroughly. Then, apply adhesive to the floor and press the rubber pan firmly down, ensuring a secure seal.
Introducing a rubber shower pan to your bathroom can provide a reliable and long-lasting solution for preventing water leaks. Whether you are replacing an old shower pan or installing a new one, the process can be relatively simple and straightforward.
By following a few steps, you can successfully install a rubber shower pan and enjoy a leak-free shower experience. We will guide you through the process of installing a rubber shower pan in your bathroom, ensuring a watertight and durable foundation. So let’s dive right in and find out how to install a rubber shower pan effectively.
Examining The Shower Area
Before installing a rubber shower pan, it is important to thoroughly examine the shower area to ensure a proper fit and installation. Inspecting the shower base and measuring the shower area are two crucial steps in this process.
Inspecting the Shower Base
Firstly, closely inspect the shower base to identify any structural issues or possible damage. Check for cracks, chips, or any signs of water leakage. Pay attention to the condition of the existing drainage system as well. It is essential to address these issues before installing a rubber shower pan to prevent any future problems.
Measuring the Shower Area
Once you have inspected the shower base, it is time to measure the shower area to ensure the rubber shower pan fits accurately. Here’s a step-by-step guide to help you with the process:
- Start by measuring the length and width of the shower area using a measuring tape. Take precise measurements to avoid any miscalculations and ensure a perfect fit.
- Next, measure the height of the shower curb or the distance between the shower floor and the top of the curb. This measurement is crucial for determining the size of the rubber shower pan needed.
- Consider the thickness of the rubber shower pan and factor it into your measurements. This will ensure the pan fits snugly without any gaps or overlapping.
- Take note of any irregularities or slopes in the shower area, as these can affect the installation process. Keep these measurements in mind when purchasing the rubber shower pan to ensure it accommodates any variations in the shower floor.
By carefully inspecting the shower base and accurately measuring the shower area, you will have a solid foundation for installing a rubber shower pan. These steps are essential for a successful installation, providing you with a secure and watertight shower space.
Gathering Tools And Materials
Before you start installing a rubber shower pan, it’s important to gather all the necessary tools and materials. By having everything on hand, you’ll be able to work efficiently and complete the project without any unnecessary delays. Here are the tools and materials you’ll need for this installation:
| Tool/Material | Description |
|---|---|
| Rubber Shower Pan | A high-quality rubber shower pan that fits your shower area is essential for creating a watertight barrier. It should be durable, easy to cut, and resistant to leaks. |
| Adhesive | Choose a strong adhesive specifically designed for bonding rubber to various surfaces. Make sure it is waterproof and provides a secure attachment. |
| Caulk Gun | A caulk gun is necessary for applying adhesive smoothly and evenly. Look for a durable caulk gun that allows for precise control. |
| Utility Knife | A sharp utility knife is indispensable for trimming the rubber shower pan to fit your shower area perfectly. It should have a retractable blade for safety. |
| Measuring Tape | Accurate measurements are crucial in ensuring a proper fit. Use a flexible measuring tape to measure the dimensions of your shower area. |
| Level | To ensure the rubber shower pan is installed evenly, use a level to check for any slopes or uneven surfaces. This will help prevent water pooling or leakage. |
| Notched Trowel | A notched trowel is useful for spreading adhesive evenly onto the subfloor. The notches in the trowel help create grooves, maximizing the bond between the rubber pan and the subfloor. |
Now that you have all the necessary tools and materials, you’re ready to move on to the next step: preparing the shower area for installation.
Disconnecting The Drain
When it comes to installing a rubber shower pan, one of the essential steps is disconnecting the drain. This process involves loosening the drain cover and disconnecting the drain pipe. By following these steps correctly, you can ensure a smooth and successful installation. In this post, we will guide you through each step in detail, ensuring that you have a clear understanding of the process.
Loosening the Drain Cover
The first step in disconnecting the drain is to loosen the drain cover. To do this, follow these simple steps:
- Start by locating the drain cover in your shower. It is usually located in the center of the shower floor.
- Using a screwdriver or a suitable tool, carefully remove the screws or bolts that are holding the drain cover in place.
- Once the screws or bolts are removed, gently lift the drain cover off the shower floor. Be cautious not to damage the drain cover in the process.
Disconnecting the Drain Pipe
After loosening the drain cover, the next step is to disconnect the drain pipe. This step requires some careful attention, so make sure to follow these instructions closely:
- Inspect the drain pipe to locate the connections. There may be various types of connections, such as glue joints or threaded connections.
- If there are glue joints, use a suitable solvent to break down the adhesive. Apply the solvent carefully and allow it to sit for the recommended time as mentioned on the solvent label.
- After the adhesive is sufficiently softened, carefully twist and pull apart the glued sections of the drain pipe.
- If the connections are threaded, use a wrench or pliers to loosen the fittings. Turn counterclockwise to unscrew the connections and gently pull the pipe sections apart.
By following these steps, you will successfully disconnect the drain, allowing you to proceed with the installation of your rubber shower pan. The key is to be cautious and take your time to ensure that you do not damage any components in the process. In the next section, we will guide you through the process of installing the rubber shower pan itself, so stay tuned!
Removing The Existing Pan
Are you planning to install a new rubber shower pan in your bathroom? The first step is to remove the existing pan. This may seem like a daunting task, but with the right tools and a little bit of patience, you can easily complete this step. In this article, we will guide you through the process of removing the old pan step by step, ensuring a smooth transition to your new rubber shower pan.
Cutting Caulk and Adhesive Seal
The first thing you need to do is cut the caulk and adhesive seal that holds the existing pan in place. To do this, use a utility knife or a caulk removal tool to carefully cut along the edges where the pan meets the walls and the shower floor. Be sure to wear gloves to protect your hands during this process.
Once you have cut the caulk and adhesive seal, gently pry up the edges of the pan using a pry bar or a putty knife. Take your time and be careful not to damage the walls or the floor. If you encounter any stubborn areas, you can use a heat gun to soften the adhesive and make it easier to remove.
Detaching the Pan from the Walls
After cutting the caulk and adhesive seal, it’s time to detach the pan from the walls. Start by removing any screws or nails that may be securing the pan to the walls. Use a screwdriver or a pry bar to loosen and remove these fasteners. Once the fasteners are removed, gently pull the pan away from the walls, making sure to support it to prevent it from falling.
If the pan is still tightly attached to the walls, you can use a putty knife or a pry bar to carefully separate the pan from the wall surface. Take your time and be mindful of any delicate materials, such as tiles or plaster, that may be damaged during this process.
Removing the Pan from the Shower Area
With the pan detached from the walls, the next step is to remove it from the shower area. Carefully lift the pan and check if it is attached to the shower drain. If so, you will need to disconnect it before fully removing the pan. Refer to the manufacturer’s instructions for guidance on how to disconnect the pan from the drain.
Once the pan is disconnected from the drain, you can easily lift it out of the shower area. Be cautious of the weight and size of the pan to prevent any injuries. If needed, ask for assistance from another person to ensure a safe and smooth removal.
Now that you have successfully removed the existing pan, you are ready to move on to the next steps of installing your new rubber shower pan. Stay tuned for our upcoming blog posts where we will guide you through the installation process in detail.
Preparing The Subfloor
Before installing a rubber shower pan, it is crucial to properly prepare the subfloor. This ensures a stable and durable base for the shower pan installation and prevents any future issues such as leaks or cracks. There are a few essential steps to follow when preparing the subfloor for a rubber shower pan installation.
Ensuring a Clean and Level Surface
The first step in preparing the subfloor is to ensure it is clean and level. Any dirt, debris, or old adhesive should be thoroughly removed, as it can affect the adhesion of the shower pan. A clean and dry surface is essential for optimal installation. Additionally, double-check that the subfloor is level. Use a level tool to measure and identify any areas that require leveling.
Making Any Necessary Repairs
If there are any visible damages or flaws in the subfloor, it is crucial to make the necessary repairs before installing the rubber shower pan. Fix any loose or broken floorboards, repair cracks, and fill in any gaps or holes. This will ensure a solid and stable subfloor for the shower pan installation.
If the subfloor is made of wood, check for any signs of rot or water damage. Replace any rotted or damaged sections of the subfloor. It is important to address these issues before proceeding with the installation, as they can compromise the integrity of the shower pan and cause future problems.
For concrete subfloors, check for any cracks or uneven areas. Fill in any cracks using a concrete filler or patching compound. Use a leveling compound to even out any low or high spots on the concrete subfloor. This will create a smooth and level surface for the rubber shower pan installation.
By ensuring a clean and level subfloor, as well as making any necessary repairs, you are laying a solid foundation for the rubber shower pan installation. Taking the time to properly prepare the subfloor will result in a secure and long-lasting shower pan that provides years of reliable use.
Placing The Rubber Shower Pan
Once you have prepared the shower area and ensured that it is clean and free from any debris, it is time to move on to the next step: placing the rubber shower pan. This crucial step will help create a watertight seal, preventing any leakage that could potentially damage your floor or walls. In this section, we will guide you through the process of unrolling the rubber shower pan, positioning it correctly, and ensuring proper overlapping and placement.
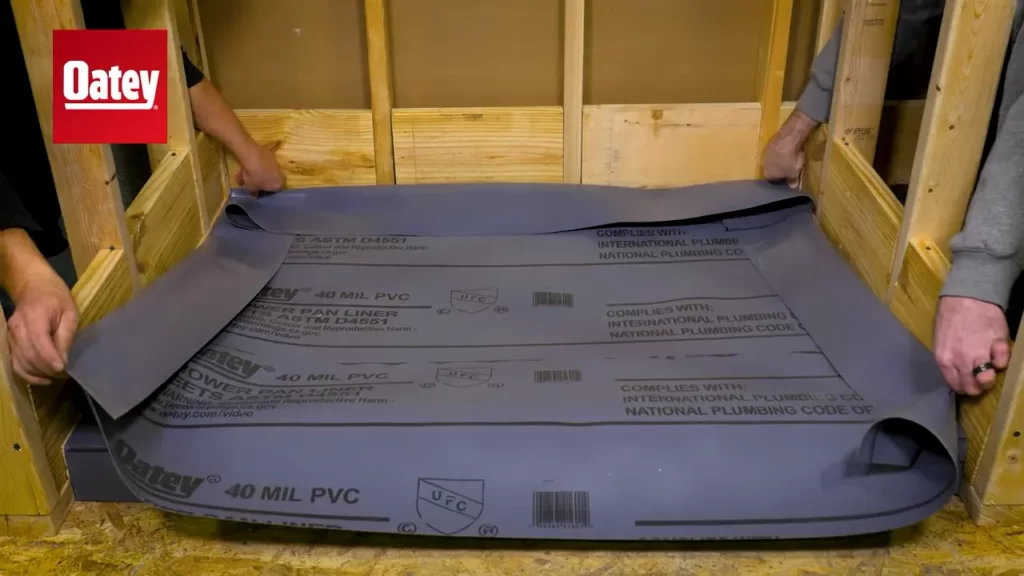
Unrolling the Rubber Shower Pan
To begin, carefully unroll the rubber shower pan and place it in the shower area. Ensure that the bottom of the pan is positioned flat against the floor, allowing it to cover the entire shower space. **Be sure to smooth out any wrinkles or folds in the rubber pan to ensure a snug fit.**
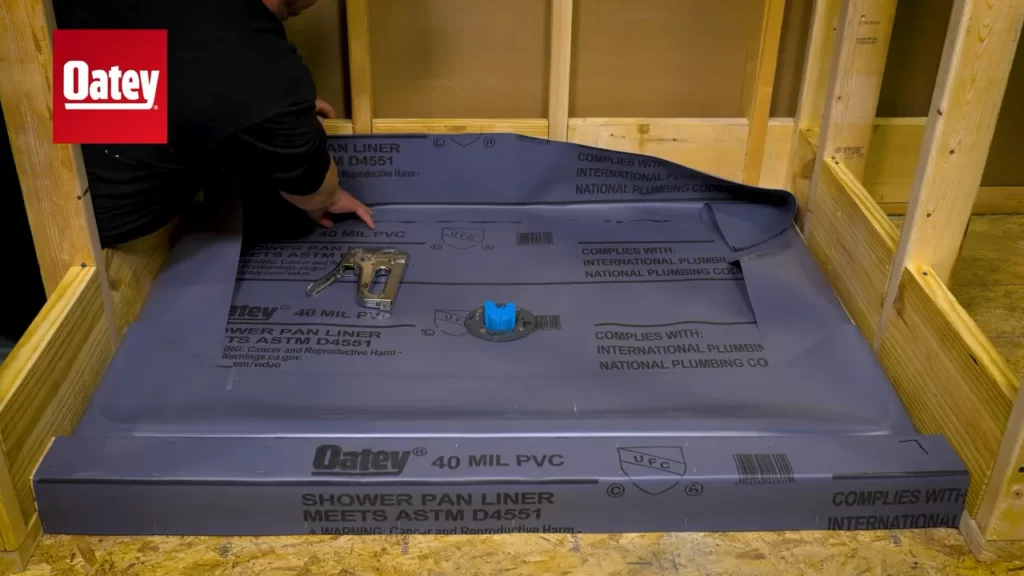
Positioning the Pan in the Shower Area
Once the rubber shower pan is unrolled, it’s time to position it correctly in the shower area. Start by aligning the pan with the walls, ensuring that it extends slightly up the sides. This will help prevent any water from seeping into the adjacent areas. Additionally, **make sure that the pan is centered within the shower space to maintain symmetry and proper drainage.**
Ensuring Proper Overlapping and Placement
Proper overlapping and placement of the rubber pan is crucial for creating a watertight seal. Start by **ensuring that the pan overlaps the shower curb or any vertical surfaces by at least a few inches**. This will help prevent water from seeping underneath the pan and causing damage. Moreover, **make sure that the pan extends up the walls at least several inches to create a proper barrier against moisture**.
Once you have positioned the pan correctly, **press down firmly on the pan to adhere it to the floor and walls**. Take extra care to smooth out any air pockets or bubbles that may have formed during the process. **By doing so, you will ensure a tight fit that will effectively contain water within the shower area**.
Now that you have successfully placed the rubber shower pan, you are ready to move on to the next step of your shower installation process. Stay tuned for our next blog post, where we will guide you through the remaining steps to complete your shower project with ease and efficiency.
Securing The Rubber Pan
Once you have properly prepared your shower subfloor and laid out the rubber pan, it’s time to secure it in place. This step is crucial to prevent any leaks or damage in the future. In this section, we will discuss how to apply adhesive to the subfloor, firmly press the rubber pan in place, and check for a proper fit.
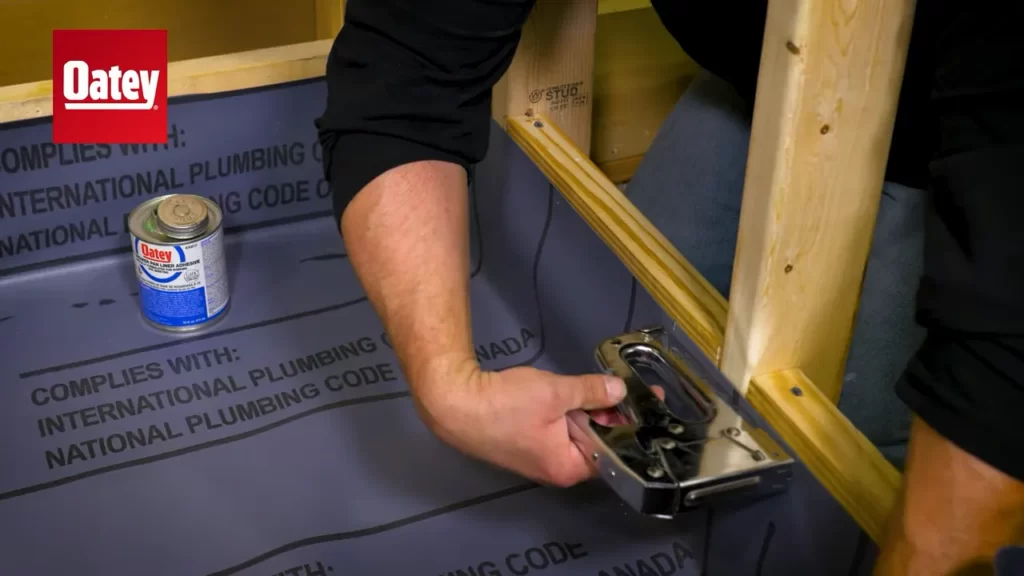
Applying Adhesive to the Subfloor
Before you can secure the rubber pan, you need to apply adhesive to the subfloor. Make sure you select a high-quality adhesive that is specifically designed for rubber shower pans. Here’s how you can proceed:
- Clean the subfloor thoroughly to remove any dirt, debris, or old adhesive.
- Apply the adhesive evenly over the entire surface of the subfloor using a trowel.
- Make sure to follow the manufacturer’s instructions for the recommended amount of adhesive to use.
Pressing the Rubber Pan Firmly in Place
Once the adhesive is applied, it’s time to press the rubber pan firmly in place. This will ensure a secure and watertight seal. Here are the steps to follow:
- Starting from one end of the shower, carefully lower the rubber pan onto the adhesive.
- Press the rubber pan down firmly, making sure it adheres to the adhesive and the subfloor.
- Use a flat trowel or a roller to smooth out any air bubbles or wrinkles in the rubber pan.
- Continue this process until the entire rubber pan is securely in place.
Checking for Proper Fit
After securing the rubber pan, it’s important to check for a proper fit. This will ensure that the rubber pan is correctly aligned and will provide a solid foundation for your shower. Here’s what you need to do:
- Inspect the edges of the rubber pan to ensure they are flush against the walls of the shower.
- Check for any gaps or uneven areas that may require additional adhesive or adjustments.
- Make sure the drain hole aligns properly with the shower drain.
By following these steps and checking for a proper fit, you can ensure that your rubber shower pan is securely installed and ready for use.
Trimming Excess Rubber
Trimming the excess rubber is a crucial step in installing a rubber shower pan. This ensures that the pan fits perfectly and leaves you with a neat and flush edge. In this section, we will guide you through the two important steps: marking and trimming the rubber pan, and ensuring a neat and flush edge.
Marking and Trimming the Rubber Pan
Before you begin, make sure you have all the necessary tools: a utility knife with a sharp blade, a straight edge, and a measuring tape.
1. Measure and mark:
- Using the measuring tape, measure the excess rubber around the edges of the shower pan.
- Make several small marks along the edge of the rubber pan to indicate where you will be cutting.
2. Cut the rubber:
Place the straight edge along the marked line to guide your knife.
Using a steady and light pressure, carefully cut along the marked line, making sure to follow the straight edge.
Repeat this process for all the marked lines until all the excess rubber is trimmed.
Ensuring a Neat and Flush Edge
Once you have trimmed the excess rubber, it’s important to ensure that you have a neat and flush edge for a professional-looking installation.
1. Smooth the edges:
After trimming, use light pressure with the edge of the utility knife to smooth out any rough edges.
Run the knife along the trimmed edge, creating a smooth and clean finish.
2. Check for alignment:
Place the rubber shower pan back into the shower floor and check if the edges align properly.
If you notice any unevenness, use the utility knife to make small adjustments until the edges are flush and aligned.
By following these steps, you can ensure that your rubber shower pan is properly trimmed and has a neat and flush edge. This will not only enhance the overall appearance but also prevent any water leakage, providing you with a durable and waterproof shower installation.
Sealing Edges And Corners
When it comes to installing a rubber shower pan, one of the most important steps is properly sealing the edges and corners. This ensures that water won’t leak out from underneath the pan and cause damage to your bathroom floor. In this guide, we’ll walk you through the process of sealing the edges and corners of your rubber shower pan to ensure a watertight installation.
Applying Caulk to the Edges
The first step in sealing the edges of your rubber shower pan is to apply caulk. Caulk is a flexible material that creates a waterproof seal between the shower pan and the walls or flooring of your bathroom. To apply the caulk, follow these steps:
- Start by preparing the surface. Clean the edges of the shower pan thoroughly, making sure to remove any dirt, debris, or old caulk. This will ensure proper adhesion of the new caulk.
- Load a caulk gun with the caulk of your choice. Silicone caulk is often used for this purpose due to its flexibility and water-resistant properties.
- Position the caulk gun at a 45-degree angle along the edge of the shower pan and press the trigger to start a steady flow of caulk.
- Slowly move the caulk gun along the edge, applying a consistent bead of caulk. Be sure to maintain a steady hand and apply even pressure to ensure a uniform seal.
- Continue applying caulk to all the edges and corners of the shower pan, working your way around the entire perimeter.
Ensuring Proper Coverage and Adhesion
Once the caulk has been applied, it’s important to ensure proper coverage and adhesion. Follow these tips to make sure your rubber shower pan is securely sealed:
- Use a caulk smoothing tool or your finger to press the caulk firmly into the groove between the shower pan and the walls or flooring. This will help to ensure a tight seal and eliminate any air pockets.
- Inspect the caulk line carefully to ensure there are no gaps or areas where the caulk didn’t adhere properly. If you find any, simply add more caulk and smooth it out again.
- Allow the caulk to dry completely before using the shower. This will typically take 24 to 48 hours, depending on the type of caulk you used.
Smoothing the Caulk for a Clean Finish
To achieve a professional and clean-looking finish, it’s important to smooth the caulk properly. Here’s how you can do it:
- Dip your finger or a caulk smoothing tool into a bowl of water.
- Gently run your wet finger or tool along the caulk line, applying light pressure. This will help to smooth out any imperfections and create a professional-looking finish.
- Wipe away any excess caulk with a damp cloth.
- Allow the caulk to dry completely before using the shower.
By following these steps and properly sealing the edges and corners of your rubber shower pan, you can ensure a watertight installation and enjoy a leak-free shower experience.
Testing For Leaks
Once you have successfully installed the rubber shower pan, the next important step is to test for leaks. This crucial step ensures that your shower pan is installed correctly and will protect your bathroom from water damage. Testing for leaks is a simple process that involves filling the shower base with water and observing for any leaks or drips.
Filling the Shower Base with Water
To begin the testing process, start by filling the shower base with water. This will allow you to identify any leaks or weak spots in the rubber shower pan. Make sure to close off any drains or openings in the shower base before filling it with water. You can use a garden hose or a bucket to fill the shower base.
When filling the shower base with water, it is important to do it gradually. This will help to simulate the normal shower conditions and put the rubber shower pan to the test. Fill the shower base until it reaches a level that is slightly higher than the drain. This will ensure that any leaks or drips are easily detectable.
Observing for Any Leaks or Drips
Once the shower base is filled with water, it’s time to observe for any leaks or drips. Carefully inspect the entire surface of the rubber shower pan, paying close attention to the edges and corners. Look for any signs of water seeping through or pooling in certain areas.
One effective method to detect leaks is to run your hand along the surface of the rubber shower pan. Feel for any wet spots or areas where the water seems to be leaking. Additionally, you can also use a flashlight to check for any signs of water dripping or running along the surface.
If you notice any leaks or drips during the testing process, it is important to address them promptly. This may involve resealing certain areas of the rubber shower pan or applying additional waterproofing measures. Taking immediate action will help prevent any further damage and ensure a fully functional and leak-free shower.
By following these simple steps and conducting a thorough leak test, you can ensure that your rubber shower pan is installed correctly and will provide a reliable waterproof barrier. Testing for leaks is an essential part of the installation process, allowing you to enjoy your shower without any worries of water damage.
Frequently Asked Questions
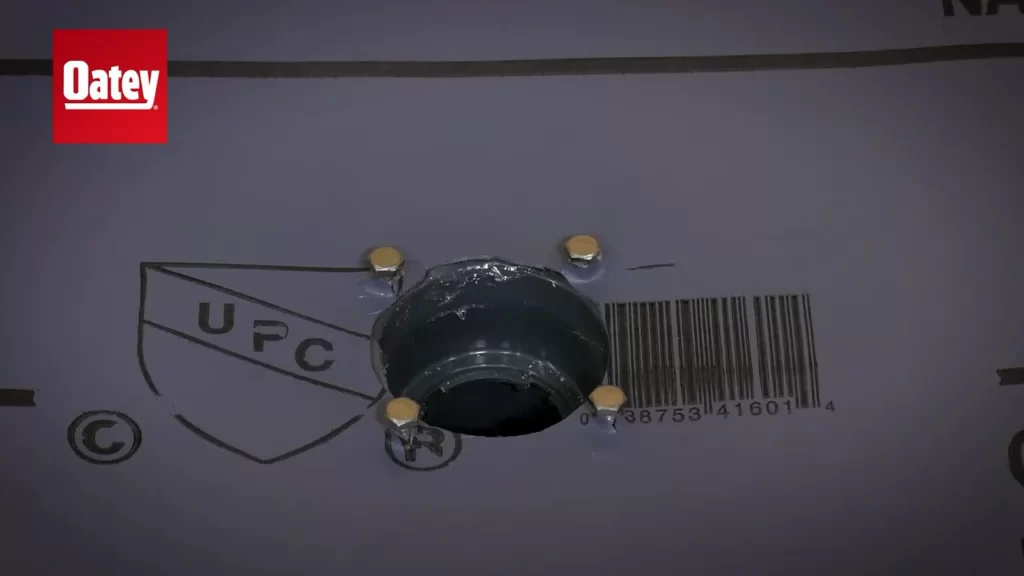
How Do You Install A Rubber Gasket On A Shower Base?
To install a rubber gasket on a shower base, follow these simple steps: first, clean and dry the surface of the base. Then, place the gasket around the drain hole and press it firmly into place. Make sure it is centered and securely sealed.
Finally, trim off any excess gasket material and test for leaks.
Does A Shower Pan Need To Be Glued Down?
Yes, a shower pan should be glued down. Gluing the shower pan ensures stability and prevents leaks. Using adhesive will hold the pan securely in place for long-lasting performance.
What Is The Proper Way To Install A Shower Pan?
To properly install a shower pan, follow these 5 guidelines: 1. Prepare the subfloor by removing any debris and ensuring it’s level. 2. Apply a layer of thinset mortar to the subfloor using a trowel. 3. Place the shower pan over the mortar, ensuring it is properly aligned.
4. Secure the pan to the subfloor using screws or nails. 5. Apply a waterproofing membrane and connect the drain.
What Do You Put Under Shower Pan For Support?
Shower pans need support. Use mortar or cement under the pan to give it stability. This creates a solid base for the pan and prevents any movement or damage.
Conclusion
Installing a rubber shower pan is a simple and effective way to prevent leaks and water damage in your bathroom. By following the step-by-step guide provided in this blog post, you can easily and confidently install your rubber shower pan.
Remember to choose a high-quality rubber pan and use the recommended adhesive for a secure and long-lasting installation. With the right tools and techniques, you can enjoy a waterproof and hassle-free shower experience for years to come.