To install PVC conduit, begin by measuring and marking the desired layout, then cut lengths of conduit and attach fittings to create the desired configuration.
Planning And Preparation
Before you start installing PVC conduit for your electrical project, it’s important to have a well-thought-out plan in place and ensure you have all the necessary tools and materials. This will help streamline the installation process and ensure the project is a success.
Determining the project requirements
The first step in planning your PVC conduit installation is to determine the specific requirements of your project. This includes identifying the location where the conduit will be installed, the purpose of the conduit (e.g., electrical wiring, telecommunications), and any specific regulations or codes that need to be followed.
To ensure proper planning, ask yourself the following questions:
- What is the purpose of the conduit?
- What are the electrical or communication needs in the area?
- Are there any specific regulations or codes that need to be adhered to?
By answering these questions, you can assess the scope of your project and determine the best approach.
Selecting the appropriate PVC conduit size and type
Once you have determined the project requirements, the next step is to select the appropriate size and type of PVC conduit. This will depend on factors such as the number and size of cables or wires that will be run through the conduit, the environment in which it will be installed (indoor or outdoor), and any specific regulations or codes.
Consider the following when selecting PVC conduit:
- Number and size of cables or wires
- Indoor or outdoor installation
- Specific regulations or codes
Take proper measurements to determine the size of the conduit required and choose a type that is suitable for the project needs. PVC conduit is available in various sizes and types, such as rigid (Schedule 40) or flexible (Schedule 80).
Acquiring the necessary tools and materials
Once you have determined the requirements and selected the appropriate PVC conduit, it’s time to gather all the necessary tools and materials for the installation. This will ensure that you have everything you need on hand and can complete the project smoothly.
Here is a list of the basic tools and materials you will need for installing PVC conduit:
| Tools | Materials |
|---|---|
| Measuring tape | PVC conduit pipes |
| Hacksaw or pipe cutter | PVC conduit connectors |
| PVC solvent cement | PVC conduit fittings |
| Drill with hole saw attachment | Duct seal compound |
| Screwdriver | Cable or wire |
| Level | Mounting brackets or straps |
| Hammer | Grounding wire |
Make sure you have all the necessary tools and materials before you start the installation process. This will save you time and prevent any unnecessary delays.
By ensuring your project requirements are determined, selecting the appropriate PVC conduit size and type, and acquiring the necessary tools and materials, you will be well-prepared for the installation process.

Step-By-Step Installation Process
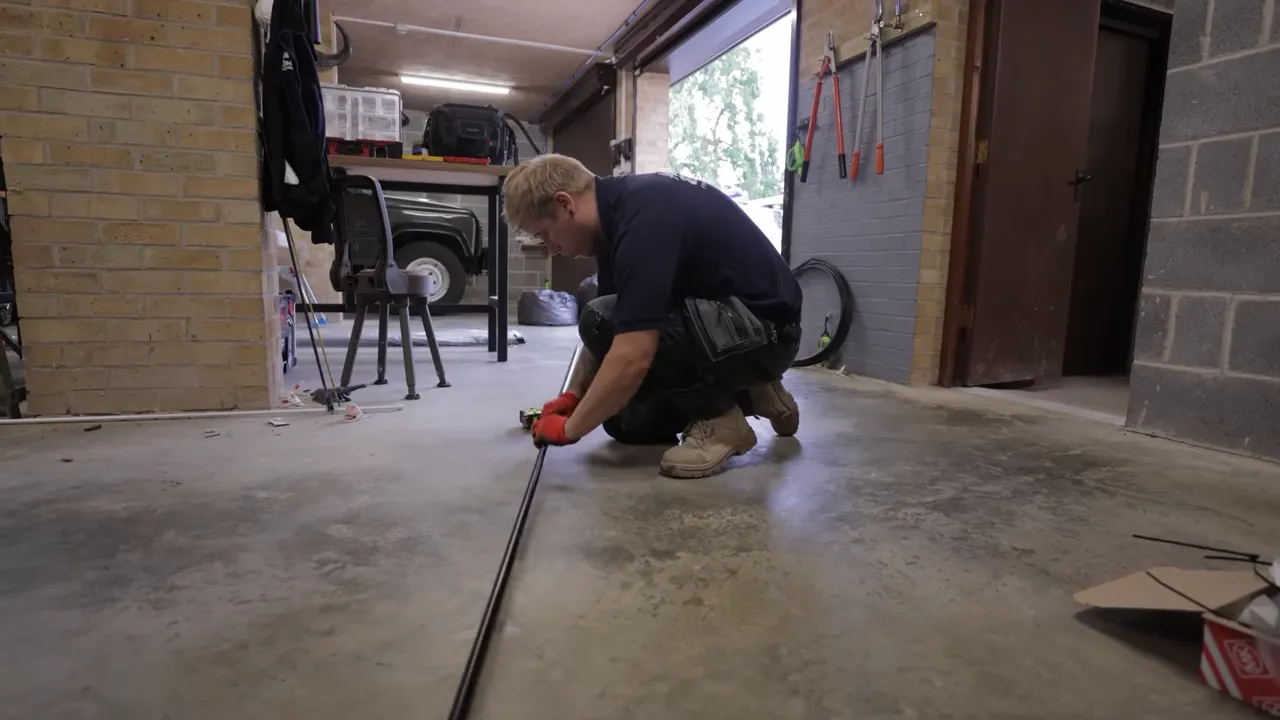
Installing PVC conduit requires careful planning and attention to detail. In this step-by-step guide, we will walk you through the installation process to ensure a safe and efficient installation. Follow these instructions to mark the conduit route, cut the conduit to the desired length, deburr the edges, install conduit fittings, secure the conduit in place, assemble multiple conduit sections, install conduit supports and hangers, and finally, connect the conduit to electrical boxes or fittings.
Marking the Conduit Route
The first step in installing PVC conduit is to carefully mark the route where the conduit will be installed. Start by determining the path that the conduit will follow, taking into consideration any obstacles or obstructions along the way. Once you have determined the route, use a marker or chalk to mark the location where the conduit will be placed.
Cutting the Conduit to the Desired Length
After marking the conduit route, it’s time to cut the conduit to the desired length. Measure the distance between the two ends of the conduit route and add a few inches for adjustments. Using a saw or a conduit cutter, carefully cut the conduit at the marked location. Ensure that the cut is clean and straight to ensure a proper fit.
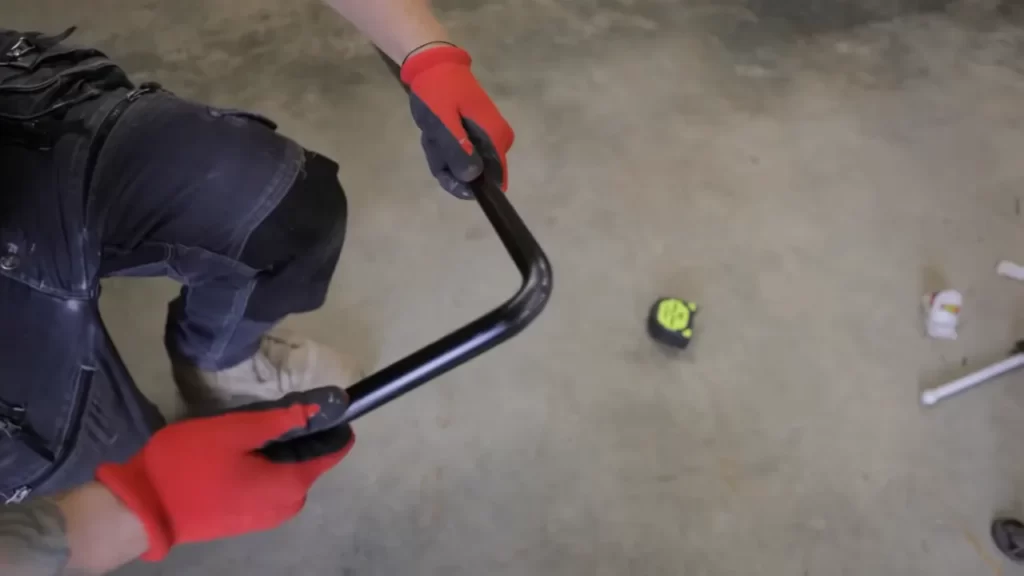
Deburring the Edges of the Conduit
Once the conduit is cut to the desired length, it’s important to deburr the edges to remove any rough or sharp edges. Using a deburring tool or a utility knife, carefully smooth out the edges of the conduit to prevent any damage to the wires or cables that will be pulled through.
Installing Conduit Fittings
With the conduit cut and deburred, it’s time to install conduit fittings. Conduit fittings are used to connect the conduit to electrical boxes or fittings. Start by selecting the appropriate fittings for your installation. Common fittings include connectors, elbows, and adapters. Apply PVC primer to the inside of the fitting and the outside of the conduit, then apply PVC cement to both surfaces. Connect the fitting to the conduit, ensuring a secure and tight fit.
Securing the Conduit in Place
Once the conduit fittings are installed, it’s important to secure the conduit in place. Use conduit straps or clips to secure the conduit to walls, ceilings, or other surfaces. Space the straps or clips evenly along the conduit route to provide adequate support and prevent sagging or bending.
Assembling Multiple Conduit Sections
If your conduit route requires multiple sections of conduit, you will need to assemble them together. Start by connecting the ends of the conduit sections using couplings or connectors. Apply PVC primer and cement to ensure a secure connection. Ensure that the conduit sections are aligned properly to maintain a straight and continuous conduit route.
Installing Conduit Supports and Hangers
For longer conduit runs, additional support may be required. Install conduit supports or hangers at regular intervals along the conduit route to provide additional stability and prevent sagging. Use appropriate hardware and fasteners to secure the supports or hangers to the surface.
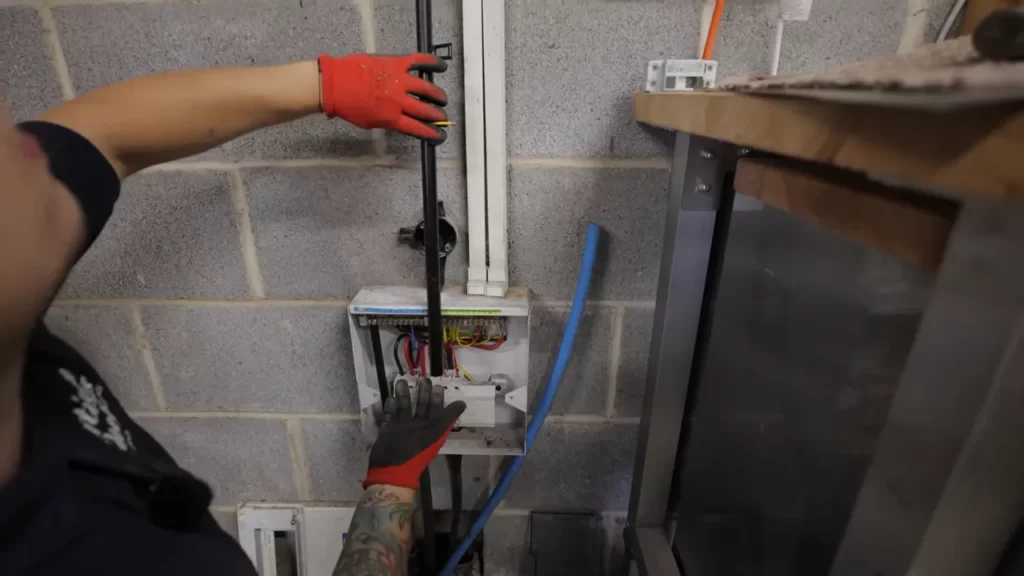
Connecting the Conduit to Electrical Boxes or Fittings
The final step in the installation process is to connect the conduit to electrical boxes or fittings. Start by measuring and cutting an opening in the electrical box or fitting that matches the size of the conduit. Insert the conduit into the opening, ensuring a snug fit. Use locknuts or compression fittings to secure the conduit in place.
By following these steps, you can successfully install PVC conduit for your electrical wiring needs. Taking the time to properly plan and execute the installation will ensure a safe and reliable electrical system.
Ensuring Proper Conduit Installation
Installing PVC conduit is an essential step in electrical projects to protect and route electrical wires effectively. However, simply installing it is not enough; ensuring proper conduit installation is crucial for the safe and efficient operation of any electrical system. In this section, we will discuss important checkpoints to consider when installing PVC conduit. Let’s dive in!
Checking for proper alignment and level
Before moving forward with the installation, it is essential to check that the PVC conduit is properly aligned and level. This ensures that the conduit runs smoothly and seamlessly without any kinks or bends that could impede wire pulling. To confirm proper alignment, use a level tool to align the conduit straight along its entire length. This simple step helps guarantee a professional and streamlined installation process.
Verifying the conduit is securely attached
Securing the PVC conduit in place is another critical aspect of proper installation. Whether it’s a wall, ceiling, or floor, it is essential to ensure that the conduit is securely attached. This helps prevent unwanted movement, sagging, or potential damage that could occur over time. To achieve this, use appropriate mounting brackets, straps, or clamps suitable for the surface the conduit will be attached to. Remember to check the manufacturer’s guidelines for recommended attachment methods.
Testing the conduit for smooth wire pulling
One of the main purposes of a conduit is to provide a smooth and obstacle-free pathway for electrical wires. To ensure this, it is highly recommended to test the conduit for smooth wire pulling before completing the installation. Apply a lubricant specifically designed for conduit installations to minimize friction and make the process of pulling wires easier. By doing so, you can avoid potential damage or unnecessary strain on the wires during the installation process.
Inspecting for any damage or defects in the conduit
Prior to installing the PVC conduit, carefully inspect it for any signs of damage or defects. Look for cracks, dents, or other visible issues that could compromise its integrity or impact its functionality. Additionally, inspect the ends of the conduit to ensure they are clean and free from any debris or obstructions. It is crucial to address any defects or damage before proceeding, as a faulty conduit can lead to future problems or delays in electrical projects.
In conclusion, ensuring proper conduit installation is vital to the success of any electrical project. By following these four checkpoints—checking for proper alignment and level, verifying secure attachment, testing for smooth wire pulling, and inspecting for damage or defects—you can guarantee a professional and efficient installation. Take the time to carry out these steps, and you’ll be well on your way to a safe and reliable electrical system!
Tips For A Successful Pvc Conduit Installation
Installing PVC conduit is an essential step in electrical installations, ensuring the safe and efficient routing of electrical wires. However, without proper knowledge and techniques, the installation process can become challenging and time-consuming. To help you achieve a successful PVC conduit installation, we have compiled a list of tips that cover various aspects of the process. From using lubricants for easier wire pulling to conducting a final inspection, following these guidelines will ensure a smooth and compliant installation.
Using lubricants for easier wire pulling
One of the most important tips for a successful PVC conduit installation is utilizing lubricants during the wire pulling process. Lubricants create a slippery surface, reducing friction and making it easier to navigate wires through the conduit. It is recommended to use specific lubricants designed for electrical applications. Applying lubricant generously before inserting the wires will significantly decrease the chances of wire damage or getting stuck. This step can save you time and ensure a smooth wire pulling process.
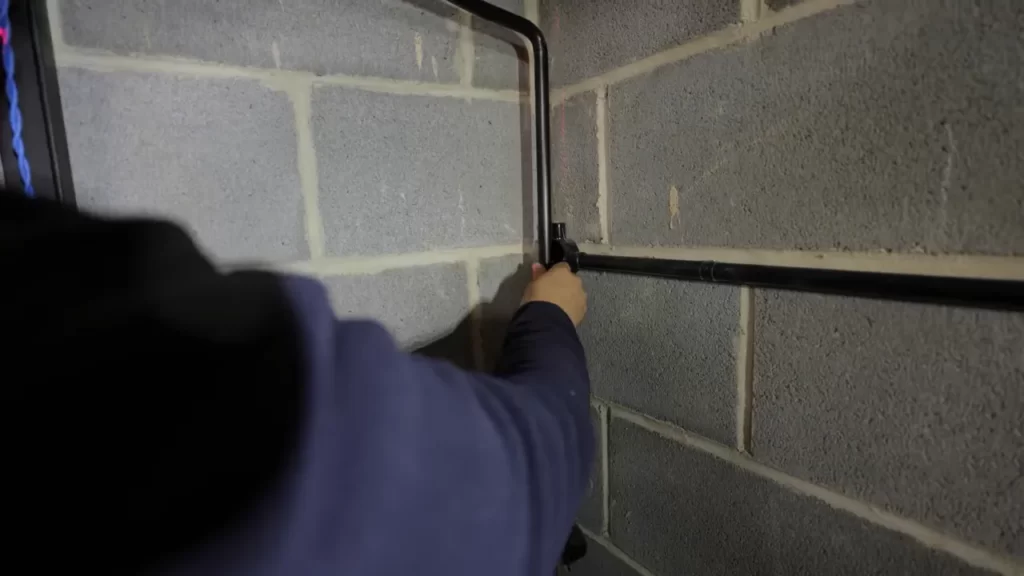
Applying proper bending techniques for conduit bends
When it comes to bending PVC conduit, it is crucial to employ proper bending techniques. Using incorrect methods can lead to cracks, leaks, or compromised wire protection. To achieve successful conduit bends, start by measuring and marking the desired bending point. You can then use a conduit bending machine or a heat gun, if applicable, to heat the conduit at the marked spot. This softens the PVC, making it easier to bend without breaking. Ensure you bend the conduit smoothly and gradually to avoid any kinks or stress points.
Ensuring proper grounding for electrical installations
To maintain the safety and integrity of your electrical installation, ensuring proper grounding is crucial. Grounding provides an efficient path for electrical faults, protecting equipment and preventing electrical shocks. As you install PVC conduit, make sure to incorporate grounding wires at appropriate intervals as required by electrical codes. These grounding conductors should be installed along with the electrical wires and connected to accessible grounding points. Proper grounding will not only comply with electrical regulations but also enhance the overall safety of your installation.
Following electrical codes and regulations
Adhering to electrical codes and regulations is vital for any electrical installation, including PVC conduit. Electrical codes are designed to ensure the safety and reliability of electrical systems. Familiarize yourself with the specific codes and regulations in your region before starting the installation. This includes understanding the permitted conduit types, filling capacities, and clearance requirements. By strictly following these guidelines, you can avoid costly mistakes, penalties, and most importantly, ensure the safety of the electrical system.
Conducting a final inspection for safety and compliance
Once you have completed the PVC conduit installation, it is essential to conduct a thorough final inspection to ensure safety and compliance. Inspect the conduit for any visible signs of damage, such as cracks or protruding wires. Check all connections to ensure they are tightly secured and properly grounded. Additionally, confirm that the conduit is adequately supported and positioned correctly along the desired route. Lastly, review the entire installation against electrical codes and regulations to ascertain compliance. This final step will give you peace of mind, knowing that your PVC conduit installation meets the required safety standards.
Conclusion And Additional Resources
Conclusion and Additional Resources
In conclusion, installing PVC conduit can seem like a daunting task at first, but with the right knowledge and tools, it can be a relatively straightforward process. By following the steps outlined in this guide, you can ensure a successful installation and have peace of mind knowing that your electrical wiring is protected.
Summary of the installation process
- Plan and prepare: Begin by carefully planning the route for the conduit and gathering all the necessary tools and materials.
- Measure and cut: Measure and mark the conduit sections, then use a hacksaw or a conduit cutter to make precise cuts.
- Attach fittings: Connect the conduit pieces using couplings, connectors, and elbows. Use PVC cement to secure the fittings in place.
- Mount the conduit: Attach the conduit to the wall or ceiling using conduit straps or clamps. Ensure it is secured at proper intervals and angles.
- Thread the wires: Carefully feed the electrical wires through the conduit, ensuring they are properly secured and do not exceed the conduit’s fill capacity.
- Connect the wires: Using appropriate connectors and following electrical codes, connect the wires to the desired outlets or electrical boxes.
- Test and cover: After completing the installation, test the electrical connections to ensure they are functioning properly. Finally, cover the conduit with a suitable cover or cap to provide additional protection.
Links to additional resources and references for further guidance
Frequently Asked Questions
How Do You Install Pvc Electrical Conduit?
To install PVC electrical conduit, follow these steps: 1. Plan the conduit layout. 2. Dig a trench according to the layout. 3. Assemble the conduit pieces and fittings. 4. Secure the conduit to the wall or surface with straps. 5. Connect the conduit to the electrical devices or panels.
Should Electrical Pvc Conduit Be Glued?
Yes, electrical PVC conduit should be glued to ensure a secure and reliable connection.
Does Ground Wire Need To Be In Pvc Conduit?
No, the ground wire does not need to be in PVC conduit. It can be installed in other types of conduits or even directly buried in the ground. However, the conductor should be protected from damage and meet local electrical codes.
Where Is Pvc Conduit Not Allowed?
PVC conduit is not allowed in certain locations, such as areas with high temperatures, corrosive environments, or where it may be exposed to physical damage. It is also not suitable for use in hazardous locations or where electrical codes require specific types of conduit.
Conclusion
Installing PVC conduit is a straightforward process that anyone can tackle with the right tools and guidance. By following the steps outlined in this blog post, you can ensure a safe and efficient installation for your electrical wiring needs. Remember to always prioritize safety and consult local building codes before starting any electrical project.
With a little patience and attention to detail, you’ll have your PVC conduit up and running in no time. Happy installing!