To install PVC baseboard in a bathroom, measure and cut the baseboard to fit the length of the wall, attach it using adhesive or nails, and caulk any gaps for a secure and professional finish. In the bathroom, baseboards not only add a decorative touch but also protect the walls from water damage.
Installing PVC baseboards is a simple and cost-effective solution that can be done by following a few steps. This guide will provide you with the necessary information to successfully install PVC baseboards in your bathroom.
Choosing The Right Pvc Baseboard For Your Bathroom
Importance of selecting the right PVC baseboard
Choosing the right PVC baseboard is not only a matter of aesthetics but also functionality. The baseboard not only enhances the overall appearance of your bathroom but also protects the walls from moisture, water damage, and daily wear and tear. With the right PVC baseboard, you can ensure that your bathroom remains durable and easy to maintain.
Factors to consider when choosing PVC baseboard material
When selecting PVC baseboard material for your bathroom, there are several key factors to consider:
- Moisture resistance: Since the bathroom is a high-moisture environment, it is essential to choose a PVC baseboard that is specifically designed to resist moisture and water damage. Look for baseboards that have a water-resistant or waterproof rating to ensure longevity.
- Durability: The bathroom is a high-traffic area, so it is crucial to choose a PVC baseboard that can withstand daily wear and tear. Look for baseboards that are made from high-quality PVC material and are known for their durability.
- Easy maintenance: Choose a PVC baseboard that requires minimal maintenance and is easy to clean. Look for baseboards that are resistant to stains and can be easily wiped clean with regular household cleaners.
- Compatibility: Ensure that the PVC baseboard you choose is compatible with the type of flooring and wall materials in your bathroom. Consider factors such as thickness, height, and color to achieve a seamless and visually appealing installation.
- Budget: Consider your budget when selecting PVC baseboard material. PVC baseboards offer a range of options at various price points, allowing you to find a suitable option that fits your budget without compromising quality.
Different styles and finishes available for PVC baseboards
PVC baseboards come in a variety of styles and finishes, allowing you to find the perfect match for your bathroom’s decor. Here are some of the popular styles and finishes available:
| Style | Finish |
|---|---|
| Classic | Smooth |
| Contemporary | Textured |
| Modern | High gloss |
| Rustic | Wood grain |
By considering the style and finish options, you can ensure that your PVC baseboard not only serves its functional purpose but also adds a touch of sophistication and elegance to your bathroom.
Choosing the right PVC bbaseboard for your bathroom is a decision that involves careful consideration of various factors. By selecting a moisture-resistant and durable option, considering compatibility with your existing materials, and exploring different styles and finishes, you can find the perfect PVC baseboard to elevate the overall look and functionality of your bathroom.
Measuring And Planning For Installation
Before you can start installing PVC baseboard in your bathroom, it’s important to measure and plan for the installation. Taking accurate measurements and properly planning the layout will ensure a smooth and trouble-free installation process. In this section, we will guide you through the key steps of measuring the length of the bathroom walls, calculating the amount of PVC baseboard required, and planning the layout of the installation.
Measuring the length of the bathroom walls
The first step in installing PVC baseboard is to measure the length of each wall in your bathroom. To do this, follow these simple steps:
- Start by taking a measuring tape and measure the length of one wall from corner to corner.
- Write down the measurement in inches or centimeters.
- Repeat this process for each wall in your bathroom, including any walls that have doors or windows.
Calculating the amount of PVC baseboard required
Once you have measured the length of the bathroom walls, you can calculate the amount of PVC baseboard you will need. To do this, follow these steps:
- Sum up the measurements of all the walls to get the total length.
- Divide the total length by the length of each piece of PVC baseboard you plan to use to determine the number of pieces needed.
- Remember to consider any corners or obstacles that may require additional pieces of baseboard for a seamless installation.
Planning the layout of the baseboard installation
Now that you know how much PVC baseboard you need, it’s time to plan the layout of the installation. By planning ahead, you can ensure that the baseboard is installed in the most aesthetically pleasing and functional way. Here’s how you can plan the layout:
- Start by taking note of any obstacles such as doors, windows, or electrical outlets that may need special attention during the installation.
- Decide on the height at which you want to install the baseboard, keeping in mind any existing features in the bathroom.
- Consider using a level and pencil to mark the desired height along the walls before starting the installation.
- Plan the sequence of installing the baseboard, starting from one corner and moving along the walls.
- Pre-cut the baseboard pieces according to your measurements and layout plan to make the installation process smoother.
By properly measuring and planning for the installation of PVC baseboard in your bathroom, you can ensure a successful and visually appealing result. Keep these steps in mind before you start your installation project to save time and effort in the long run. In the next section, we will guide you through the process of cutting and installing the PVC baseboard.
Preparing The Bathroom For Installation
Before installing PVC baseboards in your bathroom, it’s important to properly prepare the space to ensure a seamless and long-lasting installation. In this section, we’ll cover the essential steps to follow in order to optimize your bathroom for the installation process.
Clearing the area and removing any existing baseboards
The first step in preparing your bathroom for PVC baseboard installation is to clear the area and remove any existing baseboards. This ensures a clean and open space to work with. To do this:
- Start by removing any furniture or decorative items near the baseboards.
- Use a pry bar or putty knife to gently detach the existing baseboards from the wall.
- Slowly and carefully pull the baseboards away from the wall, taking care not to damage the walls or surrounding surfaces.
- Set aside the removed baseboards for later disposal or reuse, if desired.
Cleaning the walls and ensuring they are smooth and dry
Once the area is cleared of existing baseboards, it’s crucial to clean the walls to ensure a smooth and adhesive-friendly surface for your PVC baseboards. Follow these steps to clean the walls:
- Starting from the top, use a duster or vacuum cleaner to remove any dust or cobwebs from the walls.
- Prepare a mild cleaning solution by mixing warm water and a gentle household cleaner.
- Dampen a sponge or cloth with the cleaning solution and wipe the walls from top to bottom, removing any dirt or grime.
- After cleaning, rinse the walls with clean water to remove any remaining cleaning solution.
- Allow the walls to air dry completely before proceeding with the installation.
Patching any holes or cracks in the walls
Before installing the PVC baseboards, it’s important to patch any holes or cracks in the walls to ensure a smooth and even surface. Here’s how to patch the walls:
- Inspect the walls and identify any visible holes or cracks.
- Using a putty knife or scraper, gently remove any loose debris or old paint from the damaged area.
- Prepare a spackling compound according to the manufacturer’s instructions.
- Apply the spackling compound to the holes or cracks using a putty knife, ensuring it completely fills the damaged area.
- Smooth out the spackling compound with the putty knife, removing any excess and creating a seamless finish.
- Allow the patched areas to dry completely, following the recommended drying time of the spackling compound.
- Once dry, use a fine-grit sandpaper to lightly sand the patched areas, ensuring a smooth and even surface.
By following these steps and properly preparing your bathroom for PVC baseboard installation, you’ll ensure a sturdy and visually appealing result that will stand the test of time.
Cutting And Fitting The Pvc Baseboard
Cutting and Fitting the PVC Baseboard
Installing PVC baseboard in your bathroom not only adds a clean and polished look to the space but also provides protection to the walls from water damage. One crucial step in the installation process is cutting and fitting the PVC baseboard. In this section, we will go through the necessary steps to measure, cut, and ensure a proper fit for your baseboard. Let’s dive right in!
Measuring and Marking the Baseboard for Cutting
Before you start cutting your PVC baseboard, it’s essential to measure the length of the wall accurately. Start by measuring the distance from one end of the wall to the other. Make sure to account for any corner angles or obstacles, such as cabinets or toilets, which may require additional cuts.
Once you have your measurements, mark them directly onto the PVC baseboard using a pencil or a marker. It’s a good idea to mark both ends of the baseboard and draw a straight line connecting the two marks. This line will serve as a cutting guide when using a miter saw or PVC pipe cutter.
Using a Miter Saw or PVC Pipe Cutter to Make Accurate Cuts
Now that you have marked your PVC baseboard, it’s time to make accurate cuts. To achieve precise and clean cuts, you can either use a miter saw or a PVC pipe cutter, depending on your preference and tools available.
If you opt for a miter saw, set it to a 45-degree angle, align the cutting guide with the marked line on the baseboard, and carefully cut along the line. Remember to wear safety goggles and follow the manufacturer’s instructions for operating the miter saw.
Alternatively, if you choose to use a PVC pipe cutter, position the cutter around the baseboard at the marked line and apply firm pressure to cut through the material. Repeat this step for each section of the baseboard, ensuring clean and precise cuts.
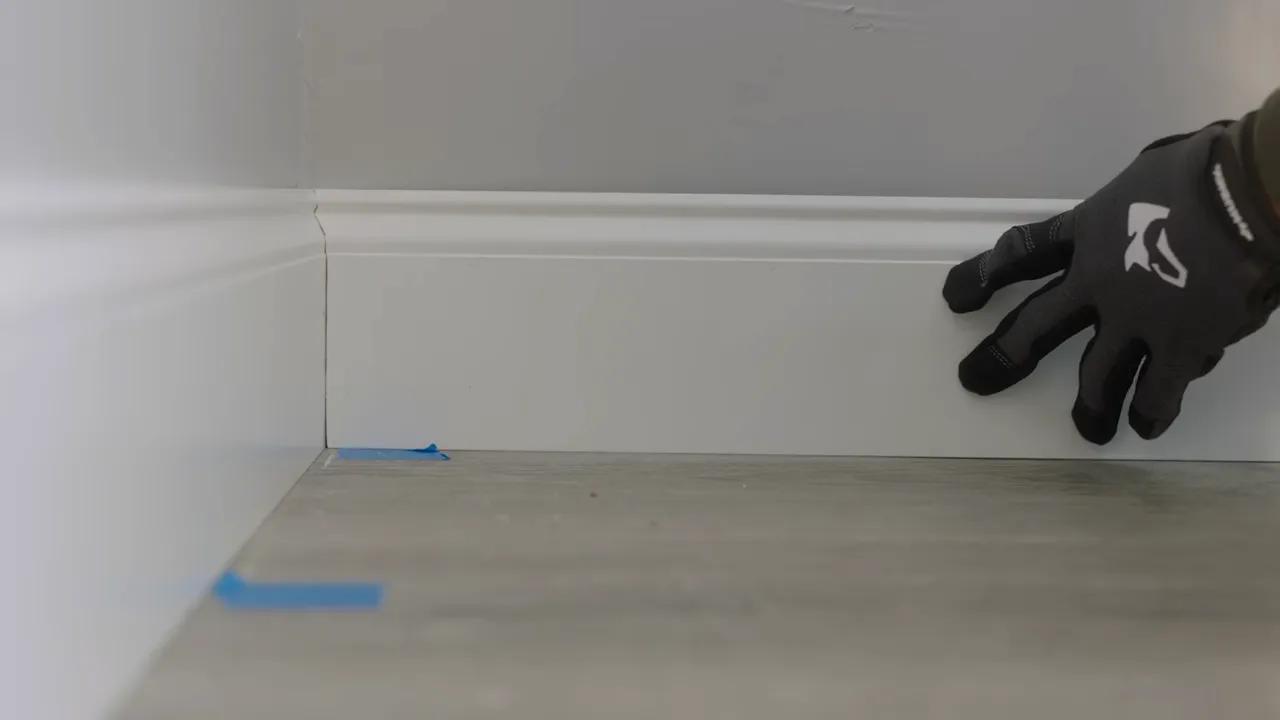
Dry-Fitting the Baseboard to Ensure Proper Fit
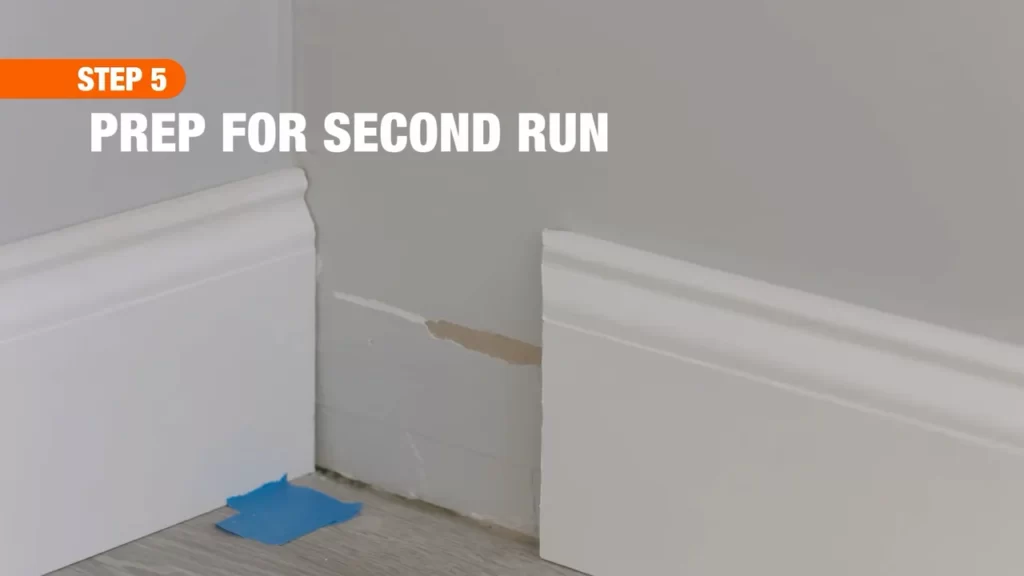
Once you have made all the necessary cuts, it’s time to dry-fit the PVC baseboard before permanently attaching it to the wall. Dry-fitting allows you to ensure that each section of the baseboard fits snugly and accurately along the wall.
Begin by placing each cut section of the baseboard against the wall, starting from one end. Make sure to align the mitered corners properly. Pay close attention to any gaps or inconsistencies, as these may need to be adjusted or recut.
During the dry-fitting process, you may also need to trim the baseboard further to achieve a seamless fit. Use the miter saw or PVC pipe cutter to make any additional cuts as needed. Take your time and be patient, as the fit and appearance of the PVC baseboard will greatly enhance the overall look of your bathroom.
In conclusion, cutting and fitting PVC baseboard in your bathroom requires careful measurement, accurate cuts, and proper dry-fitting. By following these steps, you’ll ensure the PVC baseboard fits perfectly along the walls, adding both style and practicality to your bathroom space.
Adhering The Baseboard To The Walls
After cutting the PVC baseboard to the desired lengths and properly preparing the walls in your bathroom, it’s time to adhere the baseboard to the walls. This step is crucial to ensure a secure and long-lasting installation. Here are the steps to follow:
Applying adhesive or construction adhesive to the back of the baseboard:
Start by applying adhesive or construction adhesive to the back of the PVC baseboard. Make sure to use a high-quality adhesive that is specifically designed for PVC materials. Apply a thin, even layer of the adhesive along the length of the baseboard.
TIP: To avoid using too much adhesive, consider using a caulk gun or adhesive applicator to control the amount being dispensed. This will help prevent any messy application.
Once the adhesive is applied to the back of the baseboard, you can move on to the next step.
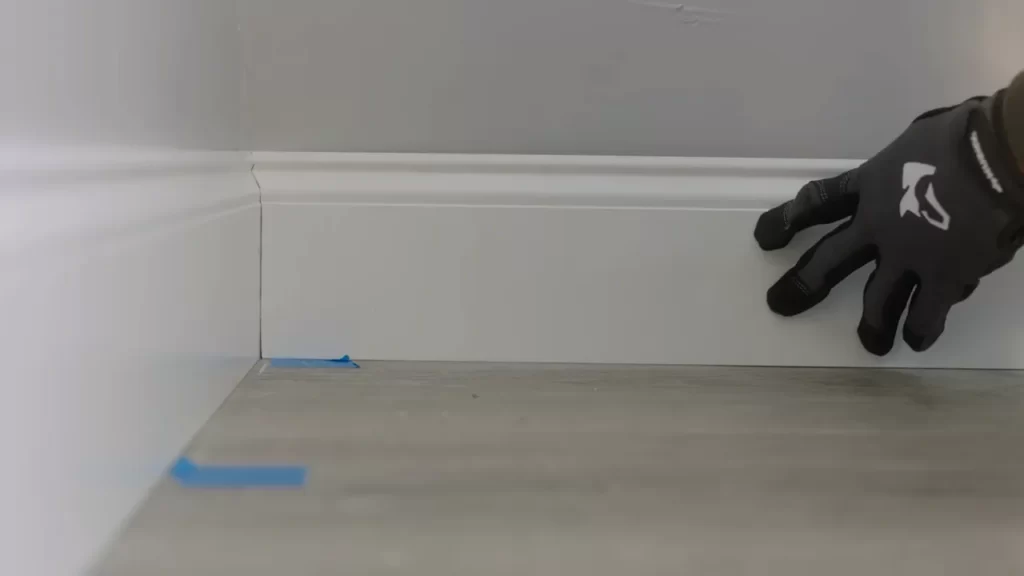
Pressing the baseboard firmly against the wall:
Take the PVC baseboard with the adhesive side facing out and firmly press it against the prepared wall. Ensure that the baseboard is aligned with the bottom edge of the wall and that it sits flush against the surface. Apply pressure along the entire length of the baseboard to ensure proper adhesion.
PRO TIP: Use a rubber mallet or a block of wood and a hammer to tap the baseboard gently in place. This will help the adhesive to bond securely to the wall.
Using a level to ensure the baseboard is straight and aligned properly:
After pressing the baseboard against the wall, use a level to double-check its alignment and ensure it is straight. Place the level on top of the baseboard and adjust as needed. This step is essential for a professional-looking installation.
If you find that the baseboard is not aligned properly, gently adjust it until it is straight. Make sure to do this before the adhesive sets to avoid any damage to the baseboard or wall.
That’s it! You’ve successfully adhered the PVC baseboard to the walls of your bathroom. Continue this process for each section of the baseboard until you have completed the installation.
TIP: If you encounter any gaps or uneven surfaces, you can use caulk or wood filler to fill them in for a seamless finish. Allow the adhesive to dry completely before applying any additional finishing touches to the baseboard.
Securing The Baseboard In Place
Using finishing nails or brad nails to secure the baseboard to the wall
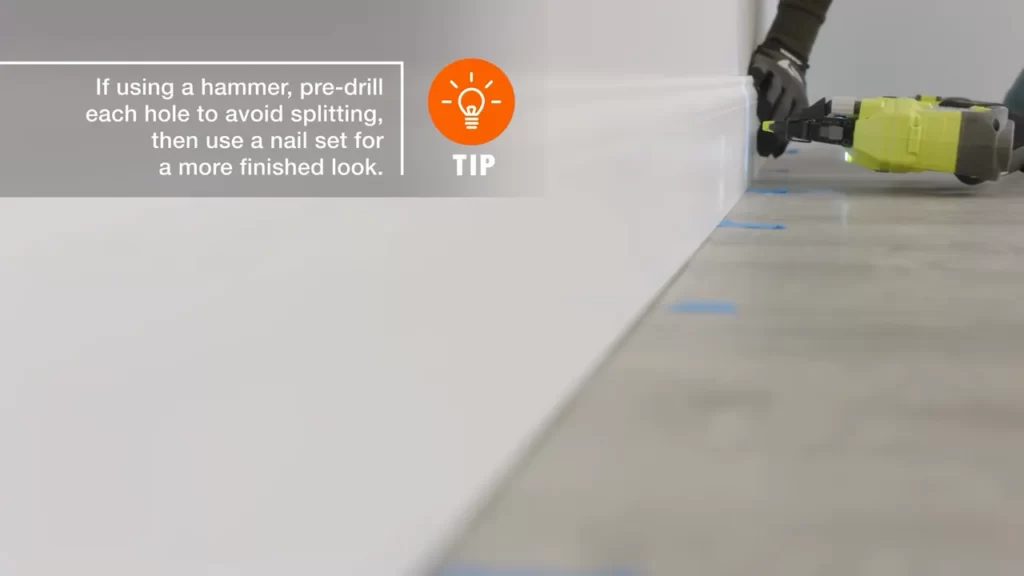
When it comes to securing your PVC baseboard in place, one of the easiest and most common methods is to use finishing nails or brad nails. These nails are specifically designed for trim work, making them ideal for attaching baseboards to the wall. To begin, measure and mark where you want to position the baseboard along the wall.
Next, hold the baseboard against the wall, ensuring it is level and aligned with your markings. Once you have it in the desired position, take your finishing nails or brad nails and begin driving them into the baseboard, making sure to hit the underlying wall stud for maximum stability. Remember, using a nail gun or a hammer will depend on your personal preference and the tools available to you. Whichever method you choose, be sure to space the nails evenly along the length of the baseboard to ensure a secure installation.
Countersinking the nails and filling the holes with putty or caulk
After securing your baseboard with nails, it’s important to take an extra step to ensure a seamless finish. Countersinking the nails is a technique that involves sinking the nail heads slightly below the surface of the baseboard. This creates a small indentation where the nail head sits, allowing you to hide the nail heads with putty or caulk.
To countersink the nails, use a countersink bit or a nail set and gently tap it over the exposed nail heads until they are slightly recessed. Take care not to damage the baseboard while doing this. Once the nail heads are countersunk, fill the resulting holes with either putty or caulk, depending on your preference.
If you choose putty, select a color that matches your baseboard and use a putty knife to fill each hole, smoothing it out and removing any excess. Allow the putty to dry completely before moving on to the next step. Alternatively, if you prefer caulk, use a caulk gun to apply a bead of caulk over each hole, ensuring it is level with the surface of the baseboard. Use a damp cloth or your finger to smooth out the caulk and remove any excess. Let the caulk dry according to the manufacturer’s instructions.
Sanding and painting the baseboard for a finished look
To achieve a polished and professional look, it’s important to sand and paint your PVC baseboard after installation. Sanding will help to smooth out any rough edges or imperfections, allowing for a flawless finish. Starting with a coarse-grit sandpaper, lightly sand the entire surface of the baseboard, focusing on any areas that may need extra attention. Gradually switch to finer-grit sandpaper until you achieve a smooth and even surface.
Once the baseboard is sanded, use a clean cloth or tack cloth to remove any dust or debris. Next, apply a coat of primer to the entire baseboard, allowing it to dry completely. Once the primer is dry, you can proceed with painting the baseboard in your desired color. Be sure to use a paint that is specifically formulated for PVC materials to ensure a long-lasting finish.
Apply at least two coats of paint, allowing each coat to dry completely before applying the next. Smooth out any brushstrokes or imperfections as you go, taking care to maintain an even and consistent finish. Once the final coat of paint is dry, your PVC baseboard will be ready to showcase its new, refreshed look in your bathroom.
In conclusion, securing your PVC baseboard in place involves using finishing nails or brad nails, countersinking the nails and filling the holes with putty or caulk, as well as sanding and painting the baseboard for a finished look. By following these steps, you’ll be able to create a polished and secure installation that adds a touch of elegance to your bathroom.
Cleaning And Maintenance Tips
Cleaning and maintaining PVC baseboards in your bathroom is an essential part of keeping them looking their best and prolonging their lifespan. By following a few simple tips, you can ensure that your baseboards remain clean and in great condition for years to come. This section will cover the necessary steps for cleaning PVC baseboards with mild soap and water, avoiding harsh cleaners or abrasive materials that could cause damage, and regularly inspecting the baseboards for signs of wear or damage.
Cleaning PVC baseboards with mild soap and water
One of the easiest and most effective ways to clean PVC baseboards is by using a mild soap and water solution. To do this, simply mix a small amount of mild liquid soap with warm water in a bucket. Dip a soft cloth or sponge into the soapy water and gently scrub the baseboards.
Be sure to wipe away any dirt or grime, paying extra attention to areas that may accumulate more dust or moisture, such as near the bottom or in corners. Rinse the cloth or sponge regularly in clean water to prevent spreading dirt onto the baseboard.
Avoiding harsh cleaners or abrasive materials that could damage the baseboard
While PVC is a durable material, it is still important to avoid using harsh cleaners or abrasive materials that could cause damage to the surface of the baseboards. Harsh chemicals or abrasive materials can scratch or discolor the PVC, compromising its appearance and integrity.
Instead, stick to mild soap and water or use a non-abrasive cleaner specifically designed for use on PVC surfaces. When using any cleaner, always test a small, inconspicuous area of the baseboard first to ensure it does not cause any damage or discoloration.
Regularly inspecting the baseboard for any signs of damage or wear
To maintain your PVC baseboards in optimal condition, it is recommended to regularly inspect them for any signs of damage or wear. This includes checking for cracks, chips, or any areas where the baseboard may have become loose or disconnected from the wall.
If you notice any damage or wear, it is important to address it as soon as possible. Repairing or replacing damaged baseboards will not only improve the aesthetic of your bathroom but also prevent further damage or potential hazards.
By following these cleaning and maintenance tips, you can ensure that your PVC baseboards remain clean, beautiful, and functional for years to come. Regular cleaning with mild soap and water, avoiding harsh chemicals or abrasive materials, and conducting routine inspections will help keep your baseboards in great shape, contributing to a well-maintained and visually appealing bathroom.
Frequently Asked Questions
Is Pvc Baseboard Good For Bathroom?
Yes, PVC baseboard is good for the bathroom. It is moisture-resistant, durable, and easy to clean. PVC baseboards also provide a finished look and protect the walls from water damage.
How Do I Attach Pvc Baseboard To Wall?
To attach PVC baseboard to a wall, follow these steps: 1. Start by measuring and cutting the baseboard to the desired length. 2. Apply construction adhesive along the backside of the baseboard. 3. Press the baseboard firmly against the wall, making sure it is level.
4. Use finishing nails to secure the baseboard in place, placing them every 16 inches. 5. Fill any nail holes with putty and finish off with paint or caulk for a seamless look.
Should I Nail Or Glue Pvc Trim?
You should use PVC trim adhesive instead of nailing for a secure and longer-lasting bond. Nailing can cause cracking or splitting in the trim. Adhesive ensures a strong attachment without any visible fasteners.
How Do You Secure Pvc Baseboards?
To secure PVC baseboards, follow these steps: 1. Measure and mark the desired placement. 2. Apply construction adhesive to the back of the baseboard. 3. Firmly press the baseboard against the wall. 4. Use a level to ensure it is straight.
5. Secure the baseboard with finishing nails or screws for added stability. Remember, always follow manufacturer’s instructions for best results.
Conclusion
Installing PVC baseboard in your bathroom is a simple and cost-effective way to enhance the overall appearance and durability of the space. By following the step-by-step guide outlined in this blog post, you can confidently tackle this DIY project. Remember to take accurate measurements, properly cut the baseboard, and ensure a secure fit.
With the right tools and a little patience, you’ll have a stylish and functional baseboard in no time.