To install a pull-up bar, find a suitable location and use the provided hardware to securely attach the bar to a sturdy wall or ceiling. A pull-up bar is a versatile fitness equipment that allows you to strengthen your upper body muscles, particularly the arms, shoulders, and back.
Having a pull-up bar installed in your home can provide a convenient and efficient way to incorporate this exercise into your fitness routine. However, it is important to install the pull-up bar correctly to ensure safety and stability during your workouts.
In this guide, we will walk you through the steps of installing a pull-up bar, highlighting important considerations along the way. By following these instructions, you’ll soon have a sturdy and reliable pull-up bar ready for use.
Planning For Installation
Installing a pull-up bar in your home can be a great way to enhance your upper-body strength and fitness routine. However, before you start with the actual installation process, it’s important to spend some time planning and preparing. This will help ensure that the installation goes smoothly and that you create a safe and functional workout area. In this section, we will guide you through the key steps to consider when planning for a pull-up bar installation.
Choosing the Right Spot
Before you start drilling holes and mounting your pull-up bar, it’s crucial to choose the right spot for installation. Look for a sturdy and structurally sound space that can accommodate the size of the bar and allow for comfortable movement when exercising. Ideally, a spot with enough overhead space and good visibility will be perfect.
Assessing the Structure
Once you have identified the spot, it’s essential to assess the structure of the chosen area. You want to ensure that the wall or ceiling can support the weight and force exerted during your workouts. Check for any signs of weak or damaged structures, such as cracks, excessive movement, or poor insulation. If you have any doubts about the integrity of the chosen spot, it’s recommended to consult with a professional before proceeding.
Gathering the Required Tools and Equipment
Now that you have chosen the ideal location and assessed its structural viability, it’s time to gather the necessary tools and equipment for installation. Here is a handy checklist:
| Tools | Equipment |
|---|---|
| Drill | Pull-up bar |
| Tape measure | Mounting brackets |
| Pencil or marker | Screws |
| Level | Anchors (if necessary) |
| Socket wrench or screwdriver |
Having all the necessary tools and equipment on hand will save you time and ensure a smooth installation process. Make sure to double-check your checklist before beginning.
By thoroughly planning for your pull-up bar installation, you are setting yourself up for success. Choosing the right spot, assessing the structure, and gathering the required tools and equipment will help you create a safe and effective workout space. In the next section, we will walk you through the step-by-step installation process.
Preparing The Installation Area
Before installing a pull-up bar, it is important to properly prepare the installation area. This will ensure a safe and secure installation, allowing you to make the most of your pull-up bar workout. In this section, we will guide you through the key steps of preparing the installation area, including clearing the workspace, marking the placement points, and ensuring adequate space.
Clearing the Workspace
The first step in preparing the installation area is to clear the workspace. Ensure that the area where you plan to install the pull-up bar is free from any obstacles or clutter. This will not only provide you with a clear working space but will also prevent any accidents during the installation process. Remove any furniture, equipment, or other objects that may hinder the installation or limit your movement while using the pull-up bar. By dedicating a clean and open space, you can enhance your safety and maximize your workout.
Marking the Placement Points
Once you have cleared the workspace, the next step is to mark the placement points for the pull-up bar. Find a suitable area where you can securely attach the bar, such as a sturdy wall or a ceiling beam. Using a measuring tape, carefully determine the desired height and width for the pull-up bar. Mark these points using a pencil or chalk, ensuring accurate placement. If you are planning to install the bar on a wall, make sure to mark the spots where you will be drilling the holes. These markings will serve as a guide during the installation process, ensuring a precise and symmetrical placement of the pull-up bar.
Ensuring Adequate Space
Aside from clearing the workspace and marking the placement points, it is crucial to ensure that there is adequate space around the pull-up bar. This will allow you to perform a full range of motion exercises without any restrictions. Approximately 2 to 3 feet of clearance on all sides of the pull-up bar is recommended. This will give you enough room to comfortably move your body while performing various pull-up variations and exercises. Moreover, having ample space will also prevent any accidents or injuries caused by accidentally hitting nearby objects or surfaces while exercising. By considering and organizing the space around the pull-up bar, you can create a safe and efficient workout environment.
Installing The Pull Up Bar
Installing the Pull Up Bar
When it comes to installing a pull-up bar in your home, following the right steps is crucial to ensure its safety and effectiveness. In this guide, we will walk you through the process of installing a pull-up bar, covering everything from assembling the bar components to securing it firmly to the wall or ceiling.
Assembling the Bar Components
The first step in installing your pull-up bar is to assemble all the necessary components. Carefully unpack the box and ensure that you have all the parts required. Typically, this will include the main bar, mounting brackets, bolts, screws, and any additional accessories that may come with the bar.
Once you have all the components, it’s time to start the assembly. Follow the manufacturer’s instructions or check the accompanying manual for specific guidelines. Generally, you will need to attach the mounting brackets to the bar using the provided bolts and screws. Make sure to tighten them securely to ensure stability.
Affixing the Mounting Brackets
After assembling the bar components, the next step is to affix the mounting brackets to the desired location. Choose a spot that offers enough space and clearance for performing pull-ups comfortably. It’s important to select a sturdy and structurally sound wall or ceiling for installation.
Before drilling any holes, use a stud finder to locate the studs or joists in the wall or ceiling. This step is crucial as it will provide the necessary support for your pull-up bar. Once you locate the studs, mark their position with a pencil.
Now, align the mounting brackets with the marked stud locations and use a drill to insert the appropriate screws or bolts. Make sure to secure the brackets tightly to ensure stability. If your pull-up bar comes with multiple brackets, repeat the process for each bracket.
Securing the Bar to the Wall or Ceiling
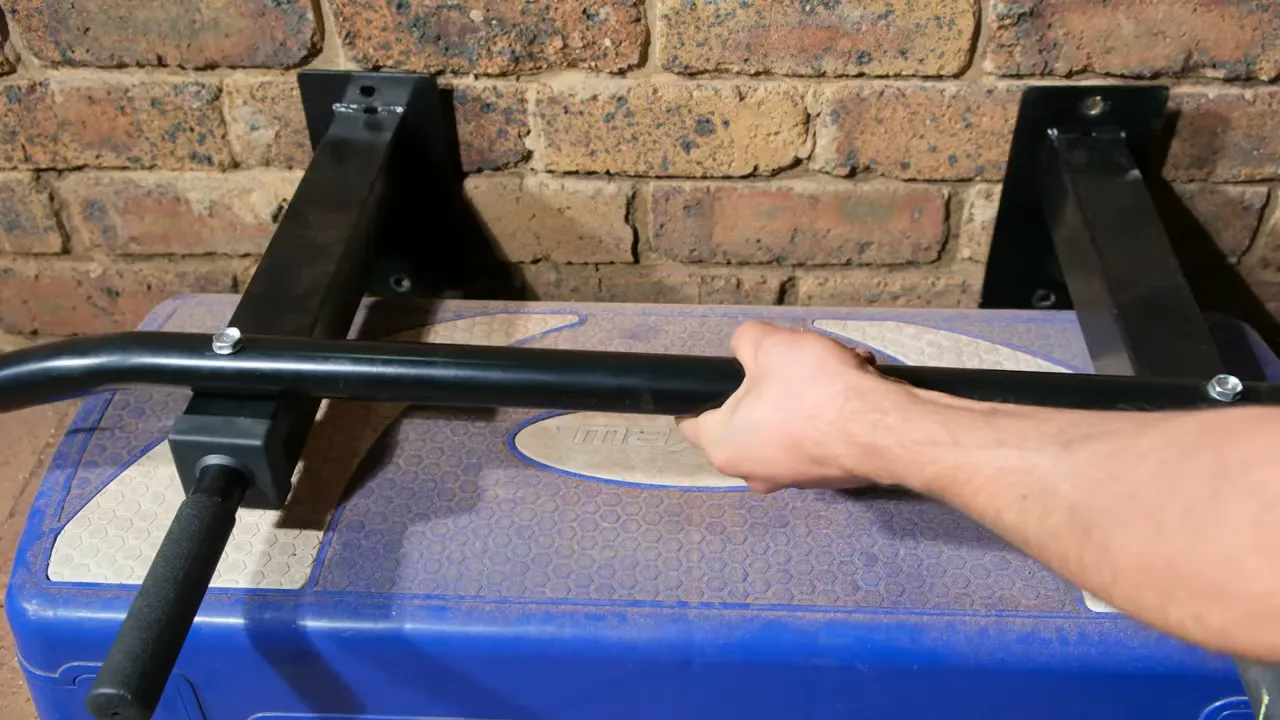
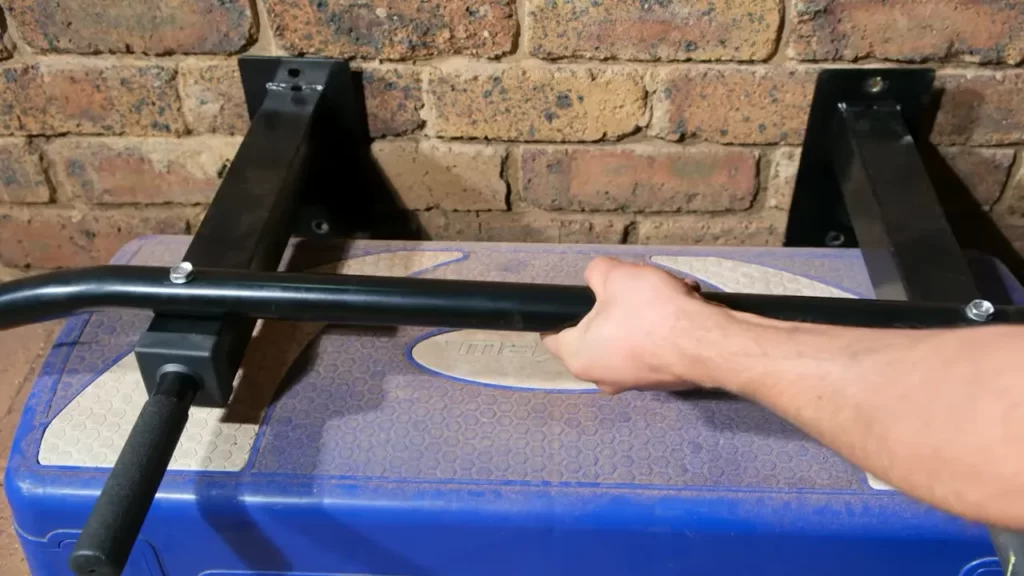
With the brackets securely attached, it’s time to mount the bar itself. Place the bar onto the brackets, ensuring that it sits evenly and aligns with the mounting holes. Insert the provided bolts or screws through the holes in the bar and tighten them to securely fasten the bar to the brackets.
Once the bar is properly secured, give it a gentle shake to test its stability. It should be firm and not wobble or move excessively. If needed, make any necessary adjustments and re-tighten the bolts or screws until the bar feels rock solid.
Congratulations! You have successfully installed your pull-up bar. Take a moment to admire your handiwork and test it out before embarking on your pull-up journey. Now, you have a convenient and effective workout tool right in the comfort of your own home.
Ensuring Safety And Stability
Installing a pull-up bar at home is a great way to add versatility to your workout routine. However, it is crucial to ensure the safety and stability of the bar to prevent any accidents or injuries. In this article, we will guide you through the process of properly anchoring the bar, checking for secure attachment, and testing its stability. By following these steps, you can have peace of mind and enjoy a safe and effective pull-up workout.
Properly Anchoring the Bar
When installing a pull-up bar, the first and most important step is to properly anchor it. This ensures that the bar can support your weight without any risk of falling. Here’s how you can do it:
- Choose a suitable location: Select a sturdy wall or ceiling that can withstand the weight and pressure of your workouts. Avoid installing the bar on weak surfaces like drywall or plaster.
- Measure and mark the mounting points: Use a tape measure to determine the optimal height for your pull-up bar. Mark the spots where you will be mounting the brackets.
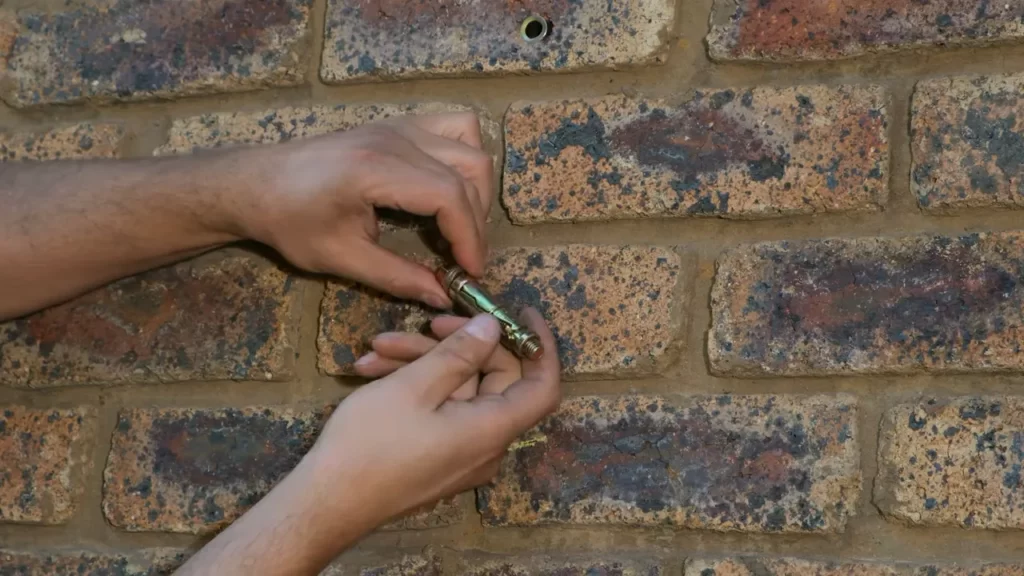
- Attach the brackets: Align the brackets with the marked spots and secure them using appropriate screws and anchors. Make sure they are tightened properly to provide a strong foundation for the bar.
- Install the bar: Once the brackets are securely attached, place the bar onto them, ensuring it is level and centered. Double-check the tightness of the brackets and make any necessary adjustments.
Checking for Secure Attachment
After anchoring the bar, it’s essential to verify that it is securely attached to the wall or ceiling. This step helps prevent any accidents caused by loose fittings or weak connections. Follow these guidelines to check for secure attachment:
- Inspect the mounting brackets: Examine the brackets to ensure they are firmly and evenly attached to the surface. Look for any signs of looseness or instability.
- Test the support capacity: With caution, apply some pressure to the bar and check if it holds your weight without any shifting or wobbling.
- Tighten any loose screws: If you notice any screws that are not completely tightened, use a suitable tool to secure them further.
Testing the Bar’s Stability
Once you have confirmed the secure attachment of the bar, it’s crucial to test its stability under actual workout conditions. This step ensures that the bar can withstand the forces applied during your exercises. Here’s how you can assess the stability:
- Gradually increase intensity: Begin with gentle hanging or partial pull-ups to assess the stability of the bar. Gradually increase the intensity, checking for any excessive movement or shaking.
- Observe during dynamic movements: Perform full pull-ups or other dynamic exercises on the bar and observe if it remains stable throughout the entire range of motion.
- Listen for unusual noises: Listen for any creaking or abnormal sounds coming from the bar or mounting brackets, which could indicate instability.
By adhering to these steps and ensuring safety and stability, you can confidently install a pull-up bar at home. Remember to regularly inspect the bar and its attachments for any signs of wear and tear, and make necessary adjustments or repairs to maintain its safety.
Exploring Different Types Of Pull Up Bars
Pull up bars are a versatile and effective piece of equipment for building upper body strength and improving overall fitness. Whether you are a beginner or a seasoned fitness enthusiast, having a pull up bar at home can be a game-changer for your workout routine. In this article, we will explore different types of pull up bars, their features, and how to install them.
Wall-Mounted Pull Up Bars
Wall-mounted pull up bars are a popular choice among fitness enthusiasts who have limited space or want a permanent fixture in their homes. These bars are securely attached to the wall, providing a stable and sturdy structure for your pull up exercises. They are usually made of durable materials such as stainless steel or heavy-duty steel, ensuring their longevity.
To install a wall-mounted pull up bar, follow these steps:
- Locate a suitable area on your wall that can support the weight of the pull up bar and your body weight.
- Use a stud finder to find the wall studs for better stability.
- Mark the desired height and position of the pull up bar on the wall.
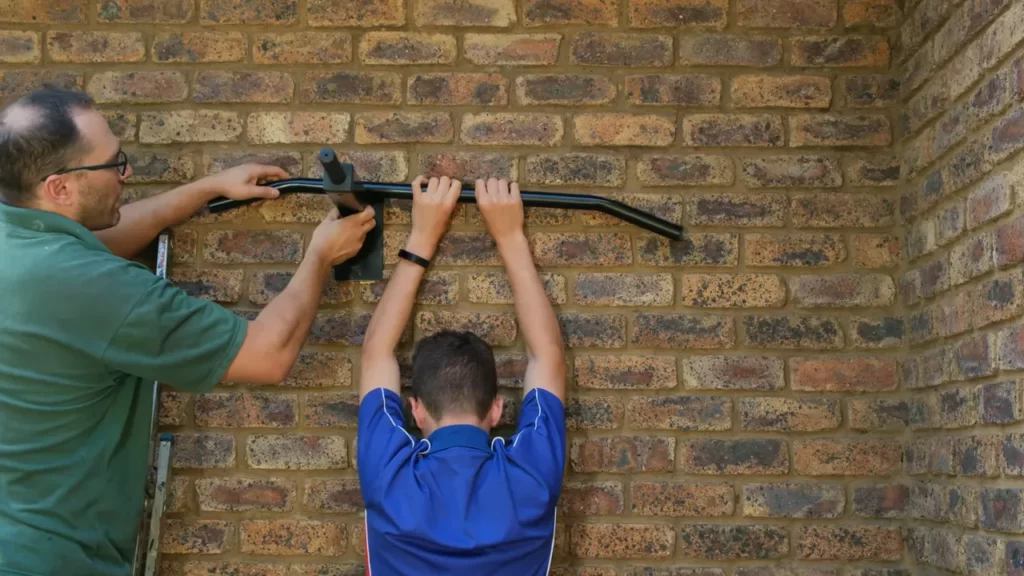
- Drill holes into the wall studs using a drill and attach the mounting brackets.
- Secure the pull up bar onto the mounting brackets using the provided screws.
- Ensure the bar is level and securely attached before testing it out.
Doorway Pull Up Bars
Doorway pull up bars are a convenient option for those who don’t want to drill holes in their walls or have limited space. These bars are designed to fit into standard door frames and utilize leverage to stay in place. They are usually adjustable in width, allowing them to fit various door sizes.
To install a doorway pull up bar, follow these steps:
- Select a door frame that is sturdy and can support your weight.
- Adjust the bar to fit the width of the door frame.
- Place the pull up bar on top of the door frame and ensure it is secure.
- Apply pressure to the bar and make sure it is stable before using it for pull up exercises.
Ceiling-Mounted Pull Up Bars
Ceiling-mounted pull up bars are ideal for those who have high ceilings and ample space in their home gym. These bars are mounted on the ceiling and can handle heavy loads, making them suitable for advanced exercises and weighted pull ups.
To install a ceiling-mounted pull up bar, follow these steps:
- Find a location on the ceiling where the bar will provide enough clearance for your exercises.
- Use a stud finder to locate ceiling joists for maximum stability.
- Mark the position of the pull up bar on the ceiling.
- Drill pilot holes into the ceiling joists and attach the mounting brackets.
- Secure the pull up bar onto the mounting brackets using the provided screws.
- Ensure the bar is level and securely attached before using it.
Now that you are familiar with the different types of pull up bars and how to install them, you can choose the one that best fits your needs and start incorporating pull up exercises into your workout routine. Remember to always follow installation instructions and prioritize safety while using the pull up bar.
Maintaining And Caring For Your Pull Up Bar
Once you have installed your pull up bar and started incorporating it into your fitness routine, it’s important to take a few extra steps to ensure its longevity and performance. Regular maintenance and proper care will not only extend the lifespan of your pull up bar but also help to prevent any accidents or injuries during your workouts. In this section, we will discuss some important steps to maintain and care for your pull up bar.
Regular Cleaning and Inspection
Regularly cleaning your pull up bar is crucial to prevent the buildup of dirt, sweat, and debris that may affect its functionality. To clean your pull up bar, follow these simple steps:
- Gently wipe the surface of the pull up bar using a damp cloth to remove any dirt or sweat.
- If necessary, use a mild detergent diluted in water to clean any stubborn stains or spots.
- Dry the pull up bar using a clean towel or let it air dry completely before using it again.
In addition to cleaning, regular inspection of your pull up bar is equally important. Check for any signs of wear and tear, loose screws or bolts, or any other damage that may compromise the safety and stability of the bar. If you notice any issues, address them immediately by tightening or replacing the necessary parts, or contacting the manufacturer for support.
Lubricating Moving Parts
Proper lubrication of the moving parts on your pull up bar is essential to maintain its smooth operation. Over time, friction and constant use may cause the joints and hinge points to become stiff or squeaky. To lubricate the moving parts:
- Apply a small amount of silicone-based lubricant to the hinge points and any other moving parts of the pull up bar.
- Gently move the bar or perform a few pull-ups to help distribute the lubricant evenly.
- Wipe off any excess lubricant to prevent it from attracting dirt or debris.
Regular lubrication will help keep the movements smooth, reduce noise, and prevent unnecessary strain on the bar’s components.
Avoiding Excessive Weight or Force
While pull up bars are designed to withstand significant weight and force, it’s important to avoid excessive pressure or misuse that could lead to damage. Here are some key points to keep in mind:
- Always check the weight limit specified by the manufacturer and avoid exceeding it.
- Avoid performing any exercises or movements that put unnecessary strain on the pull up bar, such as swinging or jerking motions.
- Refrain from using the pull up bar for any activities or purposes other than intended, such as hanging heavy objects or using it as a support for non-fitness related tasks.
By using your pull up bar responsibly and following these guidelines, you will ensure its longevity and continue to enjoy safe and effective workouts for years to come.
Troubleshooting Common Installation Issues
After purchasing a pull-up bar and getting ready for installation, it can be frustrating to encounter common issues that hinder the process. However, with a bit of troubleshooting, you can easily overcome these challenges and have your pull-up bar securely installed in no time. In this section, we will discuss three common installation issues and provide practical solutions to resolve them.
Bar Not Level or Secure
If you find that your pull-up bar is not level or secure after installation, it can greatly impact your workout experience and safety. There are a few possible reasons for this issue:
- Mounting points not aligned properly
- Insufficient tightening of screws or bolts
- Uneven pressure distribution
To address these problems and ensure a level and secure pull-up bar:
- Double-check if the mounting points are aligned properly. Measure the distance between the two brackets and ensure they are evenly spaced. Adjust them if necessary.
- Tighten all screws and bolts securely using appropriate tools. Ensure that all connections are strong and stable.
- If the bar is still not level, check for uneven pressure distribution. It could be caused by loose or damaged brackets. Tighten any loose screws or bolts and inspect the brackets for any damages.
Mounting Brackets Not Aligning Properly
Another common installation issue is when the mounting brackets of the pull-up bar do not align properly with the door frame. This can lead to instability and difficulty in using the bar. Here’s what you can do:
- Ensure that the door frame is suitable for the pull-up bar. Some door frames may be too narrow or not strong enough to support the bar’s weight.
- Measure the width of your door frame and compare it to the requirements provided by the manufacturer. If they don’t match, consider using a different type of pull-up bar or installing it in another location.
- If the door frame is suitable, but the brackets still don’t align properly, try adjusting the positioning of the brackets. Loosen the screws or bolts slightly and carefully reposition the brackets until they align with the door frame. Then, tighten the screws or bolts securely.
Bar Not Suitable for Door Frame
In some cases, you may realize that the pull-up bar you purchased is not suitable for your specific door frame. This can be disappointing, but it’s important to find a safe alternative. Here’s what you can do:
- Check the product specifications and instructions provided by the manufacturer. Verify if your door frame meets all the requirements listed.
- If your door frame is not suitable, consider alternative mounting options such as wall-mounted pull-up bars or freestanding pull-up bars.
- Consult with a professional if you’re unsure about the compatibility of your pull-up bar and door frame. They can provide you with specialized advice and recommendations.
By troubleshooting these common installation issues, you can overcome any obstacles and successfully install your pull-up bar. Remember to prioritize safety and follow the manufacturer’s instructions for a secure and enjoyable workout experience.
Frequently Asked Questions
Can You Install A Pull-Up Bar Without Drilling?
Yes, you can install a pull-up bar without drilling. There are various types, like doorway or telescopic bars, that use leverage or pressure to secure them in place. These can be easily installed and removed without any damage to the doorframe or walls.
Can You Put A Pull-Up Bar On Any Door?
Yes, you can put a pull-up bar on most doors. However, it is important to ensure that the doorframe is solid and can support your weight. Additionally, consider the dimensions of the bar to ensure it fits securely on the doorframe.
Is It Safe To Install Pull-Up Bar On Wall?
Yes, it is safe to install a pull-up bar on the wall. Ensure it is properly mounted, and follow the manufacturer’s instructions. It’s important to use appropriate hardware and ensure the wall can support the weight. Always check for any damage or instability before using it.
Do Pull Up Bars Damage Door Frames?
Pull up bars can potentially damage door frames due to the pressure exerted while using them. To minimize the risk, you can look for pull up bars with rubber padding or choose a wall-mounted bar instead. Additionally, reinforcing the door frame with a support board can also help prevent damage.
Conclusion
To sum it up, installing a pull-up bar may seem daunting initially, but with the right instructions and tools, it can be a straightforward process. By following the steps outlined in this guide, you can have your pull-up bar securely installed and ready to use in no time.
So go ahead, take the plunge, and start enjoying the benefits of this versatile exercise equipment. Stronger arms and upper body await!