To install picture hangers, first, determine the desired location on the wall. Then, use a hammer to carefully insert the hanger nails or screws into the wall at the appropriate height and spacing.
Do you have some beautiful artwork or precious family photos that you want to display on your walls? Installing picture hangers is a straightforward and efficient way to get your favorite pieces up for everyone to enjoy. Whether you’re a DIY enthusiast or a home decor enthusiast, learning how to install picture hangers is a valuable skill that will come in handy time and time again.
We will walk you through the simple steps of installing picture hangers to ensure your artwork is securely and stylishly hung. So, let’s get started and transform those empty walls into stunning art galleries that reflect your personality and style.
Before You Start
Before you start hanging pictures on your walls, there are a few important steps you need to follow to ensure a secure and properly aligned display. Taking the time to gather the necessary tools and materials, choosing the right hangers for your wall type, and accurately measuring and marking the spot for hanging will help prevent any damage to your walls and ensure your pictures stay securely in place. In this article, we will guide you through each step of the process, starting with the preparations you need to make before you start.
Gather necessary tools and materials
Having the right tools and materials on hand will make the picture hanging process much smoother. Here is a list of what you will need:
| Tools | Materials |
|---|---|
| Screwdriver | Picture hangers |
| Tape measure | Wall anchors (if needed) |
| Pencil or marker | Level |
| Hammer | Wall plugs (if needed) |
| Drill (if necessary) |
Note: The specific tools and materials you will need may vary depending on the type of wall you are hanging your pictures on.
Choose the right hangers for your wall type
Not all walls are created equal, which means you need to select the appropriate picture hangers that will securely hold your pictures and avoid any potential damage. Here are some common wall types and the recommended hangers:
- Drywall: Use picture hangers with wall anchors or wall plugs to ensure a secure hold.
- Concrete or brick: Choose a picture hanger specifically designed for masonry surfaces, such as masonry screws or adhesive hooks.
- Plaster: Opt for picture hangers with expansion anchors or toggle bolts to provide stability.
By choosing the right hangers for your wall type, you can rest assured that your pictures will be properly supported and stay in place.
Measure and mark the spot for hanging
Precision is key when it comes to hanging pictures, so measuring and marking the spot accurately is essential. Here’s how you can do it:
- Measure: Using a tape measure, determine the desired height and position of your picture. Consider the overall aesthetic of the room and any other objects or furniture nearby that may affect the placement.
- Mark: Once you have determined the ideal spot, use a pencil or marker to mark where the top center of the picture will be. This will act as your reference point for hanging.
By measuring and marking the spot precisely, you can ensure that your pictures will be properly aligned and create a visually pleasing display.
Now that you’ve gathered the necessary tools and materials, chosen the right hangers for your wall type, and measured and marked the spot for hanging, you are ready to move on to the next step: hanging your pictures. Stay tuned for our next article, where we will guide you through the process of actually installing the picture hangers.

Step 1: Preparing The Wall
Before you can hang any pictures on your wall, it’s essential to properly prepare the surface to ensure a secure and long-lasting installation. This involves removing any existing nails or screws, patching and filling any holes, and sanding the wall if necessary. By following these steps, you’ll create a smooth and even surface for your picture hangers. Let’s dive into each step in detail:
1. Remove any existing nails or screws
Begin by inspecting the wall for any nails or screws that might be protruding. Carefully remove them using a pair of pliers or a screwdriver, being mindful of any damage they could cause. Once all the nails and screws are out, dispose of them safely.
2. Patch and fill any holes
Once the nails and screws are removed, inspect the wall for any holes left behind. Depending on the size of the holes, you may need different materials to patch them. For small nail holes, a lightweight spackling compound works well. Apply the compund with a putty knife, filling the holes completely. Let it dry according to the manufacturer’s instructions.
If you have larger holes or cracks, you might need to use a wall repair patch. Cut the patch to fit over the hole, ensuring it extends at least an inch beyond the damaged area. Apply a layer of joint compound to the back of the patch and press it firmly onto the wall. Smooth out any excess compound using a putty knife, making sure the patch is fully blended with the surrounding wall. Allow it to dry completely.
3. Sand the wall if necessary
If there are bumps, rough spots, or uneven areas on the wall, it’s essential to sand them down before hanging your picture hangers. Using fine-grit sandpaper, gently sand the surface in a circular motion until it feels smooth to the touch. Be careful not to apply too much pressure, as you don’t want to damage the wall or remove too much paint.
After sanding, wipe away any dust or debris with a damp cloth or sponge. This will ensure a clean surface for your picture hangers to adhere to.
By thoroughly preparing your wall, you’ll create a sturdy foundation for your picture hangers, ensuring they stay securely in place for years to come. In the next steps, we’ll explore how to properly measure and place your picture hangers to achieve the best results.
Step 2: Selecting The Perfect Hangers
Now that you have determined the weight of your picture, it’s time to select the perfect hangers to ensure it hangs securely and stays in place. Choosing the appropriate hanger type is crucial for the longevity and stability of your artwork or photographs. Additionally, for heavier pictures, it’s important to consider additional support options.
Determine the weight of your picture
Before you start selecting hangers, it’s essential to know the weight of your picture. This will help you decide the type of hanger that can safely hold it. You can use a small scale or refer to the packaging of your picture frame to find the weight. If you have multiple pictures to hang, add up their individual weights to calculate the total weight.
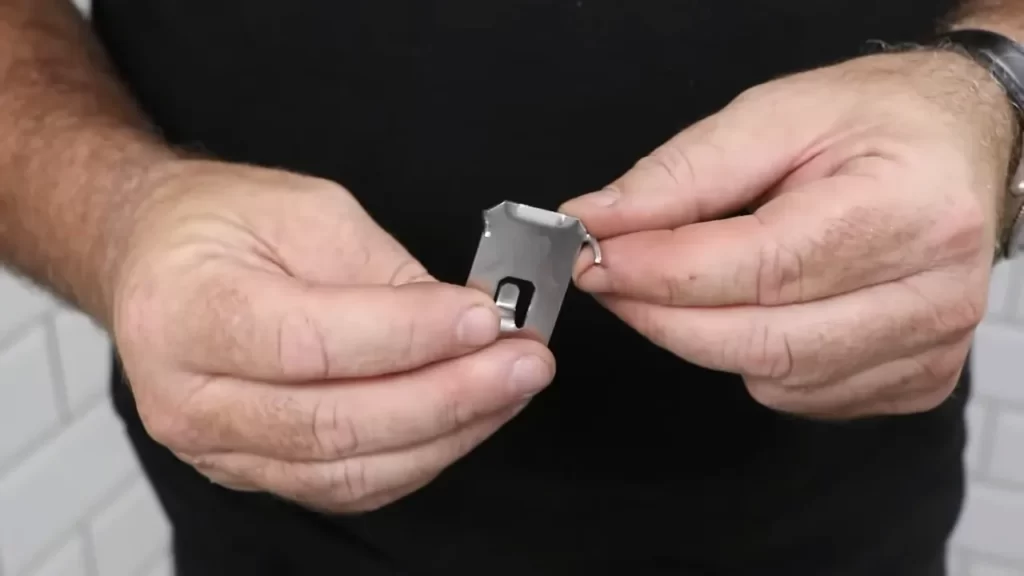
Choose the appropriate hanger type (wire, sawtooth, hook, etc.)
Once you have determined the weight, you can select the appropriate hanger type. There are several options available, including wire hangers, sawtooth hangers, adhesive hooks, and D-ring hangers.
Wire hangers are versatile and can work well for pictures of various weights. They usually consist of a metal wire that is strung across the back of the frame and attached with screws or nails. Sawtooth hangers, on the other hand, have a serrated edge and are ideal for lighter pictures. They are easy to install and provide a secure grip on the wall.
If you prefer a more decorative option, you can choose adhesive hooks. These are suitable for lightweight pictures and are easy to remove without leaving any residue. For larger or heavier pictures, D-ring hangers are a popular choice. These hangers have two metal rings attached to the back of the frame, providing extra stability.
Consider additional support options for heavier pictures
If you have a heavier picture that requires additional support, there are a few options to consider. One option is using wall anchors or toggles. These help distribute the weight more evenly and provide extra stability. Another option is using double hangers, which consist of two hangers spaced apart to evenly distribute the weight.
You can also use a cleat system for heavy pictures. This involves attaching a metal or wooden cleat to both the wall and the back of the frame. The cleat interlocks, providing a secure and stable hanging solution.
By considering the weight of your picture and selecting the appropriate hanger type, you can ensure your artwork or photographs are securely hung. Additional support options may be necessary for heavier pictures, ensuring they remain safely in place. Follow the next step to learn how to properly measure and position your hangers.
Step 3: Positioning The Hangers
Now that you have gathered the necessary tools and decided on the type of hangers to use, it’s time to position them correctly on the wall. This step is crucial to ensure that your pictures hang straight and securely. Here’s what you need to do:
Calculate the precise location for hanging
Before you start hammering any nails, it’s important to calculate the precise location where you want your pictures to hang. You don’t want to end up with a series of misaligned frames or uneven spacing. Take into consideration the size and layout of the wall, as well as other decorative elements in the room. Measure the height and width of your pictures, and determine how much space you want between each one.
Use a level and measurement tools for accuracy
To ensure accuracy and achieve a professional-looking result, make use of a level and measurement tools. A level will help you ensure that your pictures are perfectly horizontal or vertical. Place the level against the top or side of the frame and adjust accordingly until the bubble is centered.
| Tools: | Tips: |
| ✓ Level | Place it along the top or side of the frame. |
| ✓ Tape measure or ruler | Use it to measure spacing between pictures. |
| ✓ Pencil or painter’s tape | Mark the spots for hanger placement. |
Mark the spots for hanger placement
Once you have determined the precise location for your pictures and ensured they are level, you can mark the spots for hanger placement. This will serve as a guide when attaching the hangers to the wall. Use a pencil or painter’s tape to mark these spots, taking care to align them accurately with the center of each picture frame.
- Measure and mark the desired spacing between the pictures.
- Hold the picture up against the wall, aligning it with the previously marked spots.
- Using a pencil, make a small mark or a dot through the keyhole or tripod mount of the frame.
- Repeat this process for each picture you intend to hang.
By measuring and marking the spots for hanger placement, you ensure an even and pleasing display of your pictures on the wall.
Step 4: Installing The Hangers
Once you have prepared the wall and determined the ideal placement for your picture hangers, it’s time to proceed with the installation. Follow these simple steps to ensure a secure and level hanging.
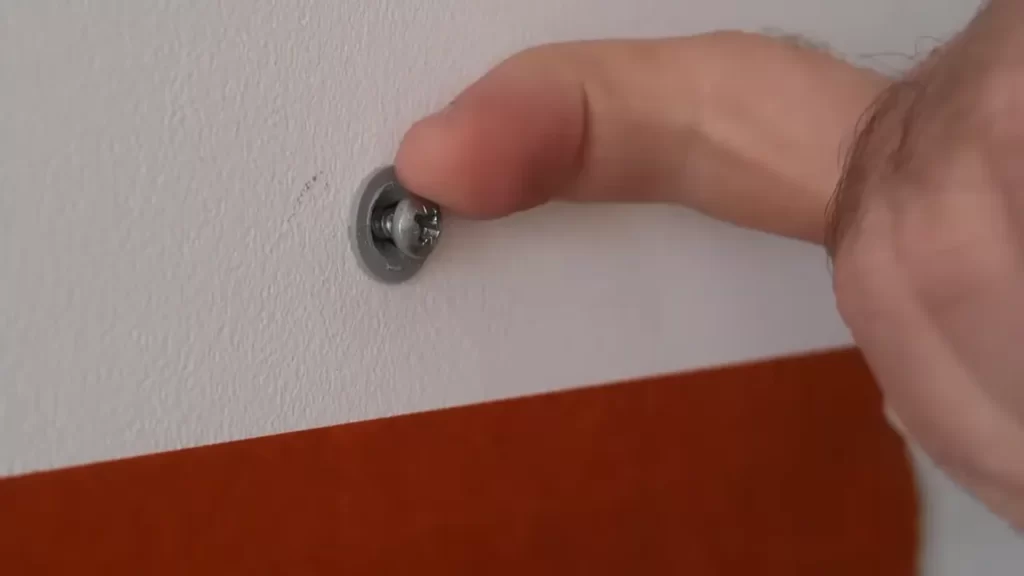
Insert the hanger nails or screws into the wall
Start by selecting the appropriate hanger nails or screws for your wall type. For drywall, it’s recommended to use picture hanger hooks with nails. For plaster or concrete walls, opt for screws that can anchor securely.
Hold the hanger against the wall, ensuring it aligns with the desired location. With a gentle but firm hand, insert the nails or screws into the designated holes on the hanger. Be cautious not to apply too much force to prevent damaging the wall.
When inserting nails, make sure they are at an angle, slightly tilted towards the center of the frame. This angle provides additional stability to prevent the picture from shifting or falling.
Ensure they are securely in place
Once the hanger nails or screws are in position, double-check their tightness. Gently wiggle the hanger to ensure it feels secure and firmly anchored to the wall. This step is crucial to prevent any accidents or damage caused by an unstable hanging.
If using screws, ensure they are tightened properly using a screwdriver or drill. Check that the screw heads are flush with the hanger surface, indicating they are securely fastened.
If you notice any looseness or instability, remove the hanger and adjust the nails or screws accordingly. It’s essential to have a solid foundation before hanging your valuable artwork or photographs.
Double-check the levelness
Before taking the final step, it’s vital to double-check the levelness of your installed hangers. Use a carpenter’s level to ensure the hanger is perfectly straight. This step is crucial to guarantee your pictures will hang evenly and not appear crooked.
Place the level vertically or horizontally against the hanger, adjusting it until the bubble rests in the center. If necessary, make slight corrections to achieve a level position. A level hanging enhances the overall appearance and professionalism of your picture display.
Once you have confirmed the levelness, you are now ready to proceed with hanging your cherished artwork or photographs. With the proper installation of picture hangers, you can now showcase your beautiful pieces with confidence and ease.
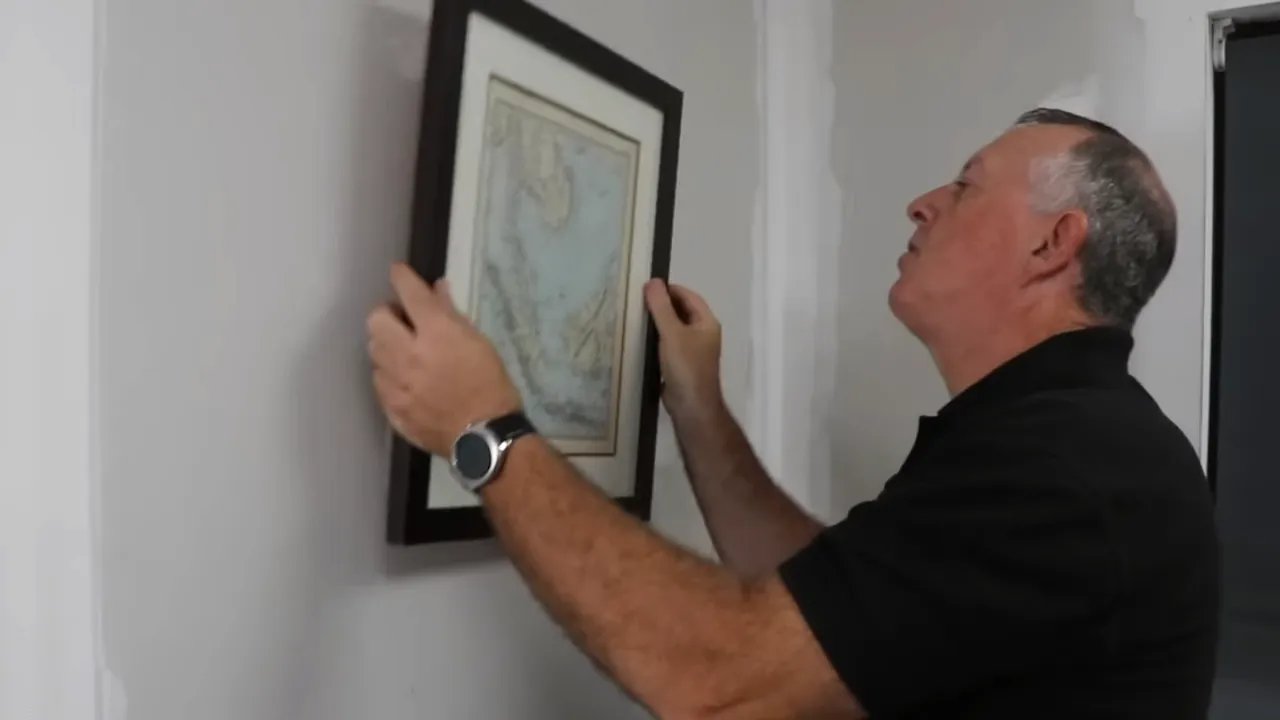
Step 5: Hanging Your Picture
Step 5: Hanging Your Picture
After successfully attaching the wire or hook onto the hangers and adjusting the positioning if needed, it’s time to finally hang your picture. This is the moment when all your efforts come together and your artwork or cherished photograph will take its rightful place on the wall. So, let’s follow these simple steps to ensure a perfect and secure display of your beautiful picture.
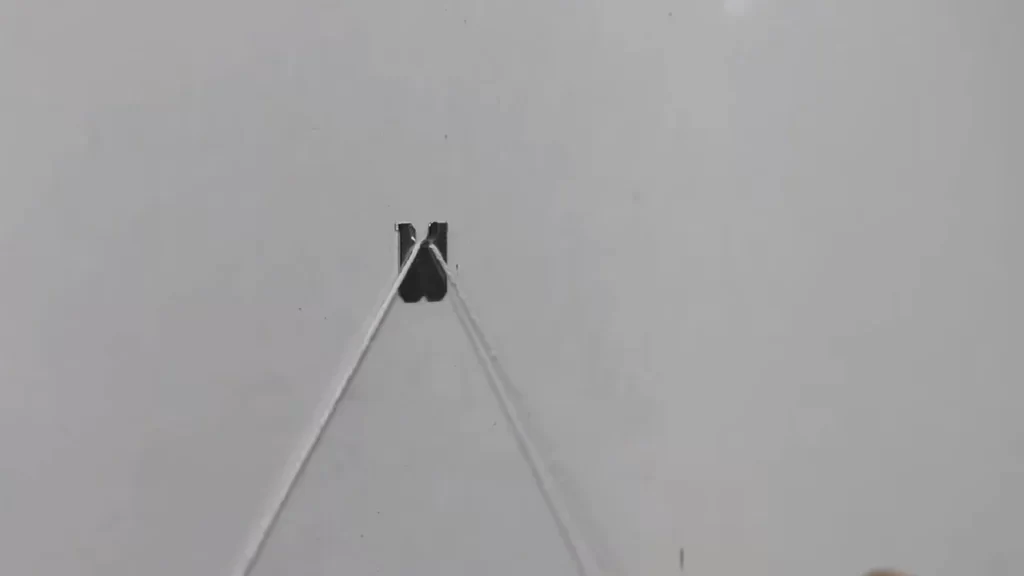
Attach the wire or hook onto the hangers
Firstly, ensure that the wire or hook is securely fastened onto the picture hangers. Double-check that it is properly aligned, as any misalignment may lead to an imbalanced display. Gently tug on the wire or hook to verify whether it holds the weight of the picture sturdy enough.
Adjust the positioning if needed
Next, carefully hold the picture against the wall at the exact spot you want it to be hung. Take a step back and visually assess the positioning. Does it need to be moved slightly to the left, right, higher, or lower? Make any necessary adjustments until you are satisfied with the placement.
To simplify the adjustment process, you can use a level tool to ensure your picture isn’t crooked. Place the level vertically or horizontally along the edges or corners of the picture frame, and carefully adjust until the bubble is centered in the level.
Step back and admire your beautifully hung picture
Now that the picture is securely attached and perfectly positioned, it’s time to step back and enjoy the sight of your beautifully hung artwork. Take a moment to appreciate the visual impact it brings to your space. Whether it’s a family portrait, a captivating landscape, or an inspiring piece of art, the right picture hanging technique can truly elevate the ambiance of any room.
Remember, the key to achieving a professional and visually appealing display depends on your attention to detail during each step of the process. By properly attaching the wire or hook onto the hangers, adjusting the positioning precisely, and stepping back to admire your handiwork, you can ensure that your picture will be a stunning focal point in your living space.
Now that you’ve mastered the art of hanging pictures, you can confidently showcase your favorite memories and artistic creations throughout your home. With a few simple tools and proper technique, you can achieve a well-curated and gallery-worthy display that will impress your guests and bring joy to your daily life.
So go ahead, grab your tools, and let your creativity shine as you proudly hang your pictures. Happy decorating!
Troubleshooting Tips
When it comes to installing picture hangers, sometimes you may encounter a few bumps along the way. But fear not! In this section, we will address some common issues and provide you with useful troubleshooting tips to ensure your pictures are hung perfectly on your walls.
Addressing uneven or tilted pictures
If you find that your pictures are hanging unevenly or tilting to one side, there are a few things you can do to resolve this issue:
- Check the levelness of your hangers: Using a level tool, make sure your hangers are positioned straight and parallel to the ground. If they are slightly off, adjust them accordingly.
- Use two hangers for larger pictures: If you have a heavier or larger picture, try using two hangers instead of one. This will distribute the weight more evenly and help keep your picture straight.
- Add adhesive bumpers: To prevent your pictures from shifting or tilting, you can place adhesive bumpers on the back corners of the frames. These bumpers will create friction and help keep your pictures in place.
Dealing with difficult wall surfaces
Not all walls are created equal, and some can pose challenges when it comes to hanging pictures. Here are some tips for dealing with difficult wall surfaces:
| Wall Surface | Troubleshooting Tip |
|---|---|
| Brick or concrete walls | Use a masonry drill bit and wall anchors to securely hang your pictures. |
| Tile or glass walls | Use special adhesive hooks or suction cups designed for these surfaces. Make sure the hooks are rated to hold the weight of your pictures. |
| Drywall with no studs | Use wall anchors or specialized drywall hooks to provide extra support for your pictures. |
Removing and repositioning hangers without damaging the wall
If you need to remove or reposition your hangers without causing damage to your walls, follow these tips:
- Use a hairdryer: Warm up the adhesive or glue holding the hangers to the wall by carefully applying heat with a hairdryer. This will help loosen the adhesive, making it easier to remove the hanger.
- Fill in holes: If you are removing a nail or screw hanger, fill the holes with spackling compound or putty. Once dry, sand the area lightly and touch up with a matching paint color.
- Use adhesive hooks: Consider using removable adhesive hooks instead of traditional hangers. These hooks are designed to be easily removed without leaving any residue or damage on the wall.
With these troubleshooting tips in mind, you’ll be able to overcome any obstacles you encounter while installing picture hangers. Now you can confidently hang your pictures with precision and enjoy a beautifully decorated space.
Final Thoughts
The final step of installing picture hangers is an exciting one! After carefully following the steps to ensure your artwork is securely hung on the wall, it’s time to take a moment to appreciate your hard work and showcase your artwork with confidence. In this section, we’ll provide a quick summary of the steps, encourage you to display your artwork proudly, and offer additional tips and suggestions to guarantee picture hanging success.
Quick summary of the steps
Let’s recap the steps involved in installing picture hangers:
- Choose the right type of hanger based on your artwork’s weight and the wall material.
- Measure and mark the desired position on the wall with a pencil.
- Hold the hanger against the wall at the marked position and level it.
- Use a screwdriver or power drill to secure the hanger to the wall.
- Gently hang your artwork on the hanger and adjust as needed.
- Step back and admire your beautifully hung artwork!
Now that you have a clear overview of the steps, it’s time to embrace the joy of displaying your artwork.
Encouragement to showcase your artwork with confidence
Don’t be hesitant when it comes to showcasing your artwork. Displaying your pieces in your living space or workspace can bring a sense of joy and personalization to the environment. Your artwork is a reflection of your creativity and passion, so embrace it confidently. Whether it’s a stunning painting, a collection of cherished photographs, or a unique piece of wall art, know that your artwork deserves to be seen and appreciated.
By following the picture hanging steps we’ve discussed, complete with precise measurements and sturdy hangers, you can have peace of mind that your artwork will stay securely on the wall for years to come.
Additional tips and suggestions for picture hanging success
In addition to the basic steps, here are a few extra tips to ensure your picture hanging experience is a success:
- Consider using adhesive strips for lightweight artworks or if you’re unable to drill into the wall.
- For larger and heavier pieces, use two hangers spaced evenly apart to distribute the weight and provide extra stability.
- Use a level or smartphone app to ensure your artwork is perfectly straight.
- Create a gallery wall by hanging multiple artworks together, maintaining consistent spacing between each piece.
- Remember to periodically check the tightness of the hanging screws to ensure they remain secure.
By applying these additional tips, you can elevate your picture hanging skills and create visually pleasing displays that enhance your space.
Now that you have the knowledge and confidence to install picture hangers, it’s time to go forth and showcase your artwork proudly. Embrace the process, enjoy the satisfaction of perfectly hung pieces, and let your creativity shine!
Frequently Asked Questions
Do You Need To Nail A Picture Hanger Into A Stud?
Yes, it is recommended to nail a picture hanger into a stud for better support and stability. Nailing into a stud provides a solid anchor point and helps prevent the picture from falling or damaging the wall.
What Kind Of Nails To Use For Sawtooth Hangers?
Use small nails such as brads or paneling nails to hang sawtooth hangers. These nails are small enough to fit into the narrow slots on the hangers, providing secure support for hanging your frames or artwork.
Where Do You Put Hangers On The Back Of A Picture Frame?
Place hangers on the back of a picture frame by attaching them to the top corners. The hangers will allow you to hang the frame securely on a wall.
Can You Nail Picture Hangers Into Drywall?
Yes, you can nail picture hangers into drywall. It is important to use the right size and type of nails to ensure the hanger holds securely. It’s recommended to locate a stud for extra support or use wall anchors if no stud is available.
Conclusion
Installing picture hangers can be an easy and efficient way to hang your artwork or photos securely. By following the step-by-step guide provided in this blog post, you can confidently tackle this task without any guesswork. Remember to choose the right hangers for your wall type, ensure proper alignment, and use the right tools for the job.
With these tips, you’ll be able to showcase your favorite pieces while adding a touch of personality to your space effortlessly. Happy hanging!