To install a Pfister single handle shower faucet, turn off the water supply, remove the old faucet, install the new faucet by following the manufacturer’s instructions, and then turn on the water supply. Now, you can enjoy your new Pfister single handle shower faucet.
Factors To Consider When Buying A Pfister Single Handle Shower Faucet
Different models and features to choose from
If you are in the market for a Pfister single handle shower faucet, you will be delighted to know that there are various models and features to choose from. Pfister offers a wide range of options that cater to different needs and preferences. Whether you prefer a traditional design or a more modern and sleek look, you can find a Pfister single handle shower faucet that suits your taste.
Finding the right fit for your bathroom aesthetics
When selecting a Pfister single handle shower faucet, it is important to consider the aesthetics of your bathroom. The faucet should seamlessly blend in with the overall design and style of your bathroom. Whether you have a contemporary or a traditional bathroom, Pfister offers a variety of finishes and designs that can complement any decor. From classic chrome and brushed nickel to elegant bronze and matte black, you can find the perfect match for your bathroom aesthetics.
Checking for compatibility with your existing plumbing system
Before purchasing a Pfister single handle shower faucet, it is crucial to check for compatibility with your existing plumbing system. This ensures a hassle-free installation and prevents any potential plumbing issues in the future. Take note of the specifications and measurements of your current plumbing setup, and compare them with the product details provided by Pfister. Make sure that the size, connections, and compatibility requirements align with your existing plumbing system to ensure a seamless installation process.
In conclusion, when buying a Pfister single handle shower faucet, it is important to consider the different models and features available, find the right fit for your bathroom aesthetics, and ensure compatibility with your existing plumbing system. By taking these factors into account, you can make an informed decision and select the perfect Pfister single handle shower faucet that meets your requirements and enhances the functionality and beauty of your bathroom.
Tools And Materials Needed For Installation
1. Screwdriver
A screwdriver is an essential tool for installing the Pfister Single Handle Shower Faucet. It is used to remove and tighten screws during the installation process. Make sure you have a screwdriver with a suitable head size to fit the screws on the faucet.
2. Adjustable Wrench
An adjustable wrench is another important tool you will need for the installation. It is used to tighten and loosen nuts, which are crucial for securing the different components of the faucet. Ensure that you have an adjustable wrench that can accommodate the sizes of the nuts involved in the installation.
3. Plumber’s Tape
Plumber’s tape, also known as Teflon tape, is an inexpensive yet highly effective tool that helps create a watertight seal between threaded connections. It is wrapped around the threads of the pipes and fittings to prevent leaks. Make sure you have plumber’s tape on hand to ensure a tight and secure installation.
4. Safety Glasses
Safety should always be a priority when working with tools and plumbing. Wear safety glasses to protect your eyes from any potential debris or accidental splashes. Even a small particle can cause significant damage to your eyes, so don’t skip this important safety measure.
5. Towels
Having towels nearby during the installation process is essential for catching any water drips or spills. They will help keep your workspace clean and prevent any damage to your floor or surrounding areas. Additionally, having towels on hand will make it easier to dry off any excess water once the installation is complete.
6. Pfister Single Handle Shower Faucet Kit
The most important item you need for the installation is the Pfister Single Handle Shower Faucet kit itself. Ensure that you have the complete kit, including all the necessary components such as the faucet handle, showerhead, valve, and any additional parts specific to your model. Double-check the contents of the kit before starting the installation to avoid any missing pieces or surprises.
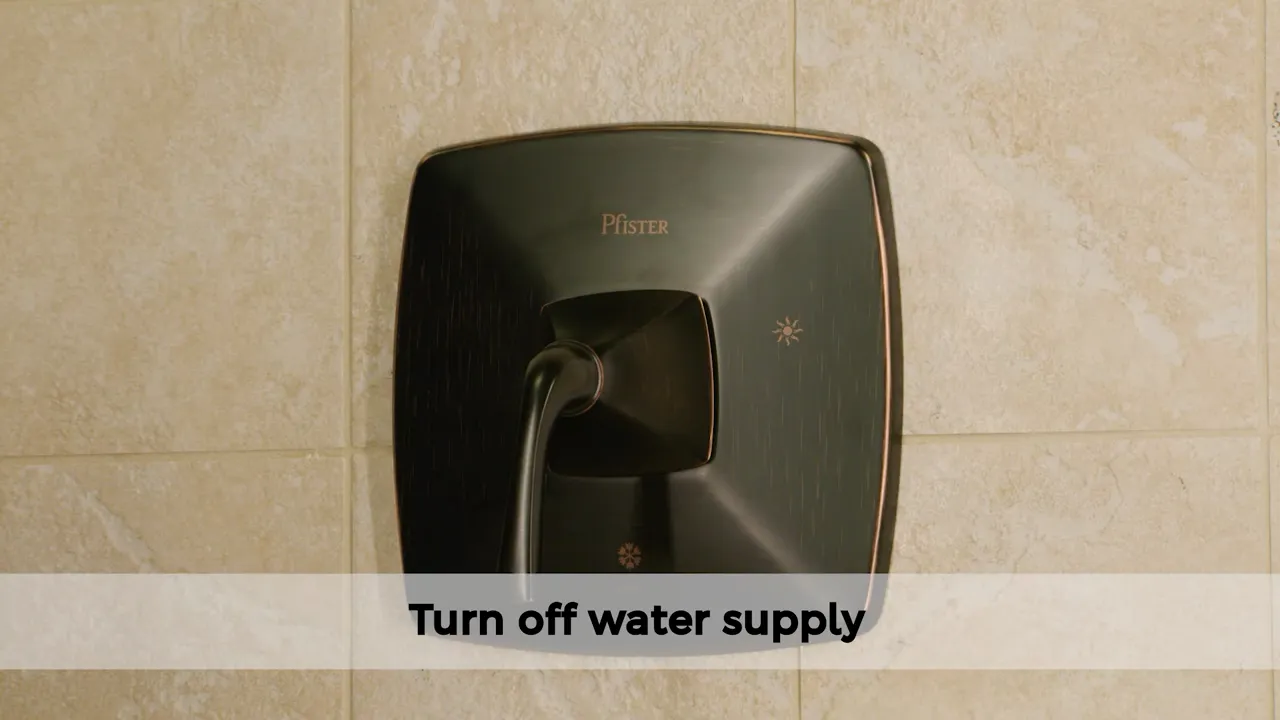
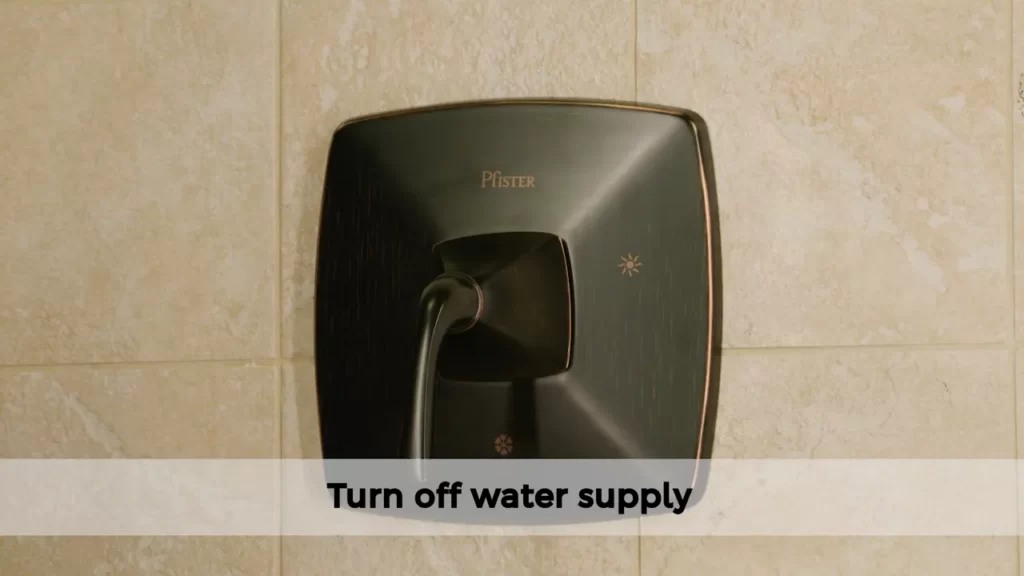
Shutting Off The Water Supply
Before installing your Pfister single handle shower faucet, it is crucial to shut off the water supply to avoid any water leakage or accidents during the installation process. In this section, we will guide you on how to locate the main water valve and effectively turn off the water supply to the shower.
Locate the main water valve
To start, you need to locate the main water valve in your home. The main water valve is usually located near the water meter or where the water supply enters your house. It is typically a round or lever-type valve.
Here are some common places where you can find the main water valve:
- In the basement or crawl space
- Near the water heater
- In the garage
- Outside your house
Since every house is unique, the exact location may vary. It is recommended to check your house blueprints or consult a local plumber if you are unsure about the location of the main water valve.
Turning off the water supply to the shower
Once you have located the main water valve, follow these steps to turn off the water supply to the shower:
- Turn the valve clockwise or, if it’s a lever-type valve, flip it to the “off” position. This will stop the water flow to the entire house.
- Next, you need to release any remaining pressure in the water lines. To do this, open a faucet at a lower level in your house, such as a sink or tub faucet, to let the water drain out.
- After draining out the water, close the lower-level faucet.
By following these steps, you have successfully shut off the water supply to the shower and are ready to proceed with the installation of your Pfister single handle shower faucet.
Removing The Old Shower Faucet
Removing the old shower faucet is an essential step when installing a Pfister single handle shower faucet. Before proceeding, it is important to conduct a thorough inspection of the existing shower faucet to identify any potential issues. By following these simple steps, you can easily remove the old shower faucet and prepare for the installation process.
Inspecting the Existing Shower Faucet
Begin by closely examining the existing shower faucet to check for any visible signs of damage or wear. Look for any leaks, cracks, or mineral buildup that may affect the functionality of the faucet. Take note of any specific components that may need to be replaced, such as the valve, cartridge, or handle.
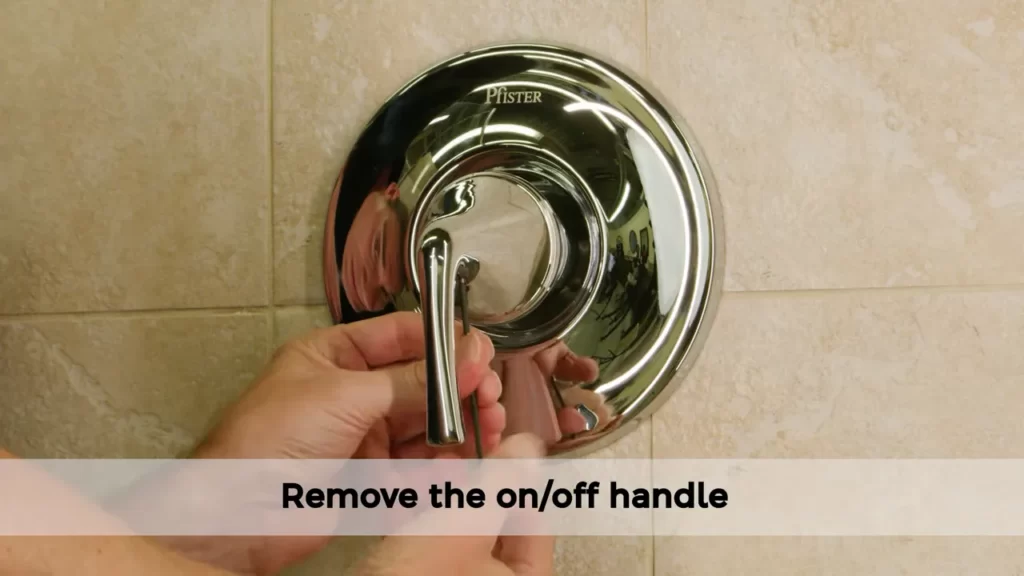
Removing the Handle and Escutcheon Plate
Once you have inspected the shower faucet, the next step is to remove the handle and escutcheon plate. Start by locating the small setscrew on the handle and use an appropriate Allen wrench to loosen and remove it. Then, gently pull the handle away from the wall to expose the escutcheon plate. The escutcheon plate is usually held in place with a few screws, which can be easily removed using a screwdriver. Carefully remove the escutcheon plate, taking care not to damage any surrounding tiles or wall surfaces.
Detaching the Valve and Piping Connections
After removing the handle and escutcheon plate, the next step is to detach the valve and piping connections. Firstly, turn off the water supply to the shower faucet using the shutoff valve located nearby. This will prevent any water from flowing when the connections are detached. Next, use a wrench to disconnect the water supply lines from the valve. Ensure you have a bowl or container handy to catch any residual water that may be released during this process.
Once the water supply lines are disconnected, proceed to remove any remaining connections attaching the valve to the piping system. Carefully loosen and remove any nuts or fittings using the appropriate tools. Take note of the sequence in which these connections are removed, as this will help during the installation of the new shower faucet.
By carefully following these steps, you can successfully remove the old shower faucet in preparation for the installation of your new Pfister single handle shower faucet. Remember to inspect the existing faucet, remove the handle and escutcheon plate, and detach the valve and piping connections. With these tasks completed, you are now ready to proceed with the installation process and enjoy your new shower faucet.
Preparing The Area For Installation
Before you start installing your Pfister single handle shower faucet, it’s important to prepare the area to ensure a smooth and successful installation. This involves cleaning the shower wall and measuring and marking the installation area. By following these steps, you can create a clean and sturdy foundation for your new shower faucet.
Cleaning the Shower Wall
The first step in preparing the area for installation is to clean the shower wall. This ensures that the surface is free from any dirt, debris, or residue that could affect the adhesion of the faucet. Here’s a simple process to clean the shower wall:
- Start by removing any shower accessories or items that might obstruct your cleaning.
- Using a mild cleaner or a mixture of water and vinegar, wipe down the shower wall thoroughly.
- Pay special attention to areas where grime and soap scum tend to build up, such as around the showerhead and handles.
- Rinse the wall with clean water and dry it with a soft cloth.
By cleaning the shower wall before installation, you ensure maximum adhesion and longevity of your Pfister single handle shower faucet.
Measuring and Marking the Installation Area
Once the shower wall is clean, the next step is to measure and mark the installation area. This is crucial to ensure that the faucet is placed in the right position and at the correct height. Here’s how you can measure and mark the installation area:
- Start by measuring the distance between the showerhead and the faucet handle. This will help you determine the ideal location for your new faucet.
- Using a measuring tape, measure the desired height for the faucet handle from the shower floor or tub.
- Mark the measurement on the shower wall using a pencil or a removable marker.
- Double-check the marked position and make any necessary adjustments.
By accurately measuring and marking the installation area, you ensure that your Pfister single handle shower faucet is installed at the perfect height and position for your convenience.
Installing The New Pfister Single Handle Shower Faucet
Installing a new Pfister single handle shower faucet can be a rewarding project that not only enhances your bathroom’s functionality but also adds a touch of style. Follow the steps below to ensure a seamless installation process.
Attaching the valve and piping connections
To begin the installation process, it’s important to attach the valve and piping connections securely. Follow these steps:
- Start by turning off the water supply to your shower.
- Detach the old shower faucet by removing any screws or bolts that hold it in place.
- Once the old faucet is removed, clean the pipe threads and ensure they are free from any debris.
- Apply some plumber’s tape to the threaded ends of the pipes to create a watertight seal.
- Attach the valve to the pipes, making sure to line up the connections properly.
- Tighten the valve securely using a wrench or pliers, ensuring there are no leaks.
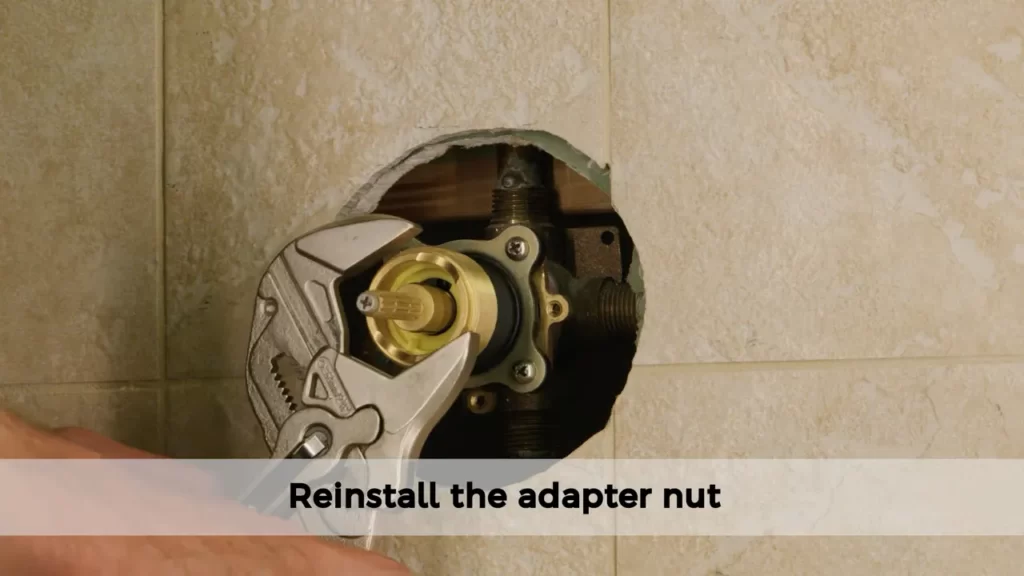
Mounting the new escutcheon plate
Next, it’s time to mount the new escutcheon plate, which acts as a decorative cover for the shower valve. Follow these steps:
- Align the escutcheon plate with the valve and secure it in place using the provided screws.
- Ensure that the plate is level and centered before tightening the screws.
- Use a screwdriver to tighten the screws until the plate is firmly attached.
Installing the handle
The final step is installing the handle, which allows you to control the temperature and flow of water. Follow these steps:
- Slide the handle onto the valve stem, aligning it with the desired position.
- Secure the handle in place by tightening the set screw with an Allen wrench.
- Test the handle to ensure smooth operation and make any necessary adjustments.
Once you have completed these steps, you can turn on the water supply to your shower, and enjoy your newly installed Pfister single handle shower faucet. With its sleek design and reliable functionality, this faucet is sure to elevate your shower experience.
Testing And Finishing Touches
Turning on the water supply
Once you have successfully installed your Pfister Single Handle Shower Faucet, it’s time for the exciting moment of turning on the water supply. This step is crucial as it ensures that everything is functioning properly and allows you to enjoy your new shower experience. Follow these simple steps to turn on the water supply:
- Locate the main water supply valve in your home. It is usually positioned near the water meter or utility room.
- Gently turn the valve in a clockwise direction to open it. Slowly open the valve to avoid any sudden pressure surges that could potentially damage the faucet or plumbing.
- Once the valve is fully open, the water should begin to flow through the pipes, reaching your Pfister Single Handle Shower Faucet.
Checking for leaks
After turning on the water supply, it’s crucial to check for any potential leaks. Even with careful installation, leaks can sometimes occur, so be diligent in inspecting your new shower faucet. Follow these steps to check for leaks:
- Observe the area around the faucet, paying close attention to any visible signs of leaks such as dripping water, water stains, or wet spots.
- If you notice any leaks, turn off the water supply immediately. Identify the source of the leak and tighten or reposition the affected parts as necessary.
- Once you have addressed any leaks, turn on the water supply again and double-check for any lingering issues.
Adjusting the temperature and water flow
The Pfister Single Handle Shower Faucet offers the convenience of adjusting both the temperature and water flow to suit your preferences. Here’s how you can make these adjustments:
- To adjust the temperature, rotate the single handle either clockwise or counterclockwise. Pay attention to any indicators or markings that indicate the desired temperature range.
- To control the water flow, lift or lower the handle. Gradually increase or decrease the handle’s position to achieve the desired water flow rate.
- Experiment with different combinations of temperature and water flow to find your perfect shower experience.
Securing any loose parts
Before you wrap up the installation process, it’s important to secure any loose parts to ensure the long-term durability of your Pfister Single Handle Shower Faucet. Follow these steps to secure any loose parts:
- Inspect all connections, joints, and fittings to identify any areas where parts may be loose.
- Using a suitable wrench or pliers, tighten any loose parts gently. Be careful not to overtighten as this could lead to damage.
- Double-check each connection to ensure everything is secure and stable.
Cleaning up the work area
With the installation complete and everything in working order, it’s time to clean up your work area. Follow these steps to ensure a tidy finish:
- Dispose of any packaging materials, debris, or excess plumbing supplies responsibly.
- Wipe down the area around the faucet to remove any dirt or dust.
- Inspect the surrounding tiles or wall surfaces for any splatters or residue. Use a mild cleaning solution and a soft cloth to clean these surfaces.
Congratulations, you have successfully installed and tested your Pfister Single Handle Shower Faucet. With its sleek design and adjustable settings, this faucet is sure to enhance your shower experience for years to come. Enjoy!
Leaking Connections
Checking and tightening the connections
One of the most common causes of a leaking Pfister single handle shower faucet is loose connections. Over time, these connections can become loose due to regular use or improper installation. Therefore, it’s essential to regularly check and tighten the connections to prevent any leaks.
To begin, turn off the water supply to the shower faucet. This will ensure that you can work on the connections without any water gushing out. Next, grab a wrench and carefully examine each connection point, including the showerhead, shower arm, valve, and handle. If you notice any loose connections, use the wrench to tighten them. Make sure to apply gentle and even pressure to avoid damaging the faucet or causing further leaks.
If you find it difficult to tighten the connection due to limited accessibility, you may need to use a basin wrench. This specialized tool allows you to reach tight spaces and provides a better grip for tightening the connections. Take your time, and ensure that each connection is securely tightened without overtightening, which could cause damage.
Applying plumber’s tape if necessary
In some cases, loose connections may persist even after tightening. If this is the case, you can use plumber’s tape to create a watertight seal and prevent further leaks. Plumber’s tape, also known as Teflon tape, is a thin white tape that is specifically designed to seal pipe threads.
To apply plumber’s tape, first, ensure that the connection is clean and dry. This will help the tape adhere better and create a more effective seal. Begin by wrapping the tape clockwise around the male threads of the connection, applying slight tension as you go. Make sure to cover the entire threaded area with at least two to three wraps of tape.
Once the plumber’s tape is in place, tightly reconnect the two parts of the connection, threading them together. The tape acts as a barrier against water leakage, creating a tight seal. However, be cautious not to overtighten, as this may cause damage to the faucet components.
In conclusion, if you notice any leaking connections in your Pfister single handle shower faucet, it’s important to address the issue promptly. By checking and tightening the connections and applying plumber’s tape if necessary, you can effectively eliminate leaks and ensure the proper functioning of your shower faucet. Remember to turn on the water supply and test the faucet after completing the installation to ensure that the leaks have been resolved.
Handle Difficulties
When it comes to installing a Pfister single handle shower faucet, you may encounter some handle difficulties. These can range from the handle being too loose or too tight, to obstructions or debris that prevent smooth operation. In this section, we will explore two common handle difficulties and walk you through the steps to overcome them.
Adjusting the handle’s position or tightness
If you find that the handle of your Pfister single handle shower faucet is either too loose or too tight, don’t worry. It’s a common issue and can be easily resolved by adjusting the handle’s position or tightness. Follow these steps:
- Locate the hex screw on the underside of the handle.
- Using an Allen wrench, turn the hex screw clockwise to tighten or counterclockwise to loosen the handle.
- Test the handle’s tightness by gently pushing or pulling on it. Repeat the adjustment process if necessary.
By following these simple steps, you can ensure the handle of your Pfister single handle shower faucet is perfectly positioned and easy to operate. Say goodbye to handle difficulties!
Checking for any obstructions or debris
If you are experiencing resistance or difficulty in turning the handle of your Pfister single handle shower faucet, it may be due to obstructions or debris. Follow these steps to check for and remove any potential obstacles:
- Turn off the water supply to the shower faucet.
- Remove the handle by locating the set screw at the base and unscrewing it.
- Gently remove the handle, being careful not to damage any components.
- Inspect the inside of the handle and the valve for any obstructions or debris.
- If you find any, use a clean cloth or brush to remove them.
- Reassemble the handle by securing it in place with the set screw.
- Turn the water supply back on and test the handle for smooth operation.
By following these steps, you can ensure that there are no obstructions or debris causing handle difficulties with your Pfister single handle shower faucet. You’ll be able to enjoy a smoothly functioning shower experience in no time!
Uneven Temperature Or Water Flow
When it comes to your Pfister single handle shower faucet, you want to make sure that the temperature and water flow are even for a comfortable showering experience. Uneven temperature or water flow can be frustrating, but luckily, there are some simple steps you can take to address this issue. In this section, we will look at how to adjust the valve cartridge and clean or replace it if needed. By following these steps, you can ensure that your Pfister single handle shower faucet delivers consistent temperature and water flow.
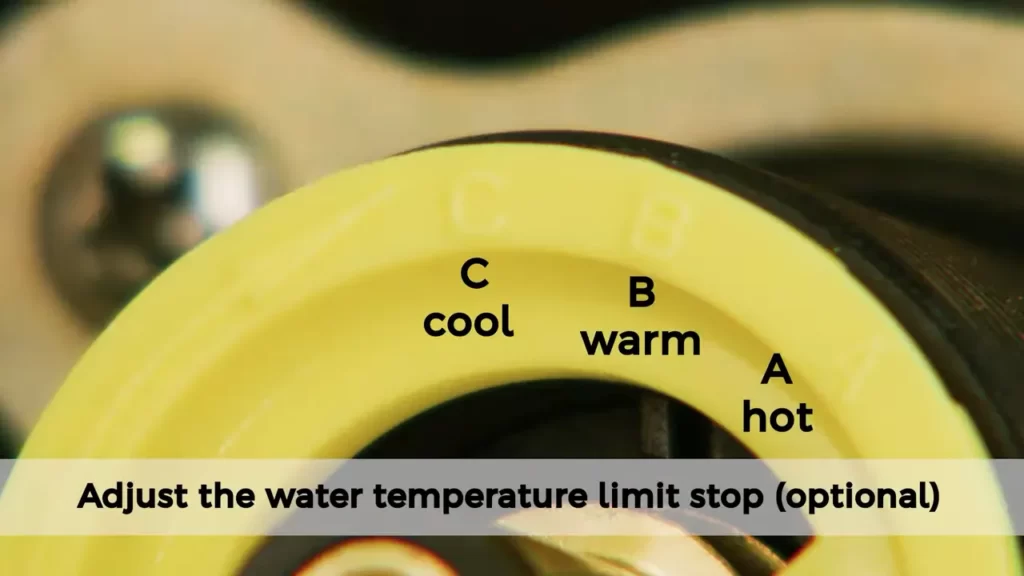
Adjusting the Valve Cartridge
If you are experiencing uneven temperature or water flow with your Pfister single handle shower faucet, adjusting the valve cartridge can help resolve the issue. Here’s how:
- Start by removing the handle of the faucet. You can do this by locating the screw under the handle and using a screwdriver to loosen and remove it.
- Once the handle is removed, you will see the valve cartridge. Look for a temperature limit stop, which is a small mechanism with a notched ring. This mechanism controls the maximum temperature of the water.
- To adjust the temperature, rotate the temperature limit stop in the desired direction. Clockwise rotation will decrease the maximum temperature, while counterclockwise rotation will increase it.
- After making the adjustment, reattach the handle by inserting the screw and tightening it with a screwdriver. Make sure the handle is secure.
By adjusting the valve cartridge and temperature limit stop, you can fine-tune the temperature of your Pfister single handle shower faucet and achieve a more even flow of hot and cold water.
Cleaning or Replacing the Cartridge if Needed
If adjusting the valve cartridge does not resolve the issue of uneven temperature or water flow, the cartridge itself may be dirty or worn out and need cleaning or replacing. Follow these steps to clean or replace the cartridge:
- First, turn off the water supply to the shower faucet. This can usually be done by locating the shut-off valves for the shower and turning them off.
- Next, remove the handle and valve cartridge as mentioned earlier.
- Inspect the cartridge for any debris, mineral buildup, or signs of wear and tear. If cleaning is sufficient, use a soft brush or cloth to remove any dirt or deposits. If the cartridge is worn out or damaged, it will need to be replaced.
- If cleaning the cartridge does not solve the problem, consider replacing it with a new one. Contact the manufacturer or a plumbing professional for assistance with finding the right replacement cartridge for your Pfister single handle shower faucet.
- Once the cartridge is cleaned or replaced, reassemble the faucet by following the earlier steps in reverse order. Make sure everything is properly secured before turning on the water supply.
By cleaning or replacing the cartridge if needed, you can ensure a smooth flow of water and consistent temperature in your Pfister single handle shower faucet.
Regular Cleaning And Inspections
Removing Mineral Deposits
Mineral deposits can accumulate over time in your Pfister single handle shower faucet, causing decreased water flow and compromising the overall performance. Regular cleaning is essential to maintain the quality of your shower experience. Here are the steps to remove mineral deposits:
- Turn off the water supply to the faucet by locating the shut-off valve in your bathroom.
- Remove the handle of the shower faucet by loosening the screw with an appropriate tool.
- Take off the decorative cap and unscrew the bonnet nut to access the cartridge.
- Remove the cartridge using pliers or a cartridge removal tool. Inspect the cartridge for any signs of mineral buildup.
- If mineral deposits are present, soak the cartridge in a solution of equal parts white vinegar and water for about 30 minutes.
- Use a soft brush or toothbrush to gently scrub away the mineral deposits from the cartridge.
- Rinse the cartridge thoroughly with water to remove any remaining vinegar residue.
- Reassemble the shower faucet by following the steps in reverse order. Make sure everything is properly tightened.
- Turn on the water supply and test the faucet to ensure there are no leaks and the water flow is restored.
Checking for Leaks or Loose Parts
Regular inspections are vital to catch any leaks or loose parts in your Pfister single handle shower faucet before they turn into major problems. It is recommended to perform this check at least once a month. Follow these steps to ensure the faucet is in top condition:
- Turn off the water supply to the faucet by locating the shut-off valve in your bathroom.
- Inspect the showerhead for any leaks or drips. If there are any, use a wrench or pliers to tighten the connections.
- Check the handle for any wobbling or looseness. If needed, tighten the screw or nut holding the handle securely.
- Examine the cartridge and other internal components for any signs of wear or damage. Replace any faulty parts if necessary.
- Inspect the shower arm and flange for leaks or corrosion. Apply plumber’s tape to the threads if needed, and ensure a tight connection.
- Turn on the water supply and test the faucet to confirm there are no leaks or loose parts.
Regular cleaning and inspections of your Pfister single handle shower faucet will prolong its lifespan and ensure optimal performance. By following these simple steps, you can maintain a refreshing and satisfying shower experience in your bathroom.
Replacing Seals And Cartridges
Signs that a seal or cartridge needs replacement
Over time, the seals and cartridges in your Pfister single handle shower faucet may wear out or become damaged due to regular use or mineral deposits build-up. It’s important to keep an eye out for certain signs that indicate a replacement is necessary. By recognizing these signs, you can avoid further damage and ensure your shower faucet continues to function optimally. Here are some common indicators that it’s time to replace the seals or cartridges:
- Dripping or leaking water from the faucet
- Difficulty in turning the faucet handle
- Inconsistent water temperature control
- Abnormal water flow, such as reduced pressure or erratic streams
If you notice any of these issues, it’s best to address them promptly by replacing the seals or cartridges. Neglecting the problem can lead to more serious plumbing issues and even excessive water wastage.
Step-by-step guide to replacing a seal or cartridge
Replacing the seals or cartridges in your Pfister single handle shower faucet is a relatively simple process that can be done with some basic tools and a little bit of patience. Follow these steps to ensure a successful replacement:
- Start by turning off the water supply to the shower faucet. Locate the shut-off valve beneath the sink or behind the shower wall and turn it clockwise until the water flow stops.
- Next, remove the handle of the shower faucet. This can usually be done by gently prying off any decorative caps or covers and unscrewing the handle screw. Once the screw is removed, carefully lift off the handle.
- With the handle removed, you should now have access to the cartridge. Depending on your faucet model, the cartridge may be held in place by a retaining nut or clip. Use an appropriate wrench or pliers to loosen and remove the retaining nut or clip.
- Once the retaining mechanism is removed, you can pull out the old cartridge from the valve body. Take note of its orientation before removing it to ensure proper installation of the new one.
- Before inserting the new cartridge, it’s recommended to lubricate the O-rings with silicone grease. This will help create a watertight seal and prevent any leaks.
- Align the new cartridge with the valve body and gently push it in, making sure it is fully seated. Reinstall the retaining nut or clip, tightening it securely.
- Replace the handle by aligning it with the cartridge stem and securing it with the handle screw. If applicable, replace any decorative caps or covers.
- Finally, turn on the water supply to the shower faucet and test for any leaks or issues. If everything appears to be working correctly, you have successfully replaced the seal or cartridge in your Pfister single handle shower faucet.
By following these step-by-step instructions, you can easily replace the seals or cartridges in your Pfister single handle shower faucet, ensuring its optimal performance and longevity.
Extending The Lifespan Of Your Pfister Single Handle Shower Faucet
Proper care and maintenance are essential for ensuring the longevity of your Pfister single handle shower faucet. By following the manufacturer’s guidelines and using the right cleaning products and techniques, you can keep your faucet in its best condition for years to come. In this article, we will discuss essential tips on how to extend the lifespan of your Pfister single handle shower faucet.
Following Manufacturer’s Guidelines for Care and Maintenance
To keep your Pfister single handle shower faucet performing its best, it is crucial to follow the manufacturer’s care and maintenance guidelines. These guidelines are designed to help you avoid common mistakes that could lead to damage or premature wear and tear.
Here are some key tips to keep in mind:
- Regularly check for leaks or drips: Inspect your shower faucet regularly for any signs of leaks or drips. If you notice any issues, address them promptly to prevent further damage.
- Avoid using excessive force: While turning the faucet handle, it’s important not to apply excessive force. Using too much force can cause internal parts to wear out faster and may result in leaks.
- Keep the faucet clean: Regular cleaning is vital to ensure the optimal operation of your Pfister single handle shower faucet. Use mild soap and water to clean the faucet, and avoid using harsh chemicals or abrasive cleaners that could damage the finish.
- Protect the faucet from harsh chemicals: When using cleaning products in your bathroom, be cautious not to let them come into direct contact with the faucet. Harsh chemicals can corrode the finish and damage the internal components.
Using Proper Cleaning Products and Techniques
The right cleaning products and techniques can make a significant difference in maintaining the appearance and functionality of your Pfister single handle shower faucet.
Here are some recommendations:
- Use non-abrasive cleaners: When cleaning your faucet, opt for non-abrasive cleaners that are safe for the specific finish of your Pfister single handle shower faucet. This will protect the surface from scratches and damage.
- Avoid using harsh chemicals: Stay away from harsh chemicals, such as bleach or ammonia-based cleaners. These can deteriorate the finish and potentially damage the internal components of the faucet.
- Prevent mineral deposits: Mineral deposits can build up over time and affect the performance of your faucet. To prevent this, wipe the faucet dry after each use, or use a soft cloth to remove any residues.
- Regularly inspect and clean the aerator: The aerator is a small component located at the spout of the faucet. It helps regulate water flow and can become clogged with debris or mineral deposits. Remove the aerator periodically and clean it with a soft brush and mild cleaning solution.
By following these guidelines and using proper cleaning products and techniques, you can ensure your Pfister single handle shower faucet remains in excellent condition. Regular care and maintenance will help extend its lifespan and keep it functioning optimally for years to come.
Frequently Asked Questions
How Do You Remove A Pfister Single Handle Shower Cartridge?
To remove a Pfister single handle shower cartridge, follow these steps: 1. Turn off the water supply. 2. Remove the handle and trim. 3. Unscrew the retaining nut. 4. Pull out the old cartridge using pliers or cartridge puller. 5. Replace with a new cartridge and reassemble the shower components.
Note: It’s always a good idea to consult the manufacturer’s instructions for specific details.
How Do You Change A Single Handle Pfister Faucet Cartridge?
To change a single handle Pfister faucet cartridge, follow these steps: 1. Turn off the water supply. 2. Remove the handle and trim sleeve. 3. Use pliers to loosen the cartridge retaining nut. 4. Pull out the old cartridge. 5. Insert the new cartridge and tighten the retaining nut.
Why Does My Pfister Shower Handle Spin?
Your Pfister shower handle may spin due to a loose or worn-out handle. Tightening or replacing the handle can fix the issue easily.
How Does A Single Handle Shower Valve Work?
A single handle shower valve controls the flow of water and temperature. You can adjust both by moving the handle left or right and up or down. It’s a convenient and easy-to-use option for controlling your shower experience.
Conclusion
To sum up, installing a Pfister single handle shower faucet is a straightforward process that anyone can do with a little knowledge and a few simple tools. By following the step-by-step instructions provided in this blog post, you can ensure a successful installation and enjoy the benefits of your new shower faucet.
Remember to always refer to the manufacturer’s instructions and consult a professional if you encounter any difficulties. Happy showering!