To install a Pfister kitchen faucet, follow these steps precisely: Gather the necessary tools and materials, turn off the water supply, assemble the faucet, install the supply lines and mounting hardware, connect the faucet to the water supply, and test for leaks. Welcome to our guide on how to install a Pfister kitchen faucet!
Whether you’re renovating your kitchen or simply replacing an old faucet, installing a Pfister kitchen faucet is a straightforward process. We will provide you with a step-by-step guide on how to install a Pfister kitchen faucet, ensuring a smooth and successful installation.
By following these instructions carefully, you’ll have your new Pfister kitchen faucet up and running in no time. So, let’s get started!
Factors To Consider
Before you start installing a Pfister kitchen faucet, there are a few important factors to consider. Taking these factors into account will ensure that you choose the right faucet for your needs and that the installation process goes smoothly.
Water Flow Options
One of the first things to consider when installing a Pfister kitchen faucet is the water flow options. Pfister offers a variety of different flow rates, allowing you to choose the perfect balance between water efficiency and performance. Whether you prefer a high-flow faucet for quick filling or a low-flow option to conserve water, make sure to select the right flow rate for your needs. It’s important to note that some areas have regulations that limit the maximum flow rate allowed, so be sure to check your local plumbing codes before making a decision.
Finishes and Styles
The finish and style of your Pfister kitchen faucet play a significant role in both the functionality and aesthetics of your kitchen. Pfister offers a wide range of finishes, including chrome, stainless steel, and various brushed options. Each finish has its own unique look and benefits. Consider the other fixtures and appliances in your kitchen when choosing a finish to ensure a harmonious design. Additionally, Pfister offers a range of styles, from traditional to modern, allowing you to find a faucet that complements your kitchen’s overall theme and decor.
Mounting Options
The mounting option you choose for your Pfister kitchen faucet is another factor to consider. Pfister faucets are available in different mounting styles, including deck-mount, wall-mount, and single-hole options. The choice of mounting style depends on your kitchen sink setup and personal preference. If you have a pre-existing sink with multiple holes, a deck-mount faucet may be the best choice. On the other hand, if you want to save counter space or prefer a sleek look, a single-hole faucet or a wall-mount option might be more suitable. Consider your sink’s configuration and layout to ensure a proper fit and a seamless installation.

Gathering Tools And Materials
Before you begin installing your Pfister kitchen faucet, it’s important to gather all the necessary tools and materials. Having everything you need will ensure a smooth and hassle-free installation process. Make sure you have the following tools and materials on hand:
Required Tools
To install your Pfister kitchen faucet, you will need the following tools:
- Adjustable wrench
- Basin wrench
- Plumber’s tape
- Screwdriver (Flathead and Phillips)
- Allen wrench
- Flashlight
These tools will help you remove the existing faucet, install the new Pfister faucet, and ensure everything is securely tightened.
Additional Materials Needed
In addition to the required tools, you will also need the following materials:
- New Pfister kitchen faucet
- New supply lines
- Plumber’s putty
The new Pfister kitchen faucet will replace your existing faucet, while the new supply lines will connect the faucet to your water supply. Plumber’s putty is used to create a waterproof seal around the base of the faucet, preventing any leaks.
Once you have gathered all the necessary tools and materials, you’re ready to proceed with the installation process. In the next section, we will guide you through the steps involved in removing your old faucet.
Turning Off The Water Supply
One of the first steps in installing a Pfister kitchen faucet is to turn off the water supply. This is essential to prevent any water from flowing while you are working on the installation process. Turning off the water supply ensures a smooth and problem-free installation experience. In this section, we will discuss how to locate the shutoff valve and turn off the water supply effectively.
Locating the Shutoff Valve
Before you can turn off the water supply, you need to locate the shutoff valve. The shutoff valve is typically located beneath the sink or near the water heater. It is important to familiarize yourself with the location of the shutoff valve before beginning the installation process.
If you are having trouble finding the shutoff valve, you can refer to the manufacturer’s instructions or consult a plumbing professional. It is crucial to identify the correct valve to avoid disrupting the water supply to other areas of your home.
Once you have located the shutoff valve, it’s time to turn off the water supply. This step is essential to ensure a safe and successful installation of your Pfister kitchen faucet. Follow these simple steps to turn off the water supply:
- Locate the handle or lever on the shutoff valve. It is typically a round or lever-shaped device.
- Turn the handle or lever clockwise until it is completely closed. This will shut off the water supply to your kitchen faucet.
- Check that the water has stopped flowing by turning on the faucet and ensuring no water comes out.
- Double-check the shutoff valve to ensure it is fully closed. This will prevent any accidental water leakage while you are installing the Pfister kitchen faucet.
By effectively locating the shutoff valve and turning off the water supply, you have taken a crucial step towards a successful installation of your Pfister kitchen faucet. Now that the water supply is securely turned off, you can proceed with confidence to the next step of the installation process.
Disconnecting The Water Lines
Before you can install your new Pfister kitchen faucet, you’ll need to disconnect the existing water lines. This is an important step that shouldn’t be rushed, as it ensures a smooth and hassle-free installation process.
Removing the Supply Lines
The first step in disconnecting the water lines is to remove the supply lines. These are the lines that connect your faucet to the hot and cold water valves. Follow these steps to remove the supply lines:
- Locate the shut-off valves underneath your sink. You may need to turn off the main water valve if there aren’t individual shut-off valves.
- Using an adjustable wrench, loosen the nuts on the supply lines. Turn counterclockwise to loosen them.
- Once the nuts are loose, use your hand to unscrew them completely. Be prepared for a bit of water to drip out when you remove the lines.
- Set the supply lines aside for now. You may want to wrap them in a towel or paper towel to prevent any water from dripping onto your floor or cabinet.
Disconnecting the Sprayer Hose (If Applicable)
If your Pfister kitchen faucet has a sprayer hose, you’ll also need to disconnect it. Follow these steps to disconnect the sprayer hose:
- Locate the connection point between the sprayer hose and the faucet. This is usually located on the side of the faucet body.
- Using an adjustable wrench, loosen the nut connecting the sprayer hose to the faucet. Turn counterclockwise to loosen it.
- Once the nut is loose, use your hand to unscrew it completely. Be prepared for a bit of water to drip out when you remove the hose.
- Set the sprayer hose aside for now, making sure to catch any drips with a towel or paper towel.
By following these steps to disconnect the water lines, you’ll be well on your way to installing your new Pfister kitchen faucet. Remember to take your time and be cautious of any water that may drip out during the process.
Removing The Old Faucet
Before installing a new Pfister kitchen faucet, the first step is to remove the old faucet. This process may seem daunting, but with the right tools and instructions, it can be done easily. In this section, we will guide you through the process of unscrewing and removing the faucet mounting nuts and then lifting and removing the old faucet.
Unscrewing and Removing the Faucet Mounting Nuts
As the first step in removing the old kitchen faucet, you’ll need to locate and unscrew the mounting nuts that hold the faucet in place.
- Start by turning off the water supply to the faucet. Locate the shut-off valves beneath the sink and turn them clockwise to shut off the water flow.
- Pro tip: To prevent any water leakage during the process, it’s advisable to place a bucket or towel beneath the sink to catch any drips.
- Next, use a basin wrench or adjustable wrench to unscrew the mounting nuts that secure the faucet to the sink. These nuts are typically found underneath the sink and may be concealed by the drain pipes.
- Pro tip: If the nuts are difficult to reach, try using a flashlight to locate them and consider using a long-handled wrench or socket wrench extension for better accessibility.
- Once you have located the nuts, position your wrench around them and turn counterclockwise to loosen them. If the nuts are too tight, applying a penetrating oil such as WD-40 can help loosen them.
- Continue unscrewing the mounting nuts until they are completely loose and can be easily removed.
Lifting and Removing the Old Faucet
With the mounting nuts removed, it’s time to lift and remove the old faucet from the sink.
- Place one hand on the top of the faucet and the other beneath the sink to support it.
- Pro tip: Before lifting, double-check that the mounting nuts are completely loose and detached.
- Gently lift the faucet upward, separating it from the sink.
- Set the old faucet aside and clean the area to prepare it for the installation of your new Pfister kitchen faucet.
By following these steps, you can easily remove the old kitchen faucet to make way for the installation of your new Pfister faucet. In the next section, we will guide you through the process of installing your new faucet, ensuring a seamless and hassle-free experience.
Attaching The Base And Mounting Nuts
In order to successfully install your Pfister kitchen faucet, it’s important to understand how to attach the base and mounting nuts securely. This crucial step ensures that your faucet is stable and leak-free. Below, we’ll guide you through the process with detailed instructions.
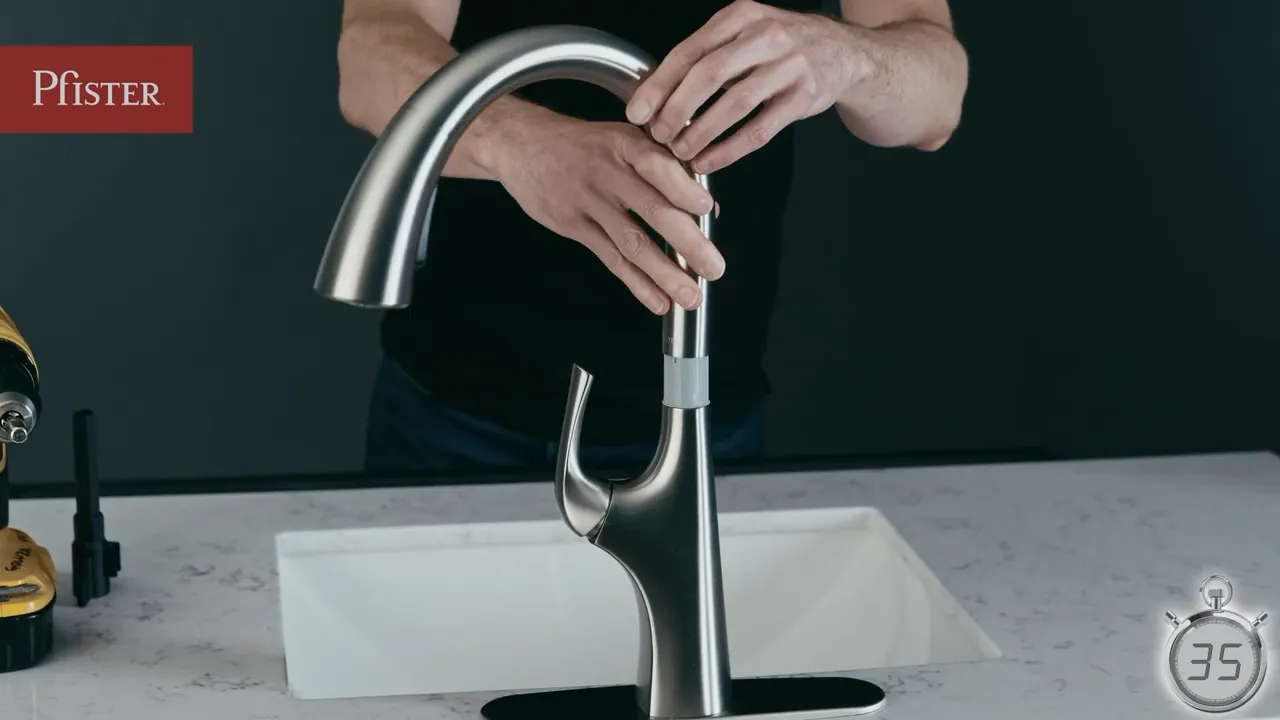
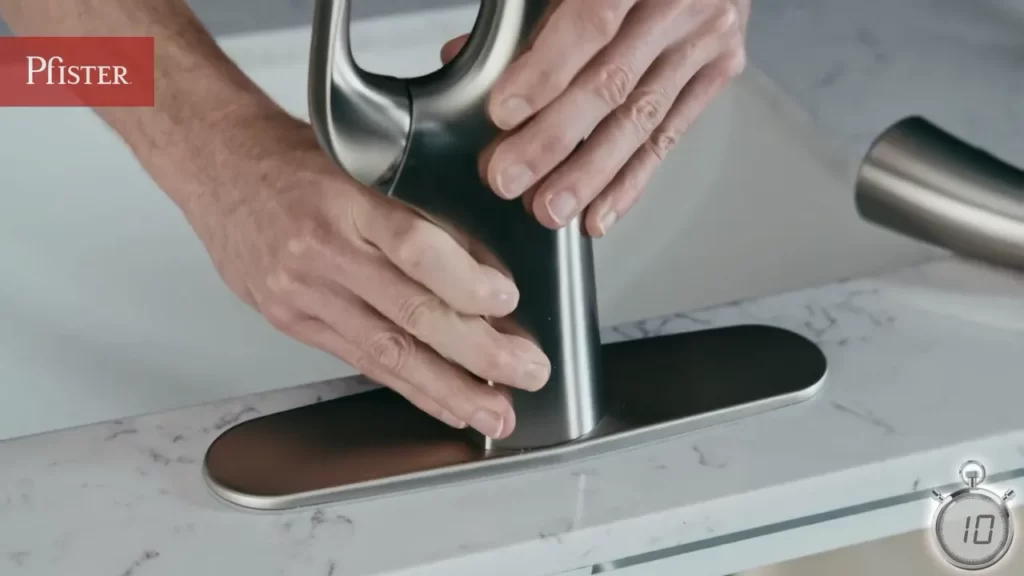
Positioning the New Faucet Base
The first step in attaching the base and mounting nuts is to properly position the new faucet base on your sink or countertop. Start by placing the base in the desired location, taking into consideration both the aesthetics and functionality of your kitchen. Make sure that the base is centered and aligned with the sink or countertop fixture.
Next, take a moment to check underneath the sink or countertop to ensure there is enough clearance for your new faucet. Look for any potential obstructions or plumbing connections that might interfere with proper installation. If necessary, make any adjustments or modifications before proceeding.
Tightening the Mounting Nuts
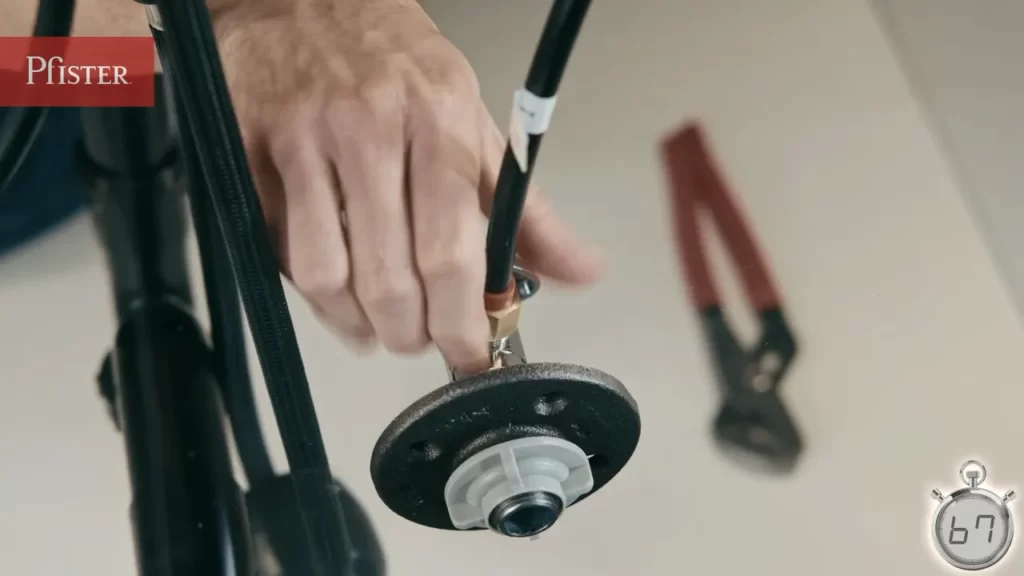
Once you have positioned the base, it’s time to tighten the mounting nuts. These nuts are essential for securing the faucet firmly to the sink or countertop. Start by locating the mounting nuts beneath the sink or countertop surface.
Using an adjustable wrench, carefully tighten each mounting nut in a clockwise direction. Be sure to apply enough pressure to create a secure seal but avoid overtightening, which could lead to damage. It’s helpful to use your hand to support the base while tightening the nuts to ensure stability.
Check the alignment of the faucet during the tightening process to ensure it remains centered and level. If any adjustments are needed, gently reposition the base and continue tightening the nuts until the desired alignment is achieved.
After tightening the mounting nuts, double-check the base for any wobbling or loose connections. If necessary, use your adjustable wrench to make any minor adjustments to secure the faucet firmly in place.
At this point, you have successfully attached the base and mounting nuts of your Pfister kitchen faucet. This step brings you one step closer to enjoying the beauty and functionality of your new faucet. Continue following the manufacturer’s instructions to complete the installation process, including attaching the supply lines and handles. Soon enough, you’ll be ready to savor the convenience and elegance of your upgraded kitchen faucet!
Connecting The Water Lines
When it comes to installing a Pfister kitchen faucet, one of the crucial steps is connecting the water lines. This process ensures that water flows properly and there are no leaks in the faucet system. In this section, we will go through the two main aspects of connecting the water lines: attaching the supply lines and connecting the sprayer hose (if applicable). Let’s dive in!
Attaching the Supply Lines
The supply lines are responsible for carrying water from the plumbing system to the faucet. It is important to properly attach the supply lines to ensure a secure and leak-free connection. Here’s a step-by-step guide on how to do it:
- Start by locating the supply lines that are usually coming out of the wall or under the sink.
- Take the hot water supply line and connect it to the hot water inlet on the faucet. Usually, the hot water inlet is marked with a red indicator or the letter ‘H’.
- Next, take the cold water supply line and connect it to the cold water inlet on the faucet. The cold water inlet is typically marked with a blue indicator or the letter ‘C’.
- Tighten the nuts on the supply lines using a wrench to ensure a secure connection. Be careful not to overtighten as it may damage the threads.
- Once the supply lines are properly attached, turn on the water valves slowly to check for any leaks. If any leaks are detected, tighten the connections further or consider using plumber’s tape.
Connecting the Sprayer Hose (If Applicable)
If your Pfister kitchen faucet comes with a sprayer hose, you’ll need to connect it as well. The sprayer hose allows for greater flexibility and convenience in your kitchen tasks. Follow these steps to connect the sprayer hose:
- Locate the sprayer hose connection point on the faucet. It is usually located on the side or bottom of the faucet body.
- Take the sprayer hose and firmly push it onto the connection point until it clicks into place. Ensure that the connection is secure and cannot be easily pulled off.
- For added security, tighten the sprayer hose connection with an adjustable wrench, being careful not to overtighten.
- Once the sprayer hose is connected, test the functionality by turning on the faucet and using the sprayer. Check for any leaks or abnormal water flow.
Congratulations! You have successfully connected the water lines for your Pfister kitchen faucet. With properly attached supply lines and a functional sprayer hose (if applicable), you can now enjoy the convenience and efficiency of your new faucet system. Remember to always check for leaks and tighten connections as needed for optimal performance.
Turning On The Water Supply
Once you have successfully installed your Pfister kitchen faucet, it is time to turn on the water supply and enjoy the benefits of your new fixture. Follow these steps to ensure a proper and leak-free water flow:
Slowly Opening the Shutoff Valve
To avoid any sudden surges in water pressure and potential damage to your plumbing system, it is important to slowly open the shutoff valve. This valve, typically located under your sink, controls the flow of water to your faucet. Begin by locating the valve and ensure it is in the off position, which is typically perpendicular to the water supply line.
Step 1: Before opening the valve, make sure the faucet handle is in the closed position.
Step 2: Using a wrench or pliers, turn the valve counterclockwise to gradually open it. It is crucial to open the valve slowly to prevent any abrupt water surges.
Step 3: Once the valve is fully open, you can proceed to the next crucial step of checking for leaks.
Checking for Leaks
After turning on the water supply, it is important to inspect for any potential leaks before using your Pfister kitchen faucet extensively. Follow these steps to ensure there are no leaks:
- Step 1: Carefully examine all the connections, including those between the faucet and the water supply lines. Look for any signs of dripping or water accumulation.
- Step 2: Monitor the area beneath the sink closely for any signs of water leakage. If you notice any dampness or water accumulation, it may indicate a leak.
- Step 3: If you detect any leaks, immediately turn off the shutoff valve to prevent further water damage. Tighten any loose connections or consider contacting a professional plumber for assistance.
By following these steps, you can ensure a smooth and leak-free water supply after installing your Pfister kitchen faucet. Regularly checking for leaks will help you address any issues promptly and maintain the integrity of your plumbing system.
Testing The Faucet’S Functionality
Once you have successfully installed your Pfister kitchen faucet, it’s crucial to ensure that it functions properly. Testing the faucet’s functionality will give you peace of mind and ensure that you can rely on it for your daily kitchen tasks. In this section, we will discuss the steps to test the water flow and handle operation of your newly installed Pfister kitchen faucet.
Checking Water Flow
Before moving onto testing the handle operation, it’s essential to check the water flow of your Pfister kitchen faucet. Here’s how you can do it:
- Turn on the water supply.
- Open the faucet’s handle to the full extent.
- Observe the water flow. It should be free-flowing without any sputtering or irregularities.
- If you notice any issues with the water flow, such as low pressure or splashing, there are a few possible causes:
- Check if the aerator is clogged. Remove it and clean it thoroughly before reinstalling it.
- Inspect the water supply lines for any kinks or blockages. If necessary, replace the supply lines.
- Ensure that the shut-off valves are fully open.
Testing Handle Operation
Next, it’s time to test the handle operation of your Pfister kitchen faucet. Follow these steps:
- Turn on the water supply.
- Slowly adjust the handle to different positions, such as hot, cold, and in between.
- Observe the water temperature and how smoothly the handle operates.
If you notice any issues with the handle operation, consider the following troubleshooting steps:
- Ensure that the handle is properly aligned with the cartridge. If it feels loose or wobbly, tighten it accordingly.
- If the water temperature is not adjusting properly, check the cartridge. It may need to be replaced.
- Inspect the handle for any damages or signs of wear. If necessary, replace the handle.
By carefully checking the water flow and handle operation, you can ensure that your Pfister kitchen faucet is functioning optimally. If any issues persist, it may be necessary to consult the manufacturer’s instructions or contact their customer support for further assistance. Enjoy the reliable and efficient performance of your Pfister kitchen faucet!
Troubleshooting Common Installation Issues
Installing a Pfister kitchen faucet in your home can be a great way to update your kitchen’s functionality and aesthetics. However, like any plumbing project, it’s not uncommon to run into a few issues along the way. In this section, we will address some common installation problems you may encounter and provide solutions to help you complete the installation smoothly.
Addressing Leaks
One of the most frustrating issues that can arise during a faucet installation is leaks. If you notice water dripping from the base of the faucet or from any connection points, it’s important to address the problem promptly to avoid further damage. Here are some steps you can take to troubleshoot and fix the leak:
- First, make sure all the connections are properly tightened. Use a wrench to gently tighten the nuts, making sure not to over-tighten them to avoid damaging the faucet or plumbing.
- If the leak persists, check the O-rings. These small rubber rings can wear out over time, causing leaks. Replace the O-rings if necessary. Pfister provides replacement parts that are specific to their faucets, ensuring a proper fit and function.
- Another potential cause of leaks is a faulty cartridge or valve. To check this, turn off the water supply, remove the faucet handle, and inspect the cartridge or valve. If you notice any cracks, chips, or other damage, it may be necessary to replace the cartridge or valve.
- Finally, if none of the above steps resolve the issue, contact Pfister’s customer service for further assistance. They have a dedicated team of experts who can guide you through additional troubleshooting steps or provide support for any warranty claims.
Fixing Handle or Spout Issues
Another common issue that may occur during the installation of a Pfister kitchen faucet is problems with the handle or spout. If you’re experiencing difficulties with these components, follow these steps to troubleshoot and resolve the issue:
- First, check the handle or spout for any obstructions. Sometimes debris or mineral buildup can hinder the smooth operation of these parts. Clean them thoroughly and make sure they move freely.
- If the handle feels loose or wobbly, tighten the set screw located on the underside of the handle. This will secure the handle to the faucet body, ensuring stability and proper functionality.
- In some cases, the handle may need to be repositioned to align with the desired hot and cold water positions. Pfister faucets often allow you to adjust the handle’s rotational limit stop, which controls the range of motion. Consult the manufacturer’s instructions for specific steps on adjusting the limit stop.
- If you’re still encountering issues with the handle or spout, it’s best to reach out to Pfister’s customer service for further assistance. They can guide you through additional troubleshooting steps or provide support for any warranty claims.
By following these troubleshooting steps, you can overcome common installation issues that may arise when installing a Pfister kitchen faucet. Remember, if you’re unsure or uncomfortable with any step of the installation process, it’s always recommended to seek professional help to ensure a successful and long-lasting installation.
Regular Cleaning And Maintenance Practices
Regular Cleaning and Maintenance Practices
Keeping your Pfister kitchen faucet clean and well-maintained is essential for ensuring its longevity and optimal performance. Regular cleaning and maintenance practices go a long way in preventing the buildup of dirt, grime, and mineral deposits that can affect the faucet’s functionality and appearance. In this section, we will explore proper cleaning techniques and explain how you can maintain the faucet finish.
Proper Cleaning Techniques
When it comes to cleaning your Pfister kitchen faucet, it’s important to use the right techniques to avoid damaging the finish or any delicate components. Here are some steps to follow for effective cleaning:
- Start by turning off the water supply to the faucet. This will prevent any accidental leaks or splashes while you clean.
- Remove any loose dirt or debris from the faucet surface using a soft cloth or sponge.
- Mix a solution of mild dish soap and warm water in a bowl or bucket. Dip a soft cloth or sponge into the soapy water and gently wipe the faucet, including the handles and spout.
- Rinse the faucet thoroughly with clean water to remove any soap residue.
- Dry the faucet completely using a soft, lint-free cloth.
- To remove mineral deposits or stubborn stains, you can use a mixture of equal parts vinegar and water. Apply the solution to a cloth or sponge, and gently scrub the affected areas. Rinse and dry the faucet as before.
Maintaining the Faucet Finish
The finish of your Pfister kitchen faucet plays a significant role in its aesthetic appeal. To preserve the beauty of the faucet finish and prevent unnecessary wear and tear, here are a few maintenance tips:
- Avoid using abrasive cleaners, harsh chemicals, or abrasive materials like steel wool, as they can scratch or dull the finish.
- Wipe down the faucet regularly with a soft cloth to remove water spots and fingerprints.
- For faucets with a chrome finish, you can use a chrome polish or a mixture of vinegar and water to restore shine.
- If your faucet has a stainless steel finish, consider using a stainless steel cleaner to maintain its luster.
- Periodically check for any loose parts or leaks and tighten them as necessary.
- Lastly, follow the manufacturer’s specific maintenance recommendations to ensure you’re taking the best care of your Pfister kitchen faucet.
By incorporating these regular cleaning and maintenance practices into your routine, you can keep your Pfister kitchen faucet looking and functioning its best for years to come.
Troubleshooting Common Issues
If you are experiencing issues with your Pfister kitchen faucet, don’t worry! We’ve got you covered. In this section, we will discuss common problems that may arise and provide simple solutions to help you troubleshoot and fix them efficiently. Read on to find out how to deal with clogs, resolve dripping or leaking, and get your faucet back in perfect working condition.
Dealing with Clogs
Clogs can be a frustrating issue, but they can be easily resolved with a few simple steps. Here’s what you need to do:
- Start by turning off the water supply to your faucet. Locate the shut-off valves under the sink and close them.
- Next, remove the aerator from the end of the faucet spout. This small, mesh-like screen can often get clogged with debris and restrict water flow.
- Once the aerator is removed, gently rinse it under running water to clear any debris. If necessary, use a small brush to remove stubborn particles.
- Inspect the spout for any visible clogs. Use a thin wire or a toothpick to dislodge any debris that might be blocking the flow of water.
- After cleaning the aerator and removing any visible clogs, reattach the aerator to the faucet spout.
- Finally, turn on the water supply and test your faucet. The clog should now be cleared, and the water flow restored.
If the problem persists or you notice a decrease in water pressure, there may be a more significant clog deeper in the plumbing system. In such cases, we recommend reaching out to a professional plumber for further assistance.
Resolving Dripping or Leaking
A dripping or leaking faucet can lead to water wastage and increased water bills. To address this issue, follow these steps:
- First, turn off the water supply to the faucet by closing the shut-off valves under the sink.
- Inspect the faucet for any visible leaks. Look for water dripping from the spout or pooling around the base.
- If you notice any loose connections, tighten them using a wrench. Be careful not to overtighten, as this can cause damage.
- Check the cartridge or valve inside the faucet handle. Over time, these components can wear out and may need replacement. Refer to the manufacturer’s instructions for your specific faucet model on how to replace the cartridge or valve.
- Once any loose connections are tightened, and necessary replacements are made, turn on the water supply and test the faucet. The dripping or leaking should be resolved.
If you are uncertain about replacing any parts or the problem persists even after following these steps, it is advisable to contact a professional plumber who can accurately diagnose and repair the issue.
Enjoying Your New Pfister Kitchen Faucet
Congratulations on your newly installed Pfister Kitchen Faucet! Now that you have a reliable and stylish faucet in your kitchen, it’s time to start enjoying the benefits it brings. From improved functionality to energy efficiency, your properly installed Pfister Kitchen Faucet is sure to enhance your culinary experience.
Benefits of a Properly Installed Faucet
A properly installed Pfister Kitchen Faucet offers numerous advantages that go beyond its visual appeal. Here are some key benefits you can look forward to:
- Efficient water flow: With its innovative design and advanced technology, your Pfister Kitchen Faucet provides a steady and powerful stream of water. This ensures that tasks like washing dishes and fruits are more efficient, saving you time and effort.
- Temperature control: One of the standout features of the Pfister Kitchen Faucet is its precise temperature control mechanism. This allows you to easily adjust the water temperature to your desired level, ensuring both comfort and safety while working in the kitchen.
- Durability and reliability: Pfister faucets are renowned for their durability and reliability. When properly installed, your faucet is built to withstand regular use and last for years to come, saving you from the hassle and expense of frequent replacements.
- Energy efficiency: By choosing a Pfister Kitchen Faucet, you have opted for an eco-friendly option. The faucet is designed to minimize water wastage, helping you save on your utility bills while reducing your environmental footprint.
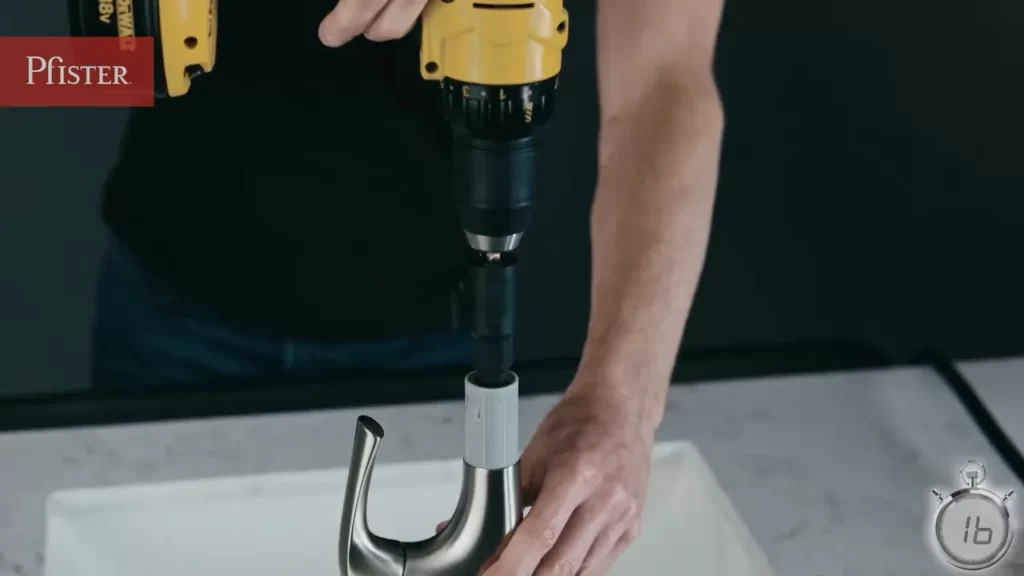
- Easy maintenance: Pfister faucets are designed with user convenience in mind. Their easy maintenance features, such as the Quick Install Tool provided, make it simple to keep your faucet in top condition. This ensures long-term satisfaction and hassle-free usage.
- Enhanced aesthetics: Beyond its practical benefits, your new Pfister Kitchen Faucet adds a touch of elegance and sophistication to your kitchen space. Its modern and sleek design elevates the overall look, making your kitchen a more inviting and stylish place to be.
Final Tips for Long-Term Satisfaction
To make the most of your Pfister Kitchen Faucet installation and ensure long-term satisfaction, here are a few final tips:
- Follow the manufacturer’s installation instructions carefully to ensure the correct installation of your faucet. This will guarantee optimal functionality and prevent any unwanted leaks or issues.
- Regularly clean and maintain your faucet to keep it in pristine condition. This includes wiping away any dirt or residue, as well as periodically checking for any loose parts that may require tightening.
- If you encounter any issues or have questions, refer to the Pfister customer support team who can provide guidance and assistance. They are dedicated to ensuring customer satisfaction and can help resolve any concerns you may have.
- Consider exploring additional Pfister accessories and upgrades to complement your new faucet. These include soap dispensers, water filtration systems, and more, all designed to enhance your kitchen’s functionality and convenience.
- Lastly, don’t forget to share your positive experience with others! Spread the word about the benefits of a Pfister Kitchen Faucet and recommend it to friends and family who are looking for a reliable and stylish upgrade for their own kitchens.
With a properly installed Pfister Kitchen Faucet, you can enjoy the numerous advantages it brings, from efficient water flow to energy efficiency. By following the provided tips, you can ensure long-term satisfaction and make the most of your new faucet’s functionality and style. Happy cooking!
Frequently Asked Questions
How Do You Remove A Pfister Kitchen Faucet Head?
To remove a Pfister kitchen faucet head, twist the aerator counterclockwise by hand to unscrew it. If it’s stuck, use pliers covered with a cloth to protect the finish. Gently apply pressure to loosen and remove the aerator.
How Do You Change A Single Handle Pfister Faucet Cartridge?
To change a single handle Pfister faucet cartridge, follow these steps: 1. Shut off the water supply. 2. Remove the handle and trim. 3. Unscrew the cartridge retaining nut. 4. Use pliers to pull out the cartridge. 5. Insert the new cartridge and reassemble the faucet.
How Do You Replace A Single Handle Kitchen Faucet Cartridge?
To replace a single handle kitchen faucet cartridge: Turn off the water supply and drain the faucet. Remove the handle and retaining nut. Take out the old cartridge and insert the new one. Reinstall the handle and nut. Turn the water supply back on and test for leaks.
How Do You Remove A Pfister Faucet Handle?
To remove a Pfister faucet handle, follow these steps: 1. Turn off the water supply. 2. Use an Allen wrench to remove the set screw located under the handle. 3. Gently pull the handle up and off the faucet. 4. If the handle is stuck, apply a lubricant and try again.
5. Replace the handle by reversing these steps.
Conclusion
Installing a Pfister kitchen faucet is a straightforward process that can be completed with ease. By following the step-by-step instructions provided in this guide, you can have your new faucet up and running in no time. Remember to gather all the necessary tools and materials before beginning the installation.
Whether you’re a seasoned DIYer or new to home improvement projects, this guide makes installing a Pfister kitchen faucet a breeze. Start enjoying the benefits of a stylish and functional faucet in your kitchen today!