To install Pex pipe with Sharkbite fittings, follow these steps: cut the pipe to the desired length, insert the fitting into one end of the pipe until it reaches the shoulder, mark the depth on the pipe, repeat the process on the other end, and finally, push the pipe onto the fitting until it reaches the marked depth. Installing Pex pipe with Sharkbite fittings is a straightforward process that offers a reliable plumbing solution.
With these fittings, you can easily connect Pex pipes without the need for special tools or soldering. This article will guide you through the steps to successfully install Pex pipe with Sharkbite fittings. Whether you are a seasoned DIY enthusiast or a beginner, this guide will help you complete the installation with ease.
Follow the instructions below to ensure a leak-free connection and enjoy the benefits of Pex pipe and Sharkbite fittings in your plumbing system.
Understanding Pex Pipe And Sharkbite Fittings
When it comes to plumbing installations, it’s essential to have a solid understanding of the materials and fittings you’re working with. In this section, we’ll explore the world of Pex pipe and Sharkbite fittings, which have revolutionized the plumbing industry with their efficiency and ease of use.
What is Pex Pipe?
Pex pipe, short for cross-linked polyethylene pipe, is a flexible and durable plumbing material used for both residential and commercial applications. It is made by cross-linking high-density polyethylene (HDPE) molecules, which gives it enhanced strength and resistance to temperature and pressure fluctuations.
Benefits of Using Pex Pipe
Pex pipe offers numerous benefits over traditional plumbing materials, making it a popular choice among homeowners and professionals. Here are some key advantages:
- Flexibility: Pex pipe is highly flexible, allowing for easy installation even in confined spaces.
- Corrosion Resistance: Unlike metal pipes, Pex pipe is immune to corrosion, ensuring long-lasting performance.
- Resistance to Freezing: Pex pipe can expand and contract without cracking, making it suitable for cold environments.
- Reduced Noise: Pex pipe has excellent sound-deadening properties, minimizing the noise associated with water flow.
- Cost-Effectiveness: Pex pipe is an affordable plumbing option that offers a great balance between price and performance.
Introduction to Sharkbite Fittings
Sharkbite fittings have revolutionized the world of plumbing installations by eliminating the need for soldering or specialized tools. These innovative fittings allow for quick and secure connections between Pex pipe and other plumbing components, such as fixtures and valves.
Advantages of Using Sharkbite Fittings
Using Sharkbite fittings comes with several key advantages:
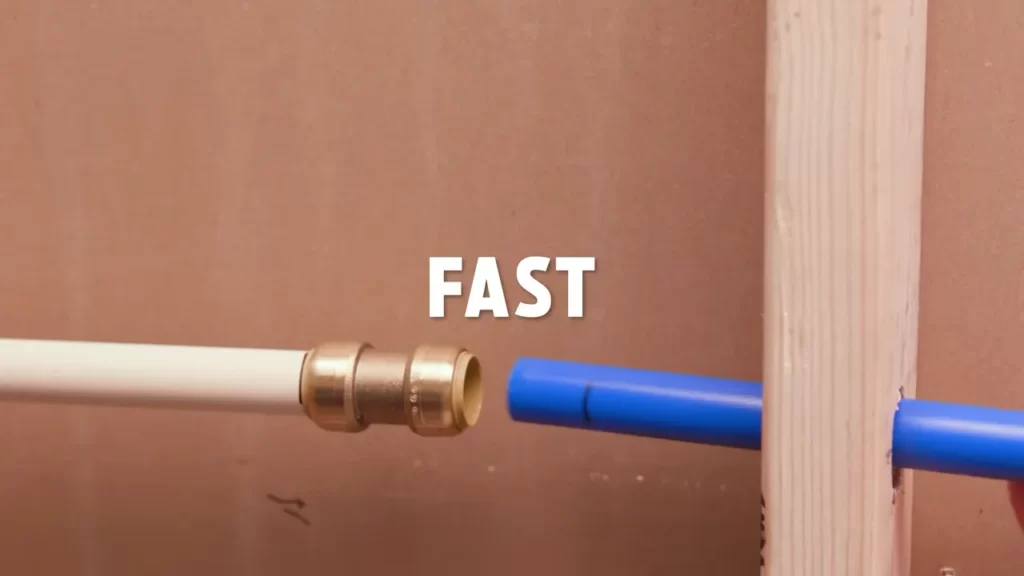
- Easy Installation: Sharkbite fittings can be installed in seconds, saving both time and effort compared to traditional soldering methods.
- No Need for Specialized Tools: Forget about torches, flux, and solder. Sharkbite fittings require no special tools or skills, making them accessible to both professionals and DIY enthusiasts.
- Reusable: Sharkbite fittings can be easily removed and reused, providing flexibility in case of repairs or modifications.
- Reliability: Designed with a push-to-connect mechanism, Sharkbite fittings create watertight connections that you can rely on for leak-free performance.
- Compatibility: Sharkbite fittings are compatible with various piping materials, including Pex, copper, CPVC, and PVC, allowing for versatile installations.
Preparing For The Installation
When it comes to installing Pex pipe with Sharkbite fittings, proper preparation is crucial for a successful and hassle-free installation. Before you start, it’s essential to gather the necessary tools and materials, measure and plan the installation, and consider the safety precautions involved. This section will guide you through each step of the preparation process, ensuring you’re well-equipped to begin the installation smoothly.
Gathering the Necessary Tools and Materials
Gathering the required tools and materials is the first and most crucial step before starting to install Pex pipe with Sharkbite fittings. Having everything on hand will save time and make the installation process more efficient. Below is a list of tools and materials you’ll need:
[TABLE]
Make sure to have all the necessary tools and materials easily accessible before you begin the installation. This will prevent any unnecessary delays or interruptions during the process.
Measuring and Planning the Pex Pipe Installation
Before you start cutting and connecting the Pex pipe with Sharkbite fittings, it’s crucial to measure and plan the installation. This step ensures that you have the correct lengths of pipe and fittings organized, minimizing any potential mistakes or wastage. Follow the steps below to measure and plan effectively:
- Begin by identifying the areas where the Pex pipe needs to be installed.
- Use a measuring tape to measure the distance between the connection points accurately.
- Add a few inches to your measurements to allow for any adjustments or potential errors during the installation.
- Based on your measurements, create a diagram or layout to visualize the installation.
By taking the time to measure and plan the installation, you’ll ensure an efficient and well-organized process, resulting in a neater and more professional-looking installation.
Safety Precautions to Consider
While installing Pex pipe with Sharkbite fittings may not involve complex procedures, it’s essential to consider safety precautions to protect yourself and ensure a secure installation. Here are a few safety measures to keep in mind:
- Always wear safety goggles to protect your eyes from any debris or potential splashes.
- Avoid using excessive force when cutting the Pex pipe or tightening the Sharkbite fittings to prevent accidental injuries or damage.
- If working in tight or confined spaces, make sure to have proper ventilation to avoid any potential health risks.
- Ensure that the water supply to the area you’re working in is turned off to prevent any accidents or water damage.
By prioritizing safety during the installation process, you can complete the project without any unwanted incidents and with peace of mind.
Preparing for the installation of Pex pipe with Sharkbite fittings involves gathering the necessary tools and materials, measuring and planning the installation, and considering safety precautions. By following these steps, you’ll be well-prepared to move forward with the installation process smoothly and confidently.
Step 1: Cutting The Pex Pipe
When it comes to installing Pex pipe with Sharkbite fittings, the first step is cutting the Pex pipe to the desired length. This crucial step determines how well the fittings will connect and ensures a secure and leak-free installation. In this guide, we will walk you through the process of cutting the Pex pipe, from measuring and marking the desired length to using a Pex pipe cutter and ensuring a clean and straight cut.
Measuring and Marking the Desired Length
To begin, you need to measure and mark the length of the Pex pipe you need for your installation. Use a tape measure or ruler to accurately measure the distance from one fitting to another, taking into account any bends or turns in the pipe. Mark the desired length using a marker or a pencil. This will serve as your guiding reference when making the cut.
Using a Pex Pipe Cutter to Make the Cut
Once you have marked the desired length on the Pex pipe, it’s time to make the cut. A Pex pipe cutter is recommended for this task as it ensures a clean and precise cut. Position the cutter perpendicular to the pipe, aligning it with the marked line. Apply steady pressure and rotate the cutter around the pipe, gradually tightening it with each rotation. Continue cutting until the pipe is severed completely. Be careful not to rush this step, as a clean cut is essential for the fittings to securely connect.
Ensuring a Clean and Straight Cut
After making the cut, it’s important to inspect the edge of the Pex pipe to ensure it is clean and free from any uneven or jagged edges. A clean and straight cut is crucial for a proper connection with the Sharkbite fittings. If you notice any imperfections or rough edges, use a deburring tool or a utility knife to gently remove them and create a smooth surface. This will prevent any potential leaks or weak points in the connection.
In conclusion, cutting the Pex pipe is an essential step in installing it with Sharkbite fittings. By measuring and marking the desired length, using a Pex pipe cutter to make the cut, and ensuring a clean and straight edge, you can confidently proceed to the next steps of your installation. Remember to take your time during this process to ensure a secure and leak-free connection in your plumbing system.</p
Step 2: Deburring The Pex Pipe
Deburring the Pex pipe is a crucial step in installing Pex pipe with Sharkbite fittings. Deburring refers to the process of removing any rough edges or burrs that may be present on the cut ends of the pipe. This step ensures a smooth and clean surface, allowing for a secure and leak-free connection.
Importance of Deburring
Deburring is essential for proper Pex pipe installation. Here’s why:
- Avoid Leaks: Deburring the pipe ends helps prevent leaks by eliminating any rough edges or imperfections that could compromise the seal between the pipe and the fitting.
- Smooth Flow: By deburring the pipe, you ensure a smooth interior surface, promoting uninterrupted water flow through the pipe.
- Protect Fitting O-Rings: Rough edges can damage the O-rings inside the Sharkbite fittings, leading to leaks and potential failures. Deburring prevents such damages, prolonging the life of your fittings.
Using a Pex Pipe Deburring Tool
The easiest and most effective way to deburr Pex pipe is by using a specialized deburring tool. This tool is designed explicitly for removing burrs and creating smooth edges. Here’s how to use it:
- After cutting the Pex pipe to the desired length, insert the deburring tool into the cut end.
- Gently rotate the tool in a clockwise motion around the inside of the pipe. Apply enough pressure to remove any burrs or debris.
- Repeat the process on the other end of the pipe, ensuring both ends are deburred.
Using a deburring tool not only saves time but also guarantees consistent and precise deburring, leading to optimal results.
Ensuring Smooth Edges for a Secure Connection
Deburring the Pex pipe is all about creating smooth edges to achieve a secure connection with Sharkbite fittings. Here are some tips to ensure smooth edges:
- Inspect the Edges: After deburring, visually inspect the pipe ends to ensure there are no remaining burrs or rough areas. Use your fingers to feel for any imperfections that may have been missed.
- Trim if Necessary: If you notice any excessive roughness or irregularities, trim the pipe using a pipe cutter or a suitable cutting tool to achieve a clean and smooth edge.
- Protect the Pipe: Always handle the deburred pipe ends with care to avoid introducing new burrs or damage. Keep the pipe elevated and away from any dirt or debris during installation.
Remember, a secure connection begins with deburring the Pex pipe. Taking the time to remove any rough edges ensures a watertight connection, minimizes the risk of leaks, and guarantees long-lasting performance.

Step 3: Inserting The Sharkbite Fittings
Once you have prepared the Pex pipe and cut it to the desired length, it’s time to move on to the next crucial step – inserting the Sharkbite fittings. Sharkbite fittings are an excellent option for connecting Pex pipes. They are easy to use, do not require any special tools, and provide a secure and leak-free connection.
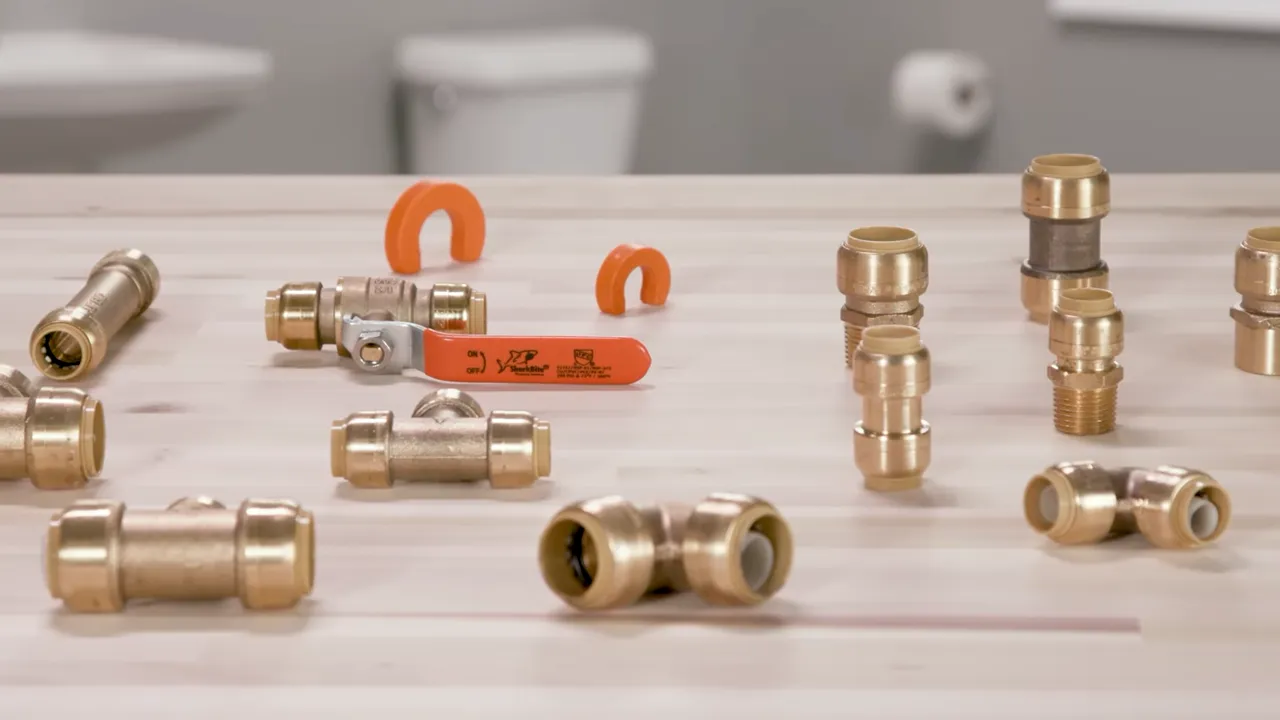
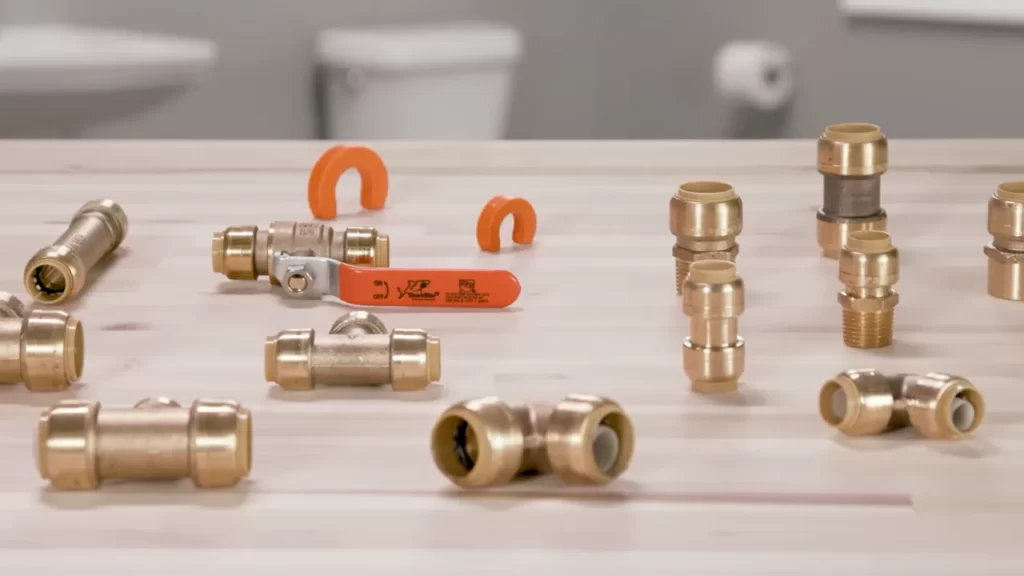
Understanding the Different Types of Sharkbite Fittings
Before diving into the process of inserting the fittings, it’s essential to familiarize yourself with the different types of Sharkbite fittings available:
- Sharkbite Coupling: This fitting is used to join two Pex pipes together in a straight line.
- Sharkbite Elbow: As the name suggests, this fitting is used to create a 90-degree bend in the Pex pipe.
- Sharkbite Tee: This fitting allows you to create a branch in the Pex system, connecting three pipes together.
- Sharkbite Valve: If you need to add a shut-off valve in your Pex system, a Sharkbite valve fitting is the way to go.
Depending on the requirements of your installation, you may need a combination of these fittings to complete your project successfully. It’s essential to choose the right fitting for your specific application.
Choosing the Right Fitting for your Application
When selecting the fitting for your Pex system, consider factors such as the pipe diameter, type of Pex (PEX-A, PEX-B, or PEX-C), and the nature of the connection you need to make. Sharkbite fittings are available in different sizes and designs to accommodate various pipe types and connection needs. Refer to the manufacturer’s guidelines or consult with a professional if you are unsure about which fitting to choose.
Properly Inserting the Fittings into the Pex Pipe
Now that you have the right Sharkbite fitting for your application, it’s time to insert it into the Pex pipe. Follow these steps to ensure a secure connection:
- Ensure that both the Sharkbite fitting and the Pex pipe are clean and free from any debris or foreign particles.
- If the Pex pipe has an oval or distorted shape, use a pipe reamer or deburrer to restore a circular shape to the end of the pipe. This step is crucial to ensure a proper insertion and prevent leaks.
- Using your fingers, start by firmly pushing the Sharkbite fitting onto the Pex pipe. Make sure it goes all the way in until it reaches the fitting’s internal stop.
- Apply light pressure and twist the fitting back and forth to ensure a tight grip and secure connection.
It’s important to note that Sharkbite fittings are reusable, which means you can remove them if needed. To remove a Sharkbite fitting, use a quick-disconnect tool specifically designed for this purpose.
By following these steps and properly inserting the Sharkbite fittings into the Pex pipe, you can ensure a reliable and leak-free Pex system. Remember to always refer to the manufacturer’s instructions and guidelines for specific details about your Sharkbite fittings and Pex installation.
Step 4: Making The Connection
In this step, we will discuss the crucial process of making the connection between the Pex pipe and the Sharkbite fitting. This step is essential to ensure a secure and leak-free installation. Follow the instructions below to make a perfect connection effortlessly.
Aligning the Sharkbite Fitting with the Pex Pipe
To begin the connection process, align the Sharkbite fitting properly with the end of the Pex pipe. The fitting should be inserted straight and in-line with the pipe for a tight and reliable connection. Take the following steps to align the fitting:
- Ensure that both the pipe and the fitting are clean and free from any debris or dirt. You can use a clean cloth to wipe them if necessary.
- Hold the fitting and the pipe parallel to each other with the open end of the fitting facing towards the pipe. Make sure the pipe end is fully inserted into the fitting.
- Check visually to confirm that the pipe is aligned straight with the fitting’s open end. The alignment should be precise to ensure a secure and leak-proof connection.
Pushing the Pipe into the Fitting until Fully Inserted
Once the fitting and pipe are perfectly aligned, the next step is to push the pipe into the fitting until it is fully inserted. This will create a strong and tight connection. Follow these steps to complete this process:
- Grasp the pipe firmly and push it into the fitting with a steady and moderate force. Push it until it reaches the built-in depth indicator on the fitting.
- Ensure that the pipe is inserted until it can no longer be pushed further, and the depth indicator on the fitting is completely covered by the pipe. This guarantees a secure and reliable connection.
Verifying a Secure Connection
Verifying the connection is crucial to ensure that it is secure and leak-free. Follow these steps to verify the connection:
- Visually inspect the connection area to ensure that the pipe is inserted fully and the fitting is properly aligned. Any signs of misalignment or incomplete insertion should be addressed.
- Gently tug on the pipe to test its hold within the fitting. It should be firmly held and not come loose easily. Any movement or looseness indicates a weak connection.
- Run a pressure test on the system to further validate the connection’s integrity. Follow the manufacturer’s instructions for pressure testing.
By following these steps and verifying the connection, you can feel confident that your Pex pipe installation with Sharkbite fittings will be secure and free from leaks. Remember to take your time and double-check each connection to ensure a successful installation.
Step 5: Testing The Connection
Once you have successfully installed the Pex pipe with Sharkbite fittings, it is crucial to perform a thorough test to ensure there are no leaks or issues with the connection. Testing the connection not only helps in preventing potential water damage but also ensures the overall effectiveness and reliability of the installation. In this step, we will guide you through the process of performing a leak test, different methods for testing the Pex pipe and Sharkbite fitting connection, and how to address any leaks or issues that may arise.
Performing a Leak Test
A leak test is a critical step in the installation process as it helps in identifying and fixing any leaks before they cause significant damage. To perform a leak test, follow these steps:
- Close all valves and turn off the water supply.
- Inspect the entire Pex pipe and Sharkbite fitting connection for any visible signs of leaks, such as water dripping or moisture.
- Use a dry cloth or towel to wipe the connection dry, ensuring there is no water residue.
- Once the connection is dry, turn on the water supply and monitor the connection closely for any signs of leaks.
- If you notice any leaks, proceed to the next section on addressing leaks and issues.
Methods for Testing the Pex Pipe and Sharkbite Fitting Connection
There are several methods you can use to test the Pex pipe and Sharkbite fitting connection for leaks. Here are two commonly used methods:
Dye Test Method
The dye test method involves adding a few drops of food coloring or a leak detection dye into the water supply, allowing it to flow through the Pex pipe and Sharkbite fitting connection. If there are any leaks, the dye will be visible, indicating the location of the leak.
Pressure Test Method
The pressure test method involves using a pressure gauge to measure the pressure inside the Pex pipe and Sharkbite fitting connection. By closing all valves and pressurizing the system to a specified level, you can observe if the pressure drops over time. A significant drop in pressure indicates a potential leak.
Addressing Any Leaks or Issues
If you notice any leaks or issues during the testing process, it is essential to address them promptly. Here are the steps to follow:
- Shut off the water supply immediately to prevent further damage.
- Inspect the area around the leak to determine the cause.
- Tighten the Sharkbite fitting if it is loose or reposition it if necessary.
- If the leak persists, consider replacing the Sharkbite fitting or consulting a professional plumber.
- Once the issue is resolved, perform another leak test to ensure the connection is secure.
By following these steps, you can ensure a secure and leak-free connection when installing Pex pipe with Sharkbite fittings. Remember that regular maintenance and periodic testing are crucial for ongoing performance and peace of mind.
Additional Tips And Considerations
When it comes to installing Pex pipe with Sharkbite fittings, there are a few additional tips and considerations that can help ensure a successful and efficient installation. From properly supporting and bracing the Pex pipe to insulating it for temperature regulation, as well as ongoing maintenance and care for both the pipe and fittings, these tips will help you make the most of your Pex pipe installation.
Proper Support and Bracing of the Pex Pipe
One of the key factors in a successful Pex pipe installation is ensuring proper support and bracing. Pex pipe, although flexible, still requires support at regular intervals to prevent sagging or movement. To ensure longevity and prevent potential issues, it’s important to follow these guidelines:
- Use appropriately sized supports or clips at least every 32 inches to support the Pex pipe along its length. This will prevent sagging and potential system leaks.
- Avoid putting excessive pressure on the Pex pipe by using hangers or supports that are snug but not overly tight.
- Consider using insulating supports to provide added stability and prevent rubbing or friction against other surfaces or materials.
Insulating the Pex Pipe for Temperature Regulation
Insulating the Pex pipe is crucial for maintaining optimal temperature regulation and preventing heat loss or gain. Here’s what you need to know:
- Insulate the Pex pipe in areas where it may be exposed to extreme temperatures, such as outdoor or attic installations. This will help prevent freezing in cold weather and reduce heat transfer in hot environments.
- Use suitable insulation materials, such as foam pipe insulation, to fully cover and protect the Pex pipe. Ensure that the insulation is properly sealed to prevent any gaps or air leakage.
- Pay extra attention to areas where the Pex pipe is exposed to exterior walls, as these can be prone to heat loss or gain. Insulating these sections thoroughly will help maintain the desired temperature within your plumbing system.
Maintenance and Care of Pex Pipe and Sharkbite Fittings
Proper maintenance and care of both the Pex pipe and Sharkbite fittings are essential for the longevity and efficiency of your plumbing system. Follow these tips to ensure your Pex pipe and fittings remain in optimal condition:
- Regularly inspect the Pex pipe for any visible signs of damage or wear, such as cracks, kinks, or bulges. Replace any damaged sections promptly to prevent leaks or system failures.
- Ensure that the Sharkbite fittings are properly secured and tightened. Inspect them periodically to ensure they’re functioning well and replace any fittings that show signs of wear or leaks.
- Avoid exposing the Pex pipe and fittings to direct sunlight, as UV rays can deteriorate the materials over time. If necessary, use UV-resistant covers or shielding to protect the pipe from sunlight exposure.
By following these additional tips and considerations when installing Pex pipe with Sharkbite fittings, you can ensure a reliable and efficient plumbing system that will withstand the test of time. Proper support and bracing, insulation for temperature regulation, and proactive maintenance and care will all contribute to a successful Pex pipe installation.
Frequently Asked Questions
Can Pex And Sharkbite Be Used Together?
Yes, PEX and SharkBite can be used together for plumbing applications. Both products are compatible and work well together, making installations easier and faster.
How Far To Push Pex Into Sharkbite?
Push PEX into a SharkBite until it hits the stop. Avoid over-pushing as it may damage the fitting or cause leaks.
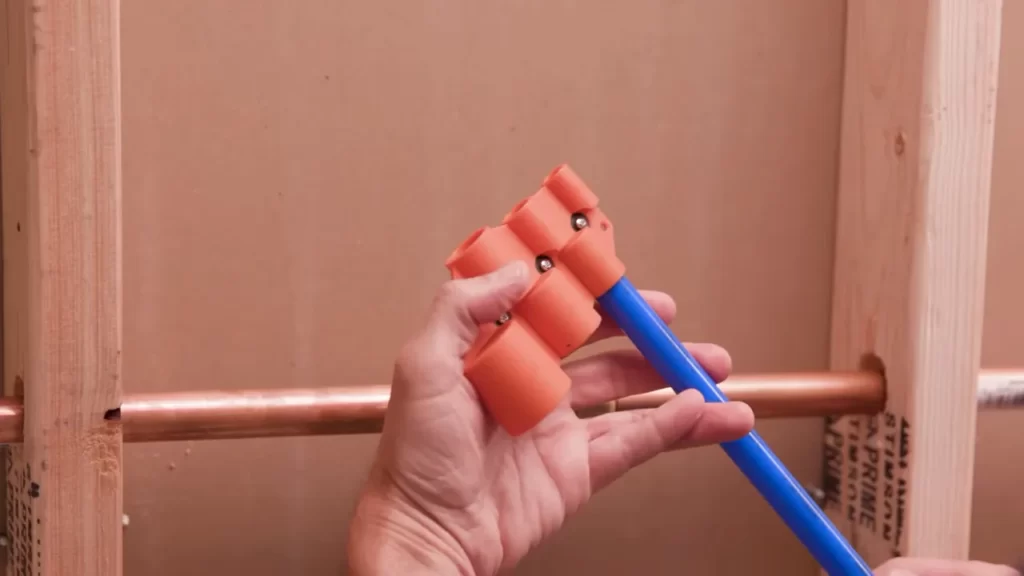
Do You Need The Plastic Insert For Sharkbite Fittings For Pex?
Yes, the plastic insert is necessary for SharkBite fittings when using PEX. It helps provide a secure connection and prevents leaks. Make sure to properly insert it into the fitting before pushing the PEX pipe onto the SharkBite fitting.
Do Sharkbite Fittings Work On All Types Of Pex?
SharkBite fittings work with all types of PEX.
Conclusion
Installing Pex pipe with Sharkbite fittings is a simple and efficient way to upgrade your plumbing system. These fittings provide a reliable and leak-free connection, saving you time and money. With step-by-step instructions and the right tools, you can easily complete this DIY project.
By following our guide, you’ll be able to enjoy a durable and flexible plumbing system that will last for years to come. So, don’t hesitate to give it a try and enjoy the benefits of hassle-free Pex pipe installation with Sharkbite fittings.