To install Pex pipe under a sink, you will need to shut off the water supply, disconnect the existing water lines, measure and cut the Pex pipe, install the fittings, and finally, connect the new Pex pipe to the existing plumbing system. Installing Pex pipe under a sink is a straightforward process that allows for efficient water flow and minimizes the risk of leaks.
By following a few steps, you can successfully complete this task without the need for extensive plumbing skills. We will guide you through the process of installing Pex pipe under a sink, ensuring a seamless and effective plumbing solution. So let’s dive in and learn how to install Pex pipe under a sink, step by step.
Materials Needed
Before you can install PEX pipe under your sink, there are several materials you will need to gather. These materials are essential for a successful installation and will ensure that your PEX piping system functions properly. Here are the materials you will need:
PEX pipe
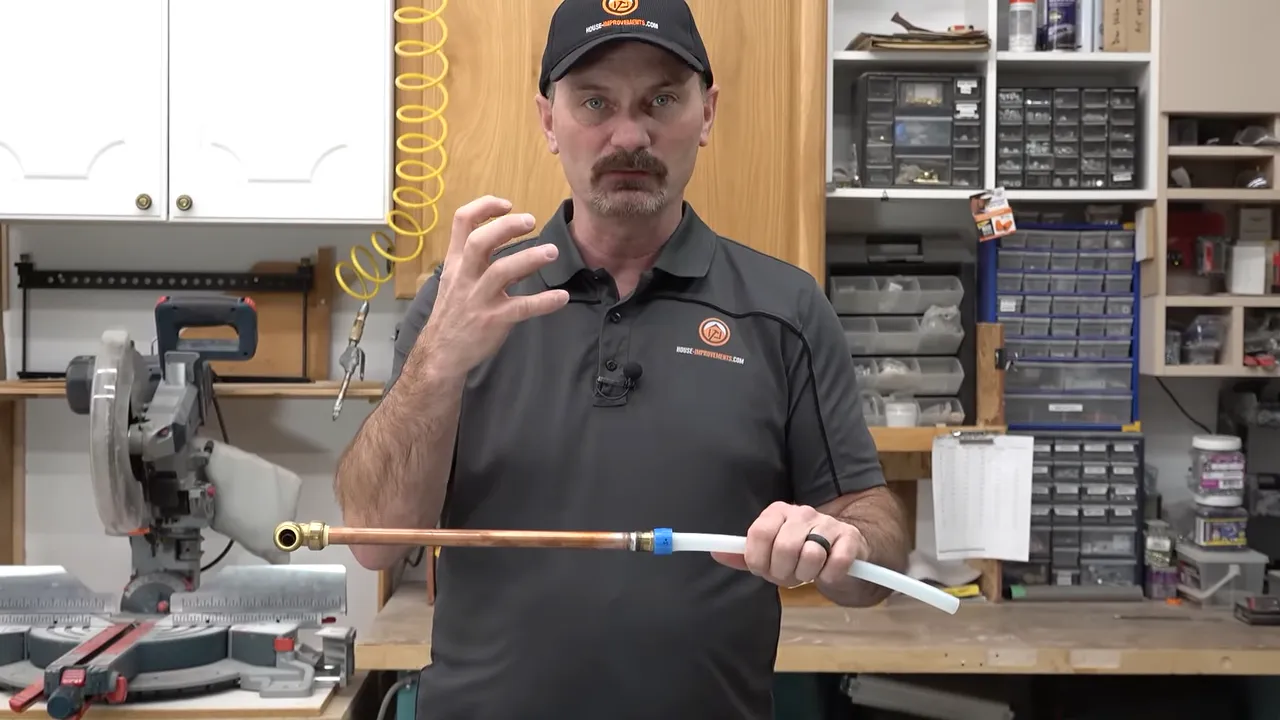
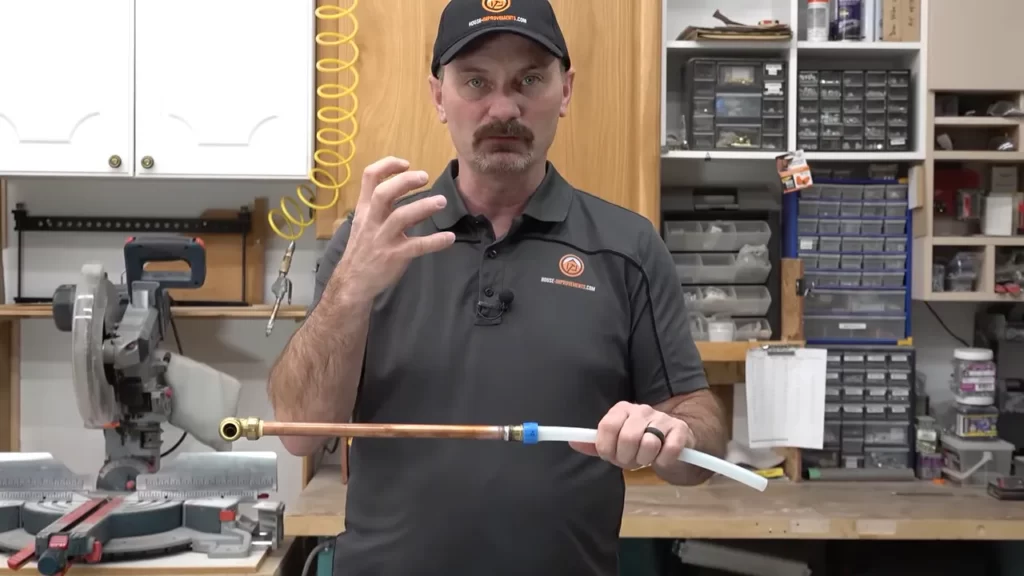
The first material you will need is PEX pipe. PEX, which stands for cross-linked polyethylene, is a flexible and durable type of pipe that is commonly used for plumbing applications. It is resistant to high temperatures and corrosion, making it an ideal choice for under-sink installations.
Pipe cutter
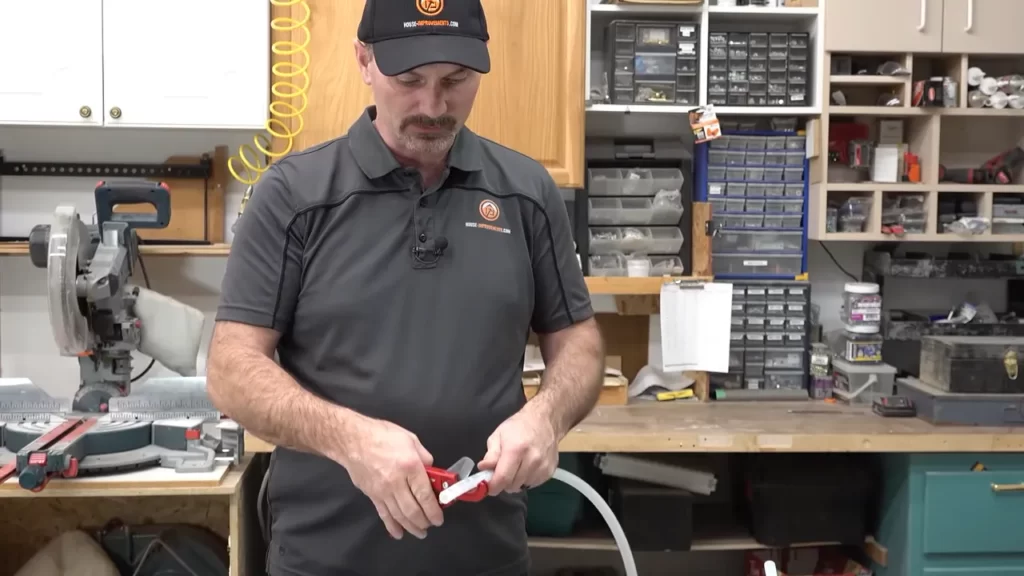
A pipe cutter is an essential tool for cutting PEX pipe to the desired length. It allows for clean, straight cuts, ensuring that the pipe fits properly into the fittings. Make sure to choose a pipe cutter that is specifically designed for cutting PEX pipe.
PEX fittings
PEX fittings are necessary for connecting the PEX pipe to other pipes or fixtures. These fittings come in various types, such as elbows, tees, and couplings, and are available in both brass and plastic materials. Make sure to choose fittings that are compatible with your PEX pipe and the plumbing system you are working with.
Crimp rings
Crimp rings are small metal rings that are used to secure PEX fittings onto the PEX pipe. They are applied using a crimp tool, which compresses the ring around the fitting, creating a tight and secure connection. Crimp rings come in different sizes, so make sure to choose the right size for your fittings.
Crimp tool
A crimp tool is specifically designed to compress crimp rings onto PEX fittings. It is a necessary tool for creating secure connections between the PEX pipe and fittings. When selecting a crimp tool, make sure it is compatible with the size of crimp rings you are using.
Compression fittings
Compression fittings are an alternative to crimp fittings for connecting PEX pipe. These fittings utilize a compression nut and ring to create a watertight seal. Compression fittings are easy to install and do not require any special tools. However, they may not be suitable for all situations, so choose the fitting type based on your specific needs.
Pipe wrench
A pipe wrench is a handy tool for gripping and turning pipes when making connections. It has adjustable jaws that can be tightened securely around the pipe, providing a strong grip. A pipe wrench is especially useful when working with larger diameter PEX pipe or stubborn fittings.
Adjustable wrench
Alongside a pipe wrench, an adjustable wrench is another useful tool to have on hand. It can be adjusted to fit various sizes of nuts and bolts, making it versatile for different plumbing tasks. An adjustable wrench is commonly used for tightening compression fittings.
Teflon tape
Teflon tape, also known as plumber’s tape, is a thin, white tape that is used to create a watertight seal between threaded connections. It is wrapped around the threaded part of a fitting or pipe before assembly. Teflon tape is particularly helpful for sealing pipe threads and preventing leaks.
Deburring tool
A deburring tool is used to remove any burrs or sharp edges from the cut end of the PEX pipe. It ensures a smooth surface, preventing any obstructions or interference during the installation process. Using a deburring tool will help to guarantee a proper connection between the PEX pipe and fittings.
By gathering all the necessary materials mentioned above, you will be well-prepared to install PEX pipe under your sink. These materials are essential for a successful installation and will contribute to the long-term function and durability of your plumbing system.
Preparation And Safety
Before you begin installing a Pex pipe under your sink, it is crucial to prioritize preparation and safety measures. By following these steps, you can ensure a smooth and secure installation process.
Turn off the water supply
The first step in preparing for the installation of a Pex pipe under your sink is to turn off the water supply. Locate the valve that controls the water flow to your sink and rotate it clockwise until it is fully closed. This will prevent any water from coming out and minimize the risk of accidents or damage during the installation process.
Remove any obstacles and clear the area under the sink
Before you can start working on the installation, it’s important to clear the area under your sink of any obstacles. Remove any items stored under the sink and ensure there is ample space for you to maneuver. This will allow you to work efficiently and without any hindrances. It’s also a good idea to use a flashlight to ensure there are no hidden objects that could get in the way.
Wear protective gloves and goggles
When handling any plumbing materials or tools, it is essential to prioritize safety by wearing protective gloves and goggles. These protective measures will shield your hands and eyes from potential hazards such as sharp edges, chemicals, or debris that may be present during the installation process. Always double-check that your gloves fit properly and your goggles provide adequate eye protection before starting the installation.
By taking these preparation and safety measures, you are ensuring a secure and successful installation of a Pex pipe under your sink. Remember to always double-check the valves, clear the area, and don the right protective gear before starting any plumbing project.
Removing The Old Pipe
Disconnect the existing pipe from the faucet and drain
When it’s time to install a new Pex pipe under your sink, the first step is to remove the old pipe. This will require disconnecting the existing pipe from both the faucet and the drain. By following these simple steps, you can ensure a smooth removal process.
- Turn off the water supply: Before you begin, make sure to turn off the water supply to your sink. You can usually do this by closing the shut-off valves located under the sink. If you can’t find the shut-off valves, you may need to shut off the main water supply to your home.
- Disconnect the pipe from the faucet: Locate the nut connecting the pipe to the faucet. You’ll usually find this near the base of the faucet. Use an adjustable wrench to loosen the nut and disconnect the pipe from the faucet. Be sure to place a bucket or towel underneath to catch any water that may drain out.
- Disconnect the pipe from the drain: Move to the drain connection and locate the nut or fastener holding the pipe in place. Using your adjustable wrench, loosen the nut and disconnect the pipe from the drain. Again, be prepared for any water that may come out when you remove the pipe.
Use a pipe cutter to remove the old pipe
After disconnecting the old pipe from both the faucet and the drain, the next step is to remove the pipe itself. A pipe cutter is a handy tool that you can use to make clean and precise cuts. Follow these steps to remove the old pipe:
- Measure and mark: Start by measuring the length of the pipe you need to remove. Use a tape measure to mark this length on the old pipe.
- Secure the pipe cutter: Place the pipe cutter on the marked spot and tighten it firmly. Make sure the blade of the pipe cutter lines up with the mark on the pipe.
- Rotate the pipe cutter: Begin rotating the pipe cutter around the pipe. Apply consistent pressure and continue rotating until the blade cuts through the pipe. This may require several rotations.
- Remove the cut section: Once the pipe is cut through, use your hands to remove the cut section. Discard it properly.
Clean the area where the old pipe was connected
Now that you have removed the old pipe, it’s important to clean the area where the old pipe was connected. This will ensure a clean and secure connection for the new Pex pipe. Follow these steps to clean the area:
- Wipe away debris: Use a clean cloth or paper towel to wipe away any debris or residue left behind by the old pipe.
- Inspect for damage: Take a moment to inspect the area for any signs of damage or corrosion. If necessary, use a wire brush to remove any rust or buildup.
- Apply plumber’s tape: To create a tight and secure seal, wrap plumber’s tape around the threads of the faucet and drain connections. This will prevent leaks and ensure a watertight connection.
By following these steps and taking the time to properly remove the old pipe, you’ll be well on your way to installing a new Pex pipe under your sink. Remember to take caution and follow any safety guidelines provided by the manufacturer.
Measuring And Cutting The Pex Pipe
One of the most crucial steps in installing a PEX pipe under the sink is measuring and cutting the pipe to the desired length. This ensures a proper fit and allows for smooth water flow. In this section, we will guide you through the steps required to measure and cut the PEX pipe accurately.
Measure the distance between the faucet and the water supply
To begin with, it’s essential to measure the distance between the faucet and the water supply. This step helps you determine the length of the PEX pipe required for efficient installation. To measure the distance, use a measuring tape or ruler and accurately note the measurement.
Add a few inches to allow for bends and connections
After measuring the distance, it’s crucial to add a few extra inches to allow for bends and connections. This additional length accounts for any twists, turns, or connections you may need during the installation process. Remember, providing ample pipe length is essential to avoid any strain on the pipe and ensure a secure and leak-free connection.
Mark the measurement on the PEX pipe
Once you have determined the required length of the PEX pipe, gently mark the measurement on the pipe using a marker or a pencil. Make sure to mark the pipe accurately to avoid any miscalculations during the cutting process.
Use a pipe cutter to cut the PEX pipe to the desired length
Finally, it’s time to cut the PEX pipe to the desired length. Use a pipe cutter specifically designed for PEX pipes to ensure clean and precise cuts. Position the cutter around the marked measurement, ensuring it is securely placed, and slowly rotate the cutter around the pipe. Continue rotating until the pipe is cut entirely, based on your marked measurement.
Remember to keep the cuts as straight and clean as possible, as this impacts the quality of the connection and prevents potential leaks. Measure carefully, cut precisely, and your PEX pipe will be ready for the next steps of the installation process!
Installing Pex Fittings
Installing PEX fittings is a crucial step in the process of installing a PEX pipe under the sink. It ensures a secure connection between the pipe and the plumbing fixture, preventing any leaks or water damage. In this section, we will guide you through the steps of installing PEX fittings. Let’s get started!
1. Apply Teflon tape to the threads of PEX fittings:
Before installing PEX fittings, it is essential to apply Teflon tape to the threads. This helps create a watertight seal and prevents any potential leaks. To do this, follow these steps:
– Take a roll of Teflon tape and unwind a few inches.
– Holding the end of the tape against the threads of the PEX fitting, begin wrapping it in a clockwise direction.
– Make sure the tape covers all the threads, ensuring a tight seal.
2. Slide a crimp ring onto the PEX pipe:
Once the Teflon tape is applied, it’s time to slide a crimp ring onto the PEX pipe. This ring will hold the fitting securely in place. To do this, follow these steps:
– Take a crimp ring and open it using a pair of adjustable pliers.
– Slide the open crimp ring onto the end of the PEX pipe.
– Position the crimp ring about 1/8 inch from the end of the pipe.
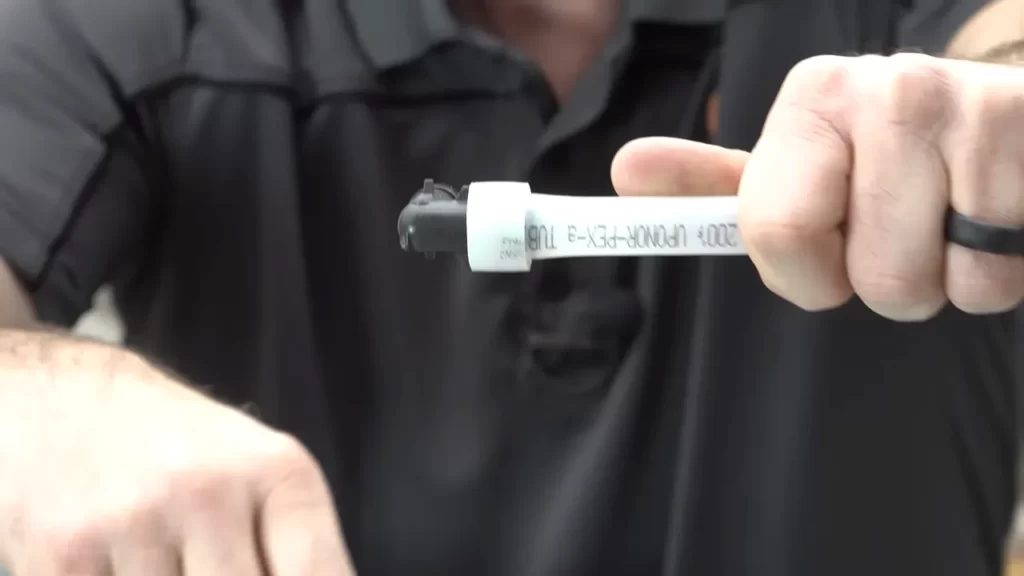
3. Insert the PEX fitting into the pipe:
With the crimp ring in place, it’s time to insert the PEX fitting into the pipe. This step ensures a proper connection between the pipe and the fitting. Follow these steps to insert the fitting:
– Take the PEX fitting and align it with the end of the PEX pipe.
– Push the fitting into the pipe until it is fully inserted and reaches the crimp ring.
– Ensure that the fitting is properly aligned and seated within the pipe.
4. Use a crimp tool to secure the crimp ring:
Once the fitting is inserted into the pipe, it’s time to secure the crimp ring using a crimp tool. This tool applies pressure to the crimp ring, creating a tight seal between the fitting and the pipe. To secure the crimp ring, follow these steps:
– Place the jaws of the crimp tool over the crimp ring, ensuring they are properly aligned.
– Squeeze the handles of the crimp tool firmly, applying pressure to the crimp ring.
– Continue squeezing until you feel the crimp tool release the ring, indicating a secure connection.
5. Repeat the process for each fitting needed:
To complete the installation of PEX fittings, repeat the same steps for each fitting needed. Make sure to apply Teflon tape, slide a crimp ring onto the pipe, insert the fitting, and secure the crimp ring using a crimp tool. This will ensure a proper and secure connection between the PEX pipe and the plumbing fixtures under the sink.
Congratulations! You have successfully installed PEX fittings under the sink. By following these steps, you have ensured a reliable and leak-free plumbing system. Remember to check for any leaks or issues once the installation is complete for a complete peace of mind.
Connecting The Pex Pipe
Connecting the PEX pipe is a crucial step when installing it under the sink. Proper connections ensure a leak-free and efficient water supply system. In this section, we will guide you through the process of connecting the PEX pipe to both the water supply connection and the faucet connection.
Slide a crimp ring onto the other end of the PEX pipe
Once you have measured, cut, and deburred the PEX pipe according to your needs, it’s time to connect it to the water supply. Start by sliding a crimp ring onto the opposite end of the PEX pipe. This ring will help secure the pipe to the connection point, preventing any water leakage.
Insert the pipe into the water supply connection
Next, carefully insert the end of the PEX pipe into the water supply connection. It is important to ensure a snug fit to avoid any future leaks. Gently push the pipe into the connection until it reaches the desired depth.
Use the crimp tool to secure the crimp ring
Once the PEX pipe is inserted into the water supply connection, it’s time to secure the crimp ring. This ensures a tight seal between the pipe and the connection point. Use a crimp tool specifically designed for PEX pipe to compress the crimp ring. Apply enough pressure to make sure the ring is securely fastened, but be careful not to damage the pipe.
Repeat the process for the faucet connection
Now that you have successfully connected the PEX pipe to the water supply, it’s time to repeat the process for the faucet connection. Slide another crimp ring onto the other end of the PEX pipe and insert it into the faucet connection. Use the crimp tool again to secure the ring, ensuring a watertight connection.
By following these steps, you can easily connect the PEX pipe under your sink. Remember to always double-check for any leaks before completing the installation. With proper connections, you’ll have a reliable and efficient plumbing system in no time.
Testing For Leaks
Open the water supply valve
Once you have completed the installation of the Pex pipe under the sink, it’s time to test for leaks. The first step in the testing process is to open the water supply valve. This will allow the water to flow through the pipes and into the system. To do this, simply locate the water supply valve and turn it on in a clockwise motion.
Turn on the faucet and check for any leaks
After opening the water supply valve, it’s time to turn on the faucet and check for any leaks. To do this, simply turn the faucet handle in a counterclockwise motion. As the water flows through the pipes, carefully inspect the connections and joints for any signs of leakage. Look for any drips or pooling water that may indicate a problem. It’s important to be thorough in your inspection, as even small leaks can lead to bigger issues if left untreated.
Tighten any connections if necessary
If you do notice any leaks during the testing process, don’t panic. It’s not uncommon for there to be some minor adjustments needed when installing Pex pipe under the sink. If you find any leaks, the first step is to tighten the connections. To do this, use a wrench or pliers to gently turn the fitting in a clockwise motion. Be careful not to overtighten, as this can damage the connections. Once you have tightened the necessary connections, repeat the testing process to ensure that the leaks have been resolved.
Remember: Properly testing for leaks is an important step in the installation process of Pex pipe under the sink. By following these steps and being diligent in your inspection, you can ensure that your pipe system is leak-free and ready for use.
Alternative: Using Compression Fittings
When it comes to installing PEX pipe under the sink, there are different methods you can choose from. One popular alternative to consider is using compression fittings. This method provides a reliable and leak-free connection between the PEX pipe and the sink fittings. In this section, we will guide you through the steps of using compression fittings to install PEX pipe under the sink.
Wrap the threads of the compression fitting with Teflon tape
To start the installation process, make sure you have all the necessary tools and materials on hand. These include PEX pipe, compression fittings, Teflon tape, a pipe cutter, and a pipe wrench. Begin by wrapping the threads of the compression fitting with Teflon tape. This will help create a watertight seal and prevent any leaks.
Insert the compression fitting onto the PEX pipe
Next, take the PEX pipe and carefully insert the compression fitting onto one end. Ensure that the fitting is pushed all the way onto the pipe, and make sure it is aligned properly. The compression fitting consists of two parts: the compression nut and the compression ring. The compression nut will thread onto the compression fitting and seal against the compression ring, creating a tight connection.
Use a pipe wrench to tighten the fitting
Once the compression fitting is properly inserted onto the PEX pipe, use a pipe wrench to tighten the fitting. Hold the compression nut with one hand and use the pipe wrench with the other to turn the compression nut clockwise. Continue tightening until you feel resistance, making sure not to over-tighten as this can damage the fitting or the pipe.
Repeat the process for each fitting needed
Repeat the above steps for each fitting needed under the sink. This may include fittings for hot and cold water supplies, as well as any other fixtures such as a dishwasher or garbage disposal. Ensure that each fitting is properly wrapped with Teflon tape, inserted onto the PEX pipe, and tightened securely with a pipe wrench.
By following these steps, you can successfully install PEX pipe under the sink using compression fittings. This alternative method offers a reliable and efficient way to connect PEX pipe to your sink fittings, ensuring a leak-free and durable installation.
Final Steps
After successfully connecting the PEX pipe and the supply lines in previous steps, it’s time to complete the installation process under the sink. This section will guide you through the final steps to secure the PEX pipe, make any necessary adjustments, and ensure there are no leaks.
Secure the PEX pipe under the sink with pipe clips
To keep the PEX pipe firmly in place under the sink, it’s crucial to use pipe clips. These clips will prevent the pipe from moving and provide stability to the entire system. Here is how you can secure the PEX pipe with pipe clips:
- Take the pipe clips and position them along the length of the pipe.
- Make sure the clips are evenly spaced to distribute the weight of the pipe.
- Using a screwdriver or a drill, secure the clips to the wall or the cabinet’s underside.
- Double-check the tightness of each clip and ensure they securely hold the PEX pipe.
Use an adjustable wrench to make any final adjustments
Before completing the PEX pipe installation, it’s important to make any necessary adjustments to ensure a proper fit and alignment. Follow these steps to use an adjustable wrench for final adjustments:
- Locate the fittings that connect the PEX pipe to the shutoff valves or other components.
- If needed, use an adjustable wrench to tighten or loosen these fittings.
- Make small adjustments until the pipe is aligned properly and does not have any kinks or bends.
- Keep an eye out for any signs of leakage while adjusting the fittings.
Check for leaks one more time before completion
Before declaring the installation complete, it’s essential to check for leaks one final time. Even though you have already tested for leaks earlier, conducting this additional check ensures there are no hidden issues. Follow these steps to check for leaks:
- Turn on the water supply to the sink.
- Examine all the connections and joints along the PEX pipe.
- Feel for any signs of moisture or dripping.
- If you notice any leaks, tighten the fittings accordingly or contact a professional plumber for further assistance.
By carefully adhering to these final steps, you can successfully install PEX pipe under the sink. Remember, securing the PEX pipe with pipe clips, making necessary adjustments with an adjustable wrench, and conducting one last check for leaks are crucial to ensure a reliable and leak-free plumbing system in your home.
Frequently Asked Questions
How Do You Connect A Pex Faucet To A Sink?
To connect a PEX faucet to a sink, first, shut off the water supply. Then, remove the old faucet and clean the sink surface. Next, connect the PEX supply lines to the faucet and secure with crimp rings or push-fit connectors.
Finally, turn on the water supply and check for leaks.
How Do You Connect Pex To Faucet Supply Line?
To connect PEX to a faucet supply line, use a PEX to faucet connector. It is a push-to-connect fitting that requires no tools. Simply cut the PEX pipe, insert it into the connector, and push it in until it clicks.
Then, attach the other end of the connector to the faucet supply line.
Where Should You Not Use Pex?
PEX should not be used in high-temperature applications, such as for water lines that connect directly to the water heater. It should also not be used outdoors, as it is susceptible to UV damage. Additionally, PEX should not be used for gas lines, as it is not approved for this application.
How Deep Should Pex Pipe Be Buried?
PEX pipes should be buried at a minimum depth of 12 inches to protect them from freezing temperatures and potential damage. This depth requirement ensures proper insulation and prevents any accidental damage during construction or landscaping activities.
Conclusion
Installing Pex pipe under the sink is a cost-effective and efficient solution for improving plumbing systems. By following the step-by-step guide provided in this blog post, you can easily complete the installation process. Remember to prioritize safety measures and consult a professional if needed.
With Pex pipe, you can enjoy reliable water flow and minimize the risks of leaks. Upgrade your plumbing system today for a hassle-free experience.