
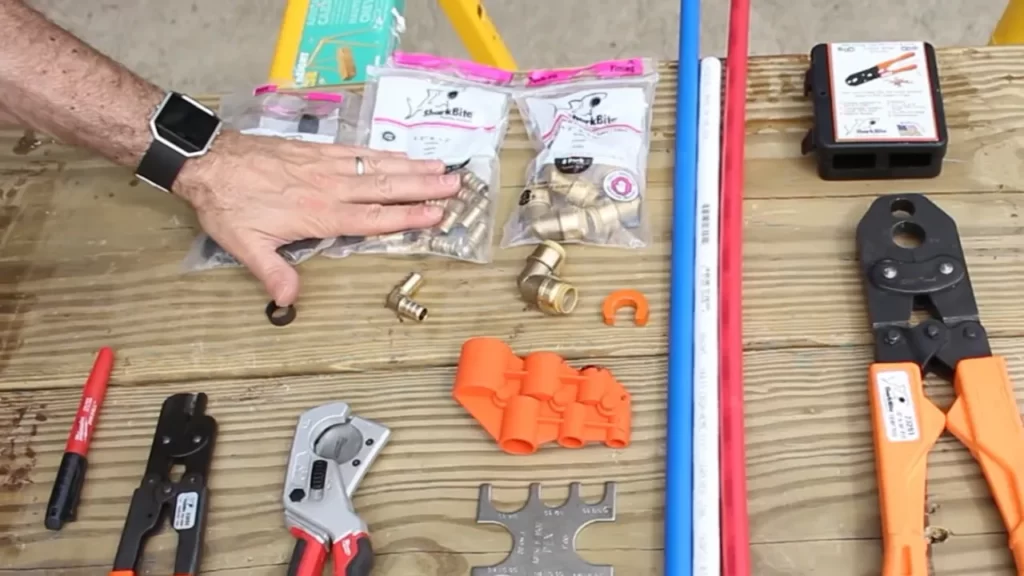
To install Pex pipe to a bathroom sink, you need to cut the existing supply line, attach a fitting, and connect the Pex pipe using crimp rings. This process ensures a secure and leak-free connection between the Pex pipe and the bathroom sink.
When it comes to plumbing installations in your bathroom, one essential aspect is connecting the water supply to your sink. Pex pipe offers a reliable and convenient solution for this task. By following a few simple steps, you can successfully install Pex pipe to your bathroom sink.
We will guide you through the process of connecting a Pex pipe to your bathroom sink, ensuring a secure and leak-free installation. With the right tools and materials, you can complete this project with ease and enjoy a fully functional bathroom sink. Read on to learn how to install Pex pipe to your bathroom sink.
Choosing The Right Pex Pipe For Your Bathroom Sink Installation
Choosing the Right Pex Pipe for Your Bathroom Sink Installation
When it comes to installing a new bathroom sink, choosing the right type of Pex pipe is crucial for a successful and leak-free installation. Pex pipe, which stands for cross-linked polyethylene, is a flexible and durable material that is commonly used for plumbing applications. Understanding the different types of Pex pipe and selecting the proper size and length for your project will ensure a smooth and efficient installation process. In this article, we will explore the factors to consider when choosing the right Pex pipe for your bathroom sink installation.
Understanding the Different Types of Pex Pipe
Before you start your bathroom sink installation project, it’s important to understand the different types of Pex pipe available in the market. There are three main types of Pex pipe: Pex-A, Pex-B, and Pex-C. Each type has its own advantages and benefits, so let’s take a closer look at each one:
- Pex-A: Pex-A is the most flexible and durable type of Pex pipe. It features a cross-linking process that increases its flexibility and resistance to freezing. Pex-A is the easiest to work with and can withstand high temperatures and pressures.
- Pex-B: Pex-B is a more rigid type of Pex pipe compared to Pex-A. It is less expensive and slightly easier to install. However, it is not as flexible as Pex-A and may be more prone to cracking in freezing temperatures.
- Pex-C: Pex-C is the least expensive type of Pex pipe. It is relatively easy to install and has good resistance to heat and chemicals. However, Pex-C is not as flexible as Pex-A and may be more prone to kinking in tight spaces.
When choosing the right type of Pex pipe for your bathroom sink installation, consider factors such as budget, flexibility requirements, and the climate in your area. Pex-A is generally recommended for its superior flexibility and durability, especially in areas with extreme temperatures.
Selecting the Proper Size and Length for Your Project
Once you have determined the type of Pex pipe that suits your needs, the next step is to select the proper size and length for your bathroom sink installation. Pex pipe is available in various sizes, typically measured in inches, such as 3/8″, 1/2″, 3/4″, and 1″. It is important to choose the correct size that matches the water supply line and fittings.
To determine the proper size, take into consideration the water flow requirements of your bathroom sink. Larger diameter Pex pipes, such as 3/4″ or 1″, are capable of delivering a higher flow rate, which may be necessary for certain bathroom sink faucets.
In addition to size, you should also consider the length of Pex pipe needed for your project. Measure the distance from the water supply line to the bathroom sink, taking into account any bends or turns in the plumbing system. It’s always a good idea to add a few extra feet to account for any unexpected maneuvering during the installation process.
To summarize, when choosing the right Pex pipe for your bathroom sink installation, consider the advantages and benefits of each type (Pex-A, Pex-B, and Pex-C) and select the type that best suits your needs. Additionally, ensure you select the proper size and length of Pex pipe that matches your water flow requirements and the distance between the water supply line and the bathroom sink. By taking these factors into account, you will be well-equipped to install your bathroom sink with confidence and efficiency.
Preparing The Work Area For Pex Pipe Installation
Before you start installing Pex Pipe to your bathroom sink, it is essential to properly prepare the work area. This will ensure a smooth and efficient installation process, and prevent any unexpected complications along the way. In this section, we will guide you through the necessary steps to prepare your work area for Pex Pipe installation, including shutting off the water supply and draining the existing plumbing system.
Shutting Off the Water Supply
The first step in preparing your work area for Pex Pipe installation is to shut off the water supply to your bathroom sink. This will prevent any water flow during the installation process, minimizing any potential leaks or water damage. Here is a simple guide on how to shut off the water supply:
- Locate the main water shut-off valve in your home. This is usually located near the water meter or in the basement.
- Turn the valve clockwise to shut off the water supply. If the valve is old or difficult to turn, consider using pliers or a wrench to assist you.
- Once the valve is fully closed, turn on the bathroom sink faucet to release any residual water in the pipes.
Draining the Existing Plumbing System
After shutting off the water supply, it is important to drain the existing plumbing system to prevent any water accumulation and potential damage. Here are the steps to drain the existing plumbing system:
- Open all the faucets in your bathroom, including the sink faucet, bathtub faucet, and showerhead.
- Flush all the toilets in your home to release any water from the tanks and bowls.
- Disconnect any hoses or attachments connected to the bathroom sink.
- Using a bucket or container, collect any remaining water in the sink trap or P-trap.
By following these steps, you will effectively prepare your work area for Pex Pipe installation. Shutting off the water supply and draining the existing plumbing system will minimize any potential water damage and ensure a successful installation. Now that your work area is ready, you can proceed to the next steps of installing Pex Pipe to your bathroom sink.
Removing The Old Plumbing From The Bathroom Sink
Before you can install a new Pex pipe system for your bathroom sink, it’s important to first remove the old plumbing. This will involve disconnecting the water lines and removing the existing drain pipe. In this section, we will guide you through the process step by step.
Disconnecting the Water Lines
To begin, you’ll need to turn off the water supply to your bathroom sink. Locate the shut-off valves under the sink or in the basement. Turn the valves clockwise until they are fully closed. This will ensure that no water flows through the lines while you’re working.
Next, you’ll need to disconnect the water lines from the sink. Place a bucket or a towel underneath the sink to catch any remaining water. Use an adjustable wrench to loosen the compression nuts at both ends of the water lines. Once the nuts are loose, carefully remove the lines from the sink connections. Be prepared for some water to come out as you disconnect the lines.
Removing the Existing Drain Pipe
Once the water lines are disconnected, you can move on to removing the existing drain pipe. Start by loosening the slip nut that connects the drain pipe to the sink’s P-trap. You can use an adjustable wrench or pliers to do this. Once the slip nut is loose, you should be able to slide it off the drain pipe easily.
Next, you’ll need to remove the tailpiece from the sink drain. This is the piece that extends down from the sink and connects to the drain pipe. Loosen the slip nut that holds the tailpiece in place and carefully remove it from the sink.
With the tailpiece removed, you can now focus on removing the drain pipe itself. This may be connected to the main drain line using a slip nut or a threaded connection. Use the appropriate tool to loosen the connection and carefully disconnect the drain pipe from the main line.
Once all the old plumbing has been disconnected, you can proceed with installing your new Pex pipe system for the bathroom sink. Remember to clean the connections thoroughly and check for any signs of damage or wear before proceeding with the installation.
This process may seem intimidating at first, but with the right tools and a little patience, you can successfully remove the old plumbing from your bathroom sink. By following the steps outlined above, you’ll be one step closer to installing your new Pex pipe system and enjoying a properly functioning bathroom sink.

Installing The Pex Pipe For The Water Lines
Measuring and Cutting the Pex Pipe
Before you can install the Pex pipe for your bathroom sink water lines, it’s crucial to measure and cut the Pex pipe to the correct length. Here’s how:
- Start by measuring the distance between the water supply and the bathroom sink. Use a tape measure to ensure an accurate measurement.
- After measuring, add an additional inch or two to the measured length to allow for any adjustments or margin of error.
- Next, mark the measured length on the Pex pipe using a permanent marker or a pencil. Ensure that the marking is clear and visible.
- Using a Pex pipe cutter or a fine-toothed saw, carefully cut the Pex pipe at the marked point. Make sure to use a straight and steady motion to achieve a clean and precise cut.
- After cutting, double-check the length by placing the pipe between the water supply and the bathroom sink. Trim if necessary for a perfect fit.
Fitting the Pex Pipe to the Water Supply
Once you have the Pex pipe cut to the correct length, it’s time to fit it to the water supply. Follow these steps:
- Inspect the end of the Pex pipe to ensure a smooth and clean cut. Remove any burrs or rough edges by using a utility knife or sandpaper.
- Apply a small amount of Pex pipe lubricant to the fitting on the water supply. This lubricant will help in easing the connection of the Pex pipe.
- Insert the end of the Pex pipe into the fitting on the water supply. Push it in until it reaches the depth mark on the fitting.
- Use a crimping tool to secure the connection between the Pex pipe and the fitting. Apply firm and even pressure to create a watertight seal.
- Repeat the process for the other end of the Pex pipe, connecting it to the bathroom sink.
Connecting Pex Pipe with Pex Fittings
Connecting the Pex pipe to Pex fittings is a crucial step in ensuring a leak-free installation. Follow these steps:
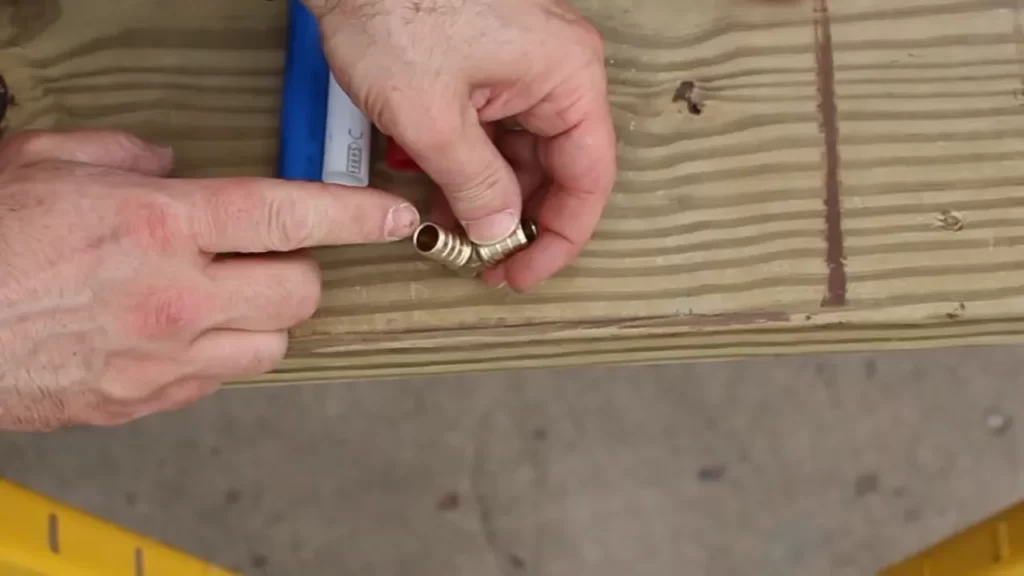
- Inspect the Pex fittings to ensure they are clean and free from any debris or dirt.
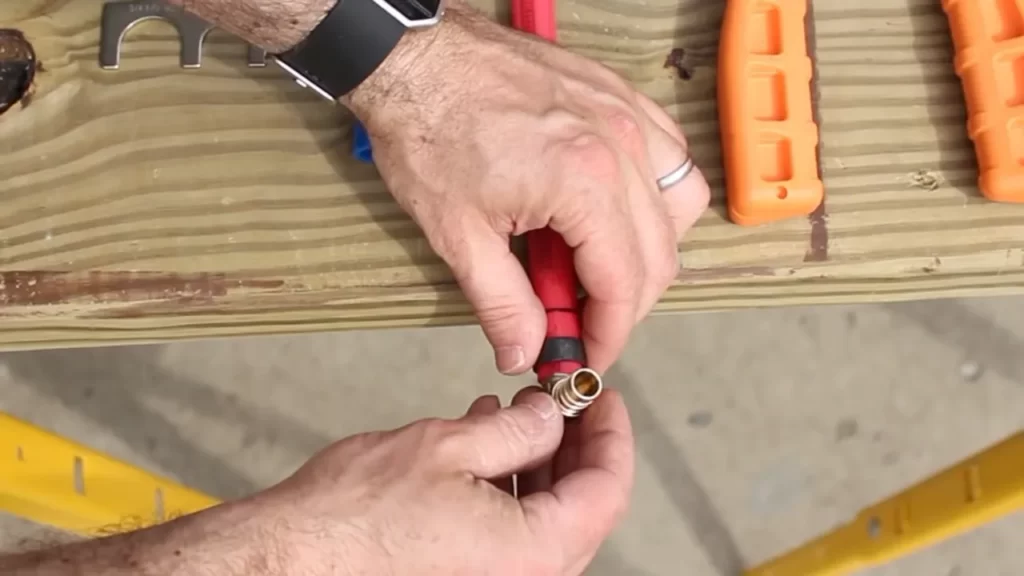
- Slide a Pex ring over the end of the Pex pipe.
- Insert the Pex pipe into the Pex fitting until it reaches the depth mark.
- Using a crimping tool, position it over the Pex ring and apply firm pressure to create a secure connection.
- Repeat the process for the remaining Pex fittings and connections.
By following these steps, you can successfully install the Pex pipe for your bathroom sink water lines. Remember to measure and cut the Pex pipe accurately, fit it properly to the water supply, and connect it securely with Pex fittings. With a well-installed Pex pipe, you can enjoy a reliable and efficient water supply for your bathroom sink.
Installing The Pex Pipe For The Drain System
Installing the Pex Pipe for the Drain System
When it comes to installing the drain system for your bathroom sink, using Pex pipe can provide you with a reliable and durable solution. Pex pipe, short for cross-linked polyethylene pipe, is a popular choice due to its flexibility, resistance to corrosion, and ease of installation. In this guide, we will walk you through the steps of selecting the proper Pex pipe, cutting and installing it for the drain pipe, and connecting it with Pex fittings.
Selecting the Proper Pex Pipe for the Drain System
Before starting the installation process, it is essential to select the right type of Pex pipe for your drain system. This will ensure optimal performance and longevity. Here are a few factors to consider:
- Diameter: Determine the required diameter of the Pex pipe based on your sink’s drain size. Common sizes include 1 ½ inches and 2 inches.
- Type of Pex: Choose between Pex-A, Pex-B, or Pex-C. Each type has its advantages, so research the pros and cons of each to make an informed decision.
- Pex Pipe Markings: Look for markings on the pipe that indicate it is suitable for drain applications. Ensure the pipe meets the necessary standards and certifications.
Cutting and Installing the Pex Pipe for the Drain Pipe
Once you have selected the appropriate Pex pipe, it’s time to cut and install it for the drain pipe. Follow these steps:
- Measure and Cut: Measure the length needed for your drain pipe and mark it on the Pex pipe. Use a specialized Pex pipe cutter to make precise cuts.
- Deburring: After cutting, make sure to remove any burrs or rough edges from the pipe using a deburring tool. This will ensure a proper fit and minimize the risk of leaks.
- Dry Fit: Before permanently installing the Pex pipe, perform a dry fit to check if the pipe fits snugly into the drain system. Make any adjustments as necessary.
- Secure the Pipe: Use pipe clamps or hangers to secure the Pex pipe in place, ensuring it maintains a proper slope for efficient drainage.
Connecting Pex Pipe with Pex Fittings
To complete the installation, it is crucial to connect the Pex pipe with Pex fittings. These fittings allow for a secure and watertight connection. Follow these steps:
- Prepare the Ends: Use the appropriate Pex fitting tools to prepare the ends of the Pex pipe for connection. This may include expanding or crimping the pipe.
- Insert the Fitting: Slide the Pex fitting onto the prepared end of the pipe until it reaches the marked depth.
- Secure the Connection: Use the recommended method of securing the fitting, such as crimping or using a compression ring. Ensure a tight and reliable connection.
- Test for Leaks: Once all connections are made, test the system for leaks by running water through the drain pipe. Check for any signs of water leakage and make adjustments if necessary.
By following these steps, you can successfully install the Pex pipe for your bathroom sink’s drain system. Remember to select the proper Pex pipe, measure and cut accurately, and securely connect the Pex pipe with fittings to ensure a reliable and efficient drain system.
Securing The Pex Pipe In Place
Using Pipe Clips or Straps to Secure the Pex Pipe
One of the most common ways to secure Pex pipe in place is by using pipe clips or straps. These handy accessories are designed to hold the pipe firmly against the wall or surface, preventing it from moving or slipping out of position.
Here are the steps to help you secure the Pex pipe using pipe clips or straps:
- Start by determining the appropriate placement for the pipe clips or straps. This will depend on the length of the pipe and the distance between the bathroom sink and the water supply.
- Using a measuring tape, measure the distance between each clip or strap to ensure even spacing along the pipe. This will help provide optimal support and stability.
- Once you have determined the spacing, use a pencil or marker to mark the exact positions where the clips or straps will be placed.
- Next, select the appropriate size of pipe clips or straps that will securely fit the Pex pipe. It is essential to choose the right size to ensure a tight and reliable grip on the pipe.
- Install the pipe clips or straps on the marked positions along the pipe. Depending on the type of clips or straps you are using, this may involve screwing them into the wall or using adhesive backing.
- Tighten the clips or straps securely, ensuring that the Pex pipe is held firmly in place without any room for movement.
- Repeat the process for each clip or strap along the length of the Pex pipe, ensuring consistent support and stability.
Ensuring Proper Support and Stability for the Pex Pipe
Proper support and stability are crucial when installing Pex pipe for a bathroom sink. This not only helps prevent leaks and damage but also ensures the longevity of the plumbing system.
Here are some additional tips to ensure proper support and stability for the Pex pipe:
- Use appropriate materials for supporting the Pex pipe, such as pipe hangers, brackets, or clamps. These materials are specifically designed to provide adequate support and prevent sagging or excessive movement.
- Ensure that the Pex pipe is well-secured to wall studs or other structural elements. This will help distribute the weight evenly and provide additional strength and stability.
- If the Pex pipe needs to run through a joist or stud, consider using protective plates to prevent any damage to the pipe from nails or screws.
- Regularly inspect the Pex pipe installation to ensure that it remains secure and stable. Look out for any signs of movement, sagging, or damage and address them promptly to prevent further issues.
- Consider insulating the Pex pipe, especially if it runs through uninsulated areas or near cold surfaces. This will help prevent freezing and reduce the risk of pipe bursts.
By following these steps and tips, you can ensure that the Pex pipe for your bathroom sink is securely installed and properly supported, providing reliable water supply for years to come.
Testing The Pex Pipe Installation
Once you have successfully installed the Pex pipe to your bathroom sink, it is essential to test the installation thoroughly before using the water supply. This crucial step will help identify any leaks or issues that need to be addressed before using the sink regularly. In this section, we will discuss the steps to turn on the water supply and check for any potential leaks or issues.
Turning on the Water Supply
After completing the installation of the Pex pipe to your bathroom sink, it’s time to turn on the water supply and ensure everything is functioning correctly.
- Locate the main water shut-off valve in your home. This valve is usually found near the water meter or where the water line enters your house.
- Turn the valve clockwise to open the water supply. Take note that the process may take a few seconds or minutes for the water to flow through the pipes and reach your bathroom sink.
Once the water is flowing, move on to the next step to check for any potential leaks.
Checking for Any Leaks or Issues
Once the water supply is turned on, it’s crucial to inspect the Pex pipe installation for any leaks or issues that may have occurred during the process. Follow these steps to ensure a thorough check:
- Visually examine the Pex pipe connections, including joints, fittings, and valves. Look for any signs of water leakage, such as water droplets, wet spots, or drips.
- Use a paper towel or a dry cloth to wipe the connections and fittings. If the towel becomes wet or damp, it indicates a possible leak.
- Inspect the area underneath the sink and around the connections for any water puddles or dampness. This can be a sign of a hidden leak.
- Turn on the faucet and let the water flow for a few minutes. Observe the Pex pipe connections and the area around them for any signs of leakage while the water is running.
If you notice any leaks during the inspection, it’s essential to address them immediately. Tighten loose connections or replace faulty fittings as necessary. Additionally, if there are no visible leaks but you still suspect an issue, consider contacting a professional plumber for further assessment.
By thoroughly testing the Pex pipe installation and addressing any leaks or issues promptly, you can ensure a reliable and efficient water supply to your bathroom sink. Regular maintenance and inspection will help prevent costly water damage and ensure the longevity of your Pex pipe system.
Connecting The Bathroom Sink Fixtures To The Pex Pipe
After successfully installing the Pex pipe for your bathroom sink, the next crucial step is connecting the various fixtures to the pipe. This involves attaching the water lines to the faucet and connecting the drain pipe to the sink. To ensure a properly functioning and leak-free bathroom sink, let’s dive into the detailed steps for each of these processes.
Attaching the Water Lines to the Faucet
Once you have the Pex pipe in place, it’s time to tackle the water lines and faucet connection. This process is relatively straightforward but requires attention to detail. Follow these steps to complete this crucial step of your bathroom sink installation:
- Begin by turning off the main water supply to avoid any accidental leaks or spills.
- Position the faucet on top of the sink according to the manufacturer’s instructions, ensuring proper alignment with the mounting holes.
- Once in position, insert the water supply lines onto the faucet’s connections, making sure they are securely attached.
- Using an adjustable wrench, tighten the connections nut until they are snug, taking care not to overtighten as it may damage the faucet or cause leaks.
- Double-check to ensure that all connections are tight and secure.
With the water lines securely attached to the faucet, you’re one step closer to completing your bathroom sink installation. Now, let’s move on to connecting the drain pipe to the sink.
Connecting the Drain Pipe to the Sink
To ensure proper drainage and prevent leaks, connecting the drain pipe to the sink is an essential step in the process. Follow these simple steps to complete this task effectively:
- Position the sink drain in the sink’s designated hole, ensuring it fits snugly and aligning it with the opening.
- Apply plumber’s putty around the underside of the drain flange to create a watertight seal.
- Place a rubber gasket and cardboard friction ring onto the drain flange before inserting it into the drain hole.
- From below the sink, screw the drain flange tightly onto the drain tailpiece.
- Attach the drain trap to the tailpiece, ensuring a secure connection.
- Double-check all connections and tighten any loose fittings if necessary.
Now that you have successfully connected the drain pipe to the sink, your bathroom sink installation is almost complete. Before testing the water flow, ensure all connections are tight and leak-free. Monitor the sink for any signs of leaks or drips, and make any necessary adjustments or tightening to prevent further issues.
By following these simple steps, you can confidently connect the bathroom sink fixtures to the Pex pipe without any hassle. A properly installed and connected bathroom sink ensures efficient water supply and drainage, allowing you to enjoy a fully functional and leak-free sink for years to come.
Insulating The Pex Pipe
Insulating the Pex pipe is a crucial step in ensuring the proper functioning and longevity of your bathroom sink’s plumbing system. By insulating the Pex pipe, you provide an extra layer of protection against heat loss and freezing temperatures, reducing the risk of pipe damage and leaks. Additionally, insulation helps to minimize condensation and dampness, preventing mold and mildew growth.
Understanding the Importance of Insulating Pex Pipe
Insulating Pex pipe offers several benefits, making it an essential part of the installation process. Here are some key reasons why insulating Pex pipe is important:
- Preventing heat loss: Insulation acts as a barrier, minimizing the loss of heat from the hot water flowing through the Pex pipe. This helps to maintain the desired temperature of the water, ensuring maximum efficiency and reducing energy costs.
- Protecting against freezing: Insulation provides an added layer of protection against freezing temperatures, reducing the risk of the Pex pipe bursting or developing leaks. This is especially important in colder climates where freezing pipes can cause significant damage.
- Minimizing condensation: Insulating the Pex pipe helps to prevent condensation from forming on the pipe’s surface. By reducing moisture buildup, insulation helps to prevent mold and mildew growth, promoting a healthier indoor environment.
Choosing the Appropriate Insulation Material
When it comes to insulating Pex pipe, choosing the right insulation material is crucial for optimal performance. Here are a few factors to consider when selecting the appropriate insulation material:
- R-Value: The R-value indicates the insulation material’s effectiveness in resisting heat flow. A higher R-value means better insulation. Consider the R-value of the insulation material to ensure it meets the desired thermal requirements for your plumbing system.
- Moisture resistance: Since Pex pipes are used for water supply, it’s important to choose insulation that is resistant to moisture. This helps to prevent water absorption that can lead to mold and mildew growth.
- Installation ease: Consider the ease of installation when selecting insulation material. Some materials may require additional adhesives or tapes, while others may be pre-slit or self-sealing, simplifying the installation process.
Installing Insulation to Protect the Pex Pipe
Once you have chosen the appropriate insulation material, it’s time to install it to protect the Pex pipe effectively. Here’s a step-by-step guide on how to install insulation for your Pex pipe:
- Measure and cut: Measure the length of the Pex pipe that needs insulation and cut the insulation material to fit the same length.
- Open the insulation: If the insulation material is pre-slit, simply open it up. If not, cut a lengthwise slit in the insulation material to create an opening for wrapping around the Pex pipe.
- Wrap the Pex pipe: Take the cut insulation material and wrap it around the Pex pipe, ensuring a snug fit. For longer sections, you may need to use additional pieces of insulation and tape them together.
- Secure the insulation: Use insulation tape or zip ties to secure the insulation in place. Make sure it is tightly sealed without any gaps.
- Test for proper installation: Run water through the Pex pipe to ensure there are no leaks or loose insulation. Make any necessary adjustments or repairs if needed.
By following these steps and insulating the Pex pipe correctly, you can provide the necessary protection and insulation for your bathroom sink’s plumbing system. This not only helps to prevent potential issues but also ensures efficient and reliable water flow for years to come.
Finalizing The Installation
After successfully installing the Pex pipe to your bathroom sink, it’s essential to ensure everything is functioning properly and address any potential issues. This final step will give you peace of mind and guarantee a smooth and reliable water flow for your daily needs. In this section, we’ll go over two crucial aspects of finalizing the installation: checking for proper functionality and water flow, and cleaning up the work area.
Checking for Proper Functionality and Water Flow
With the Pex pipe in place, the next step is to check if everything is working as expected. Turn on the water supply and observe the water flow coming out of the faucet. Make sure there are no leaks or unusual noises. You can also run water through the sink for a few minutes to ensure that the pressure remains consistent. If you notice any issues during this test, it’s important to address them right away to prevent further complications.
Cleaning up the Work Area
Now that the installation is complete, it’s time to tidy up the work area. Remove any debris, tools, or leftover materials from the sink area. Wipe down the sink, countertops, and surrounding surfaces to remove any dust or dirt accumulated during the installation process. This not only enhances the overall appearance of your bathroom but also ensures a clean and hygienic environment.
Additionally, it’s a good practice to inspect the area for any signs of damage or potential issues that might have been overlooked. Check for loose fittings, cracks, or excessive moisture. Taking care of these small details can help prevent future complications and maintain the longevity of your Pex pipe installation.
Troubleshooting any Issues
If you encounter any problems during the functionality check or notice any issues after installing the Pex pipe, it’s crucial to troubleshoot them promptly. Refer to the manufacturer’s instructions or seek professional assistance if needed. Remember that addressing issues early on can save you time and money in the long run.
Overall, finalizing the installation of your Pex pipe to the bathroom sink involves a thorough check for functionality, cleaning up the work area, and troubleshooting any potential issues. By following these steps, you’ll ensure a reliable and efficient water flow, creating a more comfortable and functional bathroom environment.
Frequently Asked Questions Of
How Do You Run A Pex Pipe To A Bathroom Sink?
To run a PEX pipe to a bathroom sink, first turn off the water supply. Next, use a PEX cutter to cut the PEX pipe to the desired length. Attach a PEX fitting to the pipe, then connect the other end of the fitting to the sink’s water supply line.
Finally, turn on the water supply and check for any leaks.
Can You Connect Pex Directly To Faucet?
Yes, you can connect PEX directly to a faucet. PEX (cross-linked polyethylene) piping is compatible with most standard faucets and can be connected using push-fit or compression fittings. It is a reliable and flexible plumbing option for many applications.
Can You Use Pex On A Sink?
Yes, PEX can be used on a sink. It is a flexible and durable plastic pipe that is commonly used for plumbing applications, including sink installations. It offers numerous advantages such as resistance to corrosion and easy installation. PEX can be a reliable choice for your sink plumbing needs.
How Do You Attach Pex To Faucet?
To attach PEX to a faucet, follow these steps. First, shut off the water supply. Second, cut the PEX tubing to the desired length. Third, slide a PEX fitting onto the tubing. Fourth, crimp the fitting using a crimping tool.
Finally, connect the fitting to the faucet and turn on the water supply.
Conclusion
To sum it up, installing Pex pipe to your bathroom sink is a straightforward process that can be done with a few simple steps. By choosing Pex, you’re opting for a versatile and durable option that is not only easy to install but also resistant to common plumbing issues like freezing and corrosion.
With the right tools and materials, you can confidently tackle this DIY project and enjoy a reliable and efficient plumbing system in your bathroom. So, go ahead and give it a try!