
To install Pex fittings, start by cutting the Pex pipe to the desired length and deburring the ends with a utility knife. Next, insert the fitting into the pipe until it reaches the shoulder of the fitting, then use a crimp ring and a crimp tool to secure the connection.
What Are Pex Fittings And Why Are They Essential?
Definition and Overview of Pex Fittings
Pex fittings, also known as PEX crimp fittings, are essential components used in plumbing systems that utilize Pex pipes. PEX, which stands for cross-linked polyethylene, is a flexible, durable, and cost-effective material that has revolutionized the plumbing industry. PEX fittings are specifically designed to connect Pex pipes, allowing for a secure and leak-free connection.
Importance of Using Pex Fittings in Plumbing Systems
Using Pex fittings in plumbing systems is of utmost importance due to various reasons:
1. Secure and Leak-Free Connections
Pex fittings are designed to provide a tight and secure connection between Pex pipes, ensuring minimal chances of leaks. The crimping method used to attach Pex fittings creates a strong bond that can withstand high pressure and temperature variations.
2. Easy Installation
One of the significant advantages of Pex fittings is their ease of installation. These fittings can be easily connected to Pex pipes using a crimping tool, eliminating the need for complex and time-consuming soldering or welding techniques. This makes Pex fittings an ideal choice for DIY enthusiasts and professional plumbers alike.
3. Versatility
Pex fittings come in various shapes and sizes, allowing for versatile applications in different plumbing systems. Whether you are working on residential or commercial projects, Pex fittings can accommodate your specific needs. They are compatible with PEX-A, PEX-B, and PEX-C pipes, offering flexibility in design and installation.
4. Corrosion and Scaling Resistance
Unlike metal fittings that are prone to corrosion and scaling over time, Pex fittings are made from non-corrosive materials such as brass or poly-alloy. This makes them highly resistant to the damaging effects of corrosive chemicals present in water, extending the lifespan of your plumbing system.
5. Cost-Effectiveness
Pex fittings are not only affordable but also cost-effective in the long run. Their ease of installation reduces labor costs, and their durability ensures a long-lasting plumbing system that requires minimal maintenance. Additionally, the versatility of Pex fittings allows for efficient use of materials, avoiding unnecessary waste.
Overall, Pex fittings play a crucial role in the success and reliability of Pex plumbing systems. Their secure connections, easy installation, versatility, resistance to corrosion, and cost-effectiveness make them an essential component for every plumbing professional and DIY enthusiast alike.
Different Types Of Pex Fittings
When it comes to installing Pex fittings in your plumbing system, there are several different types to choose from. Each type is designed to provide a secure and leak-free connection, but they differ in terms of installation methods and compatibility. In this section, we will discuss the three main types of Pex fittings: Crimp (Cinch) fittings, Push-fit (SharkBite) fittings, and Expansion fittings.
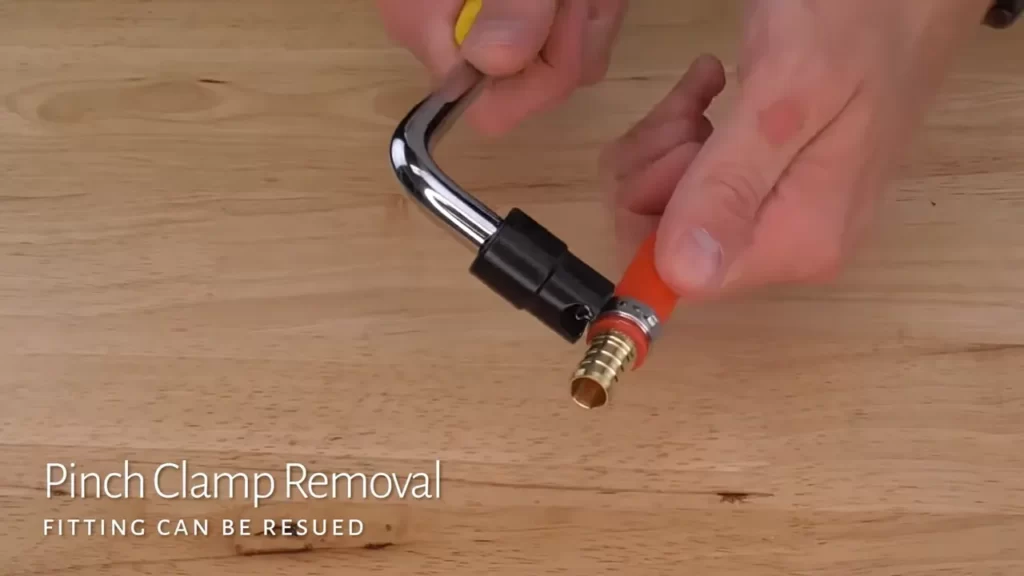
Crimp (Cinch) fittings
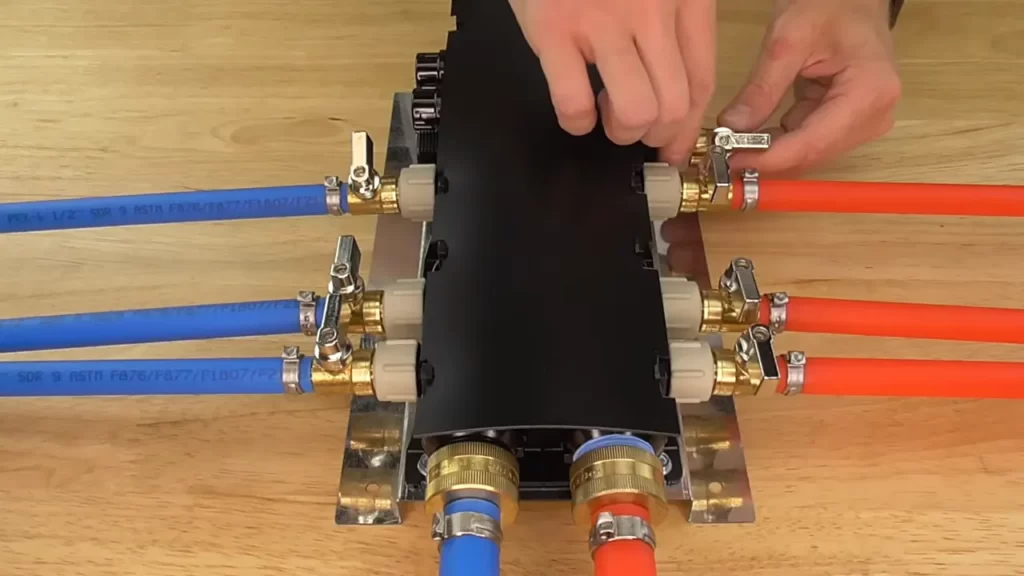
Crimp fittings, also known as cinch fittings, are among the most common and traditional types of Pex fittings. They consist of a brass fitting and a copper crimp ring. The fitting is inserted into the Pex pipe, and then the crimp ring is placed over the pipe and crimped securely using a crimping tool. This compression creates a tight seal, ensuring a reliable connection. Crimp fittings are compatible with both Pex-A and Pex-B piping systems, making them a versatile choice for various applications.
Push-fit (SharkBite) fittings
Push-fit fittings, commonly referred to as SharkBite fittings, are popular for their ease of installation. These fittings feature a push-to-connect design, which allows you to simply push the Pex pipe into the fitting until it clicks into place. The fitting is equipped with stainless steel teeth that grip onto the pipe and create a secure connection. This eliminates the need for special tools or crimp rings, making them a convenient option for DIY enthusiasts. Push-fit fittings are compatible with Pex-A, Pex-B, and Pex-C piping systems, providing flexibility for your plumbing project.
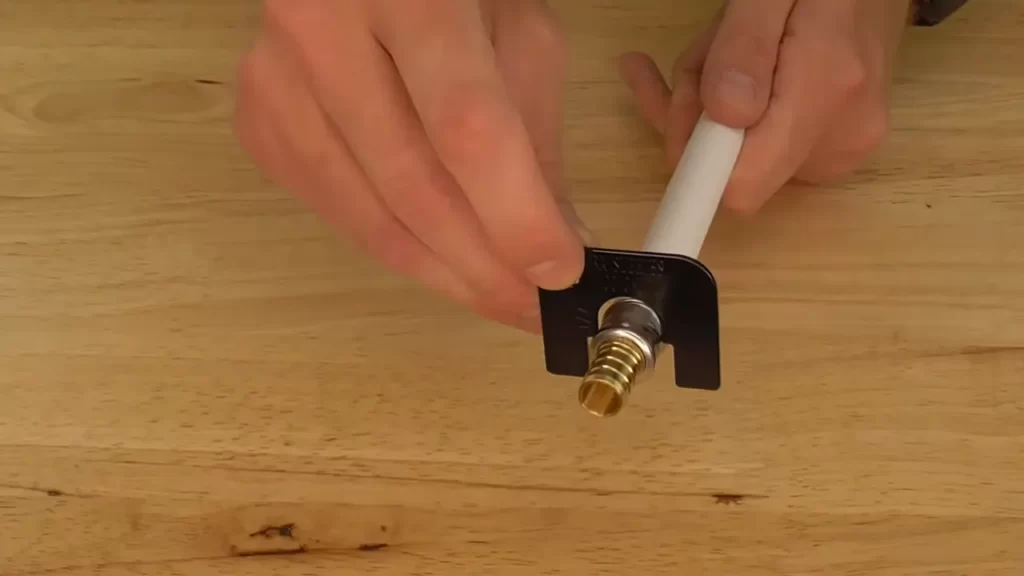
Expansion fittings
Expansion fittings are a unique type of Pex fitting that utilizes the expansion and contraction properties of Pex pipe. These fittings are specifically designed for Pex-A piping systems. During installation, the end of the Pex pipe is expanded using an expansion tool. The fitting is then inserted into the expanded end of the pipe, and as the pipe contracts back to its original size, it creates a tight seal around the fitting. Expansion fittings ensure a secure and leak-free connection, especially in areas with varying temperatures where expansion and contraction are more likely to occur.
In conclusion, when it comes to installing Pex fittings, you have a few different options to choose from. Crimp (Cinch) fittings, Push-fit (SharkBite) fittings, and Expansion fittings each offer their unique advantages in terms of installation ease and compatibility. Whether you prefer the traditional crimp method, the convenience of push-fit fittings, or the reliability of expansion fittings, there is a Pex fitting to suit your needs. Consider the specific requirements of your plumbing project and choose the fitting that best matches your needs and preferences.
Tools And Materials Required For Pex Fittings Installation
Installing Pex fittings is a relatively straightforward process, and having the right tools and materials is essential for a successful installation. In this section, we will discuss the various tools and materials you will need to complete the job. Whether you are a DIY enthusiast or a professional plumber, having these tools at your disposal will make your Pex fittings installation project a breeze.
Pex Tubing
The first item on your list is Pex tubing. Pex, short for cross-linked polyethylene, is a flexible and durable material that is commonly used for water supply lines. It is available in different sizes, so make sure to choose the appropriate size for your project. Pex tubing is resistant to corrosion and scale buildup, making it an ideal choice for long-lasting plumbing systems.
Pex Cutter
A Pex cutter is an essential tool for accurately cutting Pex tubing to the desired length. This specialized cutter ensures a clean and precise cut, preventing fraying or damage to the tubing. It features a sharp blade that effortlessly slices through the Pex tubing, saving you time and effort in the installation process. Investing in a quality Pex cutter is crucial for achieving professional-looking results.
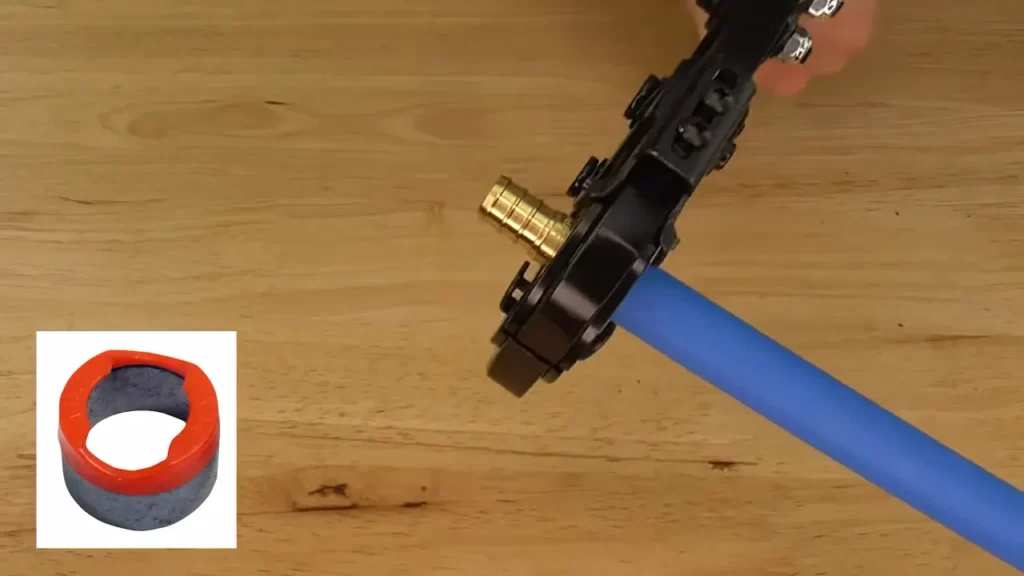
Crimp (Cinch) Tool
The crimp tool, also known as the cinch tool, is necessary for securing Pex fittings onto the Pex tubing. This tool creates a secure connection by compressing a copper ring around the fitting and the tubing. The crimp tool ensures a watertight and leak-free joint, giving you peace of mind that your plumbing system will function flawlessly for years to come.
Expansion Tool (if using Expansion Fittings)
If you opt for expansion fittings instead of crimp fittings, you will need an expansion tool. Expansion fittings utilize the expansion properties of Pex tubing to create a tight connection. This specialized tool expands the Pex tubing, allowing you to insert the fitting. As the tubing contracts, it forms a reliable seal around the fitting. Using an expansion tool enables you to create a secure and reliable joint without the need for additional materials.
Deburring Tool
A deburring tool is used to remove any sharp edges or burrs from the cut ends of the Pex tubing. This tool ensures a smooth and clean surface, reducing the risk of leaks or damage to the O-ring inside the Pex fitting. Be sure to deburr the ends of the tubing before making any connections to ensure optimal performance and longevity of your plumbing system.
Pipe Support
Proper support for your Pex tubing is crucial to prevent sagging or stressing of the pipes. Pipe supports, such as hangers and clamps, provide stability and keep the tubing in place. They help distribute the weight of the tubing and prevent it from moving or vibrating, enhancing the overall performance and durability of your plumbing system.
By having these tools and materials at your disposal, you will be well-equipped to install Pex fittings with ease and efficiency. Before you begin your installation, ensure that all the necessary tools and materials are readily available. This will save you time and frustration during the process and ensure a successful and reliable plumbing system.
Preparing For Pex Fittings Installation
Before installing Pex fittings, it is crucial to prepare your plumbing system for a smooth and successful installation process. This involves a few essential steps, including shutting off the water supply, inspecting and cleaning the plumbing system, measuring and cutting Pex tubing, and deburring the cut ends. Let’s delve into each of these steps in detail.
Shutting off water supply
The first step in preparing for Pex fittings installation is to shut off the water supply. This is necessary to prevent any water flow while you work on your plumbing system. An unchecked water supply can cause leaks and disrupt the installation process. Locate the main shut-off valve, typically found near the water meter or where the main water line enters your property. Turn the valve in a clockwise direction until it is completely closed. This ensures that no water is flowing through the pipes during the installation.
Inspecting and cleaning the plumbing system
Prior to installing Pex fittings, it is important to inspect and clean your plumbing system. Inspect the existing pipes for any signs of damage, such as cracks, corrosion, or leaks. If you come across any issues, it is recommended to address them before proceeding. Once you have inspected the pipes, clean them thoroughly to remove any dirt, debris, or residue that may hinder the installation process. Use a mild cleaning solution and a brush to ensure the pipes are free from any contaminants.
Measuring and cutting Pex tubing
Accurate measurement and cutting of Pex tubing is crucial for a successful installation. Measure the required length of tubing using a tape measure, ensuring precise measurements. You can use a Pex cutter or a fine-tooth saw to cut the tubing to the desired length. Be sure to make a straight cut to achieve a secure and leak-free connection. Remember to leave enough allowance for expansion and contraction of the Pex tubing, allowing it to accommodate temperature changes without causing any issues.
Deburring the cut ends
After cutting the Pex tubing, it is important to deburr the cut ends. Deburring removes any rough or sharp edges, ensuring a smooth and secure fit with the Pex fittings. You can use a deburring tool specifically designed for Pex tubing or a utility knife to remove any burrs. Gently rotate the deburring tool or knife around the cut end to smooth out any imperfections. This process promotes better connectivity and prevents any potential leaks.
By following these steps to prepare for Pex fittings installation, you can ensure a successful and efficient process that minimizes the chances of leaks or other complications. Now that you are ready to proceed, you can move on to the installation of Pex fittings according to your specific plumbing requirements.
Installing Crimp (Cinch) Pex Fittings
When it comes to installing Pex fittings, one common method is using crimp (cinch) fittings. These fittings are reliable and easy to install, making them a popular choice for both professionals and DIY enthusiasts.
Heating the Pex tubing
The first step in installing crimp Pex fittings is heating the Pex tubing. This can be done using a heat gun or a propane torch. It’s important to heat the tubing evenly, as this will make it more pliable and easier to work with.
Inserting the fitting into the tubing
Once the tubing is heated, it’s time to insert the fitting. The fitting should be pushed into the tubing firmly until it reaches the depth mark on the fitting. This ensures a secure and leak-free connection.
Positioning the crimp ring
After inserting the fitting, the next step is to position the crimp ring. The crimp ring should be placed over the tubing, just above the fitting. Make sure it is positioned correctly to ensure a proper seal.
Using the crimp tool to secure the fitting
Finally, the crimp tool is used to secure the fitting. The crimp tool should be placed over the crimp ring and squeezed firmly to create a tight connection. Repeat this step for each fitting to ensure all connections are secure.
By following these steps, you can easily install crimp (cinch) Pex fittings. Remember to take your time and follow the manufacturer’s instructions for the specific fittings you are using. With proper installation, you can enjoy a reliable and leak-free Pex system in your plumbing or heating applications.
Installing Push-Fit (Sharkbite) Pex Fittings
Installing push-fit (SharkBite) PEX fittings is a straightforward process that can be completed without the need for specialized tools or extensive plumbing knowledge. These fittings offer a secure and leak-free connection, making them a popular choice among DIY enthusiasts and professionals alike. To help you with the installation process, we have broken it down into three simple steps: Measuring and marking the insertion depth, Inserting the PEX tubing into the fitting, and Ensuring a secure and leak-free connection.
Measuring and marking the insertion depth
Before you begin installing your push-fit PEX fittings, it’s essential to ensure that you measure and mark the insertion depth accurately. This step is crucial as it determines the proper seating of the fitting onto the PEX tubing. To measure the insertion depth, follow these simple steps:
- Using a measuring tape or ruler, measure the required insertion depth on the PEX tubing. This depth can vary depending on the size and type of fitting you are using.
- Once you have determined the insertion depth, mark it on the PEX tubing using a permanent marker or similar tool. This mark will serve as a guide during the installation process.
Inserting the PEX tubing into the fitting
With the insertion depth marked on the PEX tubing, it’s time to insert it into the push-fit fitting. Follow these steps to ensure a proper insertion:
- Ensure that the end of the PEX tubing is cut cleanly and squarely using a PEX cutter or a suitable cutting tool.
- Hold the fitting firmly in one hand and insert the marked end of the PEX tubing into the fitting until it reaches the insertion depth mark.
- Apply firm and steady pressure while pushing the tubing into the fitting, ensuring that it goes all the way in until it is fully seated.
Ensuring a secure and leak-free connection
Once the PEX tubing is inserted into the fitting, it’s essential to ensure a secure and leak-free connection. Follow these steps to achieve a reliable connection:
- Inspect the connection to ensure that the PEX tubing is fully seated and the fitting is properly aligned.
- For a push-fit fitting, there is no need for additional tools or sealants. The internal components of the fitting create a tight seal that prevents leaks.
- Give the tube a gentle tug to confirm that it is securely held in place by the fitting.
By following these simple steps, you can successfully install push-fit (SharkBite) PEX fittings, ensuring a secure and leak-free connection. These fittings are a great choice for both DIY projects and professional plumbing installations, providing a hassle-free and reliable solution for your plumbing needs.
Installing Expansion Pex Fittings
When it comes to installing Pex fittings, there are different methods to choose from. One popular method is utilizing expansion Pex fittings, which provide a secure and reliable connection. This method involves expanding the Pex tubing using an expansion tool, inserting the fitting into the expanded tubing, and allowing the tubing to contract for a tight seal. In this section, we will walk you through the steps of installing expansion Pex fittings, ensuring a hassle-free installation process.
Expanding the Pex tubing using the expansion tool
Before installing the expansion Pex fittings, you will need to start by expanding the Pex tubing. This is done using a specially designed expansion tool. Here’s how you can do it:
- Measure and cut the Pex tubing to the desired length.
- Place the expansion ring onto the end of the Pex tubing, making sure it fits securely.
- Insert the expansion tool into the Pex tubing until the expansion ring is fully engaged.
- Gently squeeze the handles of the expansion tool to expand the Pex tubing and create a larger diameter.
- Keep the expansion tool engaged for a few seconds to ensure the proper expansion of the tubing.
- Release the handles of the expansion tool, allowing the Pex tubing to contract slightly.
Inserting the fitting into the expanded tubing
Once the Pex tubing is properly expanded, it’s time to insert the fitting into the tubing. Follow these steps:
- Apply a thin layer of lubricant to the outside of the fitting, ensuring smooth insertion.
- Align the fitting with the expanded end of the Pex tubing.
- Push the fitting into the tubing, making sure it goes in fully and securely.
- Give it a slight twist to ensure a proper connection.
Allowing the tubing to contract for a tight seal
After inserting the fitting, it’s important to allow the Pex tubing to contract for a tight seal. Follow these guidelines:
- Once the fitting is inserted, let the Pex tubing contract naturally without applying any force.
- Allow the tubing to sit for a few minutes, ensuring it fully contracts around the fitting.
- Inspect the connection to make sure it is secure and leak-free.
By following the above steps, you can successfully install expansion Pex fittings. It’s crucial to take your time and ensure each step is performed correctly for a reliable and watertight connection.
Testing And Inspecting Pex Fittings Installation
Once you have successfully installed your Pex fittings, it is important to thoroughly test and inspect the installation before considering the job complete. Proper testing and inspection ensure that your fittings are secure, that there are no leaks, and that your water supply is functioning as it should. In this section, we will cover the essential steps for testing and inspecting your Pex fittings installation, giving you the peace of mind that everything is in working order.
Turning on the water supply
Before you begin testing, make sure the water supply to the Pex fittings is turned off. This will prevent any unnecessary water wastage or sudden bursts of water when you start the testing process. Once you have double-checked that the water supply is off, slowly turn it on and allow the water to flow through the Pex fittings.
Checking for leaks
As the water flows through the Pex fittings, perform a visual inspection to check for any leaks. Look for any water seepage, dampness, or dripping around the fittings and connections. Additionally, run your hands along the pipes to feel for any moisture or water leakage. If you notice any leaks, tighten the fittings using a wrench or consider replacing the faulty fittings to ensure a watertight seal.
If you are unable to detect any leaks visually or by touch, you can use a pressure gauge to test the system for leaks. Attach the pressure gauge to a faucet or a hose bib connected to the Pex system, then slowly increase the pressure. Observe the pressure gauge to see if there are any sudden drops, indicating a leak. Pay close attention to areas where the Pex fittings are connected to other plumbing fixtures or appliances, as these are common areas for leaks to occur.
Inspecting the fittings for proper installation
Once you have confirmed there are no leaks, it is crucial to inspect the fittings for proper installation. Start by visually examining each fitting, ensuring that they are securely fastened and aligned correctly. Look for any signs of misalignment, such as fittings that are crooked or not fully inserted into the pipes.
In addition to visual inspection, test the fittings by gently tugging on them. They should feel firm and not easily move or rotate. Loose fittings can lead to leaks or even complete disconnection, so it is crucial to secure them properly. If you encounter any loose fittings, use a wrench to tighten them until they are firmly in place.
In conclusion, testing and inspecting your Pex fittings installation is a crucial step to ensure proper functionality and prevent potential leaks. By carefully turning on the water supply, checking for leaks, and inspecting the fittings for proper installation, you can have confidence in the reliability of your Pex plumbing system. Take the time to perform these tests and inspections before considering your installation complete, as they are essential for the long-term performance of your Pex fittings.
Troubleshooting And Tips For Pex Fittings Installation
Proper installation of Pex fittings is crucial for the functionality and longevity of your plumbing system. However, like any installation process, it can sometimes encounter issues. In this section, we will discuss some common problems that may arise during Pex fittings installation and provide solutions to troubleshoot these issues. Additionally, we will share some valuable tips to ensure a successful and hassle-free installation. Read on to master the art of Pex fittings installation!
Common issues and their solutions
When installing Pex fittings, it is essential to be aware of potential challenges that may arise. Here are some common issues you may encounter and solutions to overcome them:
- Leaking connections: Leaks can occur when the fittings are not properly aligned or when there is insufficient crimping pressure. To fix this problem, make sure the Pex tubing is cut straight and clean, and ensure the fittings are fully inserted into the tubing. Apply adequate crimping pressure using a high-quality crimping tool to create a secure connection.
- Deformation during installation: Pex fittings can become deformed or twisted during installation, especially if excessive force is applied. To prevent this, ensure that you use an appropriate support system when bending the tubing. A sturdy support will help maintain the shape and integrity of the fittings.
- Cracked fittings: Pex fittings can crack if excessive force is applied during installation. Avoid overtightening the connections and use the correct tools, such as a Pex-specific crimping tool or clamp ring tool, to ensure a proper and secure fit. If you notice any cracks, replace the fitting immediately to prevent future leaks.
Additional tips for a successful installation
In addition to troubleshooting common issues, here are some valuable tips to ensure a successful installation of Pex fittings:
- Inspect the fittings: Before installation, thoroughly inspect all Pex fittings for any signs of damage or defects. This includes checking for cracks, dents, or wear and tear. If you notice any issues, replace the fitting to avoid complications down the line.
- Prepare the tubing: Properly prepare the Pex tubing by cutting it cleanly and straight. Use a Pex-specific cutter or a sharp utility knife for precise cuts. It is crucial to ensure the tubing ends are smooth and burr-free to achieve a secure and leak-free connection.
- Use compatible tools: When working with Pex fittings, it is essential to use tools specifically designed for Pex installation. These include crimping tools, clamp ring tools, and Pex cutters. Using the right tools will ensure proper installation and reduce the risk of damage to the fittings.
- Follow manufacturer guidelines: Always refer to the manufacturer’s instructions and guidelines for the specific Pex fittings you are using. Each manufacturer may have slight variations in installation techniques, which must be followed to achieve optimal results and maintain warranties.
- Pressure test: After installation, perform a pressure test to check for any leaks. This involves pressurizing the system with water and monitoring for any drops in pressure. Any leaks detected should be promptly addressed to prevent further damage or water wastage.
By troubleshooting common issues and following these additional tips, you can ensure a successful installation of Pex fittings. Remember, proper installation is key to a reliable and efficient plumbing system!
Safety Precautions And Best Practices For Pex Fittings Installation
When it comes to installing Pex fittings, ensuring safety is of utmost importance. This section will outline the necessary safety precautions and best practices that should be followed during the installation process. By adhering to these guidelines, you can minimize the risk of accidents and ensure a successful and secure installation.
Wearing protective gear
Before starting any plumbing project, it’s crucial to prioritize your safety by wearing the appropriate protective gear. This includes:
- Safety goggles: Protect your eyes from any debris or potential splashes.
- Gloves: Ensure your hands are protected from sharp edges, chemicals, or possible injuries while handling tools and materials.
- Dust mask: Prevent inhalation of dust or particles that may be present during the installation process.
- Appropriate footwear: Wear sturdy, slip-resistant shoes to avoid any slips or falls.
Proper handling and storage of tools and materials
Proper handling and storage of tools and materials not only ensure your safety but also maintain the quality and integrity of the products. Here are some best practices to keep in mind:
- Organize: Keep your tools and materials neatly organized to avoid any accidents or confusion.
- Secure storage: Store sharp tools in a designated storage area, out of reach from children and pets.
- Inspect: Before using any tool, ensure it is in good condition and free from any damage that could compromise its functionality.
- Use tools as intended: Follow the manufacturer’s instructions and use tools only for their intended purpose to minimize the risk of accidents.
Following manufacturer’s instructions
Every Pex fitting product comes with specific instructions from the manufacturer. It is essential to carefully read and understand these instructions before starting the installation process. Here are some key points to consider:
- Compatibility: Ensure the Pex fittings you’ve purchased are compatible with the type of Pex tubing you’re using.
- Installation techniques: Follow the manufacturer’s recommended techniques for joining, securing, and sealing Pex fittings to ensure leak-free connections.
- Recommended tools: Use the tools recommended by the manufacturer to achieve precise and secure fittings.
- Temperature and pressure limitations: Pay attention to the temperature and pressure limitations specified by the manufacturer, as exceeding these limits can lead to system failures.
Adhering to local building codes and regulations
When installing Pex fittings, it is crucial to adhere to local building codes and regulations. These regulations are put in place to ensure the safety and functionality of the plumbing system. Failure to comply with these codes may result in serious consequences. Here’s what you need to do:
- Research local codes: Research and familiarize yourself with the specific building codes and regulations applicable to your area.
- Consult professionals: If you’re uncertain about any aspect of the installation, consult with a qualified plumber or building inspector to ensure compliance.
- Permits: If required, obtain the necessary permits before starting the installation to ensure legal compliance.
In conclusion, adhering to safety precautions and best practices while installing Pex fittings is vital for a successful and secure plumbing system. By wearing protective gear, handling and storing tools and materials correctly, following manufacturer’s instructions, and adhering to local building codes and regulations, you can ensure a safe and reliable installation.
Frequently Asked Questions
What Is The Best Way To Connect Pex Fittings?
The best way to connect PEX fittings is by using a PEX crimp or clamp method. This involves using a crimp ring or clamp ring to secure the fitting to the PEX tubing, ensuring a secure and leak-free connection.
How Do You Install Pex Barb Fittings?
To install PEX barb fittings, follow these steps: 1. Cut the PEX pipe to the desired length using a PEX pipe cutter. 2. Slide a PEX sleeve onto the end of the pipe. 3. Insert the barbed end of the fitting into the PEX pipe, ensuring a secure fit.
4. Use crimp rings and a crimping tool to secure the fitting onto the pipe. 5. To check for leaks, turn on the water supply and inspect for any water seepage.
How Do You Install A Sharkbite Fitting On A Pex Pipe?
To install a Sharkbite fitting on a PEX pipe, follow these steps: 1) Cut the pipe squarely using a tubing cutter. 2) Ensure the pipe end is smooth and clean. 3) Push the Sharkbite fitting onto the pipe until it reaches the depth mark.
4) Make sure it’s fully inserted by checking the disconnect clip doesn’t release. 5) Test for leaks.
How Do You Connect Pex To Faucet Line?
To connect PEX to a faucet line, first, turn off the water supply. Then, use a PEX crimp ring or clamp to secure a brass or plastic adapter onto the PEX tubing. Connect the adapter to the faucet line using a threaded or compression fitting.
Finally, turn on the water supply and check for leaks.
Conclusion
Installing Pex fittings can be a simple and cost-effective solution for plumbing needs. With the right tools, proper preparation, and following the step-by-step instructions provided in this blog post, you can successfully complete this task. Remember to prioritize safety precautions and double-check your work for any leaks or issues.
By mastering the installation of Pex fittings, you can confidently tackle various plumbing projects in your home or business. Start expanding your skills and enjoy the benefits of a reliable, durable plumbing system.