To install PEX fittings, start by cutting the PEX tubing to the desired length and ensure the ends are clean and straight. Insert the tubing into the fitting until it reaches the shoulder and secure it with a crimp ring or clamp.
Installing PEX fittings is a straightforward process that requires careful preparation and attention to detail. PEX, or cross-linked polyethylene, is a flexible and durable material that is widely used in plumbing systems for its resistance to corrosion, temperature, and pressure.
Whether you’re a DIY enthusiast or a professional plumber, understanding how to properly install PEX fittings is essential for maintaining a reliable and leak-free plumbing system. We will walk you through the steps involved in installing PEX fittings, highlighting the key points to ensure a successful installation.
Understanding The Basics Of Pex A Fittings
When it comes to plumbing installations, it’s essential to choose the right fittings that provide durability, flexibility, and ease of installation. One such fitting that has gained popularity in recent years is Pex a fittings. Pex a fittings, also known as expansion fittings, are made from a high-density polyethylene material that offers numerous benefits compared to other fitting types.
Introduction to Pex a Fittings
Pex a fittings are designed with the unique ability to expand and contract, making them ideal for use in plumbing systems. These fittings are manufactured using a cross-linked polyethylene (PEX) process, which enhances their strength and resistance to high temperatures and pressure. Pex a fittings are available in various shapes and sizes, including elbows, tees, couplings, and valves, making them suitable for a wide range of plumbing applications.
Benefits of Using Pex a Fittings
Pex a fittings offer several advantages over traditional plumbing fittings. Here are some key benefits:
- Flexibility: Pex a fittings are highly flexible, allowing for easy installation even in tight spaces. Their flexibility also helps prevent leaks, as there are fewer connections required.
- Durability: The cross-linked polyethylene material used in Pex a fittings provides exceptional durability. They are resistant to corrosion, scaling, and chlorine, ensuring a longer lifespan compared to other fitting types.
- Quick Installation: Pex a fittings utilize the expansion method, which makes installation quick and straightforward. The expansion fitting is inserted into the PEX pipe and then allowed to contract, creating a secure and watertight connection.
- High Performance: Pex a fittings have excellent flow rates, allowing for efficient water distribution throughout the plumbing system. They also have low thermal conductivity, reducing heat loss and improving energy efficiency.
- Cost-Effective: Pex a fittings are cost-effective in both material and labor. Their ease of installation and durability help save installation time and eliminates the need for additional tools and materials.
Applications of Pex a Fittings
Pex a fittings are suitable for various plumbing applications, including:
- Residential Plumbing: Pex a fittings are commonly used in residential plumbing systems for water supply lines, radiant floor heating, and hydronic heating systems.
- Commercial Plumbing: Pex a fittings are also widely used in commercial buildings, such as offices, hospitals, hotels, and schools, for water distribution and heating systems.
- Industrial Plumbing: In industrial settings, Pex a fittings find application in chemical processing plants, manufacturing facilities, and agricultural operations, where the need for reliable and durable plumbing systems is critical.
In conclusion, Pex a fittings offer numerous advantages, including flexibility, durability, quick installation, high performance, and cost-effectiveness. They are suitable for a wide range of plumbing applications, making them a popular choice among plumbing professionals. Consider using Pex a fittings in your next plumbing project for long-lasting, reliable performance.
Essential Tools For Installing Pex A Fittings
When it comes to installing Pex a fittings, having the right tools for the job is essential. Not only will it make the process smoother and more efficient, but it will also ensure that the fittings are correctly installed for optimal performance and durability. In this article, we will discuss the essential tools you need to have in your toolbox for installing Pex a fittings.
Pipe Cutter
A pipe cutter is an indispensable tool when working with Pex a fittings. It allows you to accurately cut the Pex pipe to the desired length, ensuring a clean and smooth cut without any burrs or jagged edges. This is essential for creating tight and leak-free connections. A pipe cutter is typically designed to work with various pipe sizes, making it versatile and suitable for different projects. To use a pipe cutter, simply place it around the pipe, tighten it, and rotate it around the pipe until it cuts through.
Crimp Tool
A crimp tool is a must-have tool for installing Pex a fittings. It allows you to create secure connections between the Pex pipe and fittings by compressing stainless-steel rings, also known as crimp rings or cinch clamps, around the connection. This creates a tight seal that prevents leaks and ensures the longevity of your Pex plumbing system. A crimp tool is available in different sizes to accommodate different Pex pipe sizes and crimp ring specifications. To use a crimp tool, position the crimp ring over the fitting and pipe, insert the jaws of the crimp tool, and squeeze the handles to compress the crimp ring.
Deburring Tool
When working with Pex a fittings, it’s crucial to deburr the inside and outside edges of the Pex pipe after cutting it. This ensures that there are no rough edges or burrs that could hinder the proper insertion of the fittings or cause potential leaks. A deburring tool is specifically designed to remove these sharp edges, providing a smooth and clean surface for the fittings to connect to. To use a deburring tool, simply insert it into the cut end of the Pex pipe and rotate it in a circular motion to remove any burrs or rough edges.
Measuring Tape
A measuring tape is an indispensable tool for any plumbing project, including installing Pex a fittings. It allows you to accurately measure the length of the Pex pipe needed for your connections, ensuring precise cuts and efficient use of materials. Whether you’re working on a small residential project or a larger commercial one, having a measuring tape on hand will save you time and prevent any unnecessary waste. Simply extend the measuring tape along the pipe, and mark the desired length before cutting.
Required Materials For Installing Pex A Fittings
Before you start installing Pex a fittings, it is important to gather all the necessary materials. Having these materials on hand will ensure a smooth and efficient installation process. Below is a list of the required materials for installing Pex a fittings:
Pex a Tubing
The first material you will need is Pex a tubing, which is a flexible and durable type of plastic tubing commonly used for plumbing systems. Pex a tubing is known for its resistance to extreme temperatures and resistance to corrosion. It is available in different sizes, so make sure to choose the appropriate size for your project.
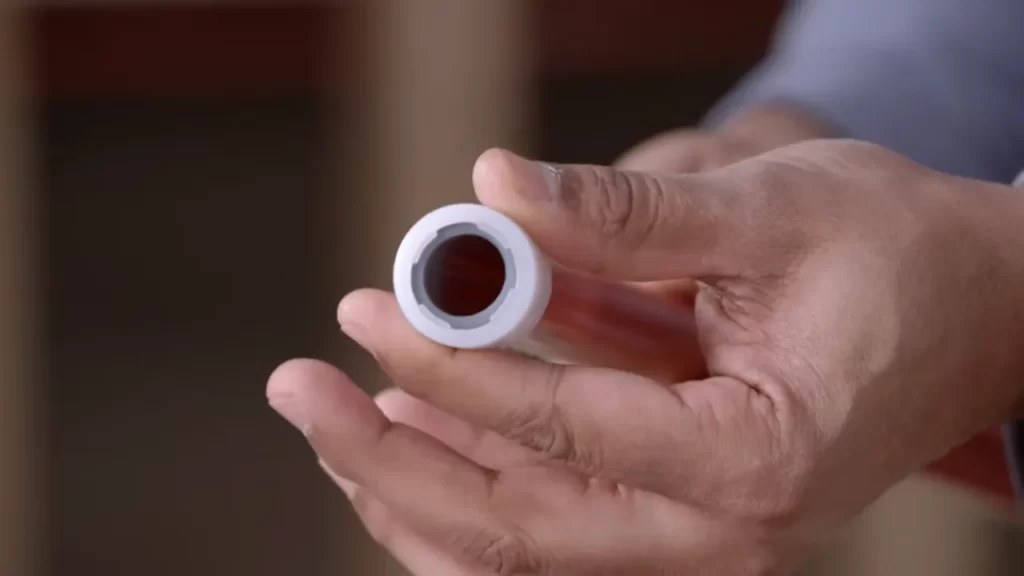
Pex a Fittings
Along with the Pex a tubing, you will also need Pex a fittings. These fittings are specifically designed to connect and secure the Pex a tubing. Pex a fittings come in various types, such as couplings, elbows, tees, and valves. It is important to select the right type of fitting for your specific plumbing needs.
Crimp Rings
Crimp rings are essential for securing the Pex a fittings to the Pex a tubing. These rings are made of stainless steel and are used to create a watertight seal between the fitting and the tubing. Crimp rings can be easily installed using a crimping tool, ensuring a reliable connection.
Teflon Tape (optional)
Although not necessary, using Teflon tape can provide an extra layer of protection against leaks. Teflon tape is a thin tape made of polytetrafluoroethylene (PTFE), and it is commonly used to seal pipe threads. Applying Teflon tape to the threaded fittings can help create a tight seal and prevent any potential leaks.
By having all these required materials readily available before starting your Pex a fitting installation, you can ensure a successful and efficient plumbing project. So, gather your Pex a tubing, Pex a fittings, crimp rings, and optionally Teflon tape, and get ready to install your Pex a fittings with confidence!

Planning And Preparation
Before you dive into installing Pex a fittings, it’s important to take the time to plan and prepare properly. This will ensure a smooth and successful installation, saving you time and hassle down the line. In this section, we’ll go over the key steps you need to take for planning and preparation.
Understanding the Layout of the Plumbing System
The first step in the planning process is to have a clear understanding of the layout of your plumbing system. This will help you determine the best route for your Pex a tubing and fittings. Take the time to study the existing plumbing system and identify where the main water supply line and fixtures are located.
If you’re unsure about the layout or need to make any modifications, it’s always a good idea to consult a professional plumber. They can provide valuable insights and recommendations based on their expertise.
Measuring and Marking the Pex a Tubing
Next, you’ll need to measure and mark the Pex a tubing to ensure accurate installation. Start by measuring the distance between the fixtures and the main water supply line. Add a few extra inches to allow for any bends and connections.
Once you have the measurements, use a permanent marker or tape to mark the tubing accordingly. This will serve as a guide during the installation process and ensure everything is aligned properly.
If you’re working with multiple lines or branches, it can be helpful to create a visual diagram or table to keep track of the measurements and markings. This will make the installation process much smoother and prevent any confusion or mistakes.
Tip: Consider using a Pex cutter or tubing cutter to ensure clean and precise cuts. This will make it easier to connect the fittings later on.
By taking the time to plan and prepare properly, you’ll set yourself up for a successful Pex a fittings installation. Understanding the layout of the plumbing system and measuring and marking the Pex a tubing are crucial steps in ensuring a smooth and efficient installation process. In the next section, we’ll dive into the actual installation of the Pex a fittings.
Cutting And Preparing The Pex A Tubing
Cutting and preparing the Pex a tubing is an essential step in the installation process that ensures proper functionality and longevity of your Pex plumbing system. In this section, we will discuss the different techniques for cutting Pex a tubing, the importance of deburring the ends, and the correct alignment and holding methods to ensure a secure and leak-free connection.
Choosing the Right Cutting Method
When it comes to cutting Pex a tubing, there are various methods you can choose from. Here are a few options to consider:
1. Scissor-type Pex cutter: This tool features a spring-loaded design that allows for effortless cutting with a clean and precise edge. It is suitable for cutting Pex a tubing up to a certain diameter.
2. Rotary Pex cutter: This tool operates similarly to a pipe cutter and utilizes a rotating blade mechanism to cut through the tubing. It offers a clean and straight cut, making it ideal for larger Pex a tubing sizes.
3. Pex shears: These specialized scissors are designed specifically for cutting Pex tubing. They provide a quick and efficient way to cut the tubing without leaving any jagged edges.
It is important to choose the cutting method that is appropriate for the size of your Pex a tubing to ensure a clean and accurate cut.
Deburring the Ends of the Tubing
After cutting the Pex a tubing, it is crucial to deburr the ends to remove any rough edges or burrs that could hinder the fitting’s insertion or cause leaks. To deburr the ends of the Pex a tubing, follow these steps:
1. Use a Pex deburring tool: This specialized tool features a blade or a brush that allows you to remove the burrs from the cut end of the tubing. Simply insert the tool into the tubing and rotate it in a circular motion to remove any imperfections.
2. Inspect the tubing: After deburring, it is essential to inspect the end of the tubing to ensure a smooth and even surface. Run your fingers along the cut end to feel for any rough spots or protrusions that may need further deburring.
By properly deburring the ends of the Pex a tubing, you will create a clean and seamless connection point for the fittings, minimizing the risk of leaks or other plumbing issues.
Properly Aligning and Holding the Tubing
Proper alignment and holding of the Pex a tubing are crucial steps to ensure a secure and leak-free connection. Here are some tips to help you achieve a proper alignment:
1. Measure and mark: Before making any cuts, measure and mark the tubing at the desired lengths for installation. This will help you maintain a straight and accurate cut.
2. Use support: When cutting a longer length of Pex a tubing, it is helpful to use a support, such as a vise or a clamp, to hold the tubing steady and prevent it from moving or slipping during the cutting process.
3. Align the tubing: Once the tubing is cut, align the ends precisely with the fitting or connector. Make sure the tubing is fully inserted into the fitting until it reaches the designated stop, ensuring a secure and leak-free connection.
By following these steps, you will be able to cut, deburr, align, and hold the Pex a tubing properly, ensuring a successful installation and a reliable plumbing system. Remember to choose the appropriate cutting method, deburr the ends thoroughly, and take the necessary precautions for proper alignment and holding to enjoy the benefits of Pex plumbing.
Inserting And Crimping Pex A Fittings
When it comes to installing Pex a fittings, inserting and crimping them properly is crucial for a secure and leak-free connection. In this guide, we’ll walk you through the step-by-step process of inserting Pex a fittings into the tubing and using a crimp tool to secure them. By following these instructions, you’ll be able to confidently tackle your next Pex installation project.
Lubricating Pex a Fittings
Before inserting Pex a fittings into the tubing, it’s important to lubricate them. This helps to ease the insertion process and ensures a smoother connection. Here’s how to lubricate Pex a fittings:
- Apply a small amount of lubricant to the exterior of the fitting.
- Spread the lubricant evenly around the fitting using your finger.
Taking the time to lubricate your Pex a fittings will make it easier to insert them into the tubing and reduce the risk of damaging the fittings or the tubing during the installation process.
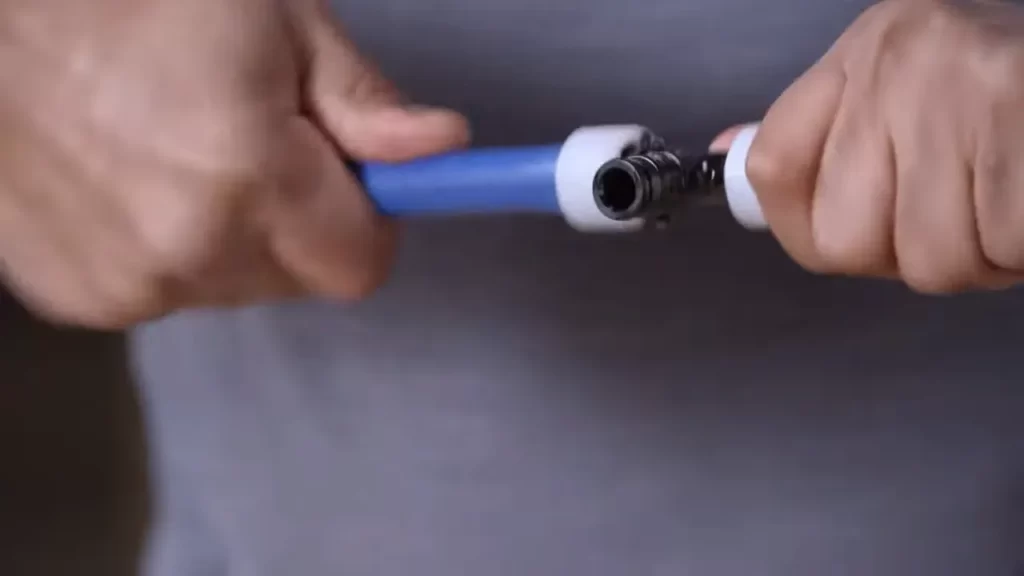
Inserting Pex a Fittings into the Tubing
Once you’ve lubricated your Pex a fittings, it’s time to insert them into the tubing. Follow these steps to ensure a proper insertion:
- Hold the Pex a tubing firmly in one hand.
- Take the lubricated Pex a fitting in your other hand.
- Insert the fitting into the tubing until it reaches the marked insertion depth.
- Ensure that the fitting is fully seated and secure within the tubing.
It’s important to insert the fittings all the way into the tubing to achieve a secure and leak-free connection. Double-check that the fitting is properly seated to avoid any issues down the line.
Using a Crimp Tool to Secure the Fittings
After inserting the Pex a fittings into the tubing, the next step is to use a crimp tool to secure them. Follow these instructions to ensure a proper crimp:
- Place the crimp ring over the end of the tubing, ensuring it is positioned close to the fitting.
- Select the appropriate crimp size on your crimp tool, making sure it matches the size of the Pex a fitting.
- Position the crimp tool jaws around the crimp ring and squeeze the handles firmly.
- Rotate the crimp tool slightly to ensure a complete and secure crimp.
- Inspect the crimp connection to ensure it is tight and free from any visible defects.
Using a crimp tool is a simple and effective way to secure Pex a fittings and create a strong connection. Take the time to inspect your crimp connection to guarantee its quality and avoid future leaks or issues.
By following these steps for inserting and crimping Pex a fittings, you’ll be able to achieve a secure and reliable plumbing system. Properly lubricating the fittings, inserting them into the tubing correctly, and using a crimp tool to secure the connection are essential for a successful Pex installation. Now, you’re ready to confidently tackle your next project with ease!
Testing And Checking For Leaks
Testing and checking for leaks are crucial steps in the process of installing Pex fittings to ensure proper functioning and prevent any potential water leakage. This part of the installation requires careful attention and precision to guarantee a reliable and leak-free system. In this section, we will discuss two important steps that need to be followed: performing a pressure test and checking for leaks and proper functioning.
Performing a Pressure Test:
To ensure the integrity of the Pex fittings installation, performing a pressure test is essential. This test involves pressurizing the system to a specific pressure level and inspecting for any pressure drop over a certain duration. It helps identify any potential leaks or weaknesses in the fittings that may lead to water leakage.
Here is a step-by-step guide on how to perform a pressure test:
1. Close all the water supply valves connected to the Pex fittings to isolate the system.
2. Attach a pressure gauge to one of the open ends of the system.
3. Gradually increase the pressure in the system to the recommended level specified by the manufacturer. Refer to the installation instructions or consult a professional for the appropriate pressure level.
4. Once the pressure reaches the desired level, close the valve on the pressure gauge to maintain the pressure.
5. Monitor the pressure gauge for any pressure drop over a specific duration, usually around 15-30 minutes.
6. If the pressure remains constant without any significant drop, it indicates that the system is secure and free of leaks.
7. However, if there is a noticeable pressure decrease, it indicates a potential leak that needs to be identified and addressed before proceeding with the installation.
Checking for Leaks and Proper Functioning:
After performing the pressure test and ensuring the system is secure, it is crucial to check for leaks and proper functioning. This step involves closely examining all the connections and fittings to ensure there are no leakage points or functional issues that may compromise the performance of the system.
Here are some steps to effectively check for leaks and proper functioning:
1. Inspect all the Pex fittings, joints, and connections. Look for any signs of water leakage, such as damp areas, water stains, or dripping water.
2. Run water through the system and observe if there are any unusual sounds, vibrations, or sudden drops in water pressure. This could indicate a faulty fitting or an issue with the installation.
3. Check the Pex fittings for proper alignment and secure connection. Make sure they are tightly fastened and correctly installed according to the manufacturer’s guidelines.
4. Feel the fittings with your hand to detect any warm spots that could indicate a possible leakage point.
5. If any leaks or functional issues are identified, take immediate corrective measures by tightening the fittings, replacing faulty components, or seeking professional assistance if needed.
6. Remember to cut off the water supply before making any adjustments or repairs to ensure safety.
By following these steps of performing a pressure test and checking for leaks and proper functioning, you can ensure a secure and reliable Pex fittings installation. Taking the time to test and inspect the system thoroughly will provide peace of mind and prevent potential water damage or disruption in the future.
Tips For Installing Pex A Fittings Efficiently
When it comes to installing Pex a fittings, efficiency is key. By following some simple tips, you can ensure a smooth and hassle-free installation process. In this article, we will explore some tried and tested techniques that will help you install Pex a fittings efficiently.
Working with Pex a Fittings in Tight Spaces
If you find yourself working in tight spaces, installing Pex a fittings can be a challenge. However, with a few tricks up your sleeve, you can make the process a lot easier. Here are some tips to help you work with Pex a fittings in tight spaces:
- Use a compact Pex crimp tool
- Opt for smaller Pex a fittings
- Cut the Pex tubing to the exact length needed to minimize excess material
- Plan your layout and measure twice before making any cuts to avoid wastage
- Consider using a flexible Pex tubing to maneuver through narrow gaps
Dealing with Different Types of Pex a Fittings
Pex a fittings come in different shapes and sizes, which can sometimes cause confusion during installation. Here are some tips to help you deal with different types of Pex a fittings:
| Type of Pex a Fitting | Tips for Installation |
|---|---|
| Elbow Fittings | Make sure the Pex tubing is cut at the correct angle before inserting into the elbow fitting. Apply consistent pressure when crimping to ensure a tight seal. |
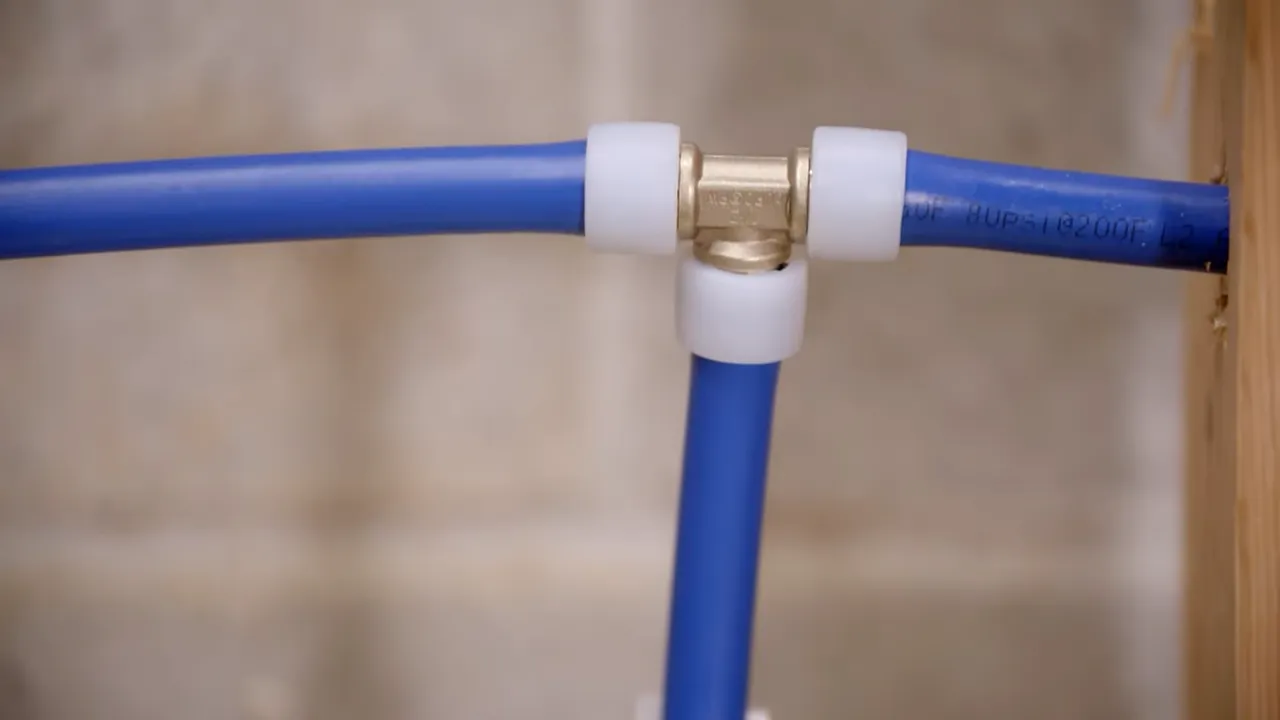
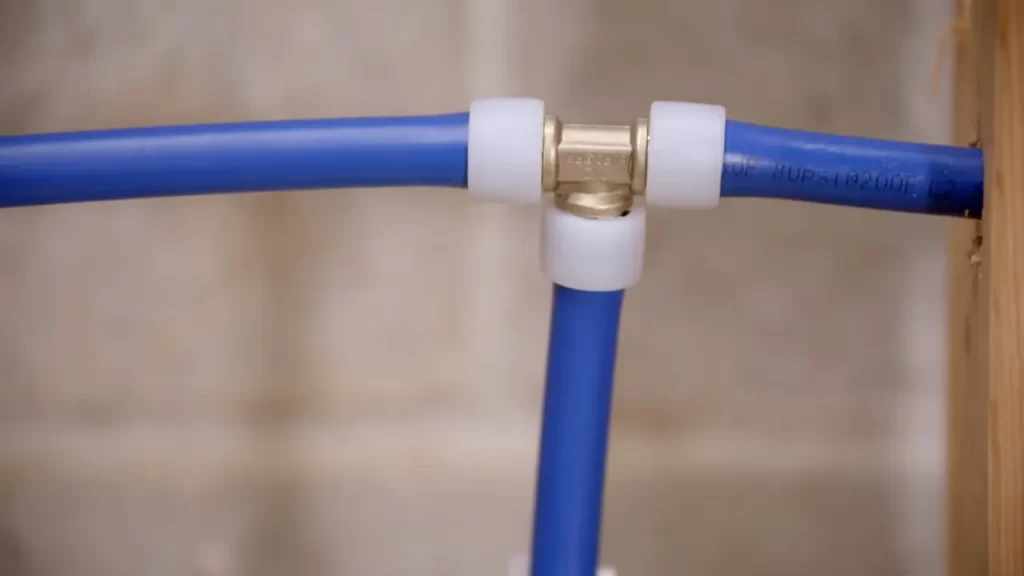
| Tee Fittings | Measure and mark the Pex tubing accurately to ensure the tee fitting is placed in the desired position. Use a crimping tool to secure the connections. |
| Coupling Fittings | Cut the Pex tubing to the desired length and ensure it is clean and free from debris. Slide the tubing into the coupling fitting until it stops, and then use a crimping tool to secure the connection. |
Remember, always refer to the manufacturer’s instructions for each type of Pex a fitting, as installation techniques may vary slightly.
By following these tips for installing Pex a fittings efficiently, you can save time and ensure a secure and reliable plumbing system. Whether you are working in tight spaces or dealing with different types of fittings, these techniques will help you overcome any challenges that may arise during the installation process.
Safety Precautions To Consider
When it comes to installing PEX fittings, it is essential to prioritize safety precautions. By taking the necessary steps to protect yourself and ensure a safe installation, you can prevent accidents and injuries. In this section, we will discuss some important safety precautions that you should consider before starting your PEX fittings installation.
Wearing Proper Protective Gear
One of the first and most important safety precautions to consider when installing PEX fittings is wearing proper protective gear. This includes safety goggles or glasses to protect your eyes from any potential debris or chemicals. It is also crucial to wear work gloves to protect your hands from sharp edges or cuts during the installation process. Additionally, wearing a dust mask can help reduce the inhalation of any harmful airborne particles that may be released during the installation. Ensuring you have the right protective gear will significantly reduce the risk of accidents or injuries.
Avoiding Common Installation Mistakes
Another crucial safety precaution to consider when installing PEX fittings is avoiding common installation mistakes. This includes carefully following the manufacturer’s instructions and guidelines to ensure a proper installation. It is essential to use the correct tools and techniques to avoid damaging the fittings or other plumbing components. Additionally, make sure to properly secure the fittings and check for any leaks before proceeding. By avoiding common installation mistakes, you can minimize the chances of accidents, leaks, or system failures.
Ensuring Proper Ventilation during Installation
Proper ventilation during the installation of PEX fittings is another critical safety precaution. This ensures that any potential fumes or gases released during the installation process are adequately dispersed to prevent inhalation. Before starting the installation, ensure that the work area is well-ventilated, either by opening windows or doors or using ventilation fans. If working in a confined space, consider using a portable exhaust fan to remove any hazardous fumes or gases. Adequate ventilation is essential for maintaining a safe work environment throughout the installation process.
Identifying And Fixing Leaks
When it comes to installing Pex a fittings, it’s essential to ensure a leak-free system. However, leaks may occur due to various reasons, such as poor installation or damage to the fittings. In this section, we will discuss how to identify and fix leaks in Pex a fittings, so that you can have a reliable and efficient plumbing system.
Locating Leak Points
The first step in fixing leaks is to locate the leak points. This can be done by observing visible signs of water leakage, such as damp spots on walls or ceilings, puddles of water, or a decrease in water pressure. In some cases, leaks may be hidden, so it’s important to inspect all areas where Pex a fittings are installed.
Here are some additional tips to help you locate leak points:
- Check all connections: Inspect the fittings where Pex a pipes are connected to fixtures, such as faucets or toilets. Look for any signs of water seepage or moisture.
- Examine the fittings: Inspect the Pex a fittings themselves for any visible cracks, damage, or loose connections. These can be potential leak points.
- Check for wet spots: Look for wet spots on the ground near the Pex a fittings. If there are damp areas or puddles, it’s likely a sign of leakage.
- Inspect the pipes: Carefully examine the Pex a pipes for any signs of damage or wear, such as kinks, bulges, or discoloration. Leaks may occur at these weak points.
Repairing Leaks in Pex a Fittings
Once you have identified the leak points, it’s time to fix them. Repairing leaks in Pex a fittings is relatively easy and can be done by following a few simple steps:
- Turn off the water supply: Before you start repairing the leaks, make sure to turn off the water supply to prevent water from flowing during the repair process.
- Prepare the area: Clean the area around the leak point and remove any debris or moisture. This will ensure a clean and dry surface for repairs.
- Apply sealant or tape: Depending on the type of leak and the severity, you can use an appropriate sealant or plumber’s tape to seal the leak. Apply it carefully and evenly around the leak point.
- Check for tight connections: If the leak is caused by a loose connection, carefully tighten the fitting using a wrench or pliers. Make sure not to overtighten to avoid damaging the fitting.
- Test for leaks: Once you have repaired the leak, turn on the water supply and check for any remaining leaks. Inspect the repaired area and ensure that it is dry and no water is seeping through.
By following these steps, you can easily identify and fix leaks in Pex a fittings. Remember to take necessary precautions, such as turning off the water supply, and always double-check your repairs to ensure a leak-free plumbing system.
Addressing Flow And Pressure Problems
When it comes to ensuring the smooth functioning of your plumbing system, addressing flow and pressure problems is essential. In this section, we will discuss effective ways to improve water flow in Pex a fittings and adjust pressure in the plumbing system.
Improving Water Flow in Pex a Fittings
Proper water flow is crucial for a well-functioning plumbing system. If you’re experiencing low water pressure or weak flow in your Pex a fittings, there are a few steps you can take to improve the situation:
- Check for any blockages: A common cause of poor water flow in Pex a fittings is the presence of debris or mineral buildup. Inspect your fittings for any blockages and clean them thoroughly if necessary. This simple step can greatly improve water flow.
- Optimize pipe diameter: In some cases, the flow problem may occur due to incorrect pipe sizing. Ensure that you have chosen the appropriate diameter for your Pex a fittings. Larger diameters allow for better water flow, so consider upgrading if needed.
- Inspect for leaks: Leaks can disrupt water flow and cause pressure problems. Regularly inspect your Pex a fittings for any leaks and repair them promptly to maintain optimal flow.
Adjusting Pressure in the Plumbing System
Correct pressure levels are crucial for the proper functioning of your plumbing system. If you’re dealing with high or low pressure, here are a few steps to adjust the pressure in your plumbing system:
- Install pressure-reducing valves: If the pressure in your plumbing system is too high, installing pressure-reducing valves can effectively reduce it. These valves regulate the pressure and ensure a consistent flow throughout the system.
- Adjust the pressure regulator: Most plumbing systems have a pressure regulator that allows you to adjust the pressure to your desired level. Consult a professional or refer to the manufacturer’s instructions to make the necessary adjustments.
- Consider a booster pump: In cases of low water pressure, especially in multi-story buildings, a booster pump can enhance the pressure and improve flow. A professional plumber can assess your system and recommend the appropriate booster pump for your needs.
Benefits Of Using Pex A Fittings Over Other Types
When it comes to plumbing systems, choosing the right fittings is essential for ensuring the longevity and reliability of your pipes. With various options available, Pex a fittings stand out as a popular choice due to their numerous advantages over other types of fittings.
Comparing Pex a Fittings to Pex b and Pex c Fittings
When comparing Pex a fittings to Pex b and Pex c fittings, it becomes evident that Pex a fittings offer distinct advantages in terms of flexibility and resistance to freezing. Unlike Pex b fittings, which have a higher rate of expansion and contraction, Pex a fittings have the ability to repair themselves when subjected to slight damages. This unique characteristic ensures a longer lifespan and reduces the risk of leaks, making them a cost-effective choice in the long run.
Pex c fittings, on the other hand, have a lower pressure rating compared to Pex a fittings. This means that Pex c fittings may not be suitable for applications that require higher pressure levels, such as commercial or industrial plumbing systems. Additionally, Pex a fittings are proven to have better resistance to chlorine and chemical degradation, making them ideal for use in areas where water quality may be a concern.
Long-Term Durability and Reliability of Pex a Fittings
In addition to their flexibility and resistance to freezing, Pex a fittings are renowned for their long-term durability and reliability. These fittings are designed to withstand extreme temperatures and harsh conditions, ensuring that they provide a reliable plumbing solution for years to come. Pex a fittings also have a higher resistance to corrosion compared to other types of fittings, reducing the risk of premature failure and the need for frequent replacements. This not only saves you time and money but also provides peace of mind knowing that your plumbing system is built to last.
Furthermore, Pex a fittings offer the advantage of easy installation. These fittings can be expanded and contracted without the need for excessive force, making them simpler to work with. The installation process becomes more efficient, resulting in reduced labor costs and quicker project completion. Their compatibility with various Pex tubing makes them a versatile choice, suiting different plumbing requirements.
In conclusion, the benefits of using Pex a fittings over other types are numerous. With their flexibility, resistance to freezing, and long-term durability, Pex a fittings provide a reliable and cost-effective solution for your plumbing needs. Whether it is for residential, commercial, or industrial applications, choosing Pex a fittings ensures a plumbing system that will withstand the test of time.
Advancements And Innovations In Pex A Fittings
Latest Developments in Pex a Fitting Technology
Over the years, Pex a fittings have seen significant advancements and innovations in technology. These developments have revolutionized the plumbing industry, making Pex a fittings a popular choice among homeowners and professionals alike.
One of the latest developments in Pex a fitting technology is the utilization of cross-linked polyethylene (PEX) material. This material provides increased strength, flexibility, and durability to the fittings, ensuring a reliable and leak-free plumbing system. The cross-linking process involves molecular bonding, resulting in a strong and resilient product that can withstand high pressures and temperatures.
Another notable development is the introduction of expansion fittings. Unlike traditional crimp or clamp fittings, which require specialized tools, expansion fittings use an expansion method to create a secure connection. This not only simplifies the installation process but also reduces the risk of leaks caused by improper crimping or clamping.
Additionally, advancements in Pex a fitting technology have led to the development of durable and corrosion-resistant fittings. These fittings are specifically designed to resist chemicals, scale, and corrosion, ensuring long-lasting performance and reducing the need for frequent replacements.
Future Trends in Pex a Fittings
The future of Pex a fittings looks promising, as there are several emerging trends that are set to further improve their performance and efficiency.
One of the future trends in Pex a fittings is the integration of smart technology. Smart fittings equipped with sensors can detect leaks, temperature changes, and pressure fluctuations, allowing homeowners to monitor their plumbing system remotely and take preventive measures. This not only enhances the overall efficiency and safety of the plumbing system but also minimizes potential damages caused by leaks or failures.
Another future trend is the development of eco-friendly Pex a fittings. With a growing focus on sustainability, manufacturers are exploring ways to reduce the environmental impact of plumbing systems. This includes developing fittings that are made from recycled materials or are recyclable themselves, reducing waste and promoting a more circular economy.
Furthermore, advancements in 3D printing technology may lead to custom-made Pex a fittings that perfectly fit unique plumbing configurations. This could eliminate the need for extensive modifications or additional fittings, ultimately saving time and reducing installation costs.
In conclusion, advancements and innovations in Pex a fitting technology have greatly improved the performance, reliability, and sustainability of plumbing systems. The latest developments in Pex a fitting technology, such as the utilization of cross-linked polyethylene material and the introduction of expansion fittings, have made installation easier and more efficient. Looking ahead, future trends such as smart technology integration, eco-friendly materials, and 3D printed fittings, promise even greater advancements in Pex a fittings.
Frequently Asked Questions
Can You Use Crimp Fittings On Pex A?
Yes, crimp fittings can be used on PEX A. This type of fitting is compatible with PEX A tubing and offers a secure connection when properly installed. It is important to follow the manufacturer’s guidelines for installation to ensure a reliable and leak-free connection.
How Do I Connect My Pex A To Pex A?
To connect PEX A to PEX A, use a PEX-specific tool called an expansion sleeve. Slide the sleeve onto one end of the first PEX A pipe, then insert the second pipe into the sleeve. Use the tool to expand the sleeve, creating a secure and watertight connection between the two pipes.
What Is The Method Of Joining Pex A?
PEX A can be joined using the expansion method, where a special tool expands the pipe and fittings. The expanded pipe is then slipped onto the expanded fitting, creating a secure connection. This method is fast, reliable, and requires no chemicals or solvents.
Can You Install Pex A Without Expansion Tool?
No, you cannot install PEX without an expansion tool. The expansion tool is necessary for creating a secure and leak-free connection.
Conclusion
Installing PEX fittings is a simple and efficient way to ensure a reliable plumbing system in your home. By following the correct steps and using the right tools, homeowners can easily achieve leak-free connections with PEX fittings. Remember to always measure and cut the pipe accurately, use proper crimping or expansion techniques, and secure fittings tightly.
With these tips in mind, you’ll be able to confidently complete your PEX fitting installation and enjoy a hassle-free plumbing system for years to come.