
To install perforated PVC drainage pipe, dig a trench according to your desired slope and depth, then lay the pipe in the trench, connecting the sections with fittings, and cover it with gravel or soil. Proper installation ensures efficient water drainage and prevents soil erosion.
(22 words) Perforated PVC drainage pipe is a crucial component in managing water flow and preventing potential damage caused by excess water accumulation. Whether you are working on a residential landscaping project or constructing a commercial building, proper installation is essential for reliable and efficient drainage.
By following a few simple steps, you can ensure that your PVC drainage pipe effectively channels water away from the desired area, keeping your property safe and protected. This article provides a concise guide on how to expertly install perforated PVC drainage pipe, covering everything from trench excavation to pipe connection and necessary materials. With this information, you can confidently tackle your drainage project and enjoy the benefits of a well-maintained property. (123 words)
Factors To Consider When Selecting Perforated Pvc Drainage Pipe
When it comes to installing a drainage system, selecting the right type of pipe is crucial for the long-term effectiveness and durability of the system. Perforated PVC drainage pipe is a popular choice due to its versatility and affordability. However, there are several factors to consider before making your selection. Let’s dive into the key considerations that will help you choose the best perforated PVC drainage pipe for your project.
Diameter and Length Options
The first factor to consider is the diameter and length options available for the perforated PVC drainage pipe. The diameter of the pipe determines how much water it can handle, while the length determines the coverage area of the drainage system. It’s important to choose a diameter and length that matches the requirements of your specific project.
Material Quality and Durability
The quality of the materials used in the manufacturing of the perforated PVC drainage pipe is another important consideration. Opting for high-quality PVC material ensures the pipe’s durability and resistance to external factors such as corrosion and weathering. It’s recommended to choose a pipe that is made from PVC materials that are known for their strength and long-lasting performance.
Perforation Pattern and Spacing
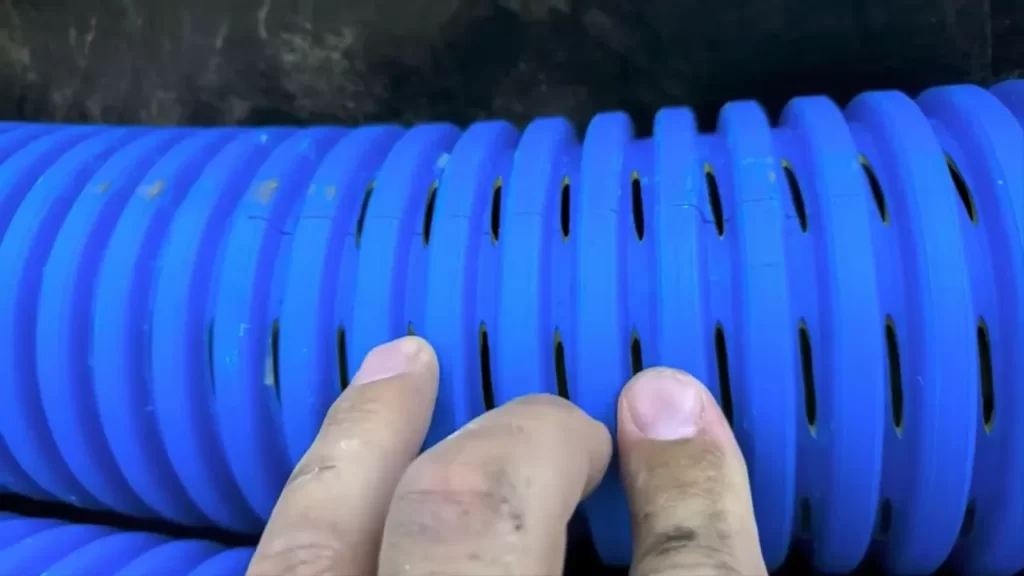
The perforation pattern and spacing of the holes in the PVC drainage pipe are crucial factors that determine the effectiveness of the drainage system. The perforations allow water to enter the pipe while preventing debris and soil from clogging the system. It’s essential to choose a perforation pattern and spacing that aligns with the specific needs of your project, considering factors such as soil type and water flow rate.
Compatibility With Other Drainage Components
Another factor that should not be overlooked is the compatibility of the perforated PVC drainage pipe with other drainage components. It’s important to ensure that the selected pipe can seamlessly connect with fittings, connectors, and other system components. This will ensure a tight and secure fit, preventing any leaks or disruptions in the drainage system. Before finalizing your choice, make sure that the perforated PVC pipe is compatible with the other components you plan to use in your system.

Surveying And Marking The Drainage Path
In order to install a perforated PVC drainage pipe effectively, it is essential to begin with a thorough survey of the landscape and proper marking of the drainage path. This initial step sets the foundation for a successful drainage system, ensuring that water is efficiently redirected away from unwanted areas.
Evaluating the Landscape
Before you can begin the process of installing a perforated PVC drainage pipe, it is crucial to evaluate the landscape in order to identify potential problem areas and determine the optimal drainage route. This evaluation involves assessing the topography, understanding the natural flow of water, and identifying any existing water accumulation issues.
Determining the Optimal Drainage Route
Once you have evaluated the landscape, the next step is to determine the optimal drainage route. This involves identifying the lowest point in the landscape, which will serve as the endpoint for the drainage pipe. By locating this point, you can then trace the most efficient path from problem areas to this endpoint, ensuring that water is effectively collected and directed away from the landscape.
Marking the Path for Excavation
With the optimal drainage route determined, it is time to mark the path for excavation. This involves physically marking the ground along the determined route using spray paint or other suitable markers. These markings will serve as a guide during the excavation process, ensuring that the trench for the perforated PVC drainage pipe is dug in the correct location.
When marking the path, it is important to be precise and consistent to avoid any confusion or miscalculations during the excavation process. Clear and visible markings will help to ensure that the installation proceeds smoothly and that the drainage pipe is properly positioned.
By thoroughly surveying the landscape and marking the drainage path, you can lay the groundwork for a successful perforated PVC drainage pipe installation. This initial step is crucial in ensuring that the drainage system effectively redirects water away from undesired areas, preventing issues such as water pooling or erosion.
Calculating The Required Pipe Length And Quantity
Before you start installing a perforated PVC drainage pipe, it’s crucial to calculate the required pipe length and quantity accurately. By doing so, you’ll ensure that you have the right materials to complete the project efficiently. In this section, we’ll guide you through the process step by step, focusing on measuring the distance of the drainage path, factoring in slope and soil conditions, and estimating the number of pipe sections needed.
Measuring the Distance of the Drainage Path
The first step in calculating the required pipe length is to measure the distance of the drainage path. Grab your measuring tape and carefully determine the length of the area where the pipe will be installed. Measure from the starting point to the endpoint of the drainage path, making sure to factor in any bends or curves along the way.
Factoring in Slope and Soil Conditions
Once you have the distance of the drainage path, it’s essential to consider the slope and soil conditions. Proper slope is crucial for effective drainage, as it ensures that water flows away from the desired area. Use a level or a laser level to determine the overall slope of the area. Additionally, evaluate the soil conditions, such as its composition and permeability. These factors will help determine the pipe size and spacing required for optimal drainage.
Estimating the Number of Pipe Sections Needed
With the distance, slope, and soil conditions in mind, you can now estimate the number of pipe sections needed for your project. To do this, follow these simple steps:
- Calculate the total drop in elevation between the starting point and endpoint of the drainage path. This can be done by subtracting the elevation at the endpoint from the elevation at the starting point.
- Divide the total drop in elevation by the slope over the distance of the drainage path. This will give you the number of pipe sections needed.
- Round up the calculated number to the nearest whole number to ensure you have enough pipe sections to cover the entire drainage path.
By accurately calculating the required pipe length and quantity, you’ll be well-prepared to install the perforated PVC drainage pipe and effectively manage water runoff. Take the time to measure the distance, consider slope and soil conditions, and estimate the number of pipe sections needed for a successful installation.
Gathering The Necessary Tools And Materials
Before you start installing perforated PVC drainage pipe, it’s essential to gather all the necessary tools and materials. This step is crucial to ensure a smooth and efficient installation process. In this section, we will discuss the tools and materials you will need, including PVC drainage pipe and connectors, excavation tools, safety equipment, and an optional inspection camera.
PVC Drainage Pipe and Connectors
The primary component for installing a perforated PVC drainage system is the PVC drainage pipe itself. This type of pipe is specifically designed to effectively drain excess water from the desired area. When selecting the PVC drainage pipe, make sure to consider the size and length required for your specific project.
You will also need connectors to join the sections of PVC drainage pipe together. Common types of connectors include couplings, elbows, tees, and end caps. These connectors play a crucial role in ensuring a secure and watertight connection between the individual pipe sections.
Excavation Tools
Proper excavation is essential to create a trench for the PVC drainage pipe. To excavate the designated area, you will need a set of excavation tools. These tools may include:
| Excavation Tools |
|---|
| Shovel |
| Trenching hoe |
| Post hole digger |
| Mattock |
These tools will help you dig the trench to the appropriate depth and width, ensuring adequate space for the PVC drainage pipe.
Safety Equipment
Safety should always be a top priority when working on any DIY project. When embarking on the installation of a perforated PVC drainage pipe, it’s important to have the following safety equipment:
- Protective gloves: This will shield your hands from sharp objects or potential hazards.
- Safety goggles: These will protect your eyes from debris, dirt, or any other potential eye injuries.
- Steel-toed boots: These will offer protection to your feet from any accidental impact.
Inspection Camera (Optional)
While not essential, an inspection camera can be a helpful tool during the installation process. This device allows you to visually inspect the inside of the PVC drainage pipe, ensuring there are no blockages or obstructions that could potentially hinder the system’s efficiency. An inspection camera can help identify any issues before completing the installation, saving you time and effort in the long run.
Gathering the necessary tools and materials before installing perforated PVC drainage pipe will ensure a successful and hassle-free installation process. By having everything at hand, you can proceed with confidence, knowing that you are well-prepared for the task at hand.
Digging The Trench
One of the most crucial steps in installing a perforated PVC drainage pipe is digging the trench. This step determines the effectiveness of the drainage system and ensures proper water flow. To properly dig the trench, you need to consider the local building codes and regulations, ensure the trench is excavated to the proper depth, and create a consistent slope for effective drainage.
Meeting Local Building Codes and Regulations
Before you start digging the trench, it is essential to familiarize yourself with the local building codes and regulations. Different areas may have specific requirements for the depth, width, and slope of drainage trenches. By adhering to these regulations, you can avoid any potential issues in the future and ensure your project is compliant with the local guidelines.
Excavating the Trench to the Proper Depth
Once you are aware of the local regulations, it’s important to excavate the trench to the appropriate depth. This depth will depend on factors such as the soil type, the volume of water you expect the drainage system to handle, and any specific requirements outlined in the building codes.
Note: Consult with a professional contractor or reference local building codes to determine the exact depth needed for your specific project.
Typically, a perforated PVC drainage pipe trench should be dug to a depth of at least 12 inches. However, it is recommended to dig deeper if your area experiences heavy rainfall or if you have soil with poor drainage capabilities. This will ensure that the pipe is properly buried and allows water to flow freely through the perforations.
Ensuring a Consistent Slope for Effective Drainage
Another critical aspect to consider while digging the trench is the slope. The trench should be sloped to ensure proper water flow and effective drainage. Ideally, the slope should be approximately one inch per eight feet. This slope allows gravity to assist in moving the water away from the desired area and prevents any pooling or standing water.
When excavating the trench, pay close attention to maintaining a smooth and consistent slope. Using a string level or another leveling tool can help you achieve the desired slope more accurately. By ensuring a consistent slope, you can ensure that water flows smoothly through the perforated PVC drainage pipe, preventing any blockages or water buildup.
In conclusion, digging the trench is a crucial step in installing a perforated PVC drainage pipe. By understanding and adhering to the local building codes and regulations, excavating the trench to the proper depth, and ensuring a consistent slope for effective drainage, you will lay the foundation for a successful drainage system that effectively manages water flow.

Laying And Connecting The Perforated Pvc Drainage Pipe
Installing a perforated PVC drainage pipe is a crucial step in ensuring proper drainage for your property. The process involves carefully positioning the pipe in the trench, making secure connections between pipe sections, and aligning the perforations for optimal drainage. In this guide, we will break down each step in detail to help you successfully lay and connect your perforated PVC drainage pipe.
Positioning the Pipe in the Trench
When positioning the pipe in the trench, there are a few important factors to keep in mind. First, make sure the trench is dug at the appropriate depth to allow for proper drainage. The depth will depend on the specific requirements of your drainage system, so it’s essential to consult local regulations or a professional for guidance.
Once the trench is prepared, carefully place the perforated PVC drainage pipe along the bottom. Ensure that the pipe is properly aligned and follows the desired path of water flow. If needed, you can use stakes or supports to keep the pipe in place while filling the trench.
Making Secure Connections Between Pipe Sections
Connecting different sections of the perforated PVC drainage pipe is a critical step to ensure a seamless and reliable drainage system. The connection method you choose will depend on the type of PVC pipe you are using, such as solvent weld or rubber couplings.
If you are using solvent weld connections, start by cleaning the pipe ends and fittings thoroughly. Apply solvent cement to both the pipe end and the fitting, then quickly and firmly join them together. Hold the connection in place for a few seconds to allow the cement to set and create a tight seal.
For rubber couplings, begin by sliding one end of the coupling onto the first pipe section. Repeat the same process for the next section, making sure the coupling covers the joint between the two pipes completely. Tighten the clamps on each end of the coupling to create a secure and watertight connection.
Aligning the Perforations for Optimal Drainage
Proper alignment of the perforations in the PVC drainage pipe is crucial for optimal drainage efficiency. When connecting multiple sections, ensure that the perforations align properly, allowing water to enter the pipe freely while preventing debris from blocking the flow.
To align the perforations, visually inspect each pipe section before making the connection. Adjust the pipe’s position if necessary to ensure that the openings are facing downwards and are evenly spaced. This will promote proper water intake and prevent clogging, ensuring the effectiveness of your drainage system.
By following these steps and guidelines, you can successfully install and connect your perforated PVC drainage pipe. Remember to pay attention to the positioning of the pipe in the trench, make secure connections between pipe sections, and align the perforations for optimal drainage. With a properly installed drainage system, you can effectively manage water runoff and protect your property from potential water damage.
Backfilling And Compacting The Trench
Once you have installed the perforated PVC drainage pipe in your trench, the next crucial step is to backfill and compact the trench properly. Backfilling involves filling the trench with suitable materials to provide support and proper drainage for the pipe. Compacting ensures that the backfilled materials are tightly packed to prevent settling, which can lead to pipe damage and inefficient drainage. In this section, we will discuss the importance of using the right materials for backfilling, ensuring proper compaction to prevent settling, and adding a protective layer for enhanced performance.
Using the Right Materials for Backfilling
When it comes to backfilling the trench, it is important to use the proper materials that will provide adequate support to the perforated PVC drainage pipe. The backfill materials should be free from large debris such as rocks or construction waste, as they can cause damage to the pipe. Instead, opt for well-graded granular materials like gravel or crushed stone. These materials allow for proper drainage and help to distribute the weight evenly across the trench. Avoid using materials such as clay, silt, or sand, as they can lead to poor drainage and potentially cause the pipe to clog.
Ensuring Proper Compaction to Prevent Settling
Proper compaction is essential to prevent settling of the backfilled materials and maintain the integrity of the perforated PVC drainage pipe. After backfilling the trench with the suitable materials, use a compactor or a hand tamper to compact the soil or granular material. This will help to eliminate any voids or air pockets, ensuring that the backfilled materials are tightly packed. Start from the edges and work your way towards the center of the trench to achieve uniform compaction. Regularly check the compaction level to ensure that it meets the required specifications for your specific drainage project.
Adding a Protective Layer for Enhanced Performance
In addition to using the right backfill materials and ensuring proper compaction, it is recommended to add a protective layer to enhance the performance and longevity of the perforated PVC drainage pipe. This layer acts as a barrier between the backfill materials and the pipe, protecting it from potential damage caused by sharp objects or shifting soil. A common protective layer option is a geotextile fabric, which is a durable material that allows for water flow while preventing the intrusion of debris. Make sure to properly install the protective layer by securely fastening it to the trench walls and avoiding any gaps or overlaps. This additional step will help to improve the overall effectiveness and durability of your PVC drainage system.
By understanding the importance of using the right materials for backfilling, ensuring proper compaction, and adding a protective layer, you can successfully install a perforated PVC drainage pipe and enjoy efficient drainage for years to come.
Checking For Proper Flow And Drainage
After installing perforated PVC drainage pipe, it is crucial to ensure that it is functioning effectively to avoid any water-related problems. Checking for proper flow and drainage is essential to prevent water stagnation and potential damage. In this section, we will go over three important steps to verify the alignment, run water through the system, and inspect for any blockages or issues. By following these steps, you can ensure that your perforated PVC drainage pipe is correctly installed and functioning optimally.
Verifying the Perforated PVC Drainage Pipe Alignment
The first step in checking for proper flow and drainage is to verify the alignment of the perforated PVC drainage pipe. Improper alignment can hinder the flow of water and lead to water accumulation, defeating the purpose of the drainage system. To verify the alignment, follow these steps:
- Visually inspect the pipe to ensure it is straight and properly connected to the input and output points.
- Check for any bends or kinks in the pipe that may restrict the flow of water.
- Use a level to confirm that the pipe has a steady downward slope, allowing water to flow freely.
Verifying the alignment of the perforated PVC drainage pipe is crucial for maintaining proper flow and drainage. It ensures that water can move efficiently through the system, minimizing the risk of water accumulation and potential damage.
Running Water Through the Drainage System
Once you have verified the alignment of the perforated PVC drainage pipe, the next step is to run water through the system to check its functionality. Follow these steps to run water through the drainage system:
- Attach a hose or other water source to the input point of the drainage pipe.
- Turn on the water at a slow and steady rate.
- Observe the flow of water through the perforated holes, ensuring it is consistent and without any blockages.
- Monitor the water as it exits the output point of the drainage pipe, ensuring it is draining effectively and not pooling or backing up.
Running water through the perforated PVC drainage pipe allows you to confirm that it is properly installed and functioning as intended. It helps identify any potential issues or blockages that may impede the flow of water and cause drainage problems.
Inspecting for Any Blockages or Issues
After running water through the drainage system, it is important to inspect for any blockages or issues that may affect proper flow and drainage. Here are some steps to follow when inspecting the perforated PVC drainage pipe:
- Check the perforated holes in the drainage pipe for any debris, such as dirt or leaves, that may be blocking the flow of water.
- Inspect the sections where multiple pipes are connected to ensure there are no leaks or loose connections.
- Examine the output point of the drainage pipe to ensure that it is clear and allowing water to flow freely.
Inspecting for any blockages or issues in the perforated PVC drainage pipe is essential for maintaining optimal flow and drainage. It allows you to address any concerns and make necessary adjustments to ensure the proper functioning of the system.
By following these steps to check for proper flow and drainage in your perforated PVC drainage pipe, you can prevent water-related problems and ensure the longevity and effectiveness of your drainage system.
Regular Maintenance And Preventative Measures
Installing a perforated PVC drainage pipe is an important step in managing excess water around your property. However, proper regular maintenance and preventative measures are essential to ensure the longevity and effectiveness of your drainage system. By following these simple guidelines, you can prevent clogging, inspect and repair any damaged sections, and clear away debris and vegetation that might hinder the flow of water.
Cleaning the Perforations to Prevent Clogging
Over time, the perforations on your PVC drainage pipe can become clogged with debris, preventing efficient water flow. Regular cleaning is necessary to maintain the effectiveness of your drainage system. Here’s how you can clean the perforations:
- Inspect the pipe and identify any areas with clogged or obstructed perforations.
- Using a high-pressure water hose or a pipe-cleaning brush, remove any dirt, sediment, or clogs from the perforations.
- Ensure that water can freely flow through the perforations by testing the drainage system after cleaning.
By regularly cleaning the perforations of your PVC drainage pipe, you can prevent clogging and ensure efficient water flow throughout the system.
Inspecting and Repairing Damaged Sections
Regular inspections are essential to identify and address any damaged sections in your PVC drainage pipe. Here’s how you can inspect and repair damaged sections:
- Visually examine the entire length of the pipe for any cracks, leaks, or breaks.
- If you discover any damaged sections, mark their location for repair.
- Use PVC glue or a fitting to repair any minor cracks or leaks.
- If a section of the pipe is severely damaged, consider replacing that section entirely.
By regularly inspecting and repairing damaged sections in your PVC drainage pipe, you can ensure the longevity and effectiveness of the system.
Clearing Debris and Vegetation Around the Drainage Path
Clearing away debris and vegetation that obstructs the drainage path is crucial for maintaining the efficiency of your PVC drainage pipe. Here are some steps you can take:
- Remove any leaves, sticks, or other debris that may have accumulated along the drainage path.
- Trim vegetation such as bushes or tree branches that might obstruct the flow of water.
- Create a clear path for the water to flow, ensuring it reaches the drainage pipe without any hindrance.
By clearing debris and vegetation around the drainage path, you can prevent blockages and facilitate proper water drainage.
Regular maintenance and preventative measures are essential for keeping your perforated PVC drainage pipe in optimal condition. By regularly cleaning the perforations, inspecting and repairing any damaged sections, and clearing away debris and vegetation, you can ensure the effectiveness and longevity of your drainage system.
Final Thoughts And Additional
As you reach the final stages of installing your perforated PVC drainage pipe, there are a few important considerations to keep in mind. By following these additional tips, you can ensure that your drainage system functions effectively and provides long-lasting performance.
Proper Disposal of Excavated Soil and Debris
After excavating the trench for your perforated PVC drainage pipe, it is crucial to properly dispose of the soil and debris to prevent any potential issues. The excavated soil should not be left on the site, as it can obstruct the flow of water or infiltrate the pipe. Instead, it should be removed and disposed of appropriately.
To ensure proper disposal, consider using a local waste disposal service or reaching out to your municipality for guidance. They can provide information on the proper procedures for disposing of soil and debris in your area. By taking this extra step, you can prevent future problems and promote a more efficient drainage system.
Hiring Professional Assistance if Required
While installing perforated PVC drainage pipe can be a straightforward process, there may be situations where professional assistance is necessary. If you encounter challenges such as a complex terrain, unfamiliar soil conditions, or the need to navigate around existing underground utilities, it may be wise to seek the expertise of a professional.
Professional contractors have the knowledge, experience, and specialized equipment to tackle more complicated installations. They can assess your specific needs, provide expert guidance, and ensure that the perforated PVC drainage pipe is installed correctly. Investing in professional assistance when required can save you time, money, and potential headaches down the road.
Installing a Filter Fabric for Added Protection and Performance
For an extra layer of protection and to enhance the overall performance of your drainage system, consider installing a filter fabric. A filter fabric acts as a barrier that prevents fine particles from clogging the perforations in the PVC pipe, ensuring a consistent flow of water.
When installing the filter fabric, make sure it is placed on the trench bottom and sides before laying the perforated PVC drainage pipe. Secure it with non-corrosive staples or other appropriate fasteners to keep it in place. The fabric should extend above the pipe to prevent any soil intrusion.
By adding a filter fabric, you can improve the longevity and efficiency of your perforated PVC drainage pipe by minimizing the risk of clogs and blockages. This simple step can make a significant difference in the long-term performance of your drainage system.
By adhering to these final thoughts and additional tips for perforated PVC drainage pipe installation, you can ensure the success and effectiveness of your drainage system. Proper disposal of excavated soil and debris, hiring professional assistance when necessary, and installing a filter fabric are all crucial considerations that can contribute to a reliable and durable drainage solution.
Frequently Asked Questions
What Is The Correct Way To Install Perforated Drain Pipe?
To install perforated drain pipe correctly, follow these steps: 1. Dig a trench along the desired drainage path. 2. Lay a bed of gravel in the trench as a base for the pipe. 3. Place the perforated drain pipe on top of the gravel bed, with the perforations facing downwards.
4. Cover the pipe with more gravel, ensuring it is evenly distributed. 5. Backfill the trench with soil and compact it for stability. Note: Seek professional guidance for specific installation requirements.
How Deep Should You Bury Perforated Drain Pipe?
Perforated drain pipes should be buried at a depth of about 6-10 inches in the ground. This helps to ensure proper drainage by allowing water to flow into the pipe. A shallow burial helps to prevent the pipe from becoming clogged with soil or debris.
Do You Need To Glue Perforated Drain Pipe?
No, you do not need to glue a perforated drain pipe. The holes in the pipe allow water to seep into it, and gluing it will hinder this drainage function.
How Do You Install A Flexible Perforated Drain Pipe?
To install a flexible perforated drain pipe, follow these steps: 1. Dig a trench to the desired depth and slope. 2. Lay the drain pipe in the trench, ensuring the perforated holes face downward. 3. Connect the pipe sections using fittings and secure with clamps.
4. Backfill the trench, compacting the soil as you go. 5. Test the drainage system by running water through the pipe.
Conclusion
Installing a perforated PVC drainage pipe is a crucial step in ensuring proper water management and preventing issues like flooding and soil erosion. By following the steps outlined in this guide, you can confidently undertake this project and reap the benefits of a well-drained landscape.
Remember to choose the appropriate pipe size, prepare the area properly, and secure the connections tightly. With attention to detail and proper maintenance, your drainage system will serve you well for years to come.