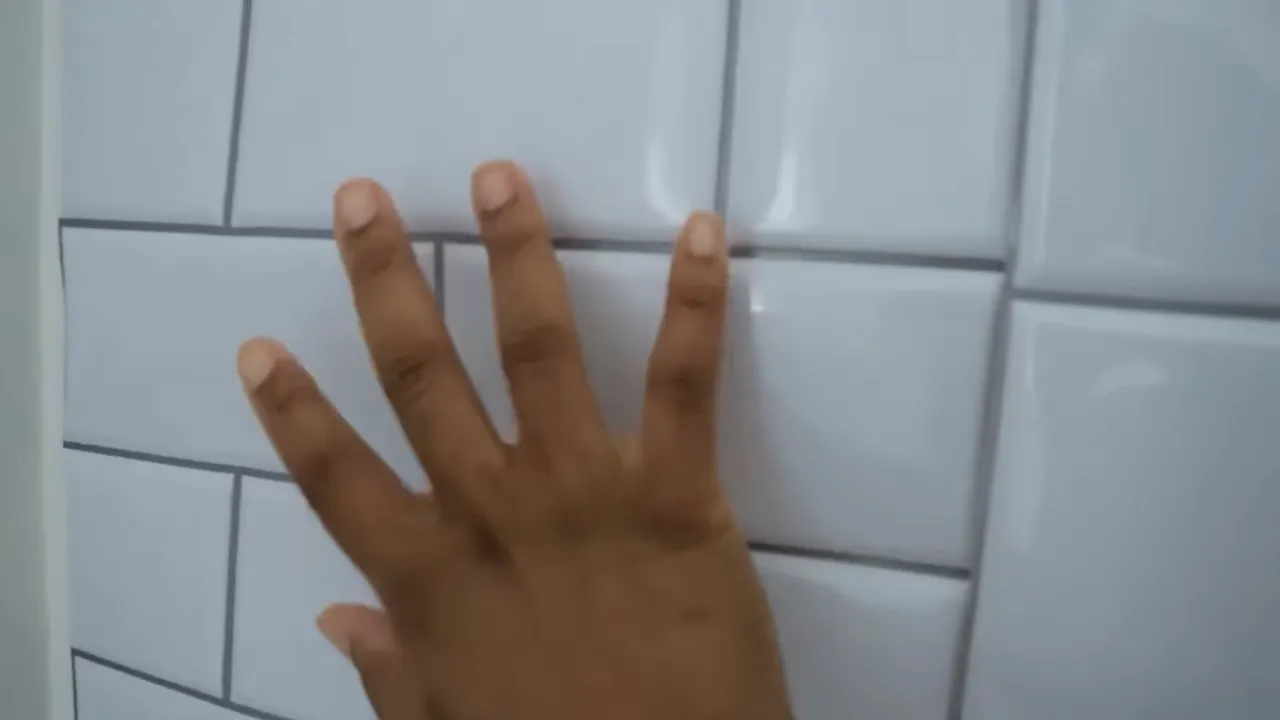
To install peel and stick backsplash over existing tile, clean the tile surface, measure and cut the peel and stick tiles, and apply them to the tile using firm pressure. With this simple process, you can easily update the look of your tile backsplash without extensive renovation or professional help.
Are you tired of your outdated tile backsplash but don’t want to go through the hassle of removing it? Installing peel and stick backsplash over existing tile can be an excellent solution. This convenient DIY project allows you to transform the look of your kitchen or bathroom quickly and easily.
By following a few simple steps, you can achieve a fresh and modern appearance without breaking the bank. We will guide you through the process of installing peel and stick backsplash over existing tile, ensuring a seamless and stylish result.
Assessing Your Existing Tile
Determining the condition of your current tile
Before you begin the process of installing peel and stick backsplash over existing tile, it is important to assess the condition of your current tile. This will help you determine if your tile is suitable for the installation and if any additional preparation is needed. Here are some steps to follow when assessing your existing tile:
- Inspect the tile surface for any cracks, chips, or missing pieces. These can impact the adhesion of the peel and stick backsplash and may need to be repaired before proceeding.
- Check the grout lines between the tiles. If the grout is cracked, crumbling, or uneven, it may need to be repaired or replaced to ensure a smooth installation surface.
- Observe the overall condition of the tile. If it is dirty, discolored, or stained, a thorough cleaning will be necessary before applying the peel and stick backsplash.
Identifying any loose or damaged tiles
In addition to assessing the condition of your current tile, it is important to identify any loose or damaged tiles. These can pose a problem for the installation, as they may affect the stability and integrity of the surface. Here are some steps to follow when identifying loose or damaged tiles:
- Gently tap on each tile with a small mallet or a wooden handle of a tool. If you hear a hollow sound, it may indicate that the tile is loose and needs to be replaced or re-adhered.
- Visually inspect each tile for any visible signs of damage, such as cracks, chips, or breaks. Any severely damaged tiles should be replaced before proceeding with the installation.
- Pay attention to any tiles that are significantly raised or sunken compared to the surrounding tiles. This can indicate a problem with the subfloor and may require professional assistance to address before the installation.
Cleaning and preparing the tile surface
Once you have assessed the condition of your current tile and identified any loose or damaged tiles, the next step is to clean and prepare the tile surface for the installation of the peel and stick backsplash. This will ensure proper adhesion and a smooth, long-lasting result. Here are some steps to follow when cleaning and preparing the tile surface:
- Start by thoroughly cleaning the tile surface with a mild detergent or tile cleaner. Remove any dirt, grease, or grime using a soft cloth or sponge.
- For tougher stains or residue, you can use a gentle abrasive cleaner or a mixture of baking soda and water. Be sure to rinse the surface thoroughly and allow it to dry completely before proceeding.
- Once the tile surface is clean and dry, lightly sand it with fine-grit sandpaper. This will help to create a slightly rough texture that will improve the adhesion of the peel and stick backsplash.
- After sanding, wipe away any dust or particles using a damp cloth or sponge.
By following these steps to assess your existing tile, identify any loose or damaged tiles, and clean and prepare the tile surface, you will be one step closer to successfully installing a peel and stick backsplash over your current tile. So roll up your sleeves and let’s transform your kitchen or bathroom with this easy and affordable DIY project!
Gather Your Tools And Materials
Gathering your tools and materials is the crucial first step in installing a peel and stick backsplash over existing tile. Having the right tools and materials will ensure a successful and hassle-free installation. In this section, we will guide you through the process of gathering everything you need.
List of the tools needed for the installation
Before starting the installation, it’s important to make sure you have the necessary tools on hand. Here is a list of tools you will need:
| Tools | Description |
| Utility knife | A sharp knife to cut the peel and stick backsplash to size. |
| Measuring tape | To accurately measure the dimensions of the backsplash area. |
| Pencil or marker | To mark the cutting lines on the peel and stick backsplash. |
| Straight edge or level | Used to ensure the backsplash is applied straight and level. |
| Smooth roller | To firmly press the backsplash onto the existing tile and remove air bubbles. |
| Rubber gloves | To protect your hands during the installation process. |
Choosing the right type of peel and stick backsplash
When it comes to choosing the right type of peel and stick backsplash, there are a few factors to consider. Firstly, make sure the backsplash is specifically designed for use over existing tile. This will ensure proper adherence and longevity. Additionally, consider the style and color of the backsplash to ensure it complements your existing kitchen or bathroom decor. If you’re unsure about the right type of backsplash to choose, consult with a professional or seek advice from the manufacturer.
Gathering additional materials for a successful installation
In addition to the tools mentioned above, you will also need some additional materials to ensure a successful installation. These materials include:
- Surface cleaner: Clean the existing tile thoroughly before applying the peel and stick backsplash to ensure proper adhesion.
- Primer: Some backsplash materials may require a primer to enhance adhesion. Check the manufacturer’s instructions to determine if a primer is needed for your chosen backsplash.
- Caulk or sealant: Use caulk or sealant to fill any gaps between the backsplash and other surfaces, such as countertops or walls.
- Scissors: A pair of scissors will come in handy for cutting around outlets, switches, and other obstacles on the wall.
By gathering these additional materials, you’ll be well-prepared for a smooth and successful installation of your peel and stick backsplash over existing tile.
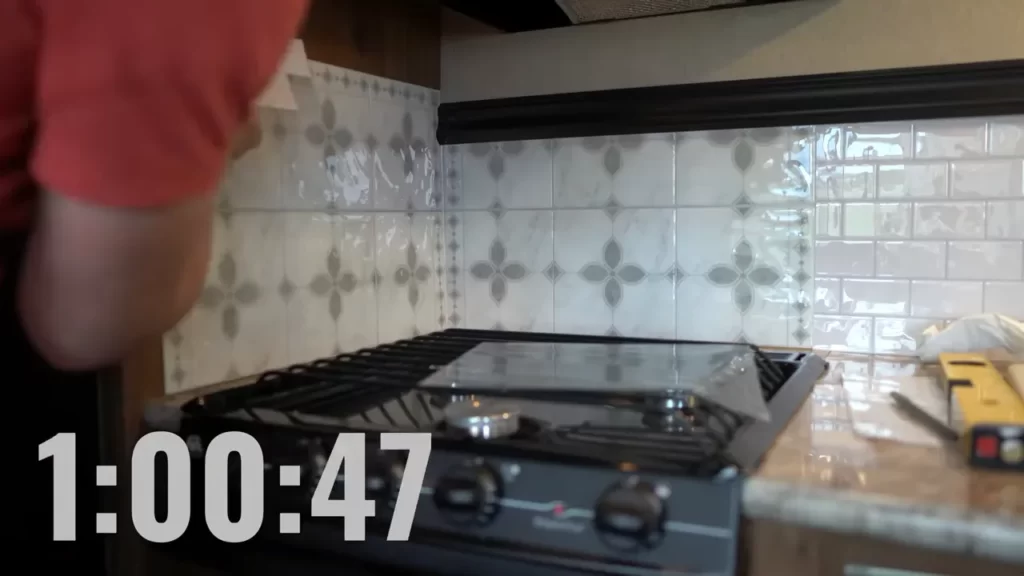
Preparing The Surface For Installation
Before installing a peel and stick backsplash over existing tile, it is important to properly prepare the surface. Following a few key steps will ensure a smooth and successful installation.
Cleaning the tile surface thoroughly
The first step in preparing the surface is to clean the tile thoroughly. Any dust, dirt, or grease on the tile can prevent the adhesive on the peel and stick backsplash from properly sticking. To clean the tile surface, follow these simple steps:
- Start by wiping down the tile with a mild detergent mixed with warm water. This will help remove any surface grime or grease.
- Rinse the tile thoroughly with clean water to remove any soap residue.
- Dry the tile with a clean towel or cloth.
Removing any old grout or adhesive
If you have any old grout or adhesive on the tile, it is important to remove it before installing the peel and stick backsplash. This will ensure a smooth and even surface for the new backsplash. Here’s how to remove old grout or adhesive:
- Start by using a grout removal tool or a sharp utility knife to carefully scrape away the old grout or adhesive.
- Be sure to remove all traces of the old material, taking care not to damage the existing tile.
- Once the old grout or adhesive is removed, clean the tile surface again to remove any leftover debris.
Sanding down any uneven areas
If you notice any uneven areas on the tile surface, it is important to sand them down before installing the backsplash. Sanding down the uneven areas will create a smooth surface for the peel and stick backsplash to adhere to. Here are the steps to sand down any uneven areas:
- Start by using a sanding block or sandpaper to gently sand down the uneven spots on the tile.
- Take care not to sand too aggressively, as this can damage the tile.
- After sanding, wipe away any dust or debris from the tile surface.
By following these steps to prepare the surface, you’ll ensure a clean, smooth, and even base for installing a peel and stick backsplash over existing tile. A properly prepared surface will result in a professional-looking backsplash that will enhance the beauty of your kitchen or bathroom.
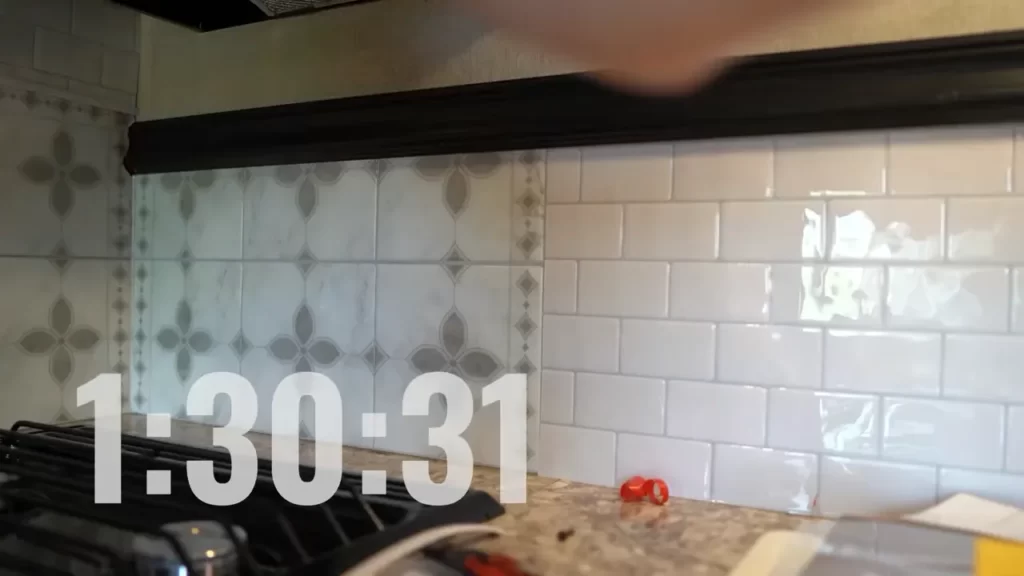
Applying The Peel And Stick Backsplash
Once you have measured and cut the backsplash tiles accurately, the next step is to apply the peel and stick adhesive to the back of the tiles. This adhesive is specifically designed to securely hold the tiles in place, ensuring a long-lasting installation. Here’s how to apply the adhesive and install the peel and stick backsplash over your existing tile:
Measuring and Cutting the Backsplash Tiles Accurately
Before you begin, it’s important to measure the area where you will be installing the backsplash. This will help you determine the number of tiles you need and ensure a precise fit. Using a measuring tape, measure the height and width of the space, taking into account any outlets or other obstacles. Once you have your measurements, cut the peel and stick backsplash tiles accordingly.
Applying the Peel and Stick Adhesive to the Back of the Tiles
With your tiles cut to the correct size, you can now apply the peel and stick adhesive. This adhesive is typically included with the backsplash tiles or can be purchased separately. Start by peeling the backing off the adhesive sheet and carefully place it onto the back of the tile. Be sure to align the adhesive with the edges of the tile to ensure proper adhesion.
If you’re working with larger tiles or multiple sheets of adhesive, it’s important to apply the adhesive in sections. This will prevent it from drying out before you have a chance to install the tiles. As you finish applying adhesive to each section, press it firmly onto the back of the tile to make sure it adheres properly.
Aligning and Pressing the Tiles Firmly onto the Tile Surface
Now that your tiles are prepared with the peel and stick adhesive, it’s time to install them onto the existing tile surface. Start by aligning the first tile with one corner of the space and press it firmly onto the tile surface. Use a level to ensure the tile is straight before moving on to the next one.
Continue aligning and pressing the tiles firmly onto the tile surface, working in a systematic pattern to maintain consistency. It’s important to make sure each tile adheres properly, so take the time to press down firmly and eliminate any air bubbles that may have formed. This will ensure a smooth and flawless installation.
As you progress, periodically step back and evaluate the overall look of the backsplash. Make any necessary adjustments to alignment or positioning to maintain a balanced and visually appealing result.
Once you have installed all the tiles, take a moment to go over the entire backsplash, pressing down on each tile to ensure they are securely adhered. This will help to prevent any future issues and ensure the longevity of your new peel and stick backsplash.
Installing a peel and stick backsplash over existing tile is a convenient and cost-effective way to update your kitchen or bathroom. By measuring and cutting the tiles accurately, applying the peel and stick adhesive properly, and firmly pressing the tiles onto the tile surface, you can achieve a professional-looking result in no time. So why wait? Transform your space with a stylish and easy-to-install peel and stick backsplash today.
Dealing With Corners, Edges, And Outlets
When installing peel and stick backsplash over existing tile, one of the challenges you may encounter is dealing with corners, edges, and outlets. These areas require special attention and techniques to ensure a seamless and professional-looking installation. In this section, we will discuss techniques for cutting tiles to fit corners and edges, installing backsplash tiles around electrical outlets, and how to achieve a seamless look throughout the installation.
Techniques for cutting tiles to fit corners and edges
Cutting peel and stick backsplash tiles to fit corners and edges can be a bit tricky, but with the right techniques, it can be done seamlessly. Here are a few tips to help you achieve a perfect fit:
- Measure the area: Before cutting your tiles, make sure to carefully measure the corners and edges where the tiles will be placed. This will help you determine the size and shape of the cut tiles.
- Use a straight edge: When cutting the tiles, it’s important to use a straight edge to ensure clean and precise cuts. A straight edge can be a ruler, a carpenter’s square, or any other straight object.
- Score and snap: To cut the tiles, score the surface using a utility knife along the cut line. Then, gently snap the tile along the scored line. This technique works well for straight cuts.
- Use tile nippers: For more intricate cuts, such as fitting tiles around corners or curves, tile nippers can be useful. Tile nippers allow you to nibble away small amounts of tile until you achieve the desired shape.
- Sand the edges: After cutting the tiles, you may notice sharp edges. To achieve a smoother finish, use sandpaper to gently sand down the edges.
Installing backsplash tiles around electrical outlets
When it comes to installing peel and stick backsplash tiles around electrical outlets, it’s essential to ensure a safe and professional installation. Here’s a step-by-step guide to help you:
- Turn off the power: Before working around electrical outlets, always turn off the power supply to the area. This will prevent any accidents or electrical shocks.
- Remove the outlet covers: Carefully unscrew and remove the outlet covers to expose the electrical outlets. Set them aside in a safe place.
- Measure and cut the tiles: Measure the area around the outlets and cut the tiles accordingly to fit around them. Use a utility knife or tile nipper for precise cuts.
- Apply the tiles: Peel off the backing of the tiles and carefully stick them in place, ensuring they fit snugly around the outlets. Press down firmly to ensure proper adhesion.
- Replace the outlet covers: Once the tiles are installed, replace the outlet covers and screw them back into place. Make sure they are secure.
Ensuring a seamless look throughout the installation
To achieve a seamless look throughout the installation of your peel and stick backsplash, there are a few important steps to keep in mind:
- Clean the surface: Before applying the tiles, make sure the existing tile surface is clean and free of any dirt or debris. A clean surface will ensure proper adhesion.
- Align the tiles: Take your time to align the tiles properly, ensuring they are straight and level. This will create a cohesive and professional look.
- Trim excess tiles: If you have any excess tiles that extend beyond the desired area, trim them using a utility knife or scissors. This will give your backsplash a clean and finished appearance.
- Apply pressure: Once the tiles are in position, apply pressure to ensure they stick securely to the surface. Use a rolling pin or a flat object to press down on the tiles and remove any air bubbles.
- Seal the edges: To further enhance the seamless look of your backsplash, consider using a clear caulk to seal the edges. This will prevent any moisture from seeping behind the tiles and give them a polished finish.
By following these techniques and tips, you can easily deal with corners, edges, and outlets when installing peel and stick backsplash over existing tile. With a little patience and attention to detail, you’ll achieve a beautiful and professional-looking backsplash that will enhance the aesthetic appeal of your space.
Grouting And Finishing Touches
Once you have successfully installed your peel and stick backsplash over existing tile, the next step is to add the finishing touches that will give your backsplash a polished look. Grouting is an important part of this process, as it not only enhances the overall appearance but also provides protection to the tiles. In this section, we will guide you through choosing the right grout and color for your backsplash, applying and smoothing the grout between the tiles, and cleaning up any excess grout to ensure a flawless finish.
Choosing the right grout and color for your backsplash
When it comes to selecting the grout for your peel and stick backsplash, it is important to choose the right type and color that will complement your existing tile. The two main types of grout are sanded and unsanded. Sanded grout is recommended for wider grout lines, typically over 1/8 inch, while unsanded grout is suitable for narrower lines. Consider the size of the tiles and the width of the grout lines when making your decision.
In addition to the type of grout, the color you choose can greatly impact the final look of your backsplash. It is advisable to select a grout color that either matches or complements the color of your tiles. This will help create a cohesive look and make the individual tiles stand out. You can opt for a contrasting color to make a bold statement or a similar shade to achieve a more seamless appearance. Take note of the color temperature of your tiles – warm colors pair well with warm grout tones, and vice versa.
Applying and smoothing the grout between the tiles
To apply the grout, start by mixing it according to the manufacturer’s instructions. Use a grout float or a rubber float to spread the grout across the tiles, making sure to press it into the grout lines firmly and at a 45-degree angle. Move the float diagonally to ensure that the grout is evenly distributed between the tiles.
Once the grout is applied, use a grout float or a grout sponge to remove any excess grout from the tile surfaces. Clean the sponge or float regularly to avoid smearing grout onto cleaned areas. Be gentle in this process to prevent dislodging the tiles.
After removing the excess grout, use a damp cloth or sponge to wipe the tile surfaces in a circular motion, removing any haze or residue. This will help to reveal the true color of the grout and enhance the overall appearance of your backsplash.
Cleaning up excess grout and adding finishing touches
To clean up any remaining grout haze or residue, use a grout haze remover or a mixture of water and vinegar. Apply the solution to a clean cloth or sponge and gently rub the affected areas in a circular motion. Rinse the cloth or sponge frequently and continue until the grout haze is removed.
Once the grout is thoroughly dried and the haze is removed, you can add the finishing touches to your backsplash. Consider using a grout sealer to protect the grout from stains and to ensure its longevity. Apply the sealer according to the manufacturer’s instructions, making sure to cover the entire grout surface. Allow the sealer to dry completely before using or touching the backsplash.
In conclusion, grouting is a crucial step in the installation of a peel and stick backsplash over existing tile. By choosing the right grout and color, applying it carefully between the tiles, and cleaning up any excess grout, you can achieve a professional and polished finish. Remember to protect your grout with a sealer to maintain its appearance and durability over time.
Maintaining And Cleaning Your New Backsplash
Tips for keeping your backsplash clean and looking its best
Maintaining a clean and beautiful backsplash is essential to preserve its appearance and extend its lifespan. Here are some valuable tips to help you keep your new peel and stick backsplash in top condition:
- Regularly wipe down your backsplash with a damp cloth or sponge to remove any surface dirt or grime. This will prevent buildup and keep it looking fresh.
- For stubborn stains, use a mild dish soap or a non-abrasive cleaner specifically designed for tile backsplashes. Apply the cleaner to a soft cloth and gently scrub the stain, then rinse with water and dry with a clean cloth.
- Avoid using harsh chemicals or abrasive cleaners, as they can damage the surface of your backsplash. Stick to gentle cleaning solutions to preserve its finish and prevent discoloration.
- Regularly inspect your backsplash for any signs of damage, such as loose or peeling tiles. If you notice any issues, address them promptly to prevent further damage.
- Consider using a silicone-based sealer to protect your backsplash from moisture and stains. This extra layer of protection will make it easier to clean and maintain in the long run.
- Be mindful of any spills or splatters while cooking or using the sink. Wipe them up immediately to prevent the stains from setting or causing any damage to your backsplash.
- Place mats or trivets under hot cookware or appliances to protect your backsplash from heat damage. The adhesive used on peel and stick tiles can be sensitive to high temperatures.
Dealing with stains and spills
Accidents happen, and even with the best precautions, you may encounter stains or spills on your backsplash. Here’s how to handle them effectively:
- For food stains, mix equal parts vinegar and water in a spray bottle. Spray the solution onto the stained area and let it sit for a few minutes. Gently scrub the stain with a soft brush or sponge, then rinse with water and dry.
- If you’re dealing with grease stains, make a paste using baking soda and water. Apply the paste to the stain, let it sit for a few minutes, then scrub gently with a sponge or cloth. Rinse with water and dry thoroughly.
- If you accidentally spill acidic liquids, such as lemon juice or vinegar, onto your backsplash, wipe them up immediately. These substances can etch the surface and cause permanent damage if left for an extended period.
- For tougher stains, there are commercial tile cleaners available that can effectively remove stubborn stains without causing harm to your backsplash. Follow the instructions on the cleaner’s packaging for best results.
Regular maintenance to prolong the lifespan of your backsplash
To ensure your peel and stick backsplash remains in excellent condition for years to come, it’s important to establish a regular maintenance routine. Here are some key steps to incorporate into your maintenance plan:
- Periodically check the edges and corners of your backsplash to ensure the adhesive is still intact. If you notice any loose tiles, reapply adhesive as needed to prevent further peeling or damage.
- Inspect the seams between tiles, focusing on any areas where water or dirt might seep through. Apply a small amount of caulk or sealant to prevent moisture from compromising the adhesive.
- Consider using a grout pen to freshen up the appearance of your peel and stick backsplash if it has a grout-like pattern. This will make it look brand new while also protecting the edges of the tiles.
By following these maintenance and cleaning tips, you can keep your new peel and stick backsplash looking stunning and increase its durability. Enjoy the beauty and functionality that your backsplash brings to your kitchen or bathroom!
Frequently Asked Questions
When it comes to installing a peel and stick backsplash over existing tile, you may have a few questions in mind. In this section, we will address some of the most commonly asked questions to help you gain a better understanding of this DIY project.
Can peel and stick backsplash be installed on any surface?
Peel and stick backsplash is versatile and can be installed on a variety of surfaces. However, it is important to ensure that the surface is clean, smooth, and free from any dust or debris. While it can be installed directly over existing tile, it may not adhere properly to surfaces with an uneven texture or heavily damaged walls. It is recommended to patch and repair any damaged areas before installing the peel and stick backsplash for better results.
How long does peel and stick backsplash last?
The durability of peel and stick backsplash can vary depending on the quality of the product, installation technique, and the amount of wear and tear it is exposed to. Generally, peel and stick backsplash is designed to last for several years with proper care. However, it is important to note that excessive moisture, direct heat, or harsh cleaning agents can shorten its lifespan. By following the manufacturer’s instructions and taking necessary precautions, you can ensure the longevity of your peel and stick backsplash.
Can I remove and reposition the backsplash if needed?
One of the advantages of using peel and stick backsplash is its repositionable nature. If you need to reposition or remove the backsplash for any reason, you can gently peel it off the surface. However, keep in mind that the adhesive may lose its strength after multiple repositioning attempts, so it is advisable to plan and position the backsplash carefully during the initial installation. Additionally, removing the backsplash may require some effort and could potentially cause damage to the underlying surface, so it’s best to proceed with caution.
What are the benefits of using peel and stick backsplash?
Peel and stick backsplash offers several benefits that make it a popular choice among homeowners. Some of the key advantages include:
- Ease of installation: Peel and stick backsplash can be installed without the need for any special tools or professional assistance.
- Cost-effective: It is an affordable alternative to traditional tile installation, allowing you to achieve a stylish look on a budget.
- Versatile design options: Peel and stick backsplash is available in a wide range of styles, colors, and patterns, allowing you to customize your space according to your personal taste.
- Temporary solution: If you are renting or looking for a temporary design solution, peel and stick backsplash offers an easy way to update your space without making permanent changes.
- Easy maintenance: Peel and stick backsplash is easy to clean and maintain, making it a practical choice for kitchens and bathrooms.
Can I install peel and stick backsplash over painted walls?
Yes, peel and stick backsplash can be installed over painted walls. However, there are a few considerations to keep in mind. Firstly, ensure that the paint is fully cured and has been on the walls for at least two weeks before installing the backsplash. Additionally, if the paint has a glossy or slick finish, it is recommended to scuff the surface lightly with sandpaper to improve adhesion. Remember to remove any dust or residue before applying the peel and stick backsplash for the best results.
Frequently Asked Questions
Can You Put Peel And Stick Backsplash Over Tile?
Yes, you can apply peel and stick backsplash over tile. It’s a convenient and easy way to update your kitchen or bathroom. Just make sure the surface is clean and free from dust or grease before applying the backsplash. Smooth out any air bubbles for a seamless finish.
Can You Lay Peel And Stick Tile Over Ceramic Tile?
Yes, you can lay peel and stick tiles over ceramic tiles.
How Can I Cover My Backsplash Without Removing Tile?
You can cover your backsplash without removing the tile by using a peel-and-stick backsplash or applying adhesive tiles directly over the existing ones. Another option is to paint the tile using special tile paint or epoxy. Updating the grout color can also bring a fresh look without removing the tile.
How Do You Prepare A Wall For Peel And Stick Backsplash?
To prepare a wall for peel and stick backsplash, clean the surface thoroughly, removing any dirt or grease. Ensure the wall is smooth by sanding it if necessary. Apply a primer to create a suitable base, following the manufacturer’s instructions.
Allow the primer to dry completely before applying the peel and stick backsplash.
Conclusion
To sum up, installing peel and stick backsplash over existing tile is a practical and cost-effective solution for a quick kitchen or bathroom makeover. By following the steps mentioned in this blog post, you can easily transform your space without the need for professional help.
With its user-friendly installation process, peel and stick backsplash provides a versatile and beautiful option for enhancing the look of your home. Enjoy the satisfaction of a stylish and modern upgrade with minimal effort and maximum impact.
