To install a pee trap, insert the trap into the drain pipe and tighten the connections. Now, let’s dive into the details of installing a pee trap.
The pee trap, also known as a P-trap or S-trap, is an essential plumbing component that prevents sewer gases from entering the house. This trap is typically found under sinks, toilets, and other fixtures. By creating a water seal, it blocks the odors and prevents insects or rodents from entering the pipes.
Given its importance, it’s crucial to know how to install a pee trap correctly. We will guide you through the installation process step by step, ensuring that you can do it yourself confidently and efficiently.
Understanding The Purpose Of A Pee Trap
When it comes to plumbing systems, one essential component that plays a crucial role in maintaining hygiene and preventing unpleasant odors is the pee trap. In this section, we will dive deeper into what a pee trap is, why it is important, and the role it plays in preventing foul odors and harmful gases. By understanding the purpose of a pee trap, you’ll gain valuable insights into its significance and how it contributes to a functioning plumbing system.
What is a Pee Trap and Why is it Important?
A pee trap, also known as a P-trap, is a curved section of pipe installed beneath sinks, toilets, and other fixtures that are connected to a drainage system. Its primary purpose is to prevent sewer gases, such as hydrogen sulfide and methane, from entering your living space and creating a foul odor that can be harmful to your health.
The Role of a Pee Trap in Preventing Foul Odors and Harmful Gases
The design of a pee trap allows it to hold a small amount of water, creating a barrier between your living space and the sewer system. This water seal acts as a trap, blocking foul odors and harmful gases from traveling back up through the drain and into your home. By preventing these odors from permeating your living space, a pee trap helps maintain a clean and fresh environment.
Additionally, a pee trap also serves as a barrier against insects, rodents, and other pests that may try to enter your home through the sewer system. By blocking their access, the pee trap helps protect your home from unwanted visitors while providing an essential component of your plumbing system.
In conclusion, a pee trap plays a vital role in maintaining cleanliness, preventing foul odors, and protecting your health and home. By understanding the purpose and importance of a pee trap, you can ensure that your plumbing system functions optimally and provides a safe and pleasant environment for you and your family.

Gathering The Necessary Tools And Materials
Before you begin installing a pee trap, it’s important to gather all the necessary tools and materials. Having everything you need on hand will make the installation process much smoother and more efficient. In this section, we will provide you with a comprehensive list of the tools and materials you’ll need, as well as the best places to purchase them.
A list of tools and materials needed for the installation process
Here’s a handy list of all the tools and materials you’ll need to successfully install a pee trap:
- Pipe cutter
- Teflon tape
- Wrench
- Hacksaw
- Plumber’s putty
- Channel-lock pliers
- PVC cement
- Bucket
- Measuring tape
Where to buy the required items
Now that you know what tools and materials you’ll need, it’s time to find the best place to purchase them. Luckily, there are several options available:
- Local hardware stores: Visit your nearby hardware store, where you’ll find a wide range of tools and materials for plumbing projects. The advantage of purchasing from a local hardware store is that you can ask for expert advice and receive personalized recommendations based on your specific needs.
- Online retailers: Online platforms such as Amazon, Home Depot, and Lowe’s offer a convenient way to browse and purchase plumbing tools and materials from the comfort of your own home. These platforms often have a wide selection, competitive prices, and customer reviews to help inform your purchasing decisions.
- Plumbing supply stores: If you’re looking for specialized tools and materials or need a larger quantity, consider visiting a plumbing supply store. These stores typically have a vast inventory and knowledgeable staff who can assist you in finding exactly what you need.
Remember to compare prices and read customer reviews before making your final purchasing decisions. By doing so, you’ll ensure that you’re getting the best quality products at the most reasonable prices.
Step 1: Assessing The Installation Area
Before installing a pee trap, it’s crucial to assess the installation area properly. This step ensures that the pee trap can be installed efficiently and functions effectively. Additionally, it helps prevent any potential complications that may arise from incorrect installation.
Checking the existing plumbing system
Start by examining the existing plumbing system in your bathroom or any area where you plan to install the pee trap. Understanding the layout and configuration of your current plumbing setup is essential for a successful installation.
Look for the main drainpipe, as this is where the pee trap will be connected. Check the condition of the existing pipes, fittings, and connections. Ensure there are no leaks, cracks, or blockages that can affect the functioning of the pee trap. Taking note of any issues will help you address them during the installation process.
Identifying the location for installing the pee trap
Next, identify the ideal location for installing the pee trap. This is typically beneath a sink, toilet, or any other fixture where the trap will serve its purpose. Ensure that the chosen location allows for easy access and maintenance of the pee trap in the future.
Consider the height and clearance requirements specified by the manufacturer for proper functioning. Taking these measurements into account will help you determine the precise location to install the pee trap and avoid unnecessary complications.
| Sink Type | Ideal Placement |
|---|---|
| Bathroom sink | Beneath the sink, directly connected to the drainpipe. |
| Toilet | Directly connected to the toilet’s outlet pipe in the floor. |
| Urinal | Located at the bottom of the urinal drainpipe. |
By evaluating the existing plumbing system and identifying the most appropriate location for installing the pee trap, you’ll be setting a solid foundation for the rest of the installation process. This thoughtful approach ensures a smooth and effective installation, ultimately preventing any issues or frustrations down the line.
Step 2: Removing The Old Pee Trap (If Applicable)
After identifying the need to install a new pee trap, the second step is to remove the old one, if it is already in place. This is an important step, as improperly removing the old trap can lead to leaks and further plumbing issues. In this section, we will guide you on how to safely remove the existing pee trap and provide tips for handling and disposing of it.
How to safely remove an existing pee trap
To safely remove the old pee trap, follow these steps:
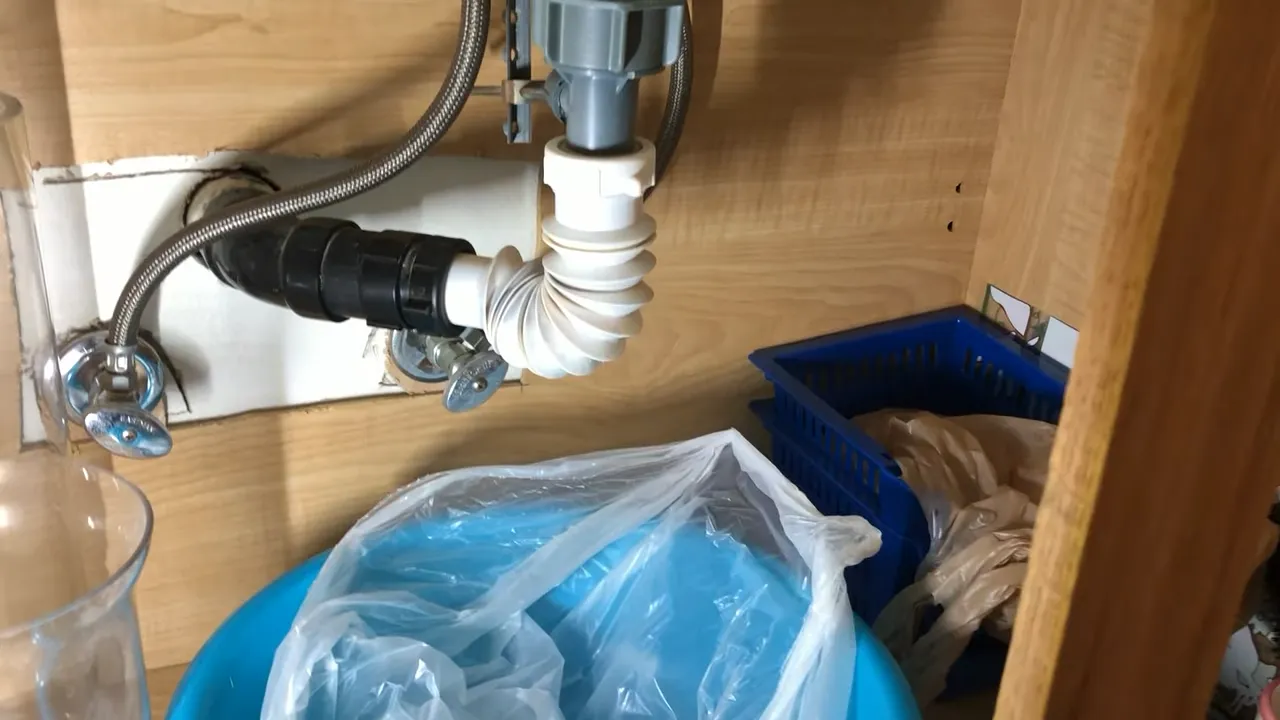
- Locate the connection points: The pee trap is usually located under the sink or the bathroom fixture that it serves. Identify the connection points where the trap is attached to both the sink drain and the wastewater pipe.
- Use a wrench: Using an adjustable wrench, loosen the nuts that secure the pee trap to the connection points. Turn the nuts counterclockwise to loosen them. If the nuts are painted or rusted, apply some penetrating oil to help loosen them.
- Remove the trap carefully: Once the nuts are loose, carefully detach the pee trap from the connection points. Be cautious not to apply excessive force or twist the trap too much, as this can cause damage to the surrounding pipes.
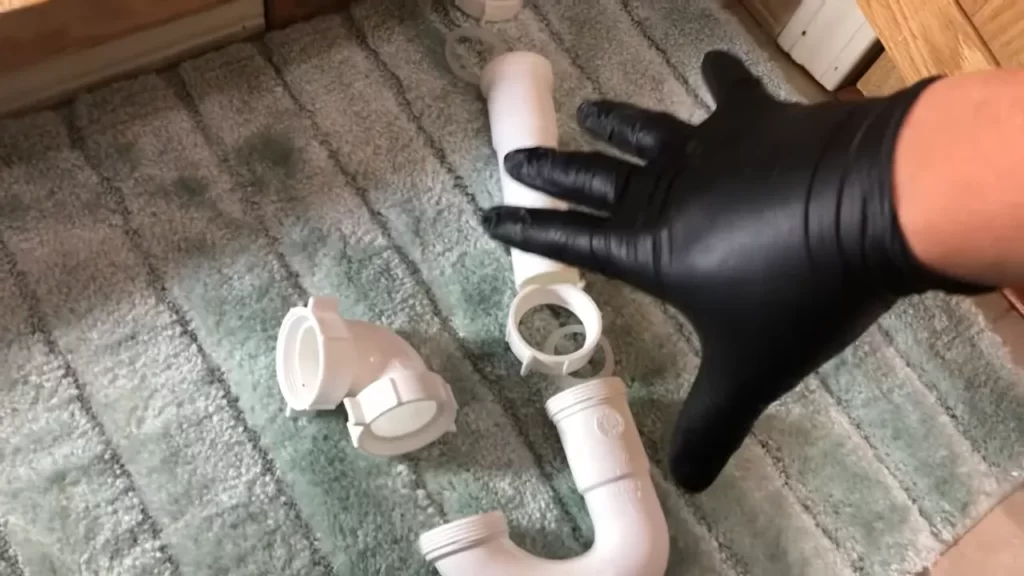
- Inspect for clogs or debris: Now that the pee trap is disconnected, take a moment to inspect the trap for any clogs or debris that may have accumulated over time. If you notice any blockages, clean them out using a wire brush or a pipe cleaner.
- Dispose of the old trap: Once you have removed the old pee trap, it is important to dispose of it properly. If the trap is in good condition, you may be able to reuse it. However, if it is damaged or old, it is recommended to replace it with a new one. Dispose of the old trap according to your local waste management guidelines.
Tips for handling and disposing of the old trap
When handling and disposing of the old trap, keep the following tips in mind:
- Wear gloves: When handling the old trap, it is important to wear protective gloves to prevent any contact with bacteria or harmful substances that may be present.
- Use a plastic bag: Place the old trap in a sturdy plastic bag to contain any residual fluids or odors. This will prevent any leakage during disposal.
- Seal the bag securely: Once the old trap is inside the plastic bag, tightly seal it to prevent any leaks or spills.
- Follow local regulations: Check your local waste management guidelines to determine the proper disposal method for the old trap. Some areas may require you to take it to a specific waste disposal facility.
- Consider recycling options: Look into recycling options for plastic or metal traps in your area. If recycling is available, it can be a more sustainable choice than simply throwing it away.
By following these steps and tips, you can safely remove and dispose of the old pee trap, making room for the installation of a new one. Remember to exercise caution and take the necessary precautions throughout the process to avoid any mishaps or damage to your plumbing system.
Step 3: Choosing The Right Pee Trap
When it comes to installing a pee trap, choosing the right type is crucial. A pee trap prevents sewer gases from entering your living space while allowing wastewater to flow freely. In this step, we will discuss the different types of pee traps available and factors to consider when selecting one that suits your plumbing system.
Different types of pee traps and their suitability for various plumbing systems
There are several types of pee traps available, each designed to meet the specific needs of different plumbing systems. Here are a few common types:
| Type of Pee Trap | Suitability |
|---|---|
| P-trap | Most common and suitable for most residential plumbing systems. |
| S-trap | Common in older properties with floor-mounted drainage systems. |
| Bottle Trap | Compact design suitable for limited space installations like a bathroom vanity. |
| Deep Seal Trap | Used in commercial or industrial settings where a higher seal is necessary. |
Factors to consider when selecting a pee trap
When choosing the right pee trap for your plumbing system, there are several factors you should consider:
- Plumbing System: Evaluate your plumbing system to determine the type of trap that will fit seamlessly. Make sure it is compatible with your existing pipes and fixtures.
- Space Availability: Consider the available space for the pee trap installation. If you have limited space, a compact trap like the bottle trap may be the ideal choice.
- Environmental Factors: Take into account any specific environmental factors that could impact the functionality of the pee trap. For example, if your property is prone to freezing temperatures, choose a trap designed to withstand extreme cold.
- Quality and Durability: Invest in a high-quality pee trap that is durable and long-lasting. Avoid cheap traps that may cause issues in the long run.
- Maintenance Requirements: Consider the ease of maintenance and cleaning when selecting a pee trap. Opt for a trap that can be easily accessed and cleaned to ensure proper functioning.
By considering these factors and selecting the right pee trap for your plumbing system, you can ensure the effective and efficient removal of wastewater while keeping unpleasant odors at bay.
Step 4: Measuring And Cutting The Pipe
One of the crucial steps in installing a pee trap is measuring and cutting the pipe to the required size. This ensures a proper fit and functionality of the trap. In this step, we will discuss how to determine the correct length for the pipe and the different techniques you can use to cut it effectively.
Determining the correct length for the pipe
Before getting started with cutting the pipe, it’s essential to determine the correct length needed for your installation. To do this, follow these steps:
- Measure the distance: Using a measuring tape or ruler, measure the distance between the outlet of the trap and the drain pipe.
- Consider fittings: Take into account any fittings or connectors that will be attached to the pipe. This will affect the overall length required.
- Add extra length: It’s always a good idea to add a few extra inches to the measured length to allow for adjustments during the installation process.
Techniques for cutting the pipe to the required size
Once you have determined the correct length for the pipe, it’s time to cut it to the required size. Here are a few techniques you can use:
- Hacksaw: A hacksaw is a versatile tool that can be used to cut through various materials, including PVC pipes. Measure the desired length on the pipe and use a marker to mark the cutting point. Secure the pipe in a vise or clamp to ensure stability, then carefully cut along the marked line using the hacksaw. Remember to use smooth, controlled strokes and let the saw do the work.
- PVC pipe cutter: If you have access to a PVC pipe cutter, it can make the cutting process even easier. Simply place the cutter around the pipe, align it with the measured cutting point, and squeeze the handles together to make a clean cut. PVC pipe cutters are designed specifically for this purpose and provide a quick and precise cut.
- Miter box and saw: For angled cuts, such as when connecting the pipe to other fittings or corners, a miter box and saw can come in handy. The miter box helps guide the saw to make accurate angled cuts. Place the pipe securely into the miter box, align the saw with the desired angle, and carefully cut through the pipe.
- Power tools: If you have experience using power tools, you can also use a circular saw with a fine-toothed blade or a reciprocating saw equipped with a PVC cutting blade. These power tools can make the cutting process faster and more efficient, but they require a steady hand and caution to avoid any accidents.
Regardless of the technique you choose, it’s important to wear appropriate safety gear, such as gloves and eye protection, and take your time to ensure accurate and precise cuts.
With the pipe now cut to the required size, you are one step closer to completing the installation of the pee trap. In the next step, we will cover how to assemble the trap and connect it to the plumbing system.
Step 5: Installing The Pee Trap
Now that you have prepared the necessary materials and followed the previous steps, it’s time to install the pee trap. This is an essential part of your plumbing system as it prevents foul smells from coming up through the drain while also catching any debris that may have accidentally slipped down the sink or basin.
Connecting the pipe to the drain and the sink/basin
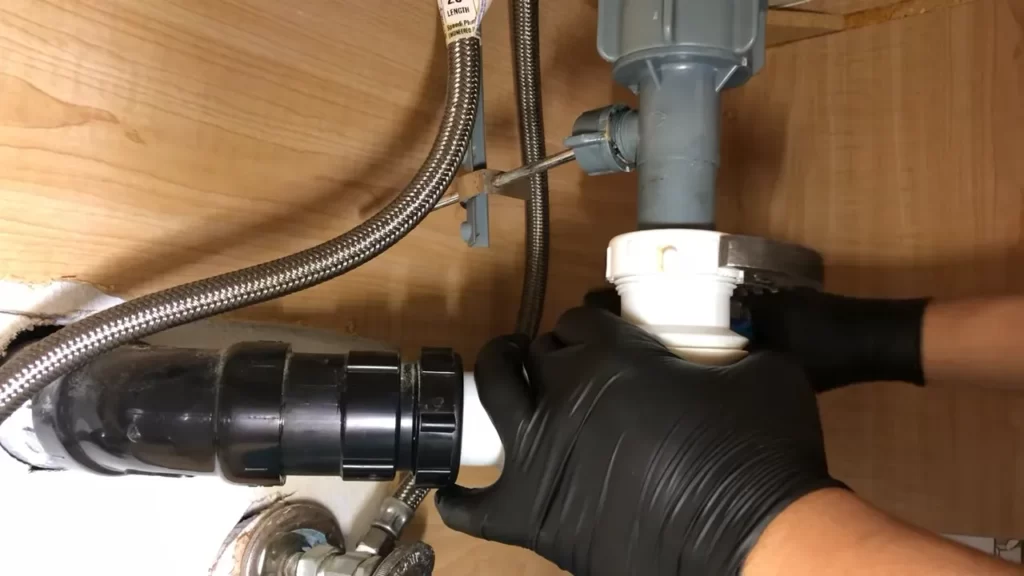
The first step in installing the pee trap is connecting the pipe to the drain. To do this, you will need to use a wrench to loosen the slip nut and remove the existing pipe connected to the drain. Take the new pipe and apply plumber’s tape to the threads to ensure a watertight seal. Then, insert the new pipe into the drain and tighten the slip nut securely with a wrench.
Once the pipe is connected to the drain, it’s time to connect it to the sink or basin. Depending on the type of sink or basin you have, there may be different methods of connection. However, most sinks or basins will have a tailpiece that connects directly to the pee trap. Simply insert the tailpiece into the slip nut of the pee trap and tighten it with a wrench. Again, make sure the connection is tight to prevent any leaks.
Securing the pee trap in place
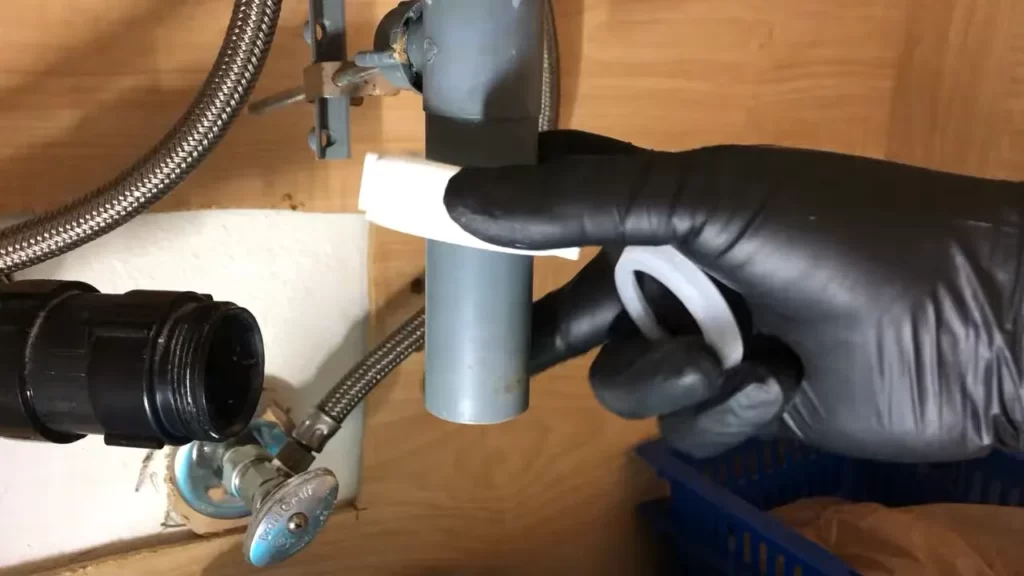
After connecting the pipe to both the drain and the sink/basin, the next step is to secure the pee trap in place. This is important to prevent any movement or loosening of the trap over time.
One common method of securing the pee trap is to use slip nuts. These are round nuts that tighten and secure the connections between the various pipes. Place slip nuts on both ends of the pee trap, ensuring that all connections are aligned properly. Tighten the slip nuts with a wrench until they are snug, but be careful not to overtighten as this can damage the pipes.
In addition to slip nuts, you may also want to use pipe hangers for extra support. These hangers can be attached to the wall or floor, depending on the location of the pee trap. They provide stability and help to prevent any unnecessary movement.
Once you have secured the pee trap in place, give it a final check to ensure all connections are tight and there are no visible leaks. Run some water through the drain to test the trap’s functionality. If everything looks good, congratulations! You have successfully installed the pee trap.
Remember, proper installation of the pee trap is crucial for maintaining the hygiene and functionality of your plumbing system. By following the step-by-step instructions and taking the necessary precautions, you can ensure a hassle-free installation process.
Step 6: Testing The Installation
After successfully installing the pee trap, it is crucial to test its functionality to ensure it is working properly. In this step, we will focus on how to check for leaks and troubleshoot common issues that may arise during the testing phase. By following these steps, you can rest assured that your pee trap is correctly installed and functioning as intended.
How to check for leaks and ensure proper functioning of the pee trap
To ensure the pee trap is effectively preventing any unwanted odors or gases from entering your living space, it is essential to check for leaks. Here are the steps to follow:
- First, fill a bucket with water.
- Take the bucket and carefully pour the water into the drain pipe connected to the pee trap.
- Monitor the drain pipe and the connections for any signs of leakage. Inspect the area around the pee trap thoroughly.
- If you notice any leaks, use a wrench to tighten the connections or replace any faulty parts.
- Repeat the process of pouring water into the drain pipe to ensure that the leaks have been successfully resolved.
By checking for leaks, you can ensure that the pee trap is watertight and functioning optimally.
Troubleshooting common issues during the testing phase
During the testing phase, you may encounter some common issues. Here are a few troubleshooting tips to help you address them:
- Foul odors: If you notice unpleasant odors even after installing the pee trap, it could be due to a dry trap. In such cases, pour water into the drain pipe to fill the trap and create a seal against the gases.
- Slow drainage: If the water drains slowly, there might be a clog in your drainage system. Use a plunger or a drain snake to clear any obstructions in the pipe connected to the pee trap.
- Excessive noise: If the pee trap produces loud gurgling noises, it indicates poor ventilation. Ensure that the vent pipe connected to the trap is not blocked or obstructed.
- Improper sealing: Inspect all the connections of the pee trap to verify they are tightly sealed. Loose connections can lead to leaks and inefficiency.
By troubleshooting these common issues, you can overcome any obstacles that may arise during the testing phase, ensuring the proper functioning of your pee trap.
Testing the installation of your pee trap is an essential step to guarantee its effectiveness. By following the steps mentioned above and addressing any issues that may arise, you can rest assured that your pee trap will successfully prevent unpleasant odors and gases from entering your living space.
Step 7: Proper Maintenance And Care
Regular maintenance tips for keeping the pee trap clean and odor-free
Proper maintenance and regular cleaning are crucial for keeping your pee trap functioning smoothly and free from unpleasant odors. Here are some essential tips to help you maintain your pee trap:
- Clear the trap regularly: Remove any accumulated waste and residue from the pee trap at least once a week. This will prevent blockages and maintain proper flow. Use a brush or a small tool to clear any debris or deposits from the trap.
- Flush with hot water: Pour boiling water down the drain to help dissolve any fatty substances that may have accumulated in the trap. This will help prevent clogs and keep the trap clean.
- Use enzyme-based cleaners: Enzyme-based cleaners are effective in breaking down organic waste and eliminating odor-causing bacteria. Regularly use these cleaners to keep your pee trap fresh and odor-free. Follow the manufacturer’s instructions for proper usage.
- Maintain proper ventilation: Good airflow is essential for preventing odors in the bathroom. Open windows or use ventilation fans to ensure adequate air circulation. This will also help prevent the buildup of moisture, which can lead to mold and mildew growth.
How to troubleshoot and fix common problems
Despite regular maintenance, pee traps may encounter occasional issues. Here are some common problems you may face and how to troubleshoot and fix them:
| Problem | Solution |
|---|---|
| Foul odor | Flush the trap with hot water and use enzyme-based cleaners to eliminate odor-causing bacteria. Ensure proper ventilation in the bathroom. |
| Slow drainage | Check for any blockages in the trap or drainage system. Clear them using a plunger or a plumber’s snake. If the problem persists, seek professional help. |
| Gurgling sounds | This may indicate a partially blocked vent pipe. Clear any debris or obstructions in the vent pipe using a wire brush or seek professional assistance if needed. |
| Leaks | Inspect the trap for any cracks or loose connections. Tighten any loose fittings or replace damaged parts. If leaks persist, it’s best to consult a plumber. |
By following these regular maintenance tips and troubleshooting common issues, you can ensure the longevity and proper functioning of your pee trap. Remember, a well-maintained pee trap not only eliminates odors but also contributes to a clean and hygienic bathroom environment.
Frequently Asked Questions
How Do You Attach A P Trap To A Wall Drain?
To attach a P-trap to a wall drain, first, connect one end of the P-trap to the drainpipe using a slip joint nut and washer. Then, connect the other end of the P-trap to the fixture drain using a slip joint nut and washer.
Make sure all connections are secure and tightly fitted.
What Is The Difference Between A Pee Trap And An S Trap?
A pee trap and an S trap are two different types of plumbing traps used to prevent sewer gases from entering the living space. The main difference is in their shape: a pee trap is U-shaped, while an S trap is S-shaped.
Both serve the same purpose effectively.
Does A Shower P Trap Need To Be Glued In?
The shower P trap does not necessarily need to be glued in. However, it is recommended to glue it in to ensure a secure and leak-free installation.
Where Should A Shower P Trap Be Placed?
The shower P trap should be placed below the shower drain and behind the wall. It prevents sewer gases from entering the bathroom by creating a water seal. This helps maintain a healthy and odor-free environment.
Conclusion
Installing a pee trap is a crucial step in ensuring the proper functioning of your plumbing system. By following these simple instructions, you can easily tackle this task and avoid common plumbing issues. Remember to gather the necessary tools, take necessary precautions, and carefully follow each step.
With a properly installed pee trap, you can enjoy a clean and odor-free bathroom. So, why wait? Get started on your installation journey today!