
To install a P-trap for a bathroom sink, follow these steps: 1. Gather all the necessary tools and materials.
2. Remove the existing drain pipe from the sink.
Understanding The Importance Of A P Trap
When installing a bathroom sink, one crucial component that should not be overlooked is the P trap. This small, curved pipe plays a vital role in keeping your bathroom smelling fresh and preventing sewer gases from entering the space. In this article, we’ll discuss what a P trap is, why it is necessary for a bathroom sink, and how it effectively prevents those unpleasant odors from permeating your bathroom.
What is a P Trap?
A P trap is a simple plumbing fixture usually made of PVC or metal that resembles the letter “P” when viewed from the side. This vital pipe is typically installed below the sink and forms a water seal that prevents sewer gases from entering the bathroom. Its curved design allows liquids and solid waste to flow out while at the same time traps a small amount of water to create a seal.
Why is a P Trap necessary for a bathroom sink?
The main reason a P trap is necessary for a bathroom sink is to prevent unpleasant odors from wafting into your living space. Without a P trap, sewer gases, which consist of harmful and foul-smelling compounds like hydrogen sulfide and methane, would freely flow up through the drain and into your bathroom. Thus, having a properly installed P trap acts as a barrier, ensuring that these gases remain contained within the sewer system.
How does a P Trap prevent sewer gases from entering the bathroom?
The function of a P trap in preventing sewer gases from entering your bathroom is quite ingenious. As mentioned earlier, the P trap contains a small amount of water that creates a seal. This water barrier effectively blocks gases from traveling back up through the drain and into your living space.
When the sink is not in use, water collects in the curved portion of the P trap, creating an airtight seal. This standing water acts as a barrier that prevents sewer gases from passing through and permeating your bathroom. Even when water evaporates slowly over time, a sufficient amount remains to maintain the seal and prevent any unpleasant odors from escaping into the air.
In the event of a blockage, such as a clog in the drain, the water level in the P trap may drop. As a safety feature, most modern P traps are equipped with a cleanout plug that can be removed to access the trap and clean out any debris. Keeping the P trap clean and free from obstructions is essential to ensure it functions effectively in preventing sewer gas intrusion.
Overall, understanding the importance of a properly installed P trap is crucial when it comes to maintaining a sanitary and odor-free bathroom. By acting as a barrier and preventing sewer gases from entering your living space, the P trap plays a significant role in ensuring the comfort and well-being of your household.
Gathering The Necessary Tools And Materials
Before starting the installation of a P-trap for your bathroom sink, it is crucial to gather all the necessary tools and materials. Having everything prepared in advance will make the installation process smoother and more efficient. In this section, we will discuss the tools needed as well as the materials required for the installation.
Tools needed for the installation
To ensure a successful installation of the P-trap for your bathroom sink, you will need the following tools:
- Adjustable wrench: This versatile tool will come in handy for tightening and loosening nuts and bolts.
- Hacksaw: You may need to cut some plumbing pipes to the required length, and a hacksaw will do the job perfectly.
- Pipe cutter: If you prefer a cleaner and more precise cut, a pipe cutter is a great alternative to a hacksaw.
- Plunger: In case of any blockages, a plunger will help you clear them out effectively.
- Tape measure: You’ll need to measure the length of pipes and fittings to ensure accurate and proper installation.
- Pipe wrench: For tightening and loosening larger pipes and fittings, a pipe wrench is an essential tool.
- Bucket or basin: To catch any water or debris that may spill during the installation process, having a bucket or basin nearby is a smart move.
Materials required for the installation
In addition to the tools mentioned above, you will also need the following materials for the P-trap installation:
- PVC P-trap: This is the main component of the installation, responsible for trapping debris and preventing sewer gases from entering your bathroom.
- PVC pipes and fittings: You’ll need these to connect the P-trap to the sink drain and the main drainpipe.
- PVC primer and cement: These adhesive products are necessary for securely joining the PVC pipes and fittings together.
- Teflon tape: This thread sealant will help prevent water leaks in threaded connections.
- Silicone caulk: To ensure a watertight seal between the sink and the P-trap, silicone caulk is required.
By gathering all the necessary tools and materials beforehand, you’ll be well-prepared for installing the P-trap for your bathroom sink. Now that you have everything ready, let’s move on to the next step: disassembling the existing plumbing.
Step 1: Removing The Existing P Trap
Before you can install a new P trap for your bathroom sink, the first step is to remove the existing one. This crucial step ensures that you have a clean slate to work with and guarantees a successful installation process. In this section, we will guide you through the process of locating and accessing the existing P trap, removing it safely and efficiently, and offer tips on handling and disposing of the old P trap responsibly.
How to locate and access the existing P trap
The P trap is a curved section of pipe located under your bathroom sink that prevents foul odors and gases from entering your home. To locate and access the existing P trap, you will need a few basic tools:
- Adjustable wrench
- Bucket or container
- Rags or towels
Follow these steps:
- Find the water supply valves beneath your sink and shut off the water by turning the valves clockwise.
- Place a bucket or container beneath the P trap to catch any water or debris that may spill during the removal process.
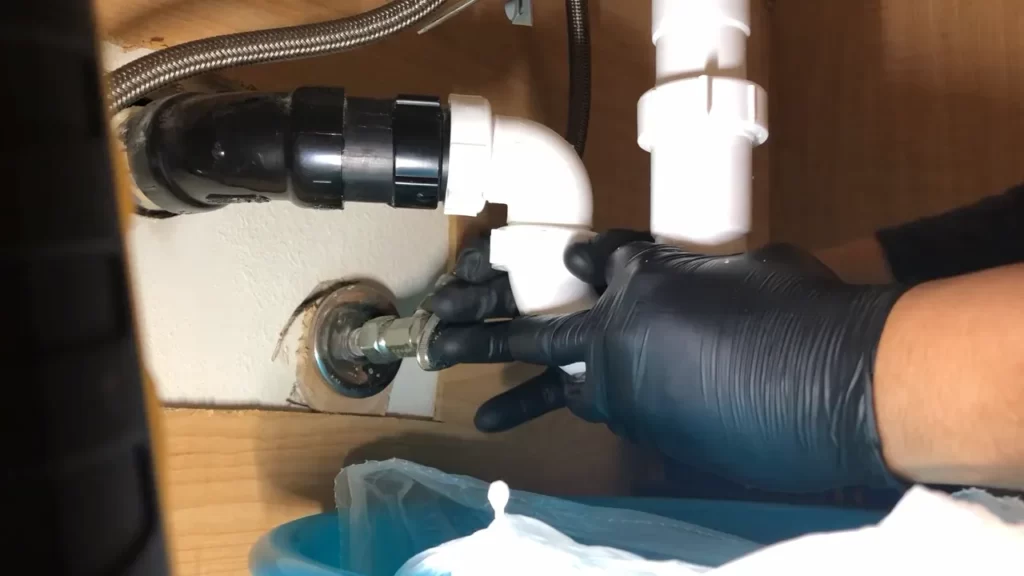
- Using your adjustable wrench, loosen the nuts where the P trap connects to the drain pipe and the sink tailpiece. Turn the nuts counterclockwise until they are loose enough to remove by hand.
- Once the nuts are loosened, carefully detach the P trap from both the drain pipe and the sink tailpiece. You may need to wiggle it back and forth or twist it slightly to loosen it completely. Be cautious as the trap may still contain residual water.
Removing the P trap safely and efficiently
Now that you have located and accessed the existing P trap, it’s time to remove it safely and efficiently. Here are the steps to follow:
- Inspect the P trap for any signs of damage or wear. If you notice any cracks, leaks, or other issues, it’s best to replace the entire trap.
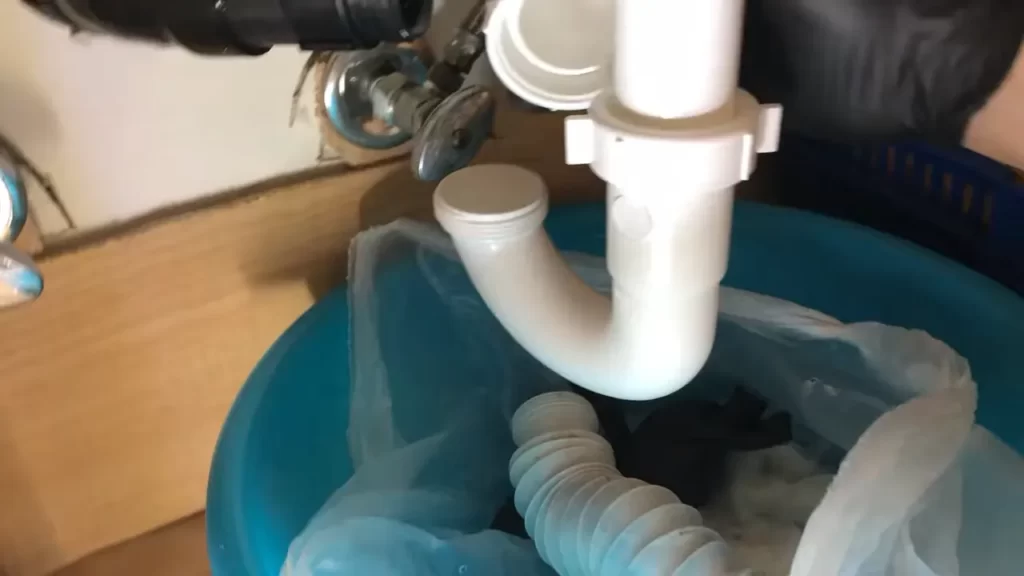
- Empty any remaining water from the P trap into the bucket or container, ensuring that it is completely drained.
- Using your adjustable wrench, carefully loosen and remove the nuts that connect the P trap to the drain pipe and the sink tailpiece. Be cautious not to damage or strain the pipes while doing so.
- Once the nuts are removed, gently pull the P trap away from the drain pipe and the sink tailpiece. If necessary, use a twisting motion to loosen stubborn connections.
Tips for handling and disposing of the old P trap
Now that you have successfully removed the old P trap, it’s important to handle and dispose of it properly. Follow these tips:
- Place the old P trap in a plastic bag or wrap it in newspaper to contain any residual water or debris.
- Dispose of the old P trap according to your local regulations and guidelines. Contact your local waste management department for specific instructions on how to dispose of it responsibly.
- Ensure that the area where the old P trap was removed from is clean and free of any debris or water.
By following these steps and tips, you have successfully completed the first step of installing a new P trap for your bathroom sink. Stay tuned for the next steps to complete the installation process.
Step 2: Choosing The Right Replacement P Trap
Once you have successfully removed the old P trap from your bathroom sink, it’s time to take the next crucial step – choosing the right replacement P trap. This step is essential to ensure that your new P trap fits perfectly and functions efficiently. In this section, we’ll explore various aspects of selecting a replacement P trap, including understanding the different types available, factors to consider in your decision-making process, and ensuring compatibility with your bathroom sink.
Understanding the different types of P traps available
When it comes to P traps, it’s important to understand that different types are available in the market. Each type serves the same purpose but may differ in terms of design and installation requirements. Here are some common types of P traps:
| Type | Description |
|---|---|
| Standard P Trap | A traditional P trap with a curved shape, typically made of PVC or ABS plastic. |
| Bottle P Trap | A compact P trap with a unique shape, often used in tight spaces or under wall-mounted sinks. |
| Adjustable P Trap | A versatile P trap that can be adjusted to fit various sink configurations, making it suitable for tricky installations. |
Factors to consider when selecting a replacement P trap
Choosing the right replacement P trap involves considering several factors that will impact the installation process and overall effectiveness of your bathroom sink’s plumbing system. Keep the following factors in mind:
- The material of the P trap: Opt for a durable material like PVC or ABS plastic that can withstand water pressure and resist corrosion.
- Size and dimensions: Ensure that the replacement P trap matches the size and dimensions of the previous one.
- Compatibility with your bathroom sink: Consider the configuration of your sink and ensure that the replacement P trap is compatible with the drain and plumbing connections.
- Quality and brand reputation: Choose a reputable brand known for manufacturing reliable and durable plumbing products.
- Price and budget: Compare prices among different options, keeping in mind both quality and affordability.
How to ensure proper compatibility with your bathroom sink
Ensuring compatibility between your replacement P trap and bathroom sink is crucial for a seamless and leak-free installation. Follow these steps to ensure proper compatibility:
- Measure the diameter of the drain pipe and the tailpiece of your sink to determine the required size of the replacement P trap.
- Check the pipe fittings of the replacement P trap to ensure they align properly with the existing drain and plumbing connections.
- Consider the depth and clearance requirements of your sink to determine the appropriate length of the P trap’s horizontal arm.
- If your sink has unique installation requirements, such as wall-mounted or pedestal sinks, consult the manufacturer’s instructions or seek professional advice for selecting a suitable replacement P trap.
By understanding the different types of P traps available, considering important factors during the selection process, and ensuring proper compatibility with your bathroom sink, you’ll be on your way to successfully installing a new P trap and maintaining a properly functioning plumbing system.
Step 3: Preparing The Sink And Drain Pipes
Now that you have successfully removed the old P trap and disassembled the drain pipes, it’s time to prepare the sink and drain pipes for the installation of the new P trap. This step is crucial to ensure a proper and secure fit, preventing any future leaks or damage.
Cleaning the sink and drain pipes
Before installing the new P trap, it’s important to thoroughly clean the sink and drain pipes to remove any dirt, grime, or debris that may have accumulated over time. Use a mild detergent or a mixture of vinegar and water to clean the surfaces.
Inspecting the drain pipes for any damage or leaks
While cleaning the drain pipes, take a moment to inspect them for any signs of damage or leaks. Carefully examine the pipes for any cracks, corrosion, or loose fittings. If you notice any issues, it’s best to replace the damaged parts before proceeding with the P trap installation to prevent further complications down the line.
Ensuring proper alignment for the new P trap installation
Proper alignment of the new P trap is crucial for its effectiveness and longevity. To ensure proper alignment:
- Measure and mark the desired height for the P trap. This is typically around 6 to 8 inches above the floor level.
- Ensure that the sink drain outlet aligns with the opening of the P trap.
- Make sure the horizontal part of the P trap aligns with the drainpipe leading to the main sewer line or the wall drain.
- Verify that all connections are secure and properly aligned before tightening any nuts or fittings.
By following these steps, you can ensure that the sink and drain pipes are clean, free from damage or leaks, and properly aligned for the installation of the new P trap. This will help to create a tight seal and prevent any future plumbing issues.
Step 4: Installing The New P Trap
Now that you have prepared the sink and removed the old P trap, it’s time to install the new one. This step is crucial as the P trap plays a vital role in preventing noxious gases from entering your bathroom and maintaining proper drainage. Follow these steps to ensure a successful installation of the new P trap.
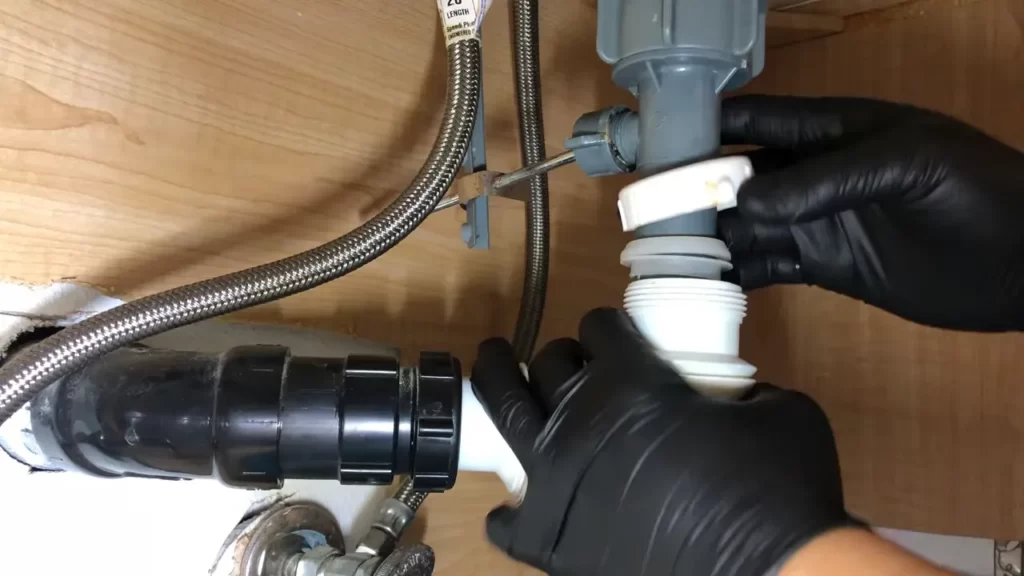
Attaching the new P trap to the sink drain
Start by taking the new P trap and carefully aligning it with the sink drain. Make sure the trap is properly positioned and fits securely, avoiding any potential leaks. To attach the P trap, you will need a threaded adapter that matches the size of your sink drain. Apply plumber’s tape to the threaded end of the adapter to create a tight seal. Insert the threaded adapter into the sink drain, ensuring it is fully tightened by rotating it clockwise.
Connecting the P trap to the wall or floor drain
Once the new P trap is securely attached to the sink drain, the next step is to connect it to the wall or floor drain. Measure the distance between the P trap and the drain pipe, ensuring the P trap’s tailpiece aligns with the drainage outlet. Cut the tailpiece to the appropriate length using a hacksaw if necessary. Apply plumber’s tape on both ends of the tailpiece and connect it to the wall or floor drain, ensuring a snug fit.
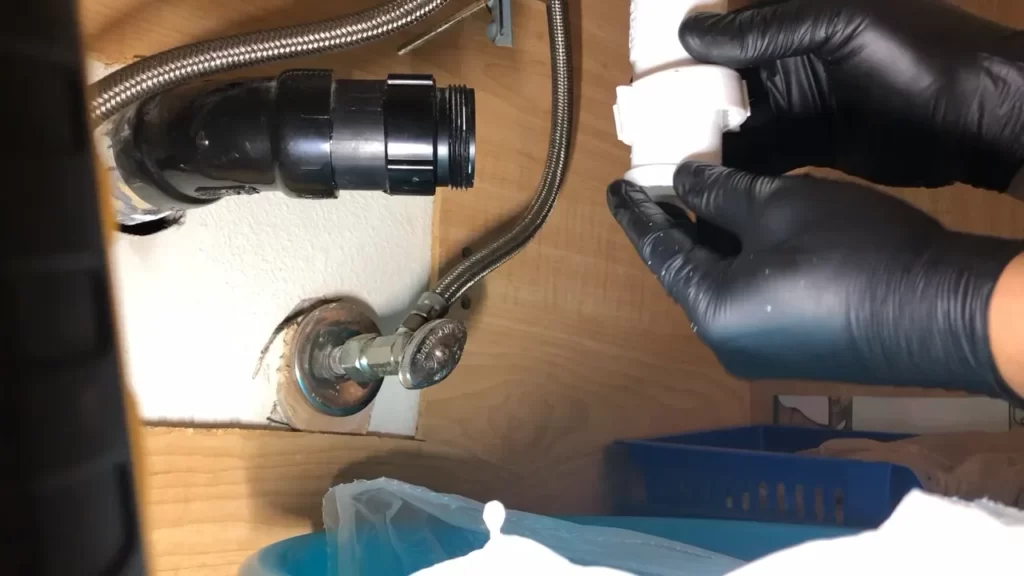
Securing all connections and ensuring a watertight seal
With the P trap connected to both the sink drain and the wall or floor drain, it’s essential to secure all connections to avoid any potential leaks. Tighten the threaded nuts on each connection by hand, ensuring they are snug but not over-tightened, as it may cause damage. To achieve a watertight seal, use a pipe wrench or a pair of pliers to give the connections an extra quarter turn. Be cautious not to overtighten, as it may result in stripped threads or cracked pipes.
Finally, turn on the water and check for any leaks. If you notice any drips, tighten the connections a bit more until the leaks stop. Remember, a properly installed P trap ensures the efficient and safe functioning of your bathroom sink. Follow these steps carefully, and you’ll have a new P trap in no time.
Step 5: Testing And Checking For Leaks
Filling the sink with water and checking for any leaks
Once you have successfully installed the P-trap under your bathroom sink, it’s time to move on to step 5: testing and checking for leaks. This is a crucial step to ensure that everything is working properly and there are no leaks in the P-trap system.
To start, fill the sink with water. Make sure to fully open the faucet and let the water flow freely for a few minutes. As the water fills up the sink, keep a close eye on the P-trap and the connections.
Check for any visible signs of leakage, such as drips or water pooling around the P-trap joints. If you notice any leaks, take note of the specific area where the leak is occurring. Small drips can sometimes be fixed by tightening the connections with a wrench, while larger leaks may require repositioning or replacing parts of the P-trap.
Troubleshooting common issues and fixing leaks
If you encounter any leaks during the testing phase, don’t worry. It’s common for a newly installed P-trap to have some minor issues that can be easily resolved. Here are a few troubleshooting steps you can follow:
1. Tighten loose connections: Inspect all the joints and connections in the P-trap system. If you notice any loose fittings, tighten them with a wrench. Be careful not to overtighten, as this can cause damage to the pipes or fittings.
2. Check the washers: Leaks can often be caused by worn-out or damaged washers. Check the washers in the P-trap connections and replace them if necessary. Ensure that the washers are properly seated and fitted snugly.
3. Apply plumber’s tape: If the leaks persist, try applying plumber’s tape to the threaded connections. This can help create a tighter seal and prevent leaks.
4. Realign the P-trap: Sometimes, leaks can occur if the P-trap is not aligned properly. Carefully inspect the alignment of the trap and make any necessary adjustments to ensure a proper fit.
Tips for maintaining the P-trap for long-lasting performance
To ensure the longevity and efficient functioning of your P-trap, follow these tips for regular maintenance:
1. Clean regularly: Over time, debris and gunk can accumulate in the P-trap, causing clogs and unpleasant odors. Clean the trap regularly by removing and clearing any trapped debris.
2. Use drain cleaners sparingly: While drain cleaners can help remove clogs, excessive use of chemical cleaners can damage the P-trap and other plumbing components. Use them sparingly and opt for natural alternatives like hot water and baking soda.
3. Inspect for damage: Regularly inspect the P-trap for any signs of wear, cracks, or damage. If you notice any issues, such as rust or corrosion, consider replacing the affected parts to prevent leaks.
4. Seek professional help: If you encounter persistent or major issues with the P-trap, it’s best to consult a professional plumber. They have the expertise to diagnose and fix any complex problems effectively.
By following these steps and implementing proper maintenance, you can ensure that your P-trap functions optimally, prevents leaks, and keeps your bathroom sink running smoothly.
Additional Tips And Considerations
When it comes to installing a P trap for your bathroom sink, there are some additional tips and considerations that you should keep in mind. These tips will help you properly maintain and clean the P trap, avoid common installation mistakes, and ensure your safety while working with plumbing. Take a look at the sections below for more details.
How to Properly Maintain and Clean the P Trap
Proper maintenance and regular cleaning of the P trap are essential to ensure the efficient functioning of your bathroom sink. Here are some steps you can follow to maintain and clean the P trap:
- Regular inspection: Periodically inspect the P trap for any signs of damage, such as leaks or corrosion. Address these issues immediately to prevent further damage.
- Remove blockages: If you notice any blockages in the P trap, remove them using a plunger or a plumbing snake. This will help prevent clogs and ensure smooth drainage.
- Clean with vinegar: To keep the P trap clean and odor-free, pour a mixture of vinegar and warm water down the drain. Let it sit for a few minutes before rinsing it with hot water. Repeat this process regularly to maintain a clean P trap.
Common Mistakes to Avoid During Installation
During the installation process, it’s important to avoid some common mistakes that can lead to plumbing problems down the line. Here are a few mistakes to watch out for:
- Incorrect measurements: Ensure that you measure and cut the pipes accurately to fit the P trap properly. Incorrect measurements can result in leaks and inefficient drainage.
- Improper alignment: Make sure that all the connections are aligned correctly when assembling the P trap. Misaligned connections can cause leaks and prevent the P trap from functioning as intended.
- Forgetting to use plumber’s tape: Always use plumber’s tape on threaded connections to create a tight seal and prevent leaks. This simple step can save you a lot of trouble in the long run.
Safety Precautions to Keep in Mind While Working with Plumbing
Working with plumbing requires careful attention to safety to avoid any injuries or accidents. Keep these safety precautions in mind:
- Wear protective gear: Always wear safety goggles and gloves to protect yourself from debris and chemicals while working with plumbing.
- Turn off the water supply: Before starting any plumbing work, make sure to turn off the water supply to prevent any accidental water damage.
- Use caution with tools: Handle plumbing tools with care and follow the manufacturer’s instructions to avoid injuries. Never force a tool or use excessive force.
By following these additional tips and considerations, you can ensure a successful installation and proper maintenance of the P trap for your bathroom sink. Remember to prioritize safety and take the necessary precautions while working with plumbing.
Frequently Asked Questions
How Do You Install A P-Trap In A Bathroom Sink?
To install a P-trap in a bathroom sink, follow these steps: 1. Turn off the water supply. 2. Remove the old trap if present. 3. Place the P-trap under the sink drain. 4. Connect the tailpiece to the sink drain. 5.
Connect the trap arm to the drainpipe. 6. Tighten all connections using a wrench. 7. Turn on the water supply and check for leaks.
How Do You Connect A Sink Drain To A P-Trap?
Connect a sink drain to a P-trap by placing the P-trap under the sink and aligning its outlet with the drainpipe. Attach the drainpipe to the P-trap using a slip nut and washer. Use plumber’s tape to secure the connections and tighten the slip nut.
Do You Need A P-Trap For Bathroom Sink?
Yes, a P-trap is essential for a bathroom sink. It prevents unwanted odors and gases from entering your home by trapping water in the curved section of the pipe. Without a P-trap, you may experience foul smells and potential health hazards.
Ensure proper installation to maintain a hygienic bathroom environment.
Should The P-Trap Be Lower Than Drain Pipe?
Yes, the P-trap should be located lower than the drain pipe. This is because the P-trap is designed to hold water in order to prevent sewer gases from entering the building, and having it lower ensures proper drainage and trap function.
Conclusion
Installing a P trap for your bathroom sink is an essential task that ensures proper plumbing and prevents foul odors. By following the step-by-step guide outlined in this blog post, you can confidently complete the installation process. Remember to gather all the necessary tools and materials before starting, and take your time to do it right.
With a little patience and some basic knowledge, you’ll have a fully functional and odor-free bathroom sink in no time. So, go ahead and tackle this DIY project with confidence!