
To install a new toilet seat, follow these steps: Remove the old seat by unscrewing the bolts underneath, align the new seat over the bowl and insert the bolts, then tighten them securely using a screwdriver. Upgrading or replacing your toilet seat is a simple and cost-effective way to improve the functionality and aesthetics of your bathroom.
Whether you want to switch to a more comfortable seat, update the style, or replace a broken one, installing a new toilet seat is a straightforward process that can be done in a few easy steps. In this guide, we will walk you through the process of installing a new toilet seat, ensuring a secure and durable fit.
With the right tools and a little bit of time, you can have a brand new toilet seat installed and ready to use in no time. So without further ado, let’s get started.
Choosing The Right Toilet Seat
When it comes to installing a new toilet seat, choosing the right one is essential. The toilet seat not only adds to the overall aesthetics of your bathroom but also provides comfort and functionality. In this section, we will guide you on how to choose the perfect toilet seat for your bathroom.
Determine the size and shape of your toilet bowl
Before selecting a new toilet seat, you need to determine the size and shape of your toilet bowl. Toilet bowls come in various sizes and shapes, such as round, elongated, compact elongated, or square. To identify the shape, look at the front of the bowl; if it is round, the distance from the front of the bowl to the mounting holes will be approximately 16.5 inches. For an elongated bowl, the distance will be around 18.5 inches.
Consider the material and style options available
Once you have identified the size and shape of your toilet bowl, you can move on to considering the material and style options available. Toilet seats are commonly made of materials like plastic, wood, or molded wood. Each material has its own advantages and disadvantages. Plastic seats are durable, affordable, and easy to clean. Wood seats offer a more natural look and feel, but they may require more maintenance. Molded wood seats provide the durability of plastic with the aesthetic appeal of wood.
When it comes to style, you can choose from a range of options, including solid colors, patterns, and even designs that match the overall theme of your bathroom. Consider the existing décor and choose a seat that complements it.
Measure the distance between the mounting holes
Lastly, you need to measure the distance between the mounting holes on your toilet bowl. This measurement will help you ensure that the new toilet seat aligns properly with the bowl. Generally, the distance between the mounting holes is either 5.5 inches or 6 inches. Measure from the center of one hole to the center of the other to confirm the exact distance.
Once you have determined the size and shape, material and style, and the distance between the mounting holes, you are ready to choose the right toilet seat for your bathroom. Remember to take your time and consider all the factors mentioned above to make an informed decision.

Removal Of The Old Toilet Seat
When it comes to bathroom maintenance, replacing an old toilet seat can be a simple and rewarding DIY project. In this step-by-step guide, we will walk you through the process of removing the old toilet seat. Gather your tools and materials, and let’s get started!
Gather the necessary tools and materials
Before you begin, ensure that you have all the required tools and materials for this task. Here is a list of things you will need:
- A wrench or pliers
- A screwdriver (flathead or Phillips, depending on the type of screws)
- A clean cloth or sponge
- Disinfectant cleaner
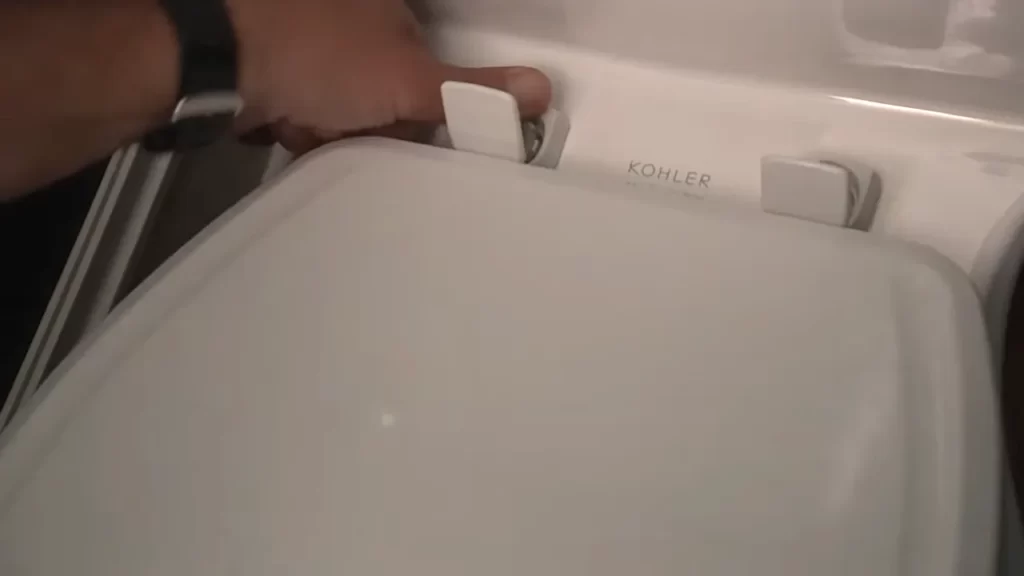
Lift the seat and cover to expose the mounting bolts
To start, lift the seat and cover upwards to reveal the mounting bolts. These bolts are usually located at the back of the seat, connecting it to the toilet bowl. Take a moment to familiarize yourself with the position of the bolts.
Unscrew the nuts from the mounting bolts
Using your wrench or pliers, locate the nuts attached to the mounting bolts and unscrew them in a counterclockwise direction. Be sure to hold onto the bolts from underneath to prevent them from spinning as you unscrew the nuts.
Remove the toilet seat and clean the area thoroughly
Once the nuts have been removed, gently lift the old toilet seat and cover off the mounting bolts. Set them aside and take this opportunity to clean the area thoroughly. Use a disinfectant cleaner and a clean cloth or sponge to wipe down the toilet bowl and surrounding areas, removing any residue or dirt that may have accumulated over time.
Now that you have successfully removed the old toilet seat and cleaned the area, you are ready to proceed with installing the new seat. Stay tuned for our next blog post where we will guide you through the installation process.
Installing The New Toilet Seat
Installing a new toilet seat is a simple and straightforward process that can greatly improve the overall appearance and functionality of your bathroom. Whether you’re replacing a worn-out seat or just want to update the look, this step-by-step guide will walk you through the process. By following these instructions, you’ll have a new toilet seat installed in no time.
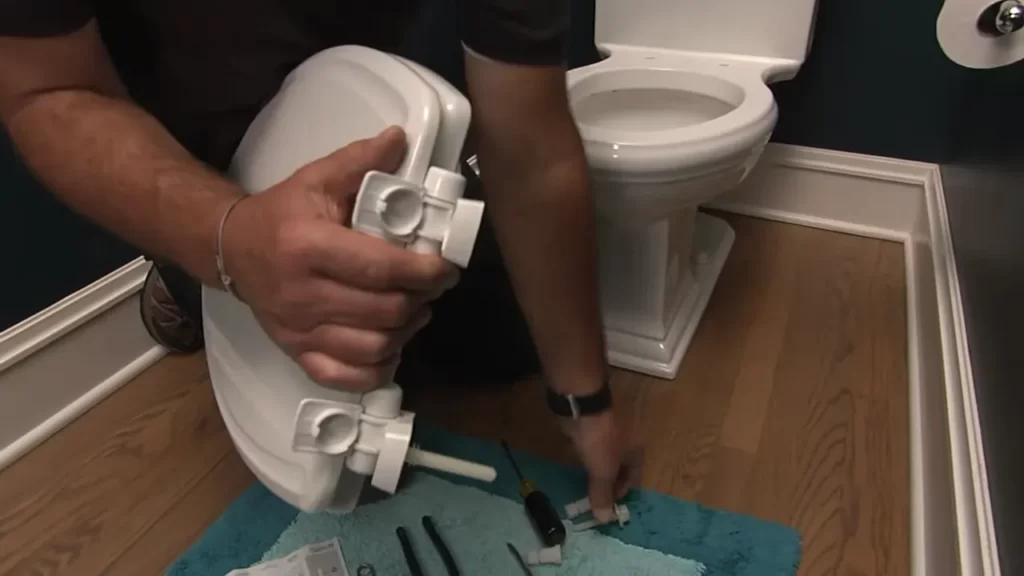
Position the new seat on the toilet bowl
The first step in installing a new toilet seat is to position it on the toilet bowl. Start by unpacking the new seat and placing it on a clean, flat surface. Make sure the seat is facing the correct way, with the lid on top and the hinges at the back.
Next, lift the existing seat and lid on your toilet bowl and set them aside. Take note of any dirt or grime around the mounting holes on the toilet bowl, as you’ll want to clean these before installing the new seat.
Align the mounting holes with the holes on the toilet bowl
Once you have positioned the new seat, the next step is to align the mounting holes on the seat with the holes on the toilet bowl. Take your time to ensure that the seat is correctly aligned to avoid any future issues.
It is essential to check that the mounting holes align perfectly. Aligning the holes will make the installation process much easier and ensure a secure fit.
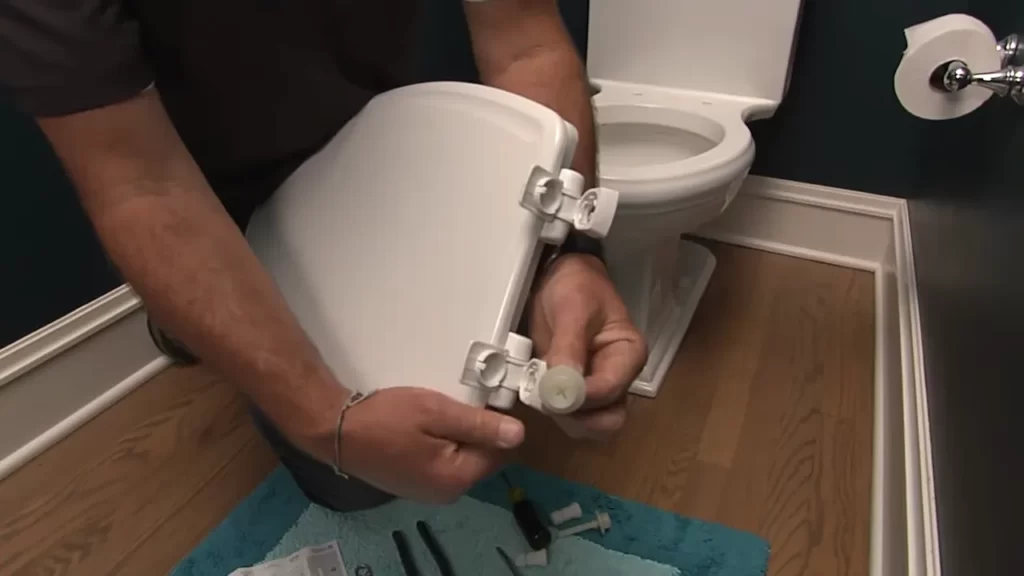
Insert the bolts into the mounting holes
After aligning the mounting holes, it’s time to insert the bolts into the holes. Start by placing a bolt into each hole and ensure they are pushed all the way through. The bolts should extend from the underside of the toilet bowl.
Once the bolts are inserted, take the included washers and slide them onto the bolts. The washers will help prevent the bolts from loosening over time, so make sure they are positioned correctly.
Secure the nuts onto the bolts and tighten them
With the bolts and washers in place, it’s time to secure the nuts onto the bolts. Start by hand-tightening the nuts onto the bolts, making sure they are snugly fitted. Use a wrench or pliers to further tighten the nuts, but be careful not to overtighten, as this could cause damage to the toilet bowl or seat.
Ensure to check the stability of the new toilet seat once you have tightened the nuts. Give the seat a gentle wiggle to ensure it feels secure and doesn’t move around excessively.
Test the stability of the new toilet seat
After the nuts are securely tightened, it’s important to test the stability of the new toilet seat. Sit on the seat and apply a bit of pressure to check if it feels stable and secure. Adjust the nuts if necessary to ensure the seat doesn’t wobble or move when in use.
Finally, check that the lid closes and opens smoothly without any obstructions. If everything checks out, congratulations! You have successfully installed your new toilet seat.
Installing a new toilet seat is a simple DIY project that can make a big difference in your bathroom. By carefully following these steps, you can have a new seat installed and enjoy a fresh, clean and updated bathroom in no time!
Additional Considerations And Tips
When installing a new toilet seat, there are a few additional considerations and tips that can help make the process smoother and ensure a successful installation. By following these guidelines, you can optimize your toilet seat installation experience:
Inspect the toilet bowl for any damage or cracks
Before installing a new toilet seat, it’s important to inspect the toilet bowl for any signs of damage or cracks. This is crucial because a damaged bowl may affect the stability and durability of the toilet seat. Take a close look at the bowl’s surface, both inside and outside, and ensure there are no cracks, chips, or other types of damage. If you notice any issues, address them before proceeding with the toilet seat installation.
Apply lubrication to the mounting bolts for easier installation
To ensure a smooth and hassle-free installation process, it’s recommended to apply lubrication to the mounting bolts. This can make it easier to tighten and loosen the bolts, reducing the chances of any damage occurring during the installation. Simply apply a small amount of lubricant to the bolts before attaching the seat to the toilet bowl. This simple step can save you time and effort during the installation process.
Follow the manufacturer’s instructions and recommendations
Every toilet seat installation may have specific instructions and recommendations provided by the manufacturer. It’s crucial to follow these instructions carefully to ensure a proper and secure installation. These instructions often include the necessary tools, steps, and precautions to take. By adhering to the manufacturer’s guidelines, you can avoid any mishaps and ensure a successful toilet seat installation.
Consider the benefits of using a soft-close toilet seat
When choosing a new toilet seat, it’s worthwhile to consider the benefits of a soft-close toilet seat. These innovative seats feature a mechanism that prevents them from slamming shut. Not only does this reduce noise and potential damage, but it also adds a touch of convenience and safety to your bathroom experience. Investing in a soft-close toilet seat can enhance your overall toilet usage and improve the longevity of your seat.
Regularly clean and maintain the toilet seat for longevity
To ensure the longevity and aesthetics of your new toilet seat, it’s essential to clean and maintain it regularly. By following a simple cleaning routine, you can remove any dirt, stains, or bacteria that might accumulate over time. Use mild soap and water or an appropriate cleaning solution to gently clean the seat. Additionally, avoid using abrasive cleaners or tools that may cause damage. Regular maintenance and TLC will help keep your toilet seat in optimal condition for years to come.
Troubleshooting Common Issues
While installing a new toilet seat may seem like a simple task, it’s not uncommon to encounter a few hiccups along the way. In this section, we will address some common issues that may arise during the installation process and provide simple solutions to troubleshoot these problems.
Loose toilet seat: Check and tighten the nuts regularly
A loose toilet seat can be quite annoying and uncomfortable to use. To prevent this issue, it’s essential to regularly check and tighten the nuts that secure the seat to the toilet bowl. Loose nuts can lead to wobbly or shifting seats, which can compromise stability and potentially cause accidents.
To tighten the nuts, follow these steps:
- Locate the nuts on the underside of the toilet bowl.
- Using a wrench, tighten the nuts by turning them clockwise.
- Ensure that the seat is securely attached to the bowl by gently testing its stability.
Difficulty in removing the old seat: Use penetrating oil to loosen rusty bolts
If you’re struggling to remove the old toilet seat due to rusty or stubborn bolts, using a penetrating oil can make the process much easier. The oil helps to loosen the rust and lubricate the bolts, allowing for a smoother removal.
Here’s how you can use penetrating oil to remove the old toilet seat:
- Apply a generous amount of penetrating oil to the rusty bolts.
- Allow the oil to penetrate and loosen the rust for a few minutes.
- Use a wrench or pliers to slowly turn the bolts counterclockwise to remove them.
Misaligned mounting holes: Adjust the position of the toilet seat
In some cases, you may find that the mounting holes on the new toilet seat do not align correctly with the holes on the toilet bowl. This can make it challenging to secure the seat properly.
To resolve this issue, follow these steps:
- Loosen the nuts on the toilet seat hinges using a wrench.
- Gently adjust the position of the seat until the mounting holes align with the holes on the toilet bowl.
- Tighten the nuts securely to hold the seat in place.
- Ensure that the seat is stable and properly aligned before using the toilet.
Damaged toilet bowl: Consult a professional for repair or replacement
In the unfortunate event that you encounter significant damage to the toilet bowl during the installation process, it’s best to seek professional assistance. Damaged bowls can lead to leaks or structural issues, and attempting to fix them without proper knowledge or tools may cause further damage.
Contact a professional plumber or a toilet replacement specialist who can assess the extent of the damage and recommend the appropriate repair or replacement solution.
Safety Precautions
When it comes to installing a new toilet seat, it’s crucial to prioritize safety. By taking a few simple precautions, you can ensure a smooth and hassle-free installation process. From wearing protective gloves to turning off the water supply, these safety measures will help you avoid any potential mishaps and keep everyone involved safe.
Wear protective gloves when handling the toilet seat
Before you begin the installation, it’s important to wear a pair of protective gloves to prevent any contact with bacteria or germs that may be present on the old toilet seat. By doing so, you not only protect yourself but also maintain good hygiene throughout the process. Ensure that your hands are clean and free from any contaminants before wearing the gloves. This will minimize the risk of any potential infections or cross-contamination.
Avoid excessive force during installation to prevent damage
When installing a new toilet seat, it’s essential to remember that excessive force can cause damage to the toilet or the seat itself. Take your time and make sure to follow the manufacturer’s instructions carefully. Avoid overtightening the bolts or hinges, as this can lead to cracks or breakages. By applying gentle pressure and using the appropriate tools, you can securely install the toilet seat without any unnecessary damage.
Keep children away from the area during installation
Ensure the safety of your children or any other curious individuals by keeping them away from the area during the entire installation process. Tools, parts, and sharp edges can pose potential risks to their safety. By setting up a barrier or explaining the importance of staying away, you can prevent any accidents and distractions that may compromise the installation process.
Turn off the water supply before starting the installation process
Prior to installing the new toilet seat, it is imperative to turn off the water supply. Locate the shut-off valve near the bottom of the toilet and close it to halt the flow of water. This step is necessary to prevent any leaks or flooding during the installation. By ensuring that the water supply is switched off, you can proceed with the installation confidently, knowing that you have minimized the risk of water damage.
By following these safety precautions, you can successfully install a new toilet seat while prioritizing safety and minimizing the risk of accidents or damage. Remember, taking the time to safeguard against potential hazards is always worth it in the long run.
Frequently Asked Questions
Can I Replace A Toilet Seat Myself?
Yes, you can replace a toilet seat yourself. It is a simple process that can be done with basic tools. Just follow the instructions provided with the new seat, and you’ll have it replaced in no time.
What Tool Is Needed To Install A Toilet Seat?
To install a toilet seat, you will need a wrench or a screwdriver.
How Do You Remove And Replace A Toilet Seat?
To remove and replace a toilet seat, start by locating the plastic caps at the back. Pop them open and unscrew the nuts. Lift off the old seat and line up the holes of the new seat with the holes on the toilet.
Secure the seat by tightening the nuts. Done!
Do All Toilet Seats Install The Same?
No, not all toilet seats install the same. There are different types of toilet seats available such as round, elongated, soft close, and quick-release seats. Make sure to measure your toilet bowl and choose the correct seat size for a proper fit.
Conclusion
Updating your bathroom with a new toilet seat is a simple DIY project that can enhance the overall look and functionality of your space. By following the step-by-step instructions provided in this blog, you can easily install a new toilet seat without the need for professional assistance.
Remember to select a suitable seat, gather the necessary tools, and carefully follow each installation step for a successful outcome. With a little effort, you can achieve a refreshed bathroom in no time!