Installing mosaic wall tiles in a bathroom is simple. Here’s a concise guide to help you through the process.
Mosaic tiles are a popular choice for bathroom walls due to their durability and aesthetic appeal. With their small individual pieces, mosaic tiles can create intricate patterns and designs that can enhance the overall look of your bathroom. To install mosaic wall tiles, start by preparing the wall surface, applying adhesive, and carefully placing the tiles in your desired pattern.
Once the adhesive dries, grout the tiles to fill in the gaps, wipe off the excess, and let it set. Finally, clean the tiles for a finished, polished look. Now you can enjoy a stunning mosaic wall in your bathroom.
Factors To Consider When Selecting Mosaic Wall Tiles
Choosing the right mosaic wall tiles for your bathroom is an important decision that can greatly impact the overall look and feel of the space. There are several factors to consider when selecting mosaic wall tiles, including tile size, shape, and material variations, color options that match your bathroom design, as well as durability and maintenance requirements. By carefully considering these factors, you can ensure that the mosaic wall tiles you choose will enhance the aesthetics of your bathroom while also meeting your practical needs.
Tile Size, Shape, and Material Variations
One of the first factors to consider when selecting mosaic wall tiles is the size, shape, and material variations. Mosaic tiles come in a wide range of sizes and shapes, including square, rectangular, hexagonal, and more. The size and shape of the tiles you choose will depend on your personal preference and the overall design aesthetic you’re aiming for in your bathroom. Additionally, mosaic wall tiles come in various materials such as porcelain, ceramic, glass, and natural stone. Each material offers its own unique advantages, so it’s essential to consider their characteristics and how they will complement your bathroom design.
Color Options that Match Your Bathroom Design
Another important factor to consider when selecting mosaic wall tiles is the color options that match your bathroom design. The color of the tiles can greatly impact the overall atmosphere and mood of the space. Whether you prefer neutral tones for a minimalistic look or vibrant colors to create a bold statement, it’s essential to choose mosaic wall tiles that harmonize with your existing bathroom design scheme. Consider the color of your bathroom fixtures, fittings, and walls to ensure a cohesive look that ties the entire space together.
Durability and Maintenance Requirements
The durability and maintenance requirements of mosaic wall tiles are crucial factors to consider as well. Depending on the material you choose, some tiles may be more durable and resistant to wear and tear than others. For instance, porcelain and ceramic tiles are known for their durability and ease of cleaning, making them ideal for high-traffic areas like bathrooms. On the other hand, natural stone tiles may require more specialized maintenance to preserve their beauty over time. By considering the level of upkeep you’re willing to commit to, you can select mosaic wall tiles that will not only withstand daily use but also remain aesthetically pleasing with minimal effort.
In conclusion, when selecting mosaic wall tiles for your bathroom, it’s important to consider factors such as tile size, shape, and material variations, color options that match your bathroom design, as well as durability and maintenance requirements. By carefully evaluating these factors, you can choose mosaic wall tiles that not only enhance the visual appeal of your bathroom but also meet your practical needs for years to come.
Assessing The Wall Condition Before Installation
Before you embark on installing mosaic wall tiles in your bathroom, it is important to assess the condition of the wall. This step is crucial to ensure a successful and long-lasting installation. By taking the time to check for moisture or structural issues, removing existing tiles or wallpaper, and repairing any damages or uneven surfaces, you can create a solid foundation for your mosaic wall tile installation.
Checking for Moisture or Structural Issues
Prior to installing mosaic wall tiles in your bathroom, it is important to check for any moisture or structural issues. Moisture can cause adhesive failure and lead to mold and mildew growth, while structural issues can compromise the integrity of your installation. Take the following steps to assess the wall condition:
- Closely inspect the surface of the wall for any signs of water damage, such as discoloration, peeling paint, or bulging.
- Use a moisture meter to check the moisture levels of the wall. Ensure that the readings are within the acceptable range for tile installation.
- If there are any signs of moisture or high moisture levels, address the source of the problem first before proceeding with the tile installation. This may involve fixing leaks, improving ventilation, or installing a moisture barrier.
- Check for any structural issues, such as cracks, loose or uneven areas, or signs of movement. These issues should be addressed and repaired by a professional before continuing with the tile installation.
Removing Existing Tiles or Wallpaper
If your bathroom already has tiles or wallpaper on the walls, it is important to remove them before installing mosaic wall tiles. The presence of these existing coverings can create an uneven surface and compromise the adhesive bond. Follow these steps for proper removal:
- Start by removing any trim or molding around the edges of the tiles or wallpaper.
- Use a putty knife or scraper to gently loosen the tiles or wallpaper from the surface.
- Once loosened, use a pry bar to carefully remove the tiles or wallpaper from the wall. Take caution to avoid damaging the underlying wall surface.
- If there is adhesive residue left on the wall, use a solvent or adhesive remover to clean the surface thoroughly.
- Ensure that the wall is clean, smooth, and free from any debris before proceeding to the next step.
Repairing Any Damages or Uneven Surfaces
To achieve a professional-looking mosaic wall tile installation, it is important to address any damages or uneven surfaces on the wall. Taking the time to repair these issues will ensure that your mosaic tiles adhere properly and create a seamless finish. Follow these steps for repairing the wall:
- Inspect the wall for any cracks, holes, or uneven areas. Mark these spots for repair.
- Fill any cracks or holes with a suitable filler or patching compound. Smooth the surface using a putty knife or trowel.
- If there are uneven areas, consider using a leveling compound to create a flat surface. Follow the manufacturer’s instructions for application.
- Once the repairs have dried and hardened, sand the surface to ensure a smooth and even finish.
- Clean the wall again to remove any dust or debris from the repair process.
By properly assessing the wall condition, checking for moisture or structural issues, removing existing tiles or wallpaper, and repairing any damages or uneven surfaces, you are one step closer to a successful installation of mosaic wall tiles in your bathroom.
Cleaning And Priming The Wall For Tile Installation
Prior to installing mosaic wall tiles in your bathroom, it is crucial to properly clean and prime the wall surface. This step is essential for ensuring a strong bond between the tiles and the wall, resulting in a long-lasting and visually appealing tile installation. In this section, we will walk you through the necessary steps to remove dust and debris, apply a suitable primer, and allow it to dry properly before proceeding with the tile installation.
Removing Dust and Debris
Before priming the wall, it is important to start with a clean surface free from any dust, debris, or other contaminants. Here’s a step-by-step guide:
- Start by clearing the area around the wall and protecting any adjacent surfaces or fixtures that are not being tiled. This will prevent dust and particles from spreading.
- Using a soft-bristle broom or vacuum cleaner, remove any loose dirt, cobwebs, or dust from the wall. Pay special attention to corners and edges.
- To further eliminate any residual dust or grime, wipe the wall with a damp cloth or sponge. This will ensure a smooth and clean surface for the primer to adhere to.
- Allow the wall to air dry completely before moving on to the next step.
Applying a Suitable Primer for Better Tile Adhesion
Once the wall is clean and dry, the next step is to apply a suitable primer. The primer serves as a bonding agent between the wall and the tile adhesive, enhancing the adhesion and preventing the tiles from loosening over time. Follow these guidelines:
| Step | Description |
|---|---|
| 1 | Select a primer specifically designed for the type of wall surface you have. Consult with your local hardware store or a professional to ensure you choose the right product. |
| 2 | Using a paint stirrer, mix the primer thoroughly to ensure an even consistency. |
| 3 | Using a paintbrush or roller, apply an even coat of the primer to the prepared wall surface. Make sure to cover the entire area that will be tiled. |
| 4 | Work the primer into the surface, paying attention to any porous areas or imperfections in the wall. This will enhance the primer’s ability to bond with the wall. |
| 5 | Allow the primer to dry for the recommended amount of time specified by the manufacturer. This is typically indicated on the primer’s packaging. |
Allowing the Primer to Dry Properly
Proper drying of the primer is crucial to achieve optimal tile adhesion. Follow these tips to ensure the primer is fully cured before moving forward:
- Avoid touching or applying any pressure to the primed wall while it is drying. This can disrupt the bonding process and compromise the effectiveness of the primer.
- Provide adequate ventilation in the bathroom to facilitate drying. Opening windows or running fans can help expel excess moisture and speed up the drying process.
- Refer to the manufacturer’s instructions for the recommended drying time. This can vary depending on factors such as humidity and temperature.
- Once the primer is completely dry, visibly check for any areas that may require a second coat. Thin or uneven primer coverage can affect the tile’s adhesion.
By carefully cleaning the wall surface and applying a suitable primer, you are setting the foundation for a successful tile installation. Following these steps will help ensure that your mosaic wall tiles adhere firmly and create a beautiful and durable finish in your bathroom.
Measuring And Marking The Layout
HTML Format:
Determining the Starting Point and Focal Area
When it comes to installing mosaic wall tile in your bathroom, one of the most crucial steps is measuring and marking the layout. This step ensures that the tiles are placed in an even arrangement, creating a visually pleasing and professional-looking installation. Before diving into the process, it’s important to determine the starting point and focal area of your project.
The starting point is where you’ll begin the installation process, typically located at the center of the wall or at a specific height. This starting point will dictate the overall layout and positioning of the mosaic tiles. To determine the best starting point, consider the overall design of your bathroom and the focal area you want to highlight.
The focal area can be a feature wall, a shower niche, or any other area of the bathroom that you want to draw attention to. It’s important to select a starting point that aligns with the focal area to create a harmonious and balanced look. For example, if you’re installing mosaic tiles around a vanity mirror, the starting point should be centered horizontally and at the appropriate height to complement the mirror’s dimensions.
Marking Guidelines for Even Tile Placement
Once you’ve determined the starting point and focal area, it’s time to mark guidelines for the tile placement. These guidelines ensure that the tiles are installed evenly and uniformly, creating a polished end result. Here are the steps to mark the guidelines:
- Start by measuring the width of your mosaic tile, including any grout lines if applicable. This will help you determine the number of tiles that can fit along each guideline.
- Using a pencil or removable marker, mark a vertical guideline at the starting point. This guideline will serve as a reference for the first column of tiles.
- Measure the height of the focal area and divide it by the height of the mosaic tile to determine the number of rows needed. Mark additional horizontal guidelines accordingly, ensuring they are evenly spaced and parallel.
- With the vertical and horizontal guidelines in place, you can now create a grid-like pattern where each intersection indicates the placement of a tile.
By following these marking guidelines, you’ll be able to achieve a uniform and visually consistent installation. It’s important to double-check your measurements and guidelines before moving on to the actual tile installation process.
Applying Thinset Mortar On The Wall
One of the key steps in installing mosaic wall tile in your bathroom is applying thinset mortar on the wall. This step ensures proper adhesion of the tiles to the wall surface, providing a durable and long-lasting result. By following a few simple steps, you can master the technique of applying thinset mortar and achieve professional-looking results.
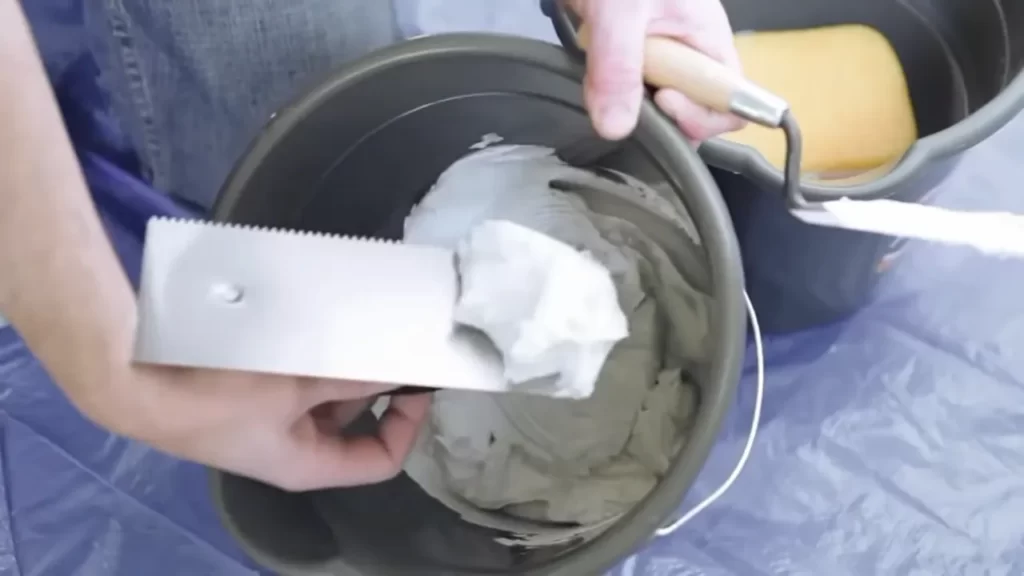
Mixing the Thinset Mortar According to Instructions
The first step in applying thinset mortar is to mix it correctly. This ensures that the mortar has the right consistency and adhesive properties. Different brands may have specific instructions on the packaging, so be sure to read and follow them carefully. Typically, the process involves the following steps:
- Gather the necessary materials including a mixing bucket, a margin trowel, and your thinset mortar.
- Pour a measured amount of water into the mixing bucket, following the instructions on the thinset mortar packaging.
- Add the pre-measured thinset mortar powder to the water.
- Using the margin trowel, mix the water and powder together until you achieve a smooth, lump-free consistency.
It’s important to mix the thinset mortar thoroughly to ensure proper bonding with the wall and tiles. Once mixed, let the mortar sit for a few minutes to activate before moving on to the next step.
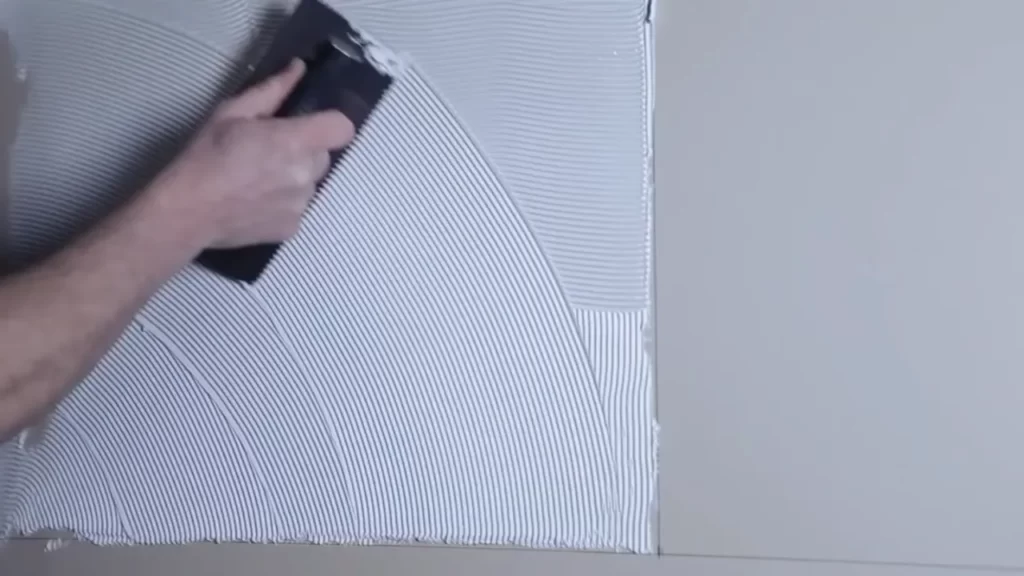
Using the Notched Trowel to Spread and Comb the Mortar
After mixing the thinset mortar, it’s time to apply it to the wall using a notched trowel. This tool helps spread the mortar evenly across the wall surface and creates ridges that enhance adhesion. Here’s how to do it:
- Start by loading the notched trowel with a generous amount of mortar.
- Hold the trowel at a 45-degree angle and use the flat side to spread an even layer of mortar on the wall, covering an area that you can tile within 15 minutes.
- Once the mortar is spread, flip the trowel over and use its notched side to comb through the mortar, creating ridges. This process ensures adequate mortar coverage and allows the tiles to adhere securely.
- Continue spreading and combing the mortar in small sections, working from the bottom up.
Remember to work efficiently, as the thinset mortar can dry quickly. Avoid spreading too much mortar at once, as it can become difficult to manage. Additionally, always double-check that the ridges are consistent and aligned to promote an even surface for tile installation.
By following these steps, you can confidently apply thinset mortar to the bathroom wall, creating a solid foundation for your mosaic wall tile installation. Taking the time to mix the mortar properly and use the notched trowel technique ensures that your tiles adhere securely, resulting in a beautiful and long-lasting finish.
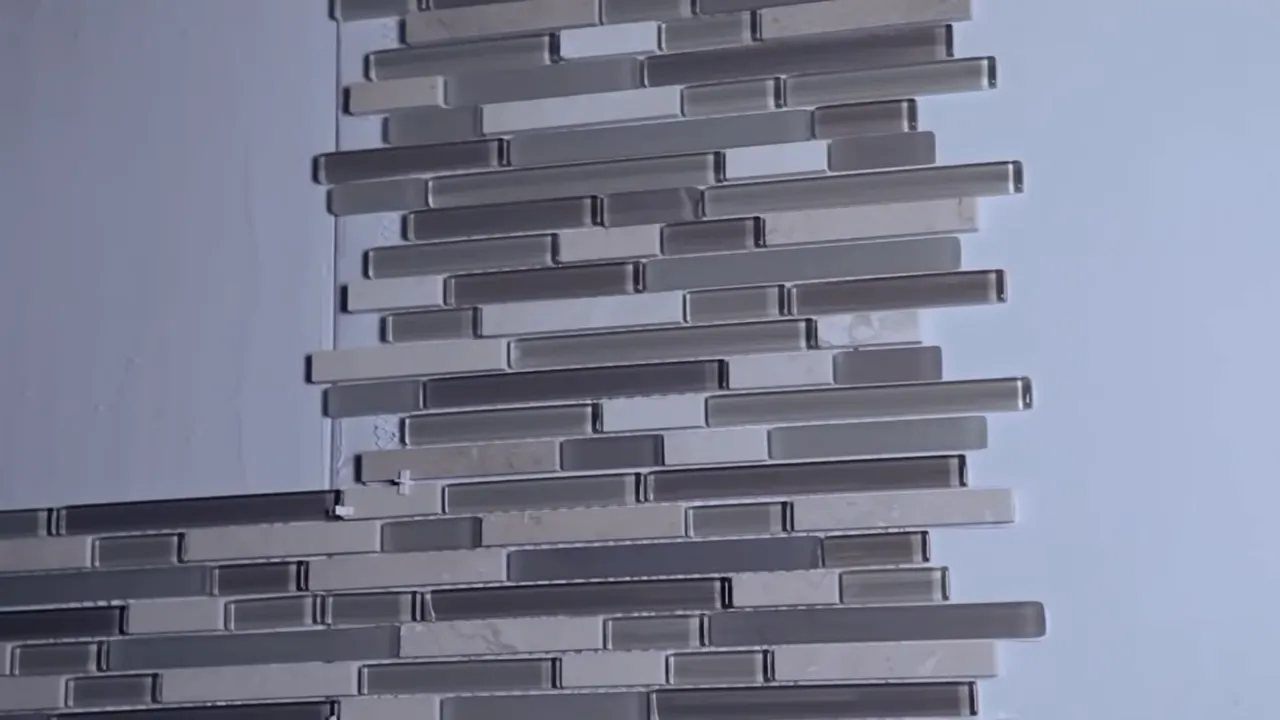
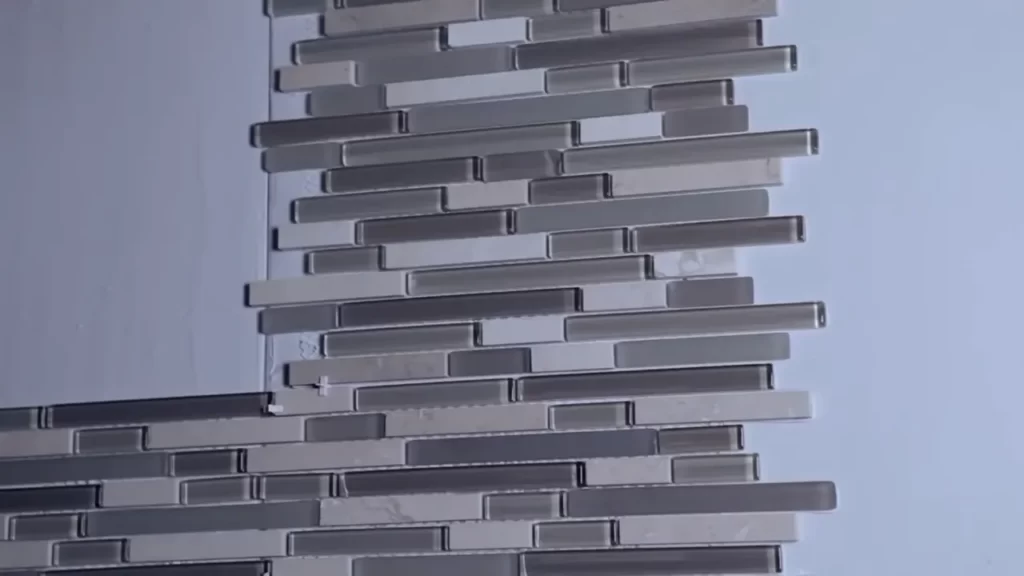
Installing The Mosaic Tiles
Installing the mosaic tiles is an important step in transforming your bathroom into a beautiful and vibrant space. This process involves pressing the tiles firmly onto the mortar, ensuring proper spacing and alignment, and using tile spacers to maintain consistent gaps. By following these steps, you can achieve a professional-looking mosaic wall tile installation that will enhance the aesthetic appeal of your bathroom.
When installing mosaic tiles, it is crucial to press them firmly onto the mortar. This ensures that the tiles adhere securely and prevents any potential for loosening or shifting over time. To do this, take a notched trowel and spread a thin layer of mortar onto the wall, covering a small section at a time. Then, using the flat side of the trowel, press the mosaic tiles firmly into the mortar, ensuring each tile is level and aligned with the others.
Proper spacing and alignment play a significant role in achieving a flawless mosaic wall tile installation. To ensure consistent spacing between each tile, it is recommended to use tile spacers. These small plastic pieces come in various sizes and can be easily inserted between tiles to maintain uniform gaps. By using tile spacers, you will prevent the tiles from being too close together or unevenly spaced, resulting in a visually appealing and symmetrical pattern.
When it comes to alignment, it is important to ensure that each mosaic tile is positioned correctly. Take the time to adjust the tiles as needed, making sure they are flush with each other and creating a seamless look. If you notice any tiles that are not aligned properly, gently remove them and readjust. This attention to detail will make a noticeable difference in the overall appearance of the mosaic wall tile installation.
In summary, installing mosaic wall tiles in your bathroom requires some essential steps to achieve a professional finish. Pressing the tiles firmly onto the mortar ensures a secure and lasting installation. Furthermore, ensuring proper spacing and alignment using tile spacers will help create a visually pleasing mosaic pattern. By following these techniques, you can successfully install mosaic wall tiles that will transform your bathroom into a stylish and inviting space.
Cutting And Trimming Tiles For Edges And Obstacles
When it comes to installing mosaic wall tiles in your bathroom, one of the most crucial steps is cutting and trimming the tiles to fit the edges and overcome any obstacles in your space. This ensures a seamless and professional-looking finish. In this section, we will guide you through the process of measuring and marking tiles for accurate cuts, as well as using a tile cutter or wet saw to make precise cuts. By following these steps, you can achieve a precise and polished installation.
Measuring and marking tiles for accurate cuts
Before you start cutting and trimming your mosaic wall tiles, it is important to measure and mark them accurately. This will help you achieve precise cuts and ensure that the tiles fit seamlessly into the desired spaces.
To measure the tiles, use a tape measure and mark the measurements on the tile surface using a pencil. Ensure that you take into account any additional space needed for grout lines. Make clear and visible markings to guide your cutting process.
Using a tile cutter or wet saw to make precise cuts
Once you have measured and marked your tiles, it’s time to make the cuts. There are two common tools you can use for cutting mosaic wall tiles – a tile cutter or a wet saw. Both options have their advantages, and the choice depends on your personal preference and the complexity of the cuts required.
A tile cutter is a handheld tool that creates controlled breaks along your marked lines, allowing you to snap the tile cleanly. It is ideal for straight cuts and smaller tiles. To use a tile cutter:
- Place the tile onto the cutter, aligning the marked line with the cutting wheel.
- Apply even pressure and score the tile along the line with one firm stroke.
- Use the breaker bar on the tile cutter to snap the tile cleanly along the scored line.
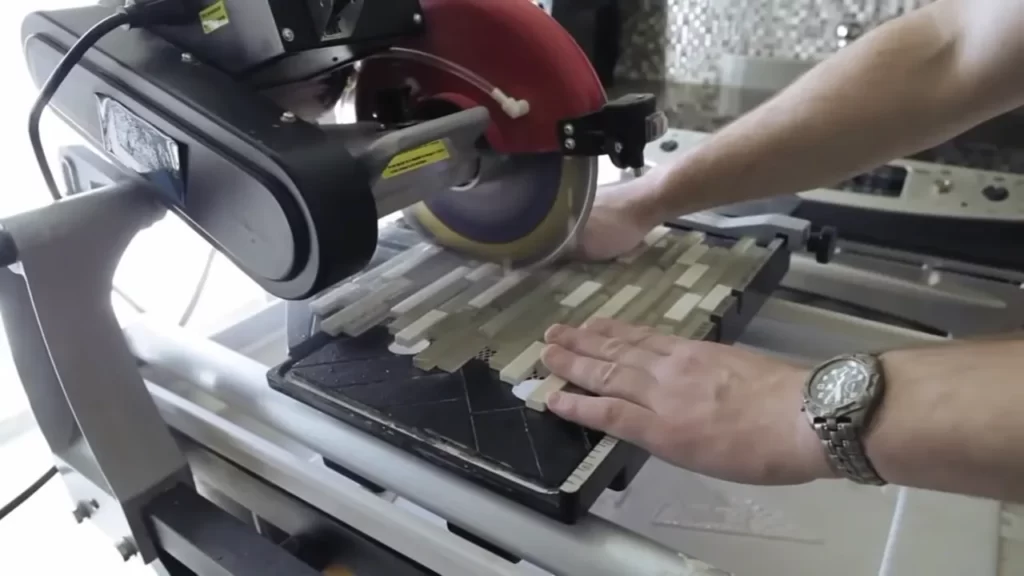
On the other hand, a wet saw is a power tool that uses a diamond blade and water to make precise cuts through mosaic tiles or larger tiles. It is perfect for cutting more intricate shapes and angles. To use a wet saw:
- Fill the reservoir with water and turn on the wet saw.
- Align the marked line with the blade, keeping your fingers clear.
- Gently push the tile towards the blade, allowing it to make the cut through the tile.
When using either tool, it is crucial to wear safety goggles and follow the manufacturer’s instructions for safe and accurate cutting.
By following these steps to measure, mark, and cut your mosaic wall tiles accurately, you can achieve a polished and professional finish in your bathroom. Take your time, use the appropriate tools, and always prioritize safety. With practice, you will become skilled at cutting and trimming tiles, allowing you to create a stunning and customized mosaic tile installation.
Grouting The Mosaic Wall Tiles
Preparing the grout mixture
Before grouting the mosaic wall tiles, it is important to prepare the grout mixture. This ensures that the grout will adhere properly and provide a strong, durable finish. To prepare the grout, follow these simple steps:
- Gather the necessary materials, including grout powder, a mixing container, and a stirring tool.
- Read and follow the instructions on the grout packaging to determine the appropriate ratio of water to grout powder.
- Pour the recommended amount of water into the mixing container.
- Sprinkle the grout powder slowly and consistently into the water, stirring continuously to avoid lumps.
- Continue stirring until the mixture reaches a smooth, creamy consistency.
Applying grout to fill the gaps between tiles
Once the grout mixture is prepared, it’s time to apply it to fill the gaps between the mosaic wall tiles. This step is crucial as it not only enhances the overall appearance of the tile installation but also helps to protect the tiles from moisture and make them more durable. Here’s a simple guide to applying grout:
- Using a rubber grout float, scoop up a generous amount of grout mixture.
- Hold the float at a 45-degree angle and spread the grout diagonally across the tile surface, making sure to push the grout into the gaps.
- Work in small sections, as this will prevent the grout from drying out before you have a chance to clean it off.
- Continue applying grout until all the gaps are filled and the tile surface is evenly covered.
- Once the grout is applied, allow it to set for the recommended time specified on the grout packaging.
Cleaning off excess grout for a clean finish
After the grout has set, it’s time to clean off any excess grout that may be lingering on the tile surface. This step is essential for achieving a clean, professional-looking finish. Follow these steps to clean off excess grout:
- Fill a bucket with clean water.
- Dampen a sponge or grout haze remover with water and wring out any excess moisture.
- Gently wipe the sponge or haze remover across the tile surface in a circular motion, being careful not to remove the grout from the gaps.
- Rinse the sponge or haze remover frequently in the clean water to prevent it from becoming saturated with grout residue.
- Continue wiping and rinsing until the tile surface is clean and free of any excess grout.
By following these simple steps to prepare the grout mixture, apply the grout, and clean off the excess, you can achieve a beautiful and professional-looking mosaic wall tile installation in your bathroom. With attention to detail and proper grouting techniques, your bathroom will be transformed into a stunning space that is both visually appealing and highly functional.
Sealing The Grout For Longevity
Allowing the grout to cure before sealing
Before sealing the grout in your newly installed mosaic wall tile, it is important to allow it ample time to cure. Curing time can vary depending on the type of grout used, so be sure to consult the manufacturer’s instructions for specific guidelines.
During the curing process, the grout forms a strong bond and hardens, ensuring its long-lasting durability. This step is crucial to prepare the grout for sealing, as it allows for a solid foundation that will maximize the effectiveness of the sealer and provide additional protection against staining and moisture absorption.
Applying a suitable grout sealer
Once the grout has fully cured, it is time to apply a suitable grout sealer. A grout sealer creates a protective barrier over the grout, preventing the penetration of dirt, liquids, and other contaminants. This not only helps to keep your grout looking clean and new but also extends its lifespan.
When choosing a grout sealer, select a product that is specifically designed for the type of grout used in your mosaic wall tile. There are various types of sealers available, including penetrating sealers, epoxy sealers, and topical sealers, each with their own unique benefits and application methods.
To apply the grout sealer, start by thoroughly cleaning the grout lines and tiles, ensuring that they are free from any debris or residue. Next, carefully follow the manufacturer’s instructions for application. In most cases, a small brush or roller applicator is used to evenly distribute the sealer onto the grout lines.
Allow the sealer to fully dry as per the manufacturer’s instructions before exposing the tiles to water or other liquids. It is important to note that grout sealers are not permanent and will need to be reapplied periodically to maintain their effectiveness.
Regular maintenance to keep the tiles and grout clean
A proactive approach to maintenance is vital in ensuring the longevity of both your mosaic wall tiles and the grout. Regular upkeep not only keeps your bathroom looking fresh and inviting but also prevents the buildup of dirt and grime that can lead to more serious issues over time.
- Start by cleaning the tiles and grout with a pH-neutral cleaning solution and a soft brush or sponge. Avoid using abrasive cleaners or tools that could damage the tiles or grout.
- Thoroughly rinse the area with clean water to remove any residue from the cleaning solution.
- Dry the tiles and grout with a soft cloth, or allow them to air dry.
- Regularly inspect the grout lines for signs of wear or damage. If necessary, touch up or replace any damaged grout to prevent further issues.
- Consider using a grout sealer and cleaner combination product to simplify the maintenance process. These products not only keep the grout sealed but also help to remove dirt and stains.
By following these maintenance tips and regularly sealing your grout, you can ensure that your mosaic wall tiles in the bathroom remain beautiful and functional for years to come.
Cleaning And Caring For Mosaic Wall Tiles
Mosaic wall tiles are a stunning addition to any bathroom, providing both style and functionality. However, to maintain their beauty and longevity, it is important to properly clean and care for them. In this section, we will discuss the best practices for cleaning your mosaic wall tiles and ensuring they remain in pristine condition.
Using mild cleaning solutions and non-abrasive tools
When it comes to cleaning mosaic wall tiles, it’s crucial to use mild cleaning solutions and non-abrasive tools. Harsh chemicals can damage the delicate surface of the tiles, causing them to lose their shine and vibrancy over time. To avoid this, opt for gentle cleaners that are specifically formulated for use on mosaic tiles.
For everyday cleaning, a mixture of warm water and a mild, pH-neutral soap will suffice. Apply the solution to the tiles with a soft sponge or cloth, gently scrubbing in a circular motion. Avoid using abrasive scouring pads or brushes, as they can scratch the surface of the tiles and compromise their appearance.
Regularly removing dirt and stains
Dirt and stains can accumulate on mosaic wall tiles over time, detracting from their visual appeal. To keep your tiles looking their best, it is important to regularly remove dirt and stains. Establish a routine cleaning schedule, depending on the level of usage in your bathroom.
You can remove dirt and stains by following these simple steps:
- Dampen a soft cloth or sponge with warm water.
- Apply a small amount of mild soap to the cloth or sponge.
- Gently scrub the affected areas in a circular motion until the dirt or stain is removed.
- Rinse the tiles thoroughly with clean water to remove any soap residue.
- Dry the tiles using a soft, absorbent towel to prevent water spots.
Avoiding harsh chemicals or scrubbing techniques
To maintain the beauty and integrity of your mosaic wall tiles, it is crucial to avoid harsh chemicals or aggressive scrubbing techniques. This includes abrasive cleaners, bleach, ammonia, and vinegar-based solutions. These substances can strip away the protective coating of the tiles and cause irreversible damage.
Instead, stick to mild cleaning solutions and gentle scrubbing with non-abrasive tools, as mentioned earlier. Regular and proper care will help your mosaic wall tiles retain their original luster and ensure they remain a focal point of elegance in your bathroom.
By following these simple cleaning and caring tips, you can prolong the lifespan of your mosaic wall tiles and enjoy their beauty for years to come.
Enhancing The Mosaic Wall Tile Installation
Once you have successfully installed mosaic wall tiles in your bathroom, you can take it a step further by enhancing the overall look and feel of the space. Paying attention to details and adding decorative accents or patterns can elevate the visual appeal of the mosaic design. Additionally, incorporating lighting can highlight the intricate patterns and textures, creating a striking focal point in your bathroom. Let’s explore these enhancement ideas in more detail.
Adding decorative accents or patterns
One way to enhance the mosaic wall tile installation is by adding decorative accents or patterns. These accents can be used strategically to create visual interest and draw attention to specific areas of the bathroom. Consider incorporating a contrasting color or texture in a border or framing the mosaic with decorative tiles. This can add depth and dimension to the overall design, making it visually appealing.
Furthermore, using decorative patterns can enhance the mosaic wall tile installation. Geometric patterns such as herringbone, chevron, or diamond can create a sense of movement and add a touch of sophistication to the bathroom. Alternatively, you can opt for more intricate patterns inspired by nature, such as floral or organic motifs. These patterns can create a whimsical and relaxing atmosphere, turning your bathroom into a tranquil retreat.
Incorporating lighting to highlight the mosaic design
Another way to enhance the mosaic wall tile installation is by incorporating lighting to highlight the intricate design. By strategically placing lights, you can create shadows and highlights that enhance the texture and detail of the mosaic tiles. Consider installing small spotlights or LED strips above or below the mosaic wall, directing the light towards the tiles. This will create a dramatic effect, accentuating the beauty of the mosaic and adding a touch of glamour to your bathroom.
Additionally, you can utilize natural light to highlight the mosaic design. If your bathroom has a window, consider positioning the mosaic wall tile near the window to allow natural light to shine through. This will not only showcase the mosaic but also create a bright and airy atmosphere in the space.
In conclusion, enhancing the mosaic wall tile installation in your bathroom can take it from ordinary to extraordinary. By adding decorative accents or patterns, you can create visual interest and elevate the overall design. Incorporating lighting will highlight the intricate details of the mosaic, making it a stunning focal point. With these enhancement ideas, you can transform your bathroom into a stylish and inviting sanctuary.
Frequently Asked Questions
How Do You Stick Mosaic Tiles To The Wall?
To stick mosaic tiles to the wall, follow these easy steps: 1. Prepare the surface by cleaning and removing any loose debris. 2. Use a trowel to apply a thin layer of adhesive to the wall in small sections. 3.
Press the mosaic tiles firmly into the adhesive, leaving a small gap between each tile. 4. Apply grout to fill in the gaps and wipe away any excess with a damp sponge. 5. Allow the adhesive and grout to dry thoroughly before cleaning and sealing the tiles.
How Do You Prepare A Wall For Mosaic Tile?
Prepare a wall for mosaic tile by following these steps: 1. Clean the wall thoroughly to remove dirt and debris. 2. Repair any cracks or uneven surfaces on the wall. 3. Apply a primer to create a smooth and even surface.
4. Measure and mark the area where the mosaic tile will be installed. 5. Use thin-set mortar to adhere the mosaic tiles to the wall.
Where Do You Put Mosaic Tile In A Bathroom?
Mosaic tiles can be placed in various areas of a bathroom, including the shower walls, backsplash, and flooring. They add visual interest and can be used to create a focal point or accent wall. Additionally, mosaic tiles are often installed around the vanity or mirror to enhance the overall design of the space.
What Is The Best Adhesive For Mosaic Tile Backsplash?
The best adhesive for mosaic tile backsplashes is a polymer modified thin-set mortar. It provides a strong bond and is specifically designed for tile installations. Make sure to choose one suitable for the type of mosaic tile you are using and follow the manufacturer’s instructions for application.
Conclusion
Installing mosaic wall tile in your bathroom can transform the entire space, giving it a stylish and vibrant look. By following the step-by-step guide in this blog post, you can easily complete this project and achieve professional results. From preparing the wall surface to applying the adhesive and grouting, each stage is important for a successful installation.
With a little patience and the right tools, you can create a stunning mosaic wall that will impress all who enter your bathroom. Start your project today and enjoy the beauty and functionality of mosaic wall tile.