
To install a Moen bathroom faucet, simply follow the manufacturer’s instructions and use the provided hardware and tools. Now, let’s dive into the step-by-step process of installing a Moen bathroom faucet for a sleek and functional upgrade to your bathroom.
Faucet installation is a relatively straightforward process that can be completed in just a few simple steps. Whether you’re replacing an old faucet or installing a new one, this guide will walk you through the process and have your new Moen faucet up and running in no time.
So, let’s get started and transform your bathroom with a stylish and efficient Moen faucet.
Tools Needed For Installing Moen Bathroom Faucet
Installing a Moen bathroom faucet can be a great DIY project to improve the look and functionality of your bathroom. But before you begin the installation process, it’s important to gather the necessary tools and materials to ensure a smooth and successful installation. In this section, we will discuss the essential tools you will need to get the job done.
Basic household tools
Before diving into the installation, make sure you have the following basic household tools on hand:
- Adjustable wrench
- Phillips screwdriver
- Flathead screwdriver
- Bucket or basin
- Rags or towels
- Plumber’s putty
These tools are commonly found in most households and are essential for various home improvement projects. Having them readily available will save you time and make the installation process much more convenient.
Moen faucet installation kit
In addition to the basic household tools, you will also need a Moen faucet installation kit. This kit typically includes the necessary hardware, such as nuts, bolts, washers, and an installation manual. The specific contents may vary depending on the model of the Moen faucet you have chosen.
It is important to use the installation kit specifically designed for your Moen faucet model to ensure a proper and secure fit. This will help prevent any leaks or complications after the installation is complete.
Teflon tape
Another important tool for installing your Moen bathroom faucet is Teflon tape. This tape is used to create a watertight seal and prevent leaks at the various connection points.
Before assembling the faucet components, wrap the threads of the water supply lines with Teflon tape. This will help create a tight and secure connection. Ensure that you wrap the tape in a clockwise direction to prevent it from unraveling as you tighten the connections.
Teflon tape is an inexpensive but essential tool that can significantly improve the performance and durability of your Moen bathroom faucet installation.
By having the basic household tools, a Moen faucet installation kit, and Teflon tape on hand, you are well-equipped to successfully install your Moen bathroom faucet. So gather your tools, follow the instructions in the installation manual, and enjoy the benefits of your newly installed faucet!
Preparing For Faucet Installation
Before you begin installing your Moen bathroom faucet, it’s important to properly prepare for the process. This involves a few key steps, including shutting off the water supply, gathering necessary tools and materials, reading the manufacturer’s installation instructions, and ensuring the sink is clean and free of debris.
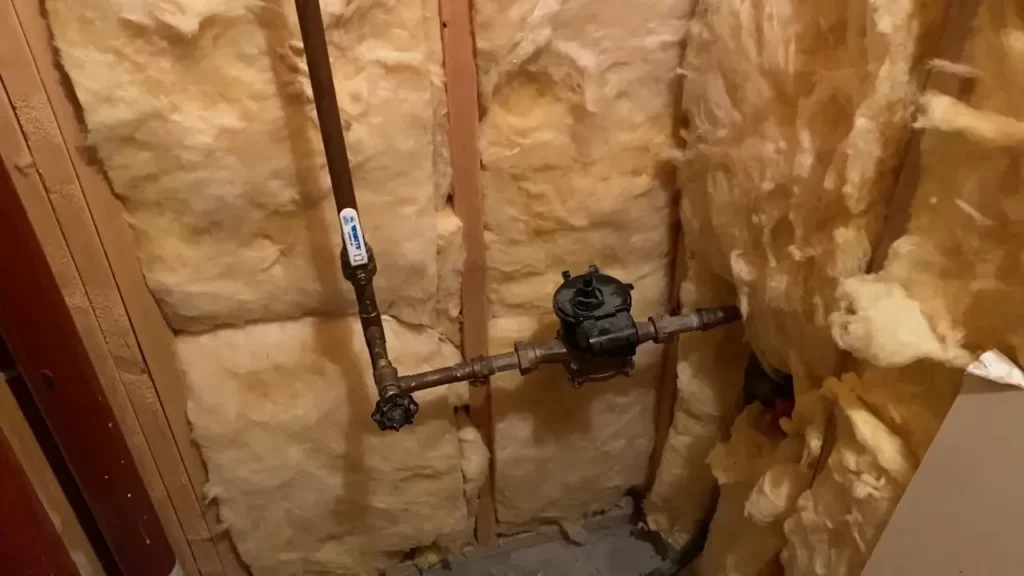
Shut off the water supply
First and foremost, you’ll need to shut off the water supply to avoid any potential flooding or leaks. This step is crucial to ensure a smooth installation process. Locate the water shut-off valves underneath the sink or near the main water line to your home.
Gather necessary tools and materials
Before diving into the installation process, it’s important to gather all the necessary tools and materials. This will help you stay organized and efficient throughout the process. Here’s a list of tools and materials you’ll need:
| Tools | Materials |
|---|---|
|
|
Read the manufacturer’s installation instructions
Once you have your tools and materials ready, it’s crucial to read and understand the manufacturer’s installation instructions. These instructions will provide specific guidance and tips for installing your Moen bathroom faucet. Make sure to follow the instructions carefully to ensure proper installation and avoid any complications.
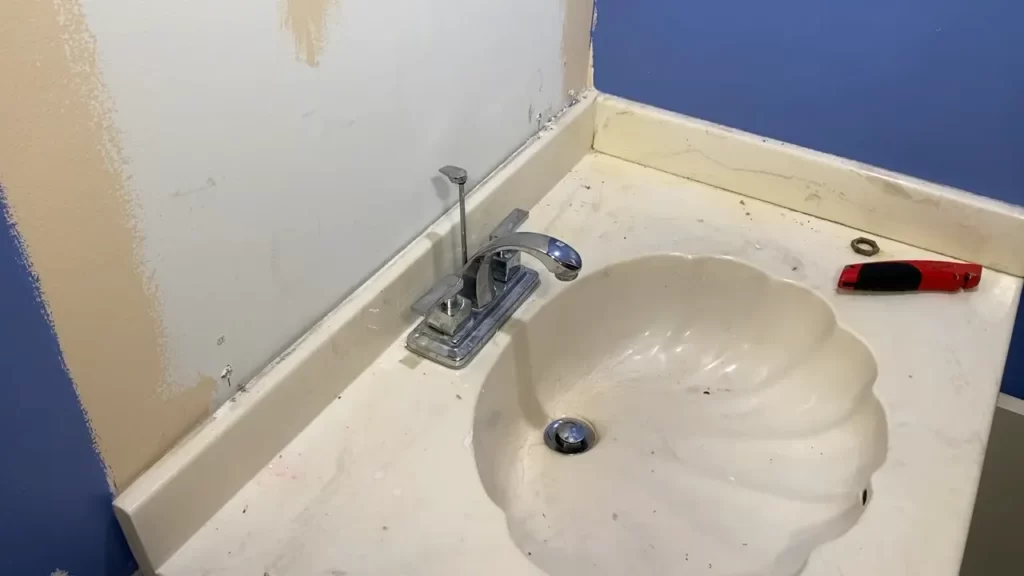
Ensure the sink is clean and free of debris
Before installing the new faucet, it’s important to clean the sink thoroughly and ensure it is free of any debris. This will help create a smooth, level surface for the faucet installation. Use a cleaner suitable for your sink surface and a soft cloth to remove any dirt or grime. Additionally, check for any existing sealant or caulk around the previous faucet and remove it if necessary.
By following these steps and properly preparing for the faucet installation, you’ll be well-equipped to complete the process successfully. Remember to take your time, refer to the manufacturer’s instructions, and have all the necessary tools and materials on hand for a smooth installation experience.
Removing The Old Faucet
Turn off the water supply valves
Before you start removing the old faucet, it is essential to turn off the water supply valves. These valves are typically located under the sink and can be turned clockwise to shut off the water flow. It is crucial to ensure the water is completely turned off to avoid any potential leaks or water damage during the removal process.
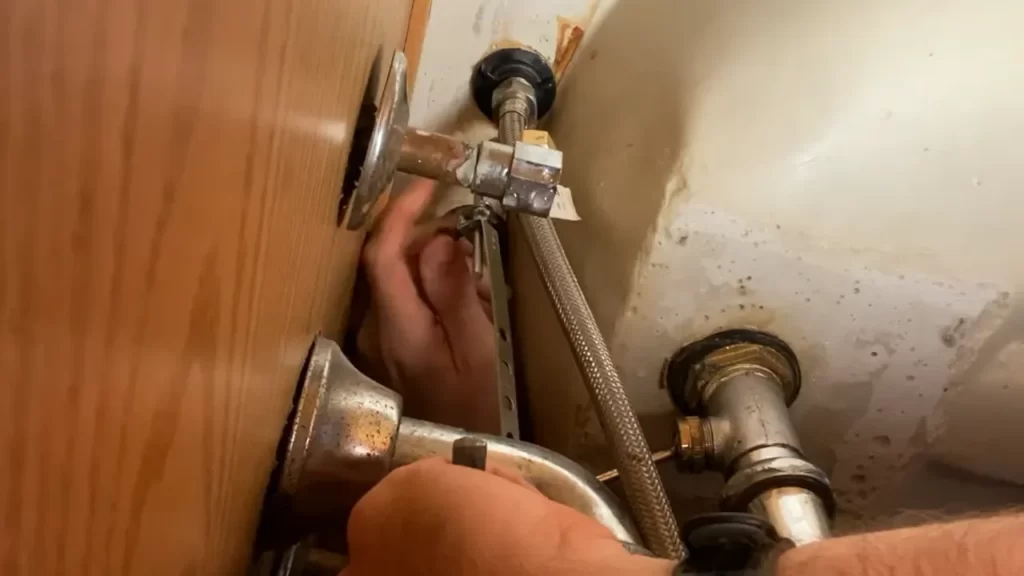
Disconnect the supply lines
Once the water supply valves are turned off, the next step is to disconnect the supply lines. These lines are responsible for carrying water from the valves to the faucet. To disconnect them, you will need an adjustable wrench. Place the wrench on the nut connecting the supply line and the valve, and turn it counterclockwise to loosen and remove the nuts. Repeat this process for both hot and cold water supply lines.
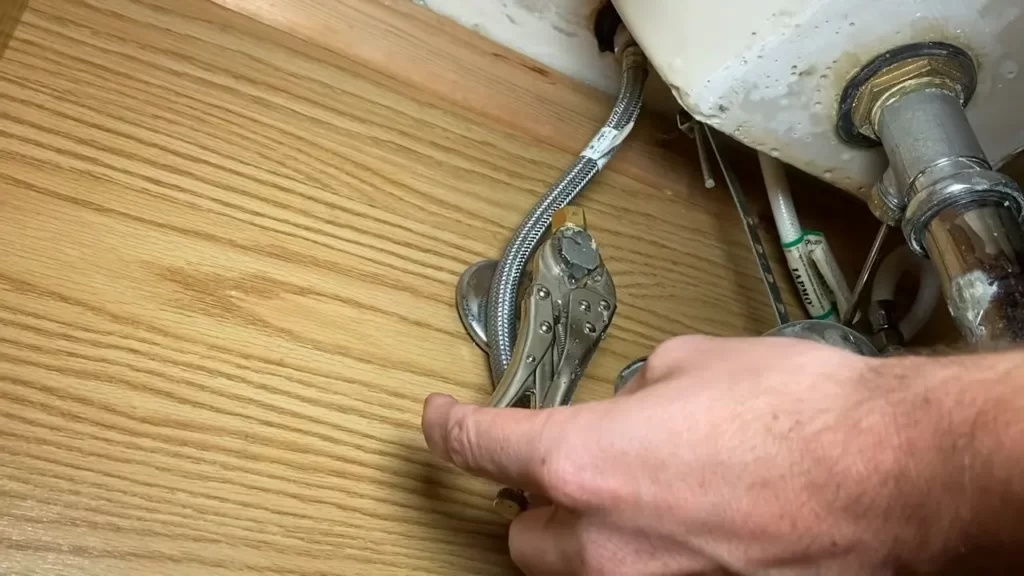
Remove the mounting nuts
After disconnecting the supply lines, the mounting nuts need to be removed. These nuts secure the faucet to the sink or countertop. To remove them, you may need a basin wrench or an adjustable wrench. Place the wrench on the nuts and turn counterclockwise to loosen and remove them. Make sure to remember their positions as they will be needed when installing the new faucet.
Lift out the old faucet
Once the supply lines and mounting nuts are removed, it’s time to lift out the old faucet. Gently lift the faucet upwards, ensuring that it doesn’t catch on any of the remaining connections. Carefully inspect the area for any remaining debris or mineral deposits that may have accumulated over time.
With these steps completed, you have successfully removed the old faucet and are ready to install the new Moen bathroom faucet. Remember to clean the area thoroughly before proceeding with the installation to ensure a secure and leak-free fit for your new faucet.
Installing The New Moen Bathroom Faucet
After purchasing your new Moen bathroom faucet and gathering all the necessary tools, it’s time to install it. Installing a faucet may seem like a daunting task, but with a little guidance, you can do it yourself without any hassle. In this section, we will guide you through the step-by-step process of installing your new Moen bathroom faucet.
Clean and Prep the Sink Surface
The first step in installing your new Moen bathroom faucet is to ensure that the sink surface is clean and prepped. Start by removing any old caulk, grime, or debris from the sink surface. Use a mild household cleaner and a soft cloth or sponge to thoroughly clean the area. Once the surface is clean, dry it with a towel to ensure there is no moisture left behind.
Apply Plumber’s Putty or Silicone Sealant
Next, you’ll need to apply plumber’s putty or silicone sealant to create a watertight seal between the faucet and the sink. Plumber’s putty is commonly used for sinks made of materials such as stainless steel, porcelain, or cast iron, while silicone sealant is more suitable for surfaces like granite or marble. Roll a small amount of putty between your hands to make it pliable, then press it onto the bottom of the faucet.
Note: If using silicone sealant, apply a thin bead of sealant around the base of the faucet instead.
Position the New Faucet on the Sink
Once the plumber’s putty or silicone sealant is applied, it’s time to position the new Moen bathroom faucet on the sink. Align the faucet’s mounting holes with the corresponding holes in the sink. Make sure the faucet is centered and level before proceeding to the next step.
Secure the Faucet to the Sink with Mounting Nuts
To secure the faucet to the sink, you’ll need to use the provided mounting nuts. Slide the nuts onto the mounting studs underneath the sink and hand-tighten them. Use a wrench to tighten the nuts further, ensuring that the faucet is securely fastened to the sink.
Carefully check the faucet’s alignment and levelness once more to ensure proper installation.
Note: Be cautious not to overtighten the nuts, as it could damage the faucet or sink.
Well done! You have successfully installed your new Moen bathroom faucet. After completing the installation, turn on the water supply to check for any leaks. If you notice any leaks, double-check the connections and tighten them as needed. Now, you can enjoy the beauty and functionality of your new Moen bathroom faucet!
Connecting The Water Supply
Once you have successfully installed your new Moen bathroom faucet, the next step is to connect the water supply. This crucial step ensures that water flows smoothly through your faucet, providing you with a refreshing and convenient bathroom experience. In this section, we will walk you through the necessary steps and precautions to take when connecting the water supply to your Moen bathroom faucet.
Attach the supply lines to the faucet
Before you begin, make sure you have all the necessary tools and materials at hand. You will need a pair of adjustable pliers, Teflon tape, and the supply lines that came with your Moen faucet.
- Start by attaching the hot water supply line to the hot water inlet on the faucet. The hot water supply line is typically marked with a red dot or the letter “H”.
- Next, attach the cold water supply line to the cold water inlet on the faucet. The cold water supply line is usually marked with a blue dot or the letter “C”.
Note: Ensure that the supply lines are tightly secured to the faucet to prevent any leaks. Use adjustable pliers to tighten the connections, taking care not to overtighten and damage the fittings.
Tighten the connections
Once you have attached the supply lines to the faucet, it’s time to tighten the connections. The following steps will guide you on how to do this effectively:
- Hold the faucet securely with one hand to prevent it from moving or rotating.
- Using the other hand, use your adjustable pliers to slowly and carefully tighten the connections.
Important: Do not use excessive force when tightening the connections as this can damage the fittings. Make sure the connections are snug and properly sealed but avoid overtightening.
Turn on the water supply valves
After tightening the connections, it’s time to turn on the water supply valves to allow water to flow through the faucet. Follow these steps:
- Locate the water supply valves underneath your sink. The hot water supply valve is usually on the left, while the cold water supply valve is on the right.
- Using your hand or a wrench, turn the valves clockwise to open them fully. This will restore the water supply to your bathroom faucet.
Check for any leaks
Once you have turned on the water supply valves, it’s important to check for any leaks. Follow these steps:
- Inspect the connections between the supply lines and the faucet. Look for any signs of water dripping or pooling.
- If you notice any leaks, use your adjustable pliers to gently tighten the connections a little more.
Note: Avoid overtightening as this can damage the fittings. If the leaks persist, it may be necessary to disassemble the connections and reapply Teflon tape before reattaching them.
In conclusion, connecting the water supply is the final step in installing your Moen bathroom faucet. By carefully attaching the supply lines, tightening the connections, turning on the water supply valves, and checking for leaks, you can ensure a smooth and hassle-free water flow in your bathroom. Now you can sit back, relax, and enjoy the beauty and functionality of your brand new Moen bathroom faucet!
Testing And Finishing
After successfully installing your new Moen bathroom faucet, it’s time to perform a few essential tests and finish up the job. By following these final steps, you can ensure the functionality, durability, and overall satisfaction of your new faucet.
Run water to test the faucet
Once the installation is complete, the first thing you want to do is to run water through your new Moen bathroom faucet. Turn on both the hot and cold water supply and let the water flow for a few minutes. This will help you check if the faucet is working properly and whether there are any issues with water pressure or temperature. It’s important to note that during this process, you may experience some initial sputtering or air spitting, which is normal after installing a new faucet. However, if the sputtering continues or you notice any irregularities, it’s best to consult the manufacturer or seek professional assistance.
Check for any leaks or drips
After running water through the faucet, carefully inspect the area around the installation for any signs of leaks or drips. Thoroughly examine the connections and joints, paying attention to both the hot and cold water handles. A small flashlight can be handy for checking hard-to-see areas. If you spot any leaks or drips, tighten the connections or joints as needed. It’s crucial to address any plumbing issues right away to prevent further damage and ensure the long-term functionality of your new faucet.
Clean up any excess debris or sealant
During the installation process, it’s common to encounter some excess debris or sealant that may have accumulated around the faucet area. Take a soft cloth or sponge and gently wipe away these loose particles. This step will not only make your faucet look visually appealing but also prevent any debris from obstructing the faucet’s mechanism. Additionally, make sure to clean the surrounding countertop or sink area to eliminate any residue or marks left behind during the installation process.
Enjoy your new Moen bathroom faucet
Congratulations! Now that you have successfully completed the installation, testing, and finishing steps, it’s time to enjoy your new Moen bathroom faucet. Take a moment to appreciate your handiwork and revel in the enhanced functionality and aesthetic appeal that your new faucet brings to your bathroom space. Whether you’re gently washing your hands or enjoying a refreshing splash of water on your face, your new Moen faucet is sure to elevate your bathroom experience.
Remember, regular maintenance and periodic checks are essential to keep your faucet in optimal condition. By following the manufacturer’s instructions and troubleshooting any issues promptly, you can enjoy the benefits of your new faucet for years to come.
Frequently Asked Questions
How Do You Change A Moen 2 Handle Bathroom Faucet Cartridge?
To change a Moen 2-handle bathroom faucet cartridge, follow these steps: 1. Turn off the water supply. 2. Remove the faucet handle. 3. Unscrew the cartridge retaining nut. 4. Remove the old cartridge and replace it with a new one.
5. Reassemble the faucet and turn the water back on.
How Do You Install A Quick Connect Bathroom Faucet?
To install a quick connect bathroom faucet, follow these steps: 1. Turn off the water supply. 2. Remove the old faucet and clean the sink surface. 3. Apply plumber’s tape on the faucet connections. 4. Insert the quick connect fittings into the faucet holes.
5. Tighten the fittings and turn on the water supply.
How Do You Install A Centerset Bathroom Faucet?
To install a centerset bathroom faucet, follow these steps: 1. Turn off the water supply. 2. Remove the old faucet. 3. Clean the sink surface. 4. Install the new faucet according to the instructions. 5. Connect the water lines and tighten the fittings.
How Do You Change A Moen Single Handle Faucet Cartridge?
To change a Moen single handle faucet cartridge, follow these steps: Turn off the water supply. Remove the faucet handle and trim. Unscrew the cartridge retaining nut and pull out the old cartridge. Insert the new cartridge and reassemble the faucet.
Finally, turn the water supply back on.
Conclusion
Installing a Moen bathroom faucet is a relatively simple process that can instantly enhance your bathroom’s functionality and aesthetic appeal. By following the step-by-step instructions provided in this guide, you’ll be able to complete the installation with ease. Remember to gather all necessary tools and materials beforehand, and take your time to ensure the job is done correctly.
With a little patience and effort, you’ll have a beautiful new faucet that will provide years of reliable service. Happy installing!