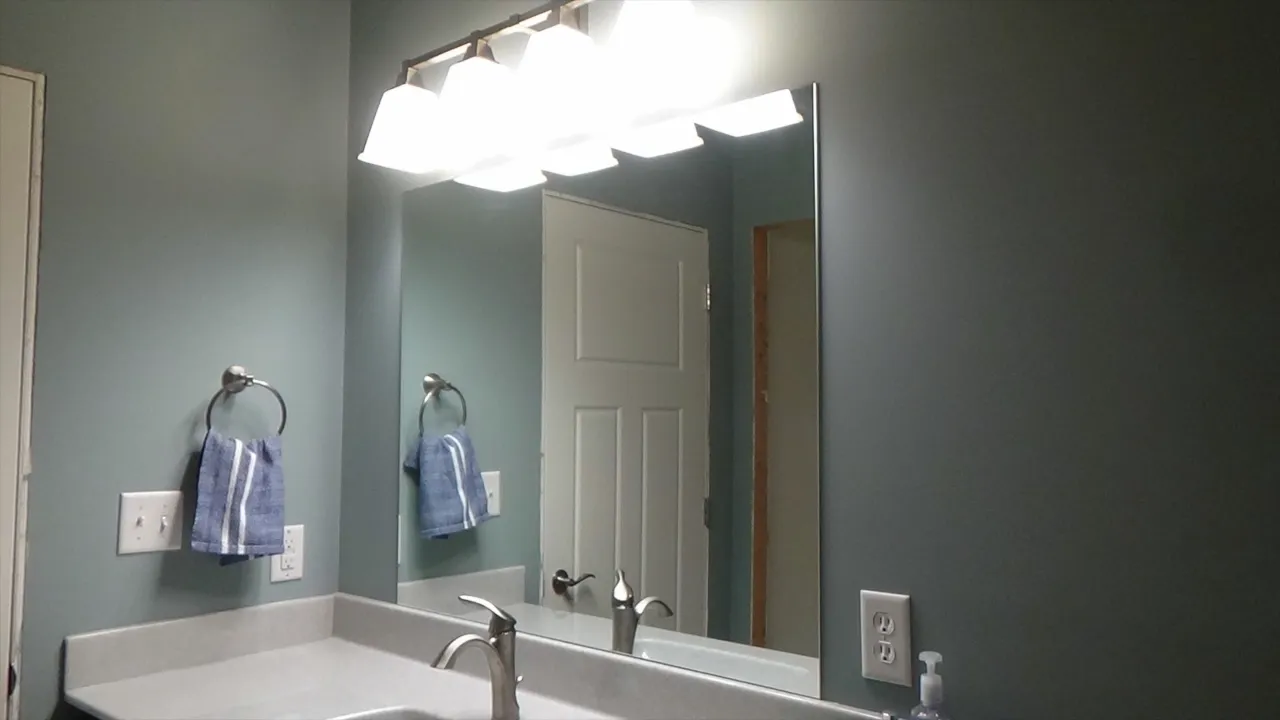
To install a mirror in the bathroom, measure the desired height, mark the mounting location, secure the brackets, and hang the mirror.
Factors To Consider When Selecting A Mirror
Factors to Consider When Selecting a Mirror
When it comes to bathroom decor, one of the most important elements is the mirror. Not only does it serve a functional purpose, but it can also enhance the overall aesthetics of the space. However, choosing the right mirror for your bathroom can be a daunting task. With so many options available in terms of size, style, frame type, lighting, and budget, it’s important to consider these factors before making a decision. In this article, we will explore each of these factors in detail to help you select the perfect mirror for your bathroom that meets your needs and suits your taste.
Size
The first factor to consider when selecting a mirror for your bathroom is the size. The size of the mirror should be proportionate to the size of your bathroom. A mirror that is too small may not be functional, while a mirror that is too large may overpower the space. To determine the right size for your mirror, measure the available wall space and consider the other elements in the bathroom, such as the vanity and lighting fixtures.
Style
The style of the mirror is another important consideration. It should complement the overall design theme of your bathroom. Whether you prefer a modern, minimalist look or a traditional, ornate style, there are mirrors available to suit every taste. Consider the shapes and finishes that will best fit your bathroom’s aesthetic. Additionally, think about the functionality of the mirror, such as whether you want a basic flat mirror or a mirror with additional features like magnification or storage.
Frame Type
The frame of the mirror can add character and personality to your bathroom. There are various frame types to choose from, including wood, metal, and frameless options. A wooden frame can add warmth and a touch of rustic charm, while a metal frame can provide a sleek, modern look. If you prefer a clean and seamless appearance, a frameless mirror may be the perfect choice. Consider the color and finish of the frame to ensure it complements the other elements in your bathroom.
Lighting
Lighting plays a crucial role in bathroom mirrors. The right lighting can enhance visibility and create a flattering reflection. Consider the available natural light in your bathroom and the artificial lighting sources. If your bathroom lacks natural light, you may want to consider a mirror with built-in lighting or one that has the ability to be paired with vanity lights. This will help ensure sufficient brightness for your grooming routine and create a pleasant ambiance within the space.
Budget
Lastly, it’s important to consider your budget when selecting a mirror for your bathroom. Mirrors come in a wide range of prices, so it’s essential to determine how much you’re willing to spend. Set a budget and research different options within your price range. Keep in mind that while cost is important, it’s also essential to choose a mirror that meets all your other requirements, such as size, style, frame type, and lighting.
In conclusion, selecting a mirror for your bathroom involves considering several factors, such as size, style, frame type, lighting, and budget. By taking these factors into account, you can find a mirror that not only serves its functional purpose but also enhances the overall aesthetics of your bathroom. carefully consider your options and choose a mirror that reflects your personal style and meets your needs.
Identifying The Wall Studs
Using a Stud Finder
Using a stud finder is the easiest and most efficient way to identify wall studs for installing a mirror in your bathroom. A stud finder is a handheld device that detects changes in a wall’s density to locate the studs.
Here’s how you can use a stud finder to find the studs:
- Start by placing the stud finder flat against the wall, slightly above the height where you want to install the mirror.
- Turn on the stud finder and slowly move it horizontally across the wall, ensuring it remains in contact with the surface.
- As you move the stud finder, it will emit a sound or display a light when it detects a stud. Make sure to pay attention to the indications given by the stud finder.
- Mark the position of the stud using a pencil or masking tape.
- Repeat the process at various heights and intervals to locate multiple studs along the desired installation area.
Using a stud finder minimizes the chance of making mistakes while identifying the studs and helps you ensure a secure installation.
Locating Studs Manually
If you don’t have access to a stud finder or prefer a more hands-on approach, you can still locate the studs manually in your bathroom wall.
Here’s how you can locate studs without using a stud finder:
|
 |
Although manual stud locating may take more time and effort, it can be a reliable method if used carefully.
Marking the Studs
Once you have identified the studs using either a stud finder or manual method, it is essential to mark them for easy reference during the mirror installation process.
Here’s how you can mark the studs:
- Use a pencil to make small marks directly on the wall’s surface, indicating the centerline of each stud. The marks should be visible but can be easily erased or covered later.
- Alternatively, you can use strips of masking tape to mark the stud locations. Place the tape vertically along the centerline of each stud.
- Ensure that the marks or tape strips are clearly visible and aligned vertically to avoid confusion during the installation process.
By marking the studs, you can easily reference their positions while mounting the mirror and ensure a sturdy and secure installation.
Removing The Existing Mirror (If Applicable)
Before you can install a new mirror in your bathroom, it’s important to remove the existing mirror, if there is one. This process may seem intimidating, but with the right steps, it can be done safely and efficiently. Follow the instructions below to successfully remove the mirror from your bathroom wall.
Removing the Mirror Clips
The first step in removing the existing mirror is to locate and remove the mirror clips. These clips are typically made of metal and hold the mirror in place against the wall. To remove them, follow these steps:
- Start by examining the edges of the mirror for any visible clips.
- Using a flathead screwdriver or a putty knife, gently pry the clips away from the mirror.
- Continue to remove all the clips around the edges of the mirror until it is no longer attached to the wall.
Once all the clips have been removed, you can proceed to the next step of detaching the mirror from the wall.
Detaching the Mirror from the Wall
After removing the mirror clips, it’s time to detach the mirror from the wall. This step requires caution to avoid any damage to the mirror or yourself. Follow these steps to safely detach the mirror:
- Put on a pair of gloves to protect your hands from any sharp edges.
- Position yourself in front of the mirror and firmly grasp it with both hands.
- Gently tilt the mirror away from the wall and slowly lift it upwards.
- Continue to lift the mirror until it is completely detached from the wall.
Once the mirror is detached, set it aside in a safe location to be properly disposed of later. Now that the old mirror has been removed, it’s vital to ensure safety precautions are taken to avoid any accidents or injuries.
Ensuring Safety Precautions
When removing a mirror from your bathroom, it’s crucial to take the necessary safety precautions. Here are some important steps to follow:
- Wear gloves to protect your hands from any sharp edges.
- Use caution when handling the mirror to avoid dropping or breaking it.
- If the mirror is large or heavy, have someone assist you to avoid straining yourself.
By following these safety precautions, you can safely remove the existing mirror from your bathroom and prepare for the installation of a new mirror. Remember to take your time and exercise caution throughout the process.
Taking Accurate Measurements
Installing a mirror in the bathroom can enhance its functionality and add a touch of elegance to the space. However, before you start the installation process, it is crucial to take accurate measurements to ensure that the mirror fits perfectly. In this guide, we will walk you through the process of measuring the height and width of the bathroom mirror, as well as accounting for vanity height and faucet placement.
Measuring the Height and Width
When measuring the height and width of your bathroom mirror, it is essential to be precise to avoid any fitting issues later on. Follow these steps to take accurate measurements:
- Use a measuring tape to measure the height of the space where the mirror will be installed. Measure from the top of the vanity countertop to the desired height.
- Next, determine the width of the mirror by measuring the available wall space. Measure from one edge to the other, ensuring not to include any obstructions such as light fixtures or tiles in your measurement.
By precisely measuring the height and width of the mirror, you can ensure a seamless installation that complements your bathroom’s aesthetic.
Accounting for Vanity Height and Faucet Placement
When installing a mirror in the bathroom, it is important to consider vanity height and faucet placement to ensure functionality and aesthetics. Here’s what to keep in mind:
| Vanity Height | Faucet Placement |
|---|---|
| Ensure that the height of the mirror is suitable for all users, accounting for people of varying heights in your household. It’s important to strike a balance between comfort and convenience. | Take into consideration the placement of faucets on the wall or countertop. Make sure the mirror does not obstruct the faucet handles or the flow of water. |
By accounting for vanity height and faucet placement, you can optimize the functionality of your mirror while maintaining a visually pleasing bathroom space.
Marking The Wall
Installing a mirror in your bathroom can instantly elevate the space and add a touch of style. However, proper installation is essential to ensure safety and functionality. One crucial step in this process is marking the wall where the mirror will be placed. This ensures accuracy and prevents any misalignment or crooked installation. In this section, we will explore the step-by-step process of marking the wall effectively.
Using a Level and Tape Measure
Before you begin marking the wall, gather a level and tape measure. These tools will be your best friends throughout the installation process. They will help you maintain straight lines and precise measurements, ensuring a professional-looking outcome. Here’s how to use them:
- Start by locating the desired spot on the wall where you plan to hang the mirror. Take into consideration factors such as height, available space, and the overall look you want to achieve.
- Using a tape measure, measure the width and height of the mirror. Jot down these measurements for later reference.
- Next, hold the level horizontally against the wall at the desired height. Adjust it until the bubble inside the level is perfectly centered, indicating a level position.
- Once the level is aligned, make a small mark at both ends of the level. These marks will act as reference points for the mirror’s width.
- Repeat the process vertically, this time placing the level against the wall vertically. Again, make marks at both ends of the level to create reference points for the mirror’s height.
Determining the Mirror’s Placement
The placement of the mirror is crucial in achieving an optimal look and functionality. Consider the following factors when determining the mirror’s placement:
- Height: Aim for a comfortable height that suits most of the household members. Consider the average eye level of the users when deciding on the mirror’s placement.
- Space: Ensure that there is enough space around the mirror for easy use and maintenance. Avoid placing the mirror too close to fixtures or walls that might obstruct its functionality.
- Lights: Take into account any lighting fixtures near the mirror. Position the mirror in a way that minimizes shadow and provides ample illumination for grooming tasks.
Making Clear Marks
Now that you have determined the ideal placement of the mirror and marked the wall accordingly, it’s time to make clear marks. These marks will act as your guide during the installation process. Here are a few tips to ensure your marks are clear and visible:
- Use a pencil or marker: Opt for a pencil or marker that contrasts with the wall color. This will make the marks more noticeable and easier to follow.
- Double-check your measurements: Before making any permanent marks, double-check your measurements and ensure their accuracy. This will help prevent any errors during installation.
- Measure twice, mark once: Take the time to recheck your measurements before making the final marks. This extra step will ensure that your marks are precise and aligned correctly.
By following these guidelines, you can mark the wall accurately and set the stage for a successful mirror installation. The next step will involve securely attaching the mirror to the wall, but that deserves a section of its own!
Applying Adhesive Or Mirror Clips
When it comes to installing a mirror in your bathroom, you have two main options: applying adhesive directly to the back of the mirror or using mirror clips. Each method has its own advantages and considerations, so it’s important to choose the right one for your needs.
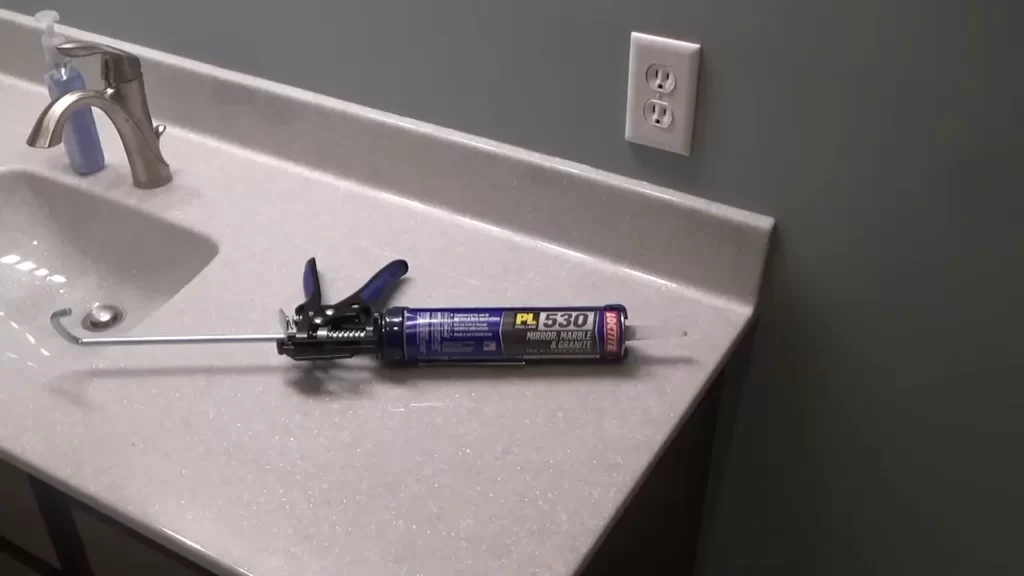
Choosing the Right Adhesive or Clips
If you decide to go with adhesive, you’ll want to make sure you choose the right one for your mirror. There are a few different types of adhesive that work well for bathroom mirrors, including mirror mastic, silicone adhesive, and construction adhesive. Mirror mastic is a popular choice because it is specifically designed for mirrors and provides a strong bond. Silicone adhesive is another good option as it is resistant to moisture and provides flexibility. Construction adhesive is the strongest option and is great for large and heavy mirrors, but keep in mind that it may be more difficult to remove in the future.
If you prefer the option of mirror clips, you’ll need to ensure you select the right style and size. Mirror clips come in various finishes and designs to match your bathroom decor. Measure the thickness of your mirror and choose clips that can securely hold it in place. It’s a good idea to use at least four clips, one on each side, to provide adequate support.
Applying Adhesive to the Back of the Mirror
If you’ve decided to use adhesive, follow these steps to apply it to the back of your mirror:
- Clean the back of the mirror with a non-ammonia based glass cleaner to ensure a clean surface.
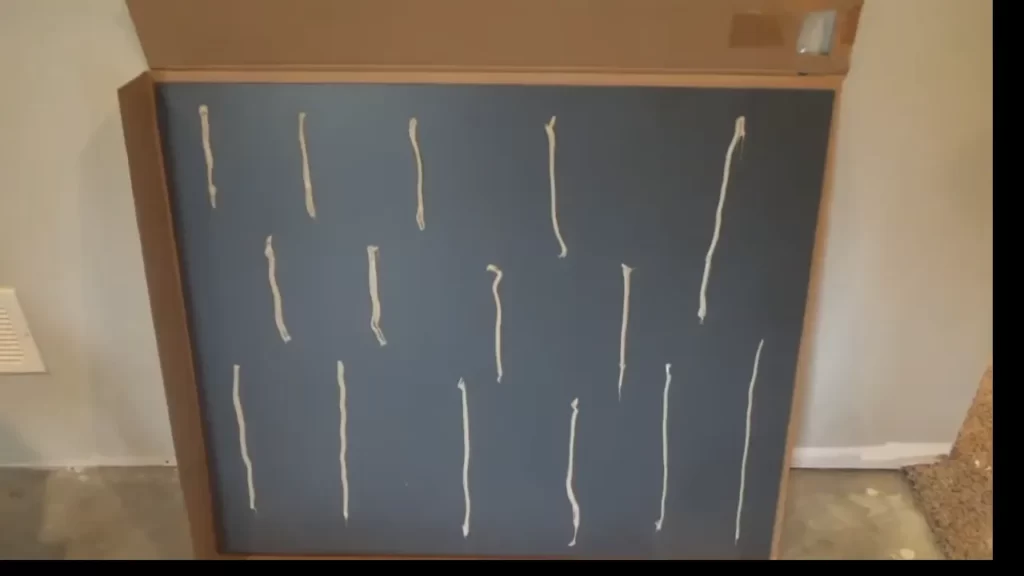
- Apply small dots of adhesive to the back of the mirror, spacing them evenly along the edges and in the middle.
- Use a caulk gun or adhesive applicator to spread the adhesive into a thin layer, ensuring full coverage.
- Hold the mirror against the wall and gently press it into place, applying even pressure across the surface.
- Allow the adhesive to dry and cure according to the manufacturer’s instructions before removing any protective tape or clamps.
Installing Mirror Clips (if applicable)
If you’ve chosen to use mirror clips, here’s how to install them:
- Measure and mark the appropriate locations for the clips on the wall.
- Drill pilot holes at the marked locations to ensure the screws go in easily.
- Secure the clips to the wall using the provided screws, making sure they are level and aligned.
- Carefully position the mirror on the clips, ensuring it sits securely.
- Confirm that the mirror is level and adjust the position of the clips if necessary.
Installing a mirror in your bathroom can add functionality and aesthetic appeal to the space. Whether you choose to apply adhesive or use mirror clips, following these steps will help ensure a successful installation. Take the time to choose the right adhesive or clips, and carefully follow the installation instructions for a secure and long-lasting mirror in your bathroom.
Mounting The Mirror
Mounting the Mirror
Mounting a mirror in the bathroom adds both functionality and aesthetics to the space. Whether you’re replacing an old mirror or installing a new one, proper positioning, level checking, and secure fastening are essential. Let’s go through the steps to mount a mirror in your bathroom.
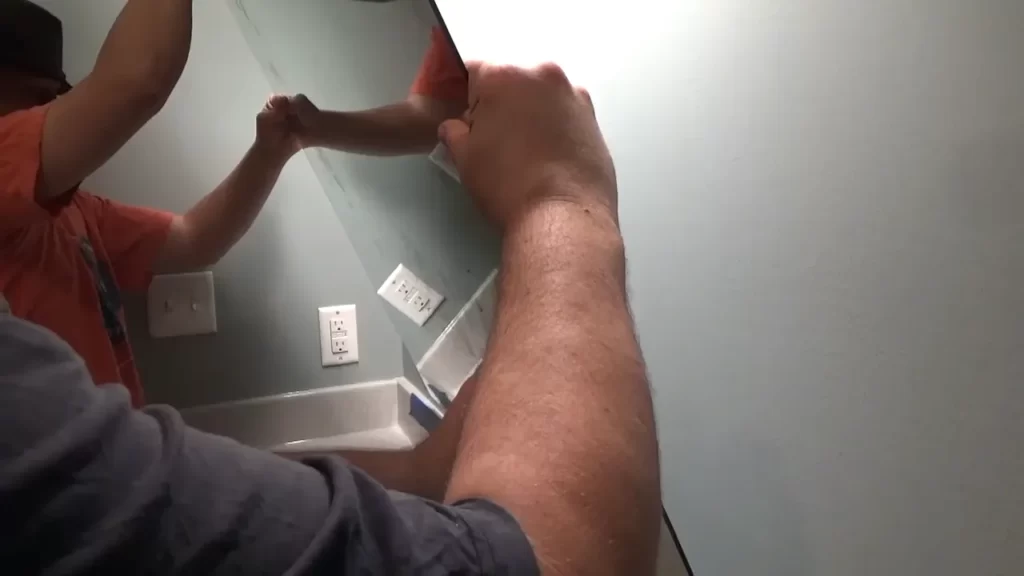
Carefully Positioning the Mirror on the Wall
When positioning the mirror on the wall, take into consideration factors such as height, width, and placement. You want to ensure that the mirror is at a comfortable eye level and complements the overall design of your bathroom. Follow these steps:
- Measure and mark the desired position of the mirror on the wall using a tape measure and a pencil.
- Hold the mirror against the wall to see if it aligns with your desired placement. Make any necessary adjustments to ensure it is centered and at the correct height.
- If you are mounting a heavy or large mirror, consider using a stud finder to locate and mark the studs on the wall. This will provide additional support and stability.
Checking for Level and Alignment
Before securing the mirror, it is crucial to check for level and alignment to ensure a professional and polished look. Follow these steps:
- Place a level on top of the mirror and adjust as necessary until it is perfectly level.
- Check the alignment of the mirror with other fixtures and objects in the bathroom to ensure it appears straight and balanced.
Securing the Mirror in Place
Once you have carefully positioned the mirror and verified its level and alignment, it’s time to securely fasten it to the wall. Follow these steps:
- If your mirror has built-in mounting brackets, attach them to the wall using screws and anchors, following the manufacturer’s instructions.
- For mirrors without built-in brackets, use mirror clips or J-channel to secure the mirror to the wall. Place the clips along the top and bottom edges of the mirror, ensuring they are evenly spaced.
- Using a screwdriver or drill, attach the clips to the wall by inserting screws through the holes in the clips and into the wall.
- Double-check the mirror’s level and alignment before fully tightening the screws.
Cleaning And Polishing The Mirror
Now that you have successfully installed a mirror in your bathroom, it’s time to keep it sparkling clean and looking its best. Cleaning and polishing the mirror regularly not only enhances its appearance but also ensures that you have a clear reflection every time you use it. In this section, we will discuss two important steps to maintain the mirror’s cleanliness: using non-abrasive cleaners and a microfiber cloth, and removing any residue or streaks that may form.
Using Non-Abrasive Cleaners and Microfiber Cloth
When it comes to cleaning mirrors, it’s essential to choose the right products that won’t damage the glass surface. Non-abrasive cleaners are your best bet as they are gentle yet effective in removing dirt, fingerprints, and smudges. Harsh chemicals or abrasive cleaners can deteriorate the mirror’s reflective coating over time, leaving behind permanent damage.
For natural and environmentally friendly options, you can create a DIY cleaner using a mixture of water and vinegar. Simply mix equal parts of water and vinegar in a spray bottle, and you have an excellent homemade cleaner ready to go. Spray the solution onto a microfiber cloth, avoiding directly spraying it onto the mirror, as excess liquid can seep into the edges and damage the mirror backing.
Microfiber cloths are the perfect choice for cleaning mirrors as they are non-abrasive and lint-free. Their fine fibers attract and trap dust particles and smudges, leaving a streak-free shine. When cleaning the mirror, gently wipe the surface using a circular motion, paying close attention to any stubborn spots. Always start from the top and work your way down to prevent drips and streaks from forming.
Removing Any Residue or Streaks
Even with the use of non-abrasive cleaners and microfiber cloth, there may still be residue or streaks left behind from the cleaning process. To ensure a crystal-clear finish, follow these simple steps:
- Prepare a solution of warm water and a small amount of dish soap in a bucket or basin.
- Dip a clean microfiber cloth into the soapy water solution and wring out any excess liquid.
- Gently wipe the mirror surface using long, even strokes. Apply slight pressure to remove stubborn residue or streaks.
- Rinse the cloth with clean water and wring out any remaining moisture.
- Wipe the mirror again to remove any soapy residue.
Remember to dry the mirror with a separate dry microfiber cloth to prevent water spots from forming. These simple steps will ensure that your mirror remains spotless and gleaming for years to come.
Inspecting The Mirror Installation
When it comes to installing a mirror in your bathroom, it is crucial to inspect the installation to ensure its stability and secure attachment. Inspecting the mirror installation helps in identifying any potential issues and ensures that the mirror is properly installed and aligned.
Checking for Stability and Secure Attachment
One of the first things to consider when inspecting the mirror installation is checking for stability and secure attachment. A stable mirror ensures that it doesn’t wobble or move, providing a safe environment for everyday use. To check for stability, try gently pushing and pulling the mirror from different angles. If you notice any movement or instability, it may indicate that the mirror is not securely attached to the wall.
To ensure secure attachment, examine the mounting hardware used to hang the mirror. The hardware should be sturdy and appropriate for the size and weight of the mirror. Inspect the screws, brackets, or clips that hold the mirror in place. Tighten any loose screws and ensure that the attachments are properly secured to the wall. If you find any damaged or insufficient hardware, consider replacing them with stronger alternatives.
Ensuring Proper Alignment and Leveling
Another important aspect of inspecting the mirror installation is ensuring proper alignment and leveling. A properly aligned and leveled mirror enhances the overall appearance of your bathroom and provides a symmetrical and visually pleasing look. Here are some steps to ensure proper alignment and leveling:
- Start by standing directly in front of the mirror and carefully observe its position. Look for any noticeable unevenness or distorted reflections that indicate misalignment.
- Make adjustments by gently tilting or moving the mirror until it appears level and aligned with the surrounding fixtures and walls.
- Use a spirit level to verify the accuracy of the alignment. Place the level horizontally and vertically along the edges of the mirror to check if it is perfectly level in both directions.
- If needed, adjust the mirror slightly until it aligns perfectly. This may involve loosening and repositioning the mounting hardware.
Remember: Take your time during the inspection process to ensure a perfect installation. A well-installed and aligned mirror adds functionality and aesthetic appeal to your bathroom.
Adding Decorative Trim (If Desired)
Installing a mirror in your bathroom is a great way to enhance its overall appearance and functionality. But why stop at just a plain mirror when you can add a touch of elegance and style to it? By adding decorative trim, you can completely transform the look of your bathroom mirror, making it a standout feature in the space. In this section, we will guide you through the process of choosing the right trim type and style, measuring and cutting the trim pieces, and attaching them to the mirror frame, allowing you to achieve a beautifully finished result.
Choosing the Trim Type and Style
The first step in adding decorative trim to your bathroom mirror is to select the type and style of trim that best complements your bathroom decor. There are various options available, ranging from classic and traditional to modern and contemporary. Here are some popular trim types and styles to consider:
| Trim Type | Trim Style |
|---|---|
| Wood | Carved, beveled, or stained |
| Metal | Brushed, polished, or hammered |
| Tile | Mosaic, subway, or patterned |
Once you have chosen the trim type and style that best suits your bathroom, you can move on to the next step.
Measuring and Cutting the Trim Pieces
Before you can attach the trim to the mirror frame, you need to measure and cut the trim pieces to the appropriate size. To do this, follow these steps:
- Measure the length and width of each side of the mirror frame.
- Transfer the measurements to the trim material, making sure to account for any mitered corners.
- Using a miter saw or trim cutter, cut the trim pieces according to your measurements.
Make sure to double-check your measurements before cutting to ensure accuracy.
Attaching the Trim to the Mirror Frame
Once you have the trim pieces cut to size, it’s time to attach them to the mirror frame. Follow these steps:
- Apply a small amount of construction adhesive to the back of each trim piece.
- Press the trim firmly onto the mirror frame, starting from one corner and working your way around.
- Use small finishing nails or brad nails to secure the trim in place.
- Wipe away any excess adhesive or caulk with a damp cloth.
Allow the adhesive to dry completely before using the mirror.
With the decorative trim now attached to your bathroom mirror, take a step back and admire the stunning transformation you have achieved. The addition of trim not only enhances the visual appeal of the mirror but also adds a touch of luxury to your bathroom space. Enjoy the new focal point in your bathroom and the compliments that are sure to come your way!
Frequently Asked Questions
How Do I Attach A Mirror To A Bathroom Wall?
To attach a mirror to a bathroom wall, follow these steps: 1. Choose a suitable spot on the wall. 2. Mark the right position with a pencil. 3. Drill holes into the wall at the marked spots. 4. Insert wall plugs into the holes.
5. Securely attach the mirror with screws using a screwdriver.
How Do You Attach A Frameless Mirror To The Bathroom Wall?
To attach a frameless mirror to a bathroom wall, use mirror adhesive or double-sided mirror tape for a secure bond. Clean the wall and mirror surface thoroughly, then apply the adhesive or tape according to the manufacturer’s instructions. Hold the mirror against the wall for a few seconds to ensure it sticks properly.
How Do You Install A Bathroom Mirror Without Drilling?
To install a bathroom mirror without drilling, use adhesive hooks or mounting tapes designed for mirrors. Clean the wall and the back of the mirror, then apply the adhesive to the mirror and press firmly against the wall. Make sure to follow the instructions provided with the adhesive for best results.
How Do You Attach A Mirror To A Vanity?
To attach a mirror to a vanity, use mirror adhesive or double-sided tape for a secure hold. Make sure the vanity surface is clean and dry. Apply the adhesive or tape to the back of the mirror, then firmly press it onto the vanity.
Hold for a few minutes to ensure proper bonding.
Conclusion
In a few simple steps, you can easily install a mirror in your bathroom. By following this guide and using the right tools, you can achieve a sleek and functional addition to your bathroom. Remember to measure accurately, secure the mirror properly, and check for any damage or defects.
With the right guidance, installing a mirror can be a breeze, lending style and functionality to your space. So, why wait? Get started on transforming your bathroom today!