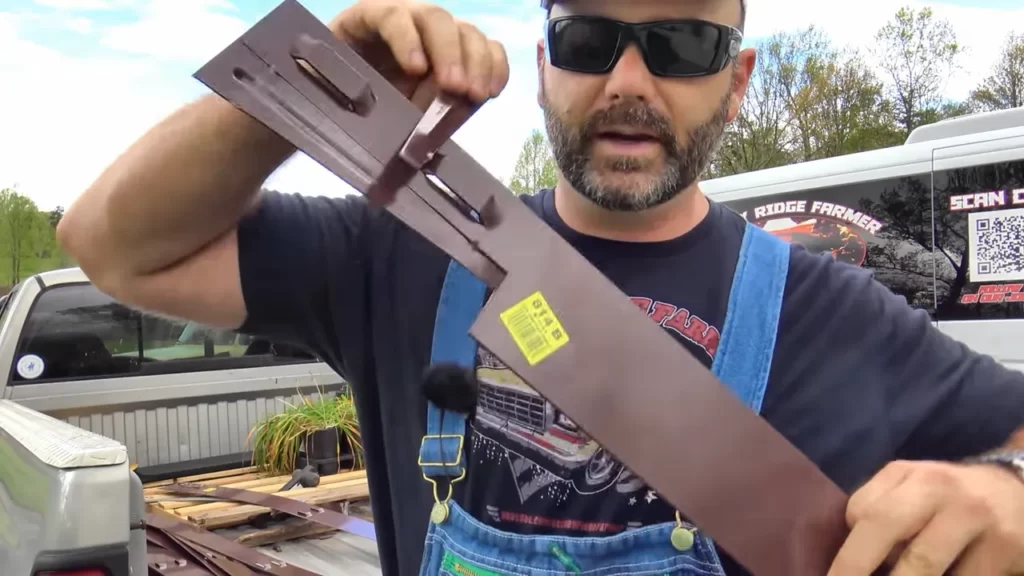
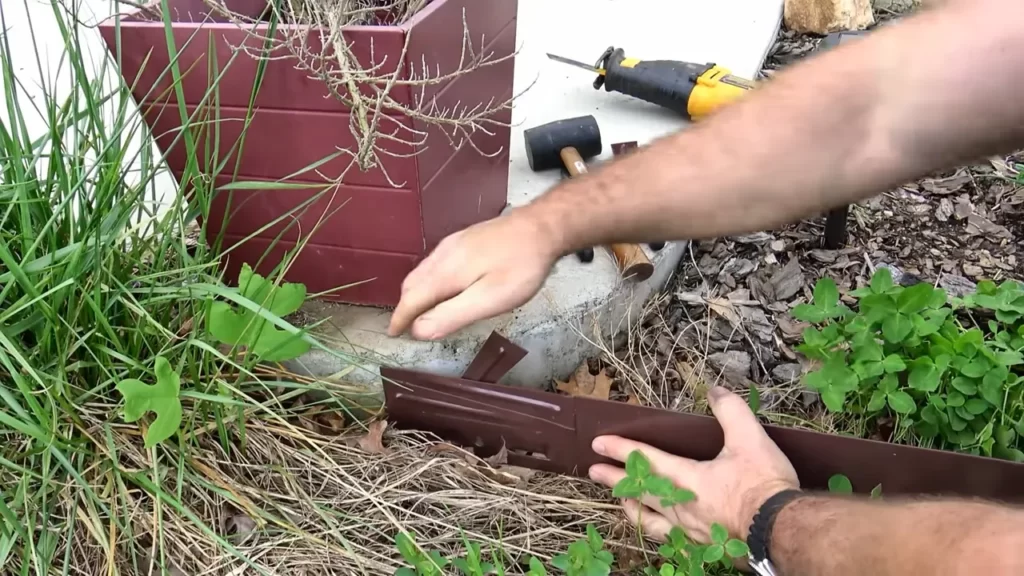
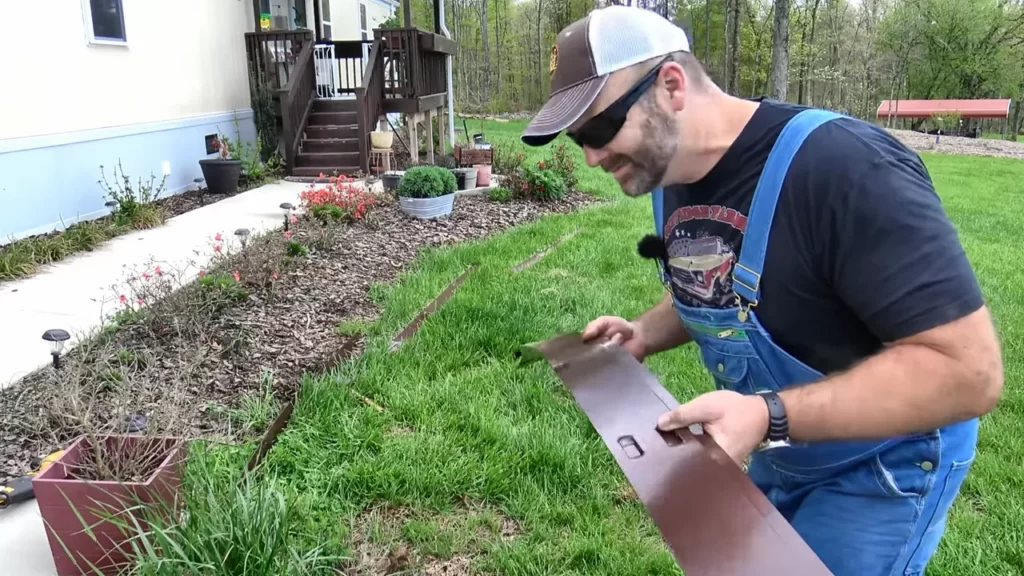
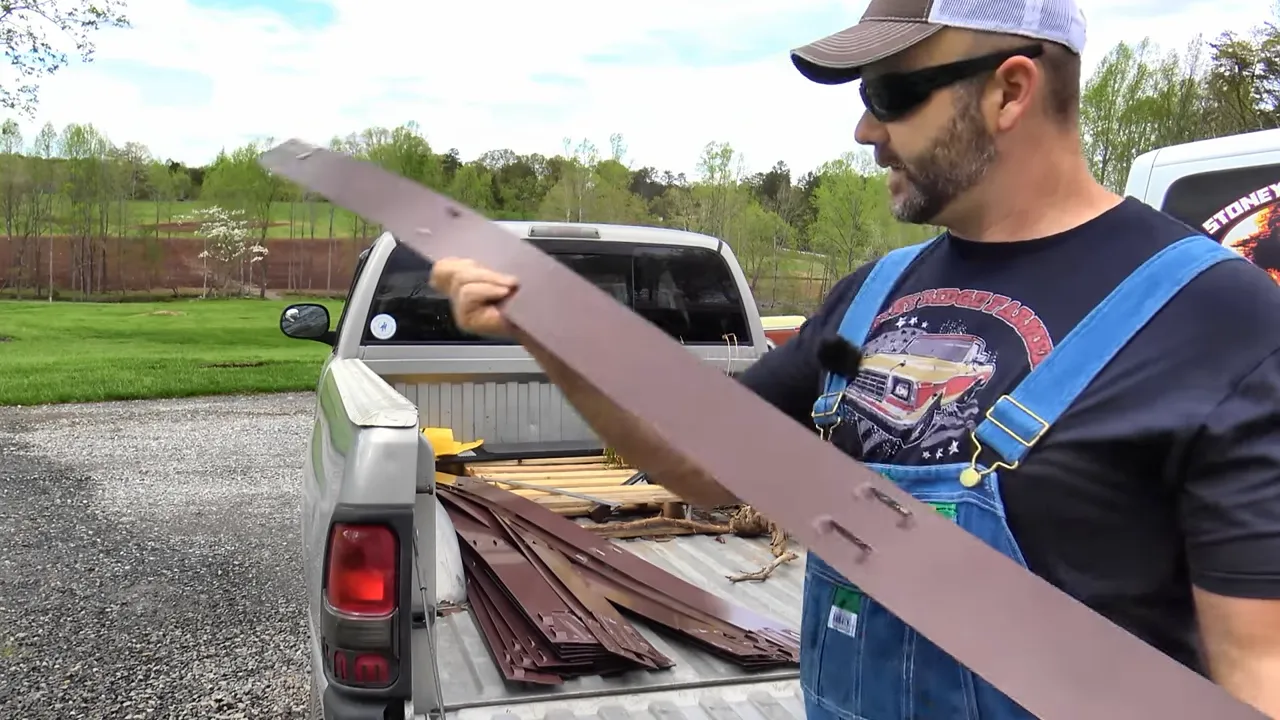
To install metal landscape edging, measure and mark the desired placement, dig a trench along the marked line, secure the edging in the trench, and backfill with soil. This article provides step-by-step instructions on how to successfully install metal landscape edging in your outdoor space.
Whether you’re looking to define garden beds, create clean lines for pathways, or add a professional touch to your landscaping, metal edging is a durable and aesthetically pleasing option. By following these simple steps, you can easily achieve a polished and well-defined look for your landscape design.
So, let’s get started with the installation process for metal landscape edging.
Why Choose Metal Landscape Edging?
Benefits of using metal landscape edging
Choosing the right landscape edging is an important decision when it comes to achieving the perfect finish for your outdoor space. While there are various options available, metal landscape edging offers a multitude of benefits, making it a popular choice among homeowners and landscapers alike.
How metal edging enhances the overall look of your landscape
Metal landscape edging is not only functional but also adds a touch of elegance and sophistication to your outdoor area. It creates clean lines and crisp edges, giving your landscape a polished and professional appearance. Whether you have a modern or traditional design, metal edging seamlessly blends with any style, enhancing the overall visual appeal of your outdoor space.
Here are a few ways in which metal edging can enhance the look of your landscape:
- Defines borders: Metal landscape edging creates distinct borders between different elements of your landscape, such as flower beds, pathways, and lawns. It provides a clear separation, preventing the spread of gravel, mulch, or plants to unwanted areas.
- Controls weeds: One of the main advantages of metal edging is its ability to control weeds. By forming a physical barrier, it restricts the growth of unwanted plants, reducing the need for constant weeding. This not only saves you time and effort but also keeps your landscape looking neat and well-maintained.
- Increases durability: Metal landscape edging is designed to withstand the elements and protect your landscape for years to come. Made from sturdy materials such as steel or aluminum, it can endure harsh weather conditions, including heavy rain, snow, and UV exposure. This ensures that your edging remains intact and retains its aesthetic appeal over time.
- Offers versatility: Metal landscape edging comes in an array of sizes, shapes, and designs, allowing you to choose the perfect option for your specific needs. Whether you prefer straight lines or curved edges, there is a metal edging variety that can be customized to fit your landscaping vision.
In conclusion, metal landscape edging offers several benefits that make it an ideal choice for enhancing the overall look of your landscape. From defining borders to controlling weeds and increasing durability, metal edging offers both functionality and aesthetic appeal. Invest in metal landscape edging to achieve a stunning and polished outdoor space that will be the envy of your neighbors.

Factors To Consider Before Installing Metal Landscape Edging
Before installing metal landscape edging, there are a few important factors that you should consider. Taking the time to assess the size and shape of your landscape, choosing the appropriate metal type for your edging, and determining the quantity of edging materials needed are crucial steps in ensuring a successful installation.
Assessing the size and shape of your landscape
When it comes to installing metal landscape edging, the first step is to assess the size and shape of your landscape. Consider the overall dimensions and contours of your outdoor space. Are there any slopes, curves, or straight lines that need to be accounted for? By taking the time to evaluate the layout of your landscape, you can determine the amount of edging materials required.
Choosing the appropriate metal type for your edging
Choosing the appropriate metal type for your landscape edging is crucial to ensure durability and longevity. There are various options to consider, including aluminum, steel, and composite metals. Each metal has its own advantages and characteristics, such as rust resistance, flexibility, and ease of installation. Determine the specific needs of your landscape, such as the level of maintenance required and the desired aesthetic, to make an informed decision on the metal type.
Determining the quantity of edging materials needed
After assessing the size and shape of your landscape and choosing the appropriate metal type, the next step is to determine the quantity of edging materials needed. To calculate the required amount of metal edging, measure the length of the areas that need to be bordered and consider any additional areas where edging may be required, such as around flower beds or walkways. Keep in mind that it’s always better to purchase slightly more edging materials than you think you’ll need, as this allows for any errors or adjustments during the installation process.
By carefully considering these factors before installing metal landscape edging, you can ensure a smooth and successful installation that not only enhances the beauty of your outdoor space but also adds functionality and value to your property.

Step 1: Preparing The Ground
Before you begin installing metal landscape edging for your outdoor space, it is crucial to start with the necessary groundwork. Proper preparation ensures a smooth installation process and long-lasting results. In step 1, we will guide you through the essential tasks to prepare the ground for installing metal landscape edging.
Marking the boundaries of your landscape area
The first task is to mark the boundaries of your landscape area. This helps define the space where you want your edging to be installed and ensures a neat and organized appearance. Grab a measuring tape and stakes to mark the corners of your desired landscape area. Insert the stakes into the ground at each corner, ensuring they are firmly rooted.
Clearing the ground and removing any debris
Once the boundaries are marked, it’s time to clear the ground and remove any debris that may be present. Start by raking up leaves, branches, and any other loose materials that may hinder the installation process. Pay close attention to areas surrounding trees, shrubs, and flower beds where organic debris tends to accumulate.
If you come across any weeds or unwanted vegetation, it’s best to remove them as well. Pull them out by hand or use a garden fork to dig them out from the root. This ensures that the edging will be installed on a clean and clear surface, preventing any interference with its stability and longevity.
Leveling the area for a smooth installation
After clearing the ground, the next step is to level the area where the metal landscape edging will be installed. A level surface is crucial as it ensures a seamless installation process and enhances the overall appearance of your landscaping.
To level the ground, start by removing any large, protruding rocks or bumpy areas. Use a garden rake or shovel to smooth out the surface, making it even and free from any irregularities. Check the levelness of the ground using a carpenter’s level or a straight board placed across different areas of the landscape space.
If certain areas are uneven, add or remove soil accordingly to achieve a level surface. Ensure the surface is compacted by tamping it down with a compactor or by using your feet to firm the ground.
By following these essential steps of preparing the ground, you are now ready to move on to the next phase of installing metal landscape edging. With a well-marked boundary, a cleared area, and a level surface, your installation process will be a breeze, resulting in a professional-looking landscape that captures the attention of all who see it.

Step 2: Digging Trenches For Edging Placement
Once you’ve measured and marked the desired trench depth for your metal landscape edging, it’s time to start digging. This step is crucial to ensure a clean and professional-looking installation. Here’s how you can get started:
Measuring and marking the trench depth
The first thing you need to do is measure and mark the desired depth of your trench. This will help you achieve a consistent and level edging placement. Using a measuring tape or yardstick, determine the depth you want the edging to sit at. With a marker or chalk, mark the trench depth along the entire length where the edging will be installed.
Using a spade or edging tool to create the trench
With the trench depth clearly marked, it’s time to start digging. You can use a spade or an edging tool specifically designed for this purpose. Hold the tool at a slight angle and begin cutting into the ground along the marked line. Apply pressure and push the tool in a forward motion to create a clean and defined trench.
Continue digging along the entire marked line, ensuring the trench is wide enough to accommodate the metal edging. Be mindful of any obstacles like tree roots or large rocks that may hinder your progress, and remove them as necessary.
Ensuring the trench has a consistent width
Consistency is key when it comes to the width of your trench. A uniform width ensures that the metal edging will fit snugly and securely into the ground. To achieve this, you can use a garden rake or a flat-edged shovel to smooth out the walls of the trench, ensuring they are straight and even.
Take a moment to double-check the depth and width of the trench, making any necessary adjustments. It’s important to maintain a consistent depth and width along the entire length of the trench for a professional-looking installation.
Once you’ve finished digging the trench and ensuring its consistency, you’re ready to move on to the next step in the installation process.
Remember, proper trench preparation is essential for a successful installation of metal landscape edging. Take your time, be thorough, and aim for a level and consistent trench to achieve the best results.

Step 3: Installing The Metal Edging
Now that you have prepared the trench and inserted the stakes, it’s time to install the metal edging. This step is crucial as it will provide a clean and defined line to your landscape, enhancing the overall appearance.
Unrolling the Metal Edging Along the Trench
Begin by unrolling the metal edging along the trench you have prepared. Make sure to follow the line of the trench, ensuring that the edging remains straight and even. This will help create a seamless and professional look for your landscape.
Securing the Edging with Stakes or Anchoring Systems
Once the metal edging is in place, it’s time to secure it using stakes or anchoring systems. Start by placing stakes at regular intervals along the edging, ensuring they are firmly inserted into the ground. If you prefer a more secure installation, consider using anchoring systems that provide additional stability, especially for curved or sloped areas.
Alternatively, you can opt for a combination of both stakes and anchoring systems, depending on the specific requirements of your landscape. This will help prevent the edging from shifting or moving over time.
Adjusting the Placement and Alignment as Needed
After securing the metal edging, take a step back and assess its placement and alignment. Make any necessary adjustments to ensure the edging is straight and level. This may involve adding or removing soil underneath the edging or repositioning the stakes or anchoring systems.
Pay close attention to curves, corners, and transitions between different areas of your landscape. Adjust the edging accordingly to maintain a consistent and seamless appearance throughout.
Remember, the ultimate goal is to create a visually appealing and durable landscape edging that will define and separate different elements of your outdoor space. Taking the time to install the metal edging correctly will ensure a long-lasting and professional-looking result.
Step 4: Connecting And Finishing The Edging
Now that you have installed the metal landscape edging, it’s time to connect the pieces together and give it a finished look. This step will help ensure that your landscaping project looks seamless and professional. Follow these steps to connect and finish the edging:
Overlapping the ends of the metal edging for a seamless look
To achieve a seamless look, start by overlapping the ends of the metal edging. This will create a smooth transition between pieces and prevent any gaps or unevenness. When overlapping, make sure to align the ends properly for a clean and straight edge. Take your time with this step to ensure a seamless appearance.
Connecting the pieces with connectors or screws
Once the ends of the metal edging are overlapped, secure them together using connectors or screws. This will provide stability and hold the edging in place. Choose connectors or screws that are specifically designed for metal landscape edging to ensure a strong connection. Follow the manufacturer’s instructions for proper installation.
Trimming any excess edging to fit the desired shape
After connecting the pieces, you may have some excess edging that doesn’t fit the desired shape of your landscaping project. In this case, it’s important to trim the excess edging to ensure a perfect fit. Use a pair of metal shears or a rotary tool with a cutting disc to carefully trim the excess. Take your time and make precise cuts to achieve the desired shape. Remember to wear protective gloves and goggles while trimming the metal edging.
Once you have completed these steps, take a step back and admire your finished metal landscape edging. Connecting and finishing the edging not only provides a polished appearance but also ensures durability and stability for your landscaping project. With proper installation, your metal landscape edging will enhance the beauty of your outdoor space and provide a long-lasting solution for defining borders and pathways.
Step 5: Backfilling And Compacting The Trench
Once the metal landscape edging is securely in place and level, it’s time to move on to backfilling and compacting the trench to ensure long-lasting stability. Following these steps will help ensure that your edging stays in place and provides a clean and professional-looking finish to your landscape.
Adding soil or gravel to the backfilled trench
To provide additional support and stability to your metal landscape edging, start by adding a layer of soil or gravel to the trench. This will help fill any gaps and create a solid foundation for the edging. Make sure to distribute the soil or gravel evenly along the entire length of the trench.
If you are using soil, use a shovel or garden trowel to carefully fill the trench. Take your time to pack the soil down firmly, ensuring that it is evenly distributed and reaches the desired height. If you prefer using gravel, pour it directly into the trench and use a rake or garden hoe to spread it evenly.
Using a tamper or hand compactor to ensure stability
After adding the soil or gravel, it’s important to compact it to provide maximum stability for your metal landscape edging. A tamper or hand compactor is an ideal tool for this task. Start at one end of the trench and work your way towards the other, using firm downward pressure to compact the soil or gravel.
Make several passes over the entire length of the trench, paying special attention to any areas that may feel loose or uneven. The goal is to create a solid base that will prevent the edging from shifting or sinking over time.
Checking the edging alignment and making final adjustments
Once you have backfilled and compacted the trench, take a moment to check the alignment of your metal landscape edging. Ensure that it is level and straight, making any necessary adjustments before proceeding.
If you notice any areas where the edging deviates from its desired position, gently tap it back into place using a rubber mallet. This will help ensure that your edging maintains its clean and professional appearance throughout your landscape.
Maintenance Tips For Metal Landscape Edging
Regular Inspection and Cleaning of the Edging
Initially, it is essential to perform regular inspections and cleaning of your metal landscape edging to maintain its appearance and functionality. Regular inspection helps identify any potential issues before they become major problems. Start by visually examining the entire length of the edging. Look for signs of damage, such as dents, scratches, or bends. These can be repaired to prevent further deterioration.
Next, clean the edging to remove any dirt, debris, or grass clippings that may have accumulated over time. This can be done by simply using a broom or a soft brush to sweep away loose particles. For tougher dirt or residue, you can use a mild detergent mixed with water and scrub gently with a soft cloth or sponge. Rinse thoroughly with water to ensure all cleaning agents are removed.
Addressing any Rust or Corrosion Issues Promptly
Rust or corrosion can occur on metal landscape edging if it is exposed to moisture or harsh weather conditions for extended periods. It is essential to address any rust or corrosion issues promptly to prevent further damage and ensure the longevity of the edging.
If you notice any rust spots on the edging, you can remove them by gently sanding the affected area with fine-grit sandpaper. Make sure to remove all loose rust particles and wipe the area clean before applying a rust converter or metal primer. Follow the manufacturer’s instructions for the specific product you choose and allow it to dry completely before applying any paint or protective coating.
Touching up any Damaged or Worn Sections of the Edging
Over time, certain sections of the metal landscape edging may become damaged or worn due to exposure to the elements or accidental impact. It is crucial to address these issues promptly to prevent further deterioration and maintain the overall appearance of your landscape.
If you notice any damaged or worn sections, start by removing any loose debris or rust. Then, using a high-quality metal paint or spray, apply a thin, even coat to the affected area. Make sure to match the color of the existing edging as closely as possible for a seamless repair. Allow the paint or coating to dry completely before subjecting the edging to any stress or pressure.
By regularly inspecting, cleaning, addressing rust or corrosion issues, and touching up any damaged or worn sections of your metal landscape edging, you can ensure that it remains in optimal condition for a long time. These simple maintenance tips will help preserve the beauty and functionality of your landscape while also extending the lifespan of your edging. Remember to always follow the manufacturer’s instructions and recommendations for maintaining your specific type of metal landscape edging to achieve the best results.
Frequently Asked Questions
How Do You Install Metal Border Edging?
To install metal border edging, follow these steps: 1. Mark the desired border line with stakes and string. 2. Dig a trench along the marked line. 3. Place the metal edging into the trench. 4. Secure it in place with spikes or connectors.
5. Backfill the trench to cover the edging.
How Do You Install Lowe’S Metal Landscape Edging?
To install Lowe’s metal landscape edging, follow these steps: 1. Prepare the area by clearing any debris. 2. Lay out the edging in your desired shape. 3. Use a rubber mallet to secure the edging into the ground. 4. Connect additional sections using the provided connectors.
5. Backfill the edging with soil and compact it for stability.
Is Metal Edging Easy To Install?
Yes, metal edging is easy to install. It requires no specialized skills, and you can do it yourself. Just follow the instructions provided, secure the edging in place, and you’re good to go. Enjoy the clean and professional look for your landscaping project.
How Far Should Metal Edging Be From The Ground?
Metal edging should be installed approximately 2-3 inches above the ground. This distance ensures proper stability and allows for effective containment of gravel, mulch, or other landscaping materials. Maintaining this clearance prevents edging from sinking or being covered by soil over time.
Conclusion
Installing metal landscape edging is a simple and effective way to enhance the visual appeal and functionality of your outdoor space. By following the step-by-step instructions provided in this blog post, you can successfully install metal landscape edging on your own.
With its durability and aesthetic appeal, metal landscape edging is a wise investment that will provide long-lasting benefits for your garden or yard. Start transforming your outdoor space today and enjoy the beauty and functionality that metal landscape edging can bring.
