To install linoleum flooring in the bathroom, start by cleaning and prepping the surface, measuring and cutting the linoleum to fit, and then gluing the linoleum down. Linoleum flooring is a popular choice for bathrooms due to its durability, water resistance, and easy maintenance.
Installing linoleum in the bathroom can be done by following a few simple steps. First, thoroughly clean and prepare the floor surface by removing any existing flooring, debris, or adhesive residue. Next, measure and cut the linoleum to fit the bathroom, allowing for any necessary adjustments.
Apply adhesive to the subfloor using a trowel, and then press the linoleum onto the adhesive, smoothing out any wrinkles or bubbles. Allow the adhesive to dry completely before using the bathroom. By following these steps, you can easily install linoleum flooring in your bathroom, creating a beautiful and functional space.
Factors To Consider When Selecting Linoleum Flooring
Durability
When selecting linoleum flooring for your bathroom, one of the most important factors to consider is durability. Your bathroom floor needs to be able to withstand constant use, moisture, and potential spills. Thankfully, linoleum is known for its exceptional durability.
Linoleum flooring is manufactured using natural materials such as linseed oil, cork dust, and wood flour, making it incredibly resilient. It can withstand heavy foot traffic, ensuring that your bathroom floor remains in top condition for years to come.
Water Resistance
Another crucial factor to consider when selecting linoleum flooring for your bathroom is water resistance. Bathrooms are prone to moisture and water exposure, which can damage certain types of flooring. However, linoleum is naturally water-resistant.
Linoleum has a water-resistant surface that helps protect it from water damage. This makes it an ideal choice for bathrooms, as it can withstand regular exposure to water without warping or deteriorating.
Design Options
Aside from its durability and water resistance, linoleum flooring offers a wide range of design options. Gone are the days when linoleum flooring only came in plain, basic colors. Now, you can find linoleum flooring in a variety of patterns, colors, and textures to suit your bathroom’s aesthetic.
Whether you prefer a classic, minimalist look or want to add a bold pop of color to your bathroom, there’s a linoleum flooring design that will perfectly complement your style. With its endless design possibilities, linoleum flooring allows you to create a bathroom that is both functional and visually appealing.
Maintenance Requirements
One of the advantages of linoleum flooring is its low maintenance requirements. Regular sweeping and occasional mopping with a mild detergent solution are usually sufficient to keep your linoleum floor clean and well-maintained.
Additionally, linoleum flooring is resistant to stains and scratches, making it easy to maintain its original appearance. Its surface is also less prone to accumulating dust and allergens, making linoleum a great choice for those with allergies or asthma.
Considering these factors, selecting linoleum flooring for your bathroom is a wise choice. Its durability, water resistance, design options, and low maintenance requirements make it a practical and stylish flooring solution that will enhance the overall look and functionality of your bathroom for years to come.
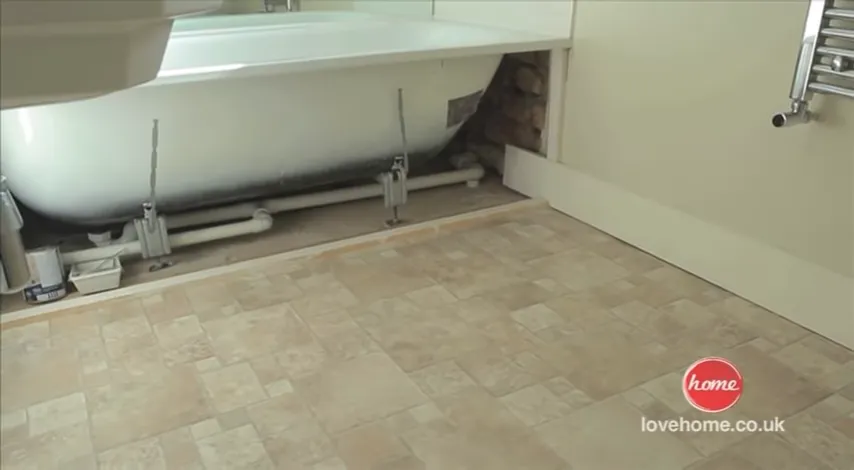
Clearing The Bathroom Space
Before installing linoleum flooring in your bathroom, it is essential to clear the space to ensure a smooth and hassle-free process. This involves removing furniture and fixtures, as well as the old flooring. Additionally, it may be necessary to repair the subfloor to create a stable and even surface for the linoleum. By following these steps, you can set the stage for a successful linoleum installation.
Removing Furniture and Fixtures
To begin, clear your bathroom of any furniture or fixtures that may obstruct the installation of the new linoleum flooring. This includes items such as cabinets, shelves, toilet seats, and towel racks. By removing these objects, you create an open and spacious environment that allows for easy access to the entire floor area. Remember to place these items in a safe location outside the bathroom, taking care not to damage or misplace them.
Removing Old Flooring
Next, it is crucial to remove the old flooring in your bathroom. This could be anything from tiles to vinyl or even carpeting. Start by carefully lifting the edges of the flooring using a putty knife or a floor scraper tool. Once you have a starting point, continue to peel back the flooring, exerting steady and even pressure. Be cautious of any adhesive or glue that may be present, as this can make the removal process more challenging. Use a solvent or adhesive remover, if necessary, to help dissolve and loosen the adhesive.
Repairing Subfloor
Once the old flooring has been completely removed, it is essential to evaluate the condition of the subfloor. Look for any signs of damage, such as water stains, mold, or rot. If any issues are detected, it is crucial to address them before proceeding with the linoleum installation. Repairing the subfloor may involve replacing damaged sections or sanding down uneven areas to create a level surface. By ensuring the subfloor is in good condition, you can prevent future problems and prolong the lifespan of your linoleum flooring.
In conclusion, clearing the bathroom space is a fundamental step when installing linoleum flooring. This involves removing furniture and fixtures, as well as taking out the old flooring and repairing the subfloor. By adequately preparing the space, you can lay the foundation for a successful and durable linoleum flooring installation in your bathroom.
Measuring And Estimating Materials
Properly measuring and estimating materials is crucial when it comes to installing linoleum flooring in your bathroom. It ensures that you have enough materials to complete the project without wasting any. In this section, we will guide you through the process of measuring the bathroom, calculating material quantity, and determining your budget. Let’s dive in!
Measuring the Bathroom
The first step in installing linoleum flooring is to accurately measure your bathroom. This will help you determine the amount of material you will need.
Here’s a step-by-step guide to measuring your bathroom:
- Start by measuring the length of each wall and write down the measurements.
- Measure the width of the bathroom and record the measurement.
- If your bathroom has any irregular shapes or obstacles such as tubs or vanities, measure those as well.
- Next, multiply the length and width measurements to calculate the square footage of each wall. Add up all the individual wall square footage to get the total square footage of your bathroom.
Using a tape measure and a notepad to record your measurements is recommended for accuracy. Make sure to measure all areas, including any closets or nooks connected to the bathroom, as these will also need flooring.
Calculating Material Quantity
Once you have the total square footage of your bathroom, you can now calculate the quantity of linoleum flooring you’ll need.
Most linoleum flooring is sold in square feet. However, it’s always a good idea to check the product specifications and see if it’s different for the specific brand or style you choose.
Use the following formula to calculate the material quantity:
| Total Square Footage of your Bathroom | Add 10% (Waste Allowance) | = Total Square Footage needed for Linoleum Flooring |
|---|
Remember to add an additional 10% to account for any waste or mistakes that may occur during the installation process. This ensures that you have enough material to cover your bathroom and make any necessary cuts.
Determining Budget
Before starting the project, it is essential to determine your budget. This will help you choose the appropriate linoleum flooring within your financial means.
- Start by researching different linoleum flooring options and their prices. Look for reviews and quality comparisons to find the right balance between cost and durability.
- Consider any additional costs, such as underlayment or adhesive, which may be required for the installation.
- Factor in any tools or equipment you may need to purchase or rent for the installation process.
By doing thorough research and planning, you can ensure that your project stays within your desired budget while still achieving your desired results.
Now that you know how to measure your bathroom, calculate the material quantity, and determine your budget, you are ready to move on to the next step – preparing the bathroom for installation.
Gathering Tools And Materials
Gathering the necessary tools and materials is the first step to a successful installation of linoleum flooring in your bathroom. By ensuring that you have everything you need before starting the installation process, you can save yourself time and frustration.
Necessary Tools:
Before beginning the installation, make sure you have the following tools on hand:
- Utility knife
- Straight edge
- Tape measure
- Pry bar
- Putty knife
- Notched trowel
- Roller
- Bucket
Required Materials:
Having the right materials is essential to achieve a successful linoleum flooring installation. Here are the materials you will need:
- Linoleum flooring
- Adhesive
- Underlayment
- Seam sealer
- Tape
- Grout
- Grout float
- Sponge
Ensure that you have these tools and materials ready before you begin the installation process. This will help you work efficiently and effectively, ensuring a smooth and professional-looking linoleum flooring in your bathroom. Once you have gathered everything, you can move on to the next step of preparing the bathroom floor for installation.
Preparing The Subfloor
Before installing linoleum flooring in your bathroom, it is important to properly prepare the subfloor to ensure a successful and long-lasting installation. This involves cleaning the subfloor and leveling it to create a smooth and level surface for the linoleum to adhere to.
Cleaning the Subfloor
The first step in preparing the subfloor is to thoroughly clean it. Any dirt, dust, or debris on the subfloor can interfere with the adhesion of the linoleum, leading to an uneven and subpar installation. To clean the subfloor, follow these steps:
- Start by removing any existing flooring material, such as tiles or carpet, and dispose of it properly.
- Vacuum or sweep the subfloor to remove loose dirt and debris. Pay special attention to the corners and edges of the room.
- Once the loose dirt is removed, use a damp mop or cloth to wipe down the subfloor. This will help to remove any remaining dust or dirt.
- Allow the subfloor to dry completely before moving on to the next step. Moisture can affect the adhesion of the linoleum, so it is important to ensure the subfloor is dry.
Leveling the Subfloor
After cleaning the subfloor, the next step is to level it. Uneven subfloors can cause the linoleum to buckle or create visible imperfections in the finished flooring. To level the subfloor, you can follow these guidelines:
- Inspect the subfloor for any uneven areas or low spots. This can be done by visually inspecting the floor or using a straightedge or level.
- If you notice any uneven areas, you can use a self-leveling compound to fill in the low spots. Follow the manufacturer’s instructions for mixing and applying the compound.
- Spread the self-leveling compound over the low spots using a trowel or putty knife, making sure to feather the edges to create a smooth transition with the rest of the subfloor.
- Allow the self-leveling compound to dry completely before proceeding with the linoleum installation. The drying time will vary depending on the product, so refer to the manufacturer’s instructions.
By properly cleaning and leveling the subfloor, you are setting the foundation for a successful linoleum flooring installation in your bathroom. Taking the time to prepare the subfloor will ensure a smooth and professional-looking finished result that will stand the test of time.
Installing The Underlayment
Installing the Underlayment
When installing linoleum flooring in your bathroom, one crucial step is to properly install the underlayment. The underlayment acts as a protective layer between the subfloor and the linoleum, providing stability and cushioning. In this section, we will discuss the different types of underlayment available and how to lay and secure it effectively.
H3: Types of Underlayment
There are several types of underlayment to choose from, each with its own unique properties. Here are a few popular options to consider:
1. Plywood Underlayment: Plywood is a common choice as it provides a smooth and sturdy surface for your linoleum flooring. Make sure to use exterior-grade plywood to withstand moisture in the bathroom.
2. Cement Board Underlayment: Cement boards are a durable option that is resistant to water and mold. They are ideal for areas prone to moisture, such as bathrooms. When using cement boards, ensure they are properly secured to the subfloor using screws or nails.
3. Rubber Underlayment: Rubber underlayment offers excellent sound insulation and cushioning properties. It is especially beneficial in areas where noise reduction is a priority, such as second-story bathrooms or apartments.
4. Foam Underlayment: Foam underlayment is lightweight and easy to install. It provides a comfortable feel underfoot and helps to absorb minor subfloor imperfections. It is an affordable option suitable for low to medium traffic areas.
H3: How to Lay and Secure Underlayment
Once you have chosen the appropriate underlayment for your bathroom, follow these steps to lay and secure it properly:
1. Clean the Subfloor: Before installing the underlayment, ensure the subfloor is clean and free from any dirt, debris, or moisture. This will help provide a smooth and level surface.
2. Measure and Cut: Measure the dimensions of your bathroom and transfer these measurements onto the underlayment material. Use a saw or utility knife to cut the underlayment to the required size, making sure to leave a small gap around the edges for expansion.
3. Lay the Underlayment: Start laying the underlayment from one corner of the bathroom, leaving a 1/8 inch gap between each panel. Secure the underlayment to the subfloor using nails, screws, or adhesive, depending on the type of underlayment you are using. Ensure the seams between each panel are properly aligned and flush.
4. Secure the Edges: To prevent any movement or shifting, secure the edges of the underlayment with nails or screws, ensuring they are driven flush with the surface.
5. Patch and Seal: Inspect the underlayment for any gaps or holes and patch them using a suitable filler. Once patched, apply a layer of sealant over the entire surface to protect against moisture.
By following these steps, you can install the underlayment for your linoleum flooring in the bathroom with confidence. The underlayment will provide a stable and comfortable base for your linoleum, ensuring a long-lasting and visually appealing result. Now that you have successfully installed the underlayment, the next step is to lay and secure the linoleum flooring itself. Stay tuned for the next section, where we will guide you through the process seamlessly.
Cutting And Fitting The Linoleum Flooring
One of the key steps in installing linoleum flooring in your bathroom is cutting and fitting the linoleum sheets to ensure a perfect fit. This process requires accuracy and attention to detail to achieve a professional finish. In this section, we will guide you through the important steps to measure, mark, cut, and adjust the linoleum flooring to fit the edges and corners of your bathroom.
Measuring and Marking
To start the process of cutting and fitting your linoleum flooring, it is essential to accurately measure and mark the areas where the flooring will be installed. Here’s a step-by-step guide:
- Begin by cleaning the bathroom floor thoroughly and removing any existing flooring or debris.
- Using a tape measure, measure the length and width of the bathroom floor. Write down the measurements on a piece of paper to refer to later.
- Next, unroll your linoleum sheet and place it over the bathroom floor. Leave a few inches of excess material on all sides to allow for adjustments during the cutting and fitting process.
- With the linoleum sheet in place, use a pencil or chalk to mark the outline of the bathroom floor onto the linoleum. Ensure the lines are straight and accurate, following the measurements you took earlier.
- Once you have marked the outline, remove the linoleum sheet and set it aside. Now you are ready to proceed with cutting the linoleum flooring.
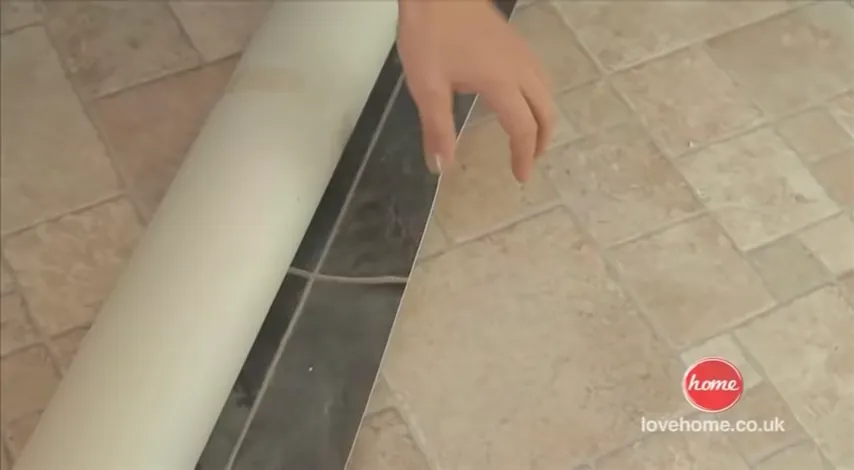
Using a Utility Knife to Cut Flooring
When cutting the linoleum flooring, a utility knife is the most commonly used tool due to its precision and ease of use. Follow these steps for cutting the linoleum:
- Begin by wearing safety gloves to protect your hands.
- Take a straightedge, such as a metal ruler or a level, and place it along the marked lines on the linoleum sheet.
- Hold the straightedge firmly in place with one hand while using the other hand to score the linoleum along the edge of the straightedge. Apply moderate pressure and make multiple passes to ensure a clean cut.
- Continue scoring the linoleum sheet until you have cut along all the marked lines.
- Once you have made all the necessary straight cuts, use the utility knife to cut out any notches for any fixtures, such as toilet flanges or vanity cabinets. Take your time and make precise cuts to ensure a snug fit.
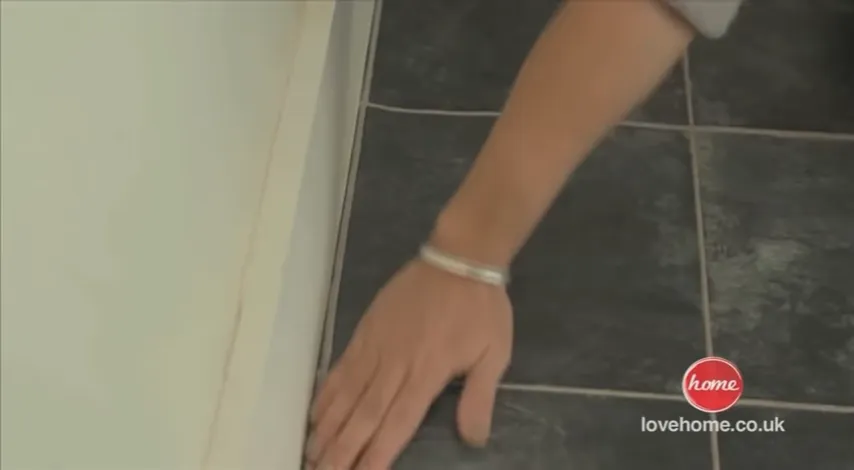
Adjusting Flooring to Fit Edges and Corners
After cutting the linoleum sheets to the desired size and shape, it’s time to fit them into the edges and corners of your bathroom. Use the following steps to achieve a seamless fit:
- Begin by aligning one edge of the linoleum sheet with the corresponding wall or surface.
- Smooth out the linoleum sheet with your hands or a roller, starting from the center and working your way towards the edges. This will help eliminate any air bubbles or wrinkles.
- If the linoleum sheet extends beyond the edges or corners of your bathroom, use a straightedge and utility knife to trim off the excess material. Again, make precise cuts to achieve a clean and neat finish.
- For corners and curved edges, you may need to make relief cuts. These are small, diagonal cuts that allow the linoleum to mold to the shape of the corner or curve without wrinkling or bunching. Make the relief cuts carefully using a utility knife.
- Finally, ensure all edges and corners are securely in place and that the linoleum flooring fits snugly throughout the bathroom floor.
By carefully measuring, marking, cutting, and fitting the linoleum flooring, you can transform your bathroom into a beautiful and functional space. Take your time, follow these steps, and you’ll achieve a professional-looking installation that will stand the test of time.
Applying Adhesive And Installing The Linoleum Flooring
When it comes to installing linoleum flooring in your bathroom, one crucial step is applying the adhesive correctly. This ensures that the flooring sticks properly and provides long-lasting results. In this section, we will discuss the types of adhesive you can use, the correct application process, and how to properly roll and press the flooring for optimal adhesion.
Types of Adhesive
Before applying adhesive, it’s important to choose the right type for your linoleum flooring. There are various options available in the market, each with its own set of characteristics. Here are some common types of adhesive used for linoleum flooring:
| Type of Adhesive | Characteristics |
|---|---|
| All-Purpose Adhesive | This adhesive is suitable for most linoleum flooring installations and offers good adhesion. |
| Pressure-Sensitive Adhesive | This adhesive requires pressure to activate the bonding process and is ideal for large linoleum sheets. |
| Water-Based Adhesive | This adhesive is environmentally friendly and dries quickly, making it convenient for bathroom installations. |
Choose the adhesive that best suits your specific flooring needs and follow the manufacturer’s instructions for application.
Applying Adhesive Correctly
Applying adhesive correctly is crucial to ensure a strong bond between the linoleum flooring and the subfloor. Follow these steps to apply adhesive correctly:
- Start by thoroughly cleaning and preparing the subfloor. It should be dry, clean, and free from any debris.
- Measure the dimensions of your bathroom floor and cut your linoleum accordingly, leaving a few extra inches for adjustments.
- Using a trowel or a recommended adhesive applicator, spread a thin and even layer of adhesive on the subfloor.
- Avoid applying too much adhesive, as it may cause the linoleum to bubble or warp.
- Work in small sections, applying the adhesive and immediately laying the linoleum on top.
- Align the linoleum carefully, ensuring it fits snugly against the walls and any other obstacles.
- Smooth out the linoleum using a flooring roller, starting from the center and working your way towards the edges. This helps eliminate any air bubbles and ensures proper adhesion.
Remember to refer to the adhesive manufacturer’s instructions for specific drying times and any additional steps.
Rolling and Pressing the Flooring for Proper Adhesion
To ensure proper adhesion and eliminate any possible air pockets, rolling and pressing the linoleum flooring is crucial. Here’s how you can do it:
- Starting from the center of the linoleum, use a flooring roller to roll over the entire surface. Apply firm pressure to create a solid bond between the flooring and the adhesive.
- Continue rolling until you reach the edges of the linoleum, ensuring each section is fully pressed down.
- Pay extra attention to seams and edges, as they are more prone to lifting over time. Roll over these areas multiple times to ensure a secure bond.
- Periodically check for any lifted or loose areas and re-roll them to ensure proper adhesion.
By following these steps and paying attention to detail when applying adhesive and installing linoleum flooring, you will achieve a professional and durable finish in your bathroom.
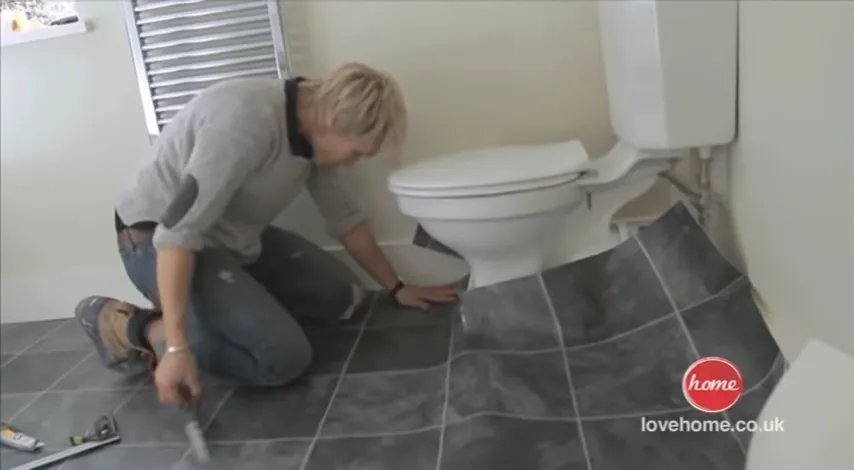
Trimming And Finishing The Linoleum Flooring
Cutting Excess Flooring
Trimming the linoleum flooring is an essential step in achieving a clean and professional-looking installation. After you have laid the flooring in your bathroom, you may notice that there is excess material along the edges. To ensure a seamless appearance, cutting the excess flooring is necessary.
To begin, measure the distance between the edge of the flooring and the wall using a tape measure. Mark this measurement onto the excess linoleum using a pencil. Next, using a utility knife, carefully cut along the marked line. Make sure to exert steady and even pressure to achieve a smooth cut.
Once the excess linoleum is cut, use a straight edge, such as a ruler or a level, to guide the knife and ensure straight cuts. Continue cutting along all edges of the flooring until the excess linoleum is completely removed. Take your time during this process to avoid any mistakes that may compromise the appearance of the flooring.
Securing Edges and Seams
Securing the edges and seams of your linoleum flooring is crucial to prevent any shifting or lifting over time. This step will help ensure the durability and longevity of your newly installed bathroom flooring.
There are different methods to secure the edges and seams, depending on the type of linoleum flooring you have chosen. One popular method is using adhesive. Apply a thin layer of adhesive along the edges and seams of the flooring, using a notched trowel to achieve an even application.
If your linoleum flooring comes with a self-adhesive backing, simply remove the protective layer and press the edges and seams firmly in place. In some cases, using a heat gun or a hairdryer on a low heat setting can help activate the adhesive and ensure a secure bond.
Adding Finishing Touches
After trimming and securing the linoleum flooring, it’s time to add those finishing touches that will elevate the overall appearance and functionality of your bathroom. These finishing touches will give your bathroom a polished and completed look.
One important finishing touch is adding baseboards or moldings along the edges of the flooring. These not only provide a visually appealing finish but also serve as a protective barrier against moisture and dirt. Measure and cut the baseboards or moldings to the desired length, then secure them in place using finishing nails or adhesive.
Additionally, consider installing thresholds or transition strips between the linoleum flooring and adjoining rooms. These strips create a smooth transition between different types of flooring and prevent tripping hazards. Measure and cut the thresholds or transition strips to fit the width of the doorway or opening, then secure them in place using screws or adhesive.
Finally, give your linoleum flooring a thorough cleaning to remove any dust or debris that may have accumulated during installation. Sweep or vacuum the entire area, then mop the flooring with a pH-neutral cleaner specifically designed for linoleum surfaces. This step will not only make your bathroom shine but also help protect the linoleum from damage and discoloration.
Regular Cleaning Routine
Sweeping and Vacuuming
Frequent sweeping and vacuuming is an essential part of maintaining a clean and hygienic linoleum flooring in your bathroom. As part of your regular cleaning routine, make sure to remove any loose dirt, dust, or debris that may have accumulated on the surface. Using a broom with soft bristles or a vacuum cleaner with a brush attachment, gently sweep or vacuum the entire bathroom floor.
Mopping with Mild Detergent
After sweeping or vacuuming, it’s time to give your linoleum flooring a thorough mopping using a mild detergent solution. The mopping process not only helps in removing dirt and grime but also ensures that your bathroom floor stays fresh and clean.
To create the cleaning solution, mix a small amount of mild detergent with warm water in a bucket. Ensure that the detergent chosen is suitable for linoleum surfaces and doesn’t contain harsh chemicals that can damage the flooring. Dip a mop or sponge mop into the solution, wring out excess liquid, and proceed to mop the linoleum floor using gentle, back-and-forth motions. Remember to cover the entire surface, including hard-to-reach corners and edges. Once finished, allow the floor to air dry or wipe it with a clean, dry cloth to prevent any water spots.
Removing Stains
Despite your best efforts, accidents happen, and sometimes stubborn stains can make their way onto your linoleum bathroom floor. Whether it’s a spill of toothpaste, makeup, or other bathroom products, it’s important to address stains promptly to prevent permanent damage to your linoleum flooring.
To remove stains from linoleum, reference the table below for specific stain removal methods:
| Stain Type | Removal Method |
|---|---|
| Fruit Juice | Dampen a cloth with warm water and gently blot the stain. If necessary, use a mild detergent solution and rinse with clean water. |
| Grease or Oil | Prepare a mixture of warm water and dishwashing liquid. Apply the mixture to the stain, gently scrub with a soft brush, and rinse thoroughly. |
| Ink | Use a cloth dampened with rubbing alcohol and gently blot the stain until it disappears. Rinse the area with clean water and dry with a cloth. |
| Mold or Mildew | Create a solution of equal parts water and vinegar. Apply the solution to the affected area, let it sit for a few minutes, scrub with a soft brush, and rinse with clean water. |
Remember, it’s important to test any cleaning solution or method on a small, inconspicuous area of your linoleum flooring before applying it to the stain, to ensure it doesn’t cause any discoloration or damage. In case of persistent or difficult stains, it’s always recommended to seek professional advice or assistance to avoid any further issues.
By incorporating these regular cleaning practices into your linoleum flooring maintenance routine, you can enjoy a clean, fresh, and beautiful bathroom floor that withstands the test of time.
Preventive Maintenance Tips
Proper preventive maintenance is essential to ensure the longevity and durability of your linoleum flooring in the bathroom. By keeping up with these maintenance tips, you can protect your investment and keep your bathroom looking fresh and pristine for years to come.
Using Mats or Area Rugs
One way to prevent premature wear and tear on your linoleum flooring is to strategically place mats or area rugs in high-traffic areas. These mats act as a barrier, protecting the linoleum from dirt, grit, and moisture.
Consider placing a mat near the entrance of your bathroom to capture any dirt or debris brought in on shoes. Additionally, using an area rug in front of the sink or tub can prevent water splashes and accidental spills from damaging the flooring.
Quick Tip: Opt for mats or rugs with a non-slip backing to enhance safety in the bathroom.
Avoiding Excessive Moisture Exposure
Linoleum flooring is resistant to moisture, but excessive exposure can still cause damage over time. To prevent this, take precautions to minimize moisture exposure in your bathroom.
When taking a shower or bath, use a shower curtain or enclosure to prevent water from splashing onto the floor. Make sure the bathroom exhaust fan is properly functioning to reduce humidity levels in the room. If you notice any water spills, wipe them up promptly to prevent prolonged contact with the linoleum.
Quick Tip: Consider applying a sealant or waterproofing agent to your linoleum flooring for added protection against moisture.
Regularly Inspecting for Damage
Regular inspections are vital to catch any signs of damage or wear before they worsen. By promptly addressing any issues, you can prevent further damage and extend the life of your linoleum flooring.
Periodically check for any cracks, scratches, or chips on the surface of the flooring. If you notice any damages, get them repaired immediately to prevent water seepage, which can lead to more significant problems.
Quick Tip: Use a soft bristle broom or vacuum with a non-abrasive attachment to regularly remove dust and debris from the linoleum flooring.
By following these preventive maintenance tips, you can enhance the durability and beauty of your linoleum flooring in the bathroom. Remember to use mats or area rugs in high-traffic areas, avoid excessive moisture exposure, and regularly inspect for damage. Taking these simple steps will ensure that your linoleum flooring remains in excellent condition for years to come.
Dealing With Common Issues And Repairs
Installing linoleum flooring in your bathroom can enhance the aesthetic appeal and durability of the space. However, over time, you may encounter common issues such as loose or damaged flooring, scratches and dents, or even the need to replace a damaged section of the flooring. Don’t worry, though! In this section, we will guide you through the process of dealing with these issues and making the necessary repairs to maintain the beauty and functionality of your linoleum bathroom flooring.
Fixing Loose or Damaged Flooring
If you notice that your linoleum flooring has become loose over time or has suffered some damage, it’s crucial to address the issue promptly to prevent further damage. Here are the steps to fix loose or damaged flooring:
- First, clear the area by removing any furniture or obstacles.
- Inspect the loose or damaged area. If there are any protruding nails or staples, use pliers or a pry bar to gently remove them.
- Apply a thin layer of linoleum adhesive to the subfloor using a trowel.
- Press the loose or damaged section of the flooring firmly onto the adhesive, ensuring it aligns correctly with the surrounding floor.
- Place a heavy object, such as a stack of books or a few weighted boxes, on top of the repaired area to help the adhesive bond securely.
- Allow the adhesive to dry completely as instructed by the manufacturer.
- Once the adhesive is fully dry, remove the weight and inspect the repaired area. If necessary, use a clean damp cloth to wipe away any excess adhesive.
Repairing Scratches and Dents
Scratches and dents are common issues that can occur on linoleum bathroom flooring. However, there’s no need to panic. Follow these steps to repair scratches and dents:
- Clean the scratched or dented area using a mild soap solution and a soft cloth to remove any dirt or debris.
- If the scratch is minor, you can use a colored wax filler or a felt-tip marker that matches the linoleum color to fill in the scratch. Apply the filler or marker, following the manufacturer’s instructions, and gently blend it in with a clean cloth.
- For deeper scratches or dents, you may need to consider using a patching compound or a linoleum repair kit. Follow the manufacturer’s instructions carefully to effectively repair the damaged area.
- After applying the necessary repair solution, allow it to dry completely.
- Gently sand the repaired area using fine-grit sandpaper to create a smooth surface.
- Finally, clean the area with a damp cloth to remove any remaining dust or debris.
Replacing a Damaged Section of Flooring
In unfortunate cases where a specific section of your linoleum bathroom flooring is extensively damaged beyond repair, you may need to replace it. Here’s what you should do:
- Begin by removing any furniture or obstructions from the area.
- Using a utility knife, carefully cut along the edges of the damaged section to separate it from the rest of the linoleum flooring.
- Once the damaged section is cut out, you can use it as a template to cut a replacement piece from a new sheet of linoleum.
- Apply adhesive to the subfloor, following the manufacturer’s instructions.
- Press the replacement piece firmly into place, making sure it fits seamlessly with the surrounding flooring.
- Wipe away any excess adhesive using a clean damp cloth.
- Allow the adhesive to dry fully before placing any weight on the repaired area.
By following these steps, you’ll be able to proficiently deal with common issues such as loose or damaged linoleum flooring, scratches and dents, and even replace a damaged section, ensuring your bathroom maintains its stylish appearance and functionality for years to come!
Frequently Asked Questions
What Do You Put Under Linoleum Flooring?
You should put an underlayment or subfloor under linoleum flooring.
Does Linoleum Flooring Have To Be Glued Down?
Yes, linoleum flooring typically needs to be glued down during installation.
Can You Put Linoleum In A Bathroom?
Yes, linoleum can be used in a bathroom. Linoleum is a durable, waterproof flooring option that is resistant to moisture and easy to maintain. Its versatile design options make it a popular choice for bathrooms. However, proper installation and regular maintenance are important to ensure its longevity and prevent water damage.
What Do You Put Under Bathroom Lino Flooring?
You should put an underlayment or moisture barrier under bathroom lino flooring. This helps to prevent moisture from seeping through and damaging the floor. It also provides a level and stable surface for the lino to be installed on. Make sure to choose a suitable underlayment for bathroom use.
Conclusion
Installing linoleum flooring in your bathroom can be a rewarding and cost-effective solution. By following the step-by-step process outlined in this blog post, you can achieve a professional-looking result while avoiding common pitfalls. Remember to properly prepare your subfloor, choose the right adhesive, and take necessary precautions.
With a little patience and attention to detail, you can transform your bathroom into a more functional and stylish space with linoleum flooring. Enjoy the process and the beautiful results!