
To install a liner in a shower, first clean and prepare the shower walls, apply adhesive to the walls, and then press the liner onto the adhesive. A properly installed shower liner is essential to prevent leaks and maintain the integrity of your shower walls.
Whether you are remodeling or building a new shower, installing a shower liner is a crucial step in the process. By following a few simple steps, you can ensure a secure and watertight installation. We will guide you through the process of installing a liner in your shower.
From cleaning the walls to applying adhesive and pressing the liner onto the wall, we will cover all the necessary steps for a successful installation. So let’s get started and have your shower protected!
Benefits Of Using A Liner For Your Shower
Protection against water damage
A shower liner is an essential component of any bathroom installation. One of the primary benefits it offers is protection against water damage. Without a liner, water can seep through the shower walls, causing mold, mildew, and structural damage. By using a liner, you create a barrier that prevents water from penetrating the walls, ensuring that your shower area remains dry and free from potential water-related issues.
Enhances the durability of your shower
Installing a shower liner not only protects against water damage but also enhances the overall durability of your shower. The liner acts as an additional layer of protection, preventing any potential leaks or cracks in the shower walls. This extra layer serves as a shield, ensuring that your shower remains strong and resilient over time. With a shower liner in place, you can enjoy a shower that stands the test of time without worrying about potential damage to the walls or surrounding structures.
Easy to maintain and clean
When it comes to shower maintenance, a liner makes your life a whole lot easier. Unlike traditional tile or other materials, a shower liner is incredibly easy to maintain and keep clean. With a smooth surface, it prevents the accumulation of grime, dirt, and soap scum. Simply wipe the liner down with a mild cleanser or soap, and it will look as good as new. Additionally, a liner eliminates the need for periodic grout cleaning or resealing, saving you time and effort in bathroom upkeep. Overall, the low-maintenance nature of a shower liner ensures that your shower always looks fresh and inviting, without requiring extensive and time-consuming cleaning tasks.
Different Types Of Shower Liners
When it comes to installing a shower liner, you have several options to choose from. Each type of liner has its own unique characteristics and benefits. In this article, we will explore three popular types of shower liners: PVC liners, vinyl liners, and fabric shower liners. Understanding the differences between these options will help you make an informed decision when it’s time to install a shower liner in your bathroom.\
PVC Liners\
PVC liners are a common choice for many homeowners due to their durability and affordability. Made from polyvinyl chloride, these liners are resistant to mold, mildew, and bacteria, making them an excellent choice for maintaining a clean and hygienic shower space.
PVC liners are available in various thicknesses, typically ranging from 8 to 24 mils. The higher the mil thickness, the more durable the liner will be. Thicker liners are less likely to rip or tear, ensuring that your shower remains leak-free.
Vinyl Liners\
Vinyl liners are another popular option for shower installations. Similar to PVC liners, vinyl liners are resistant to mold, mildew, and bacteria. They are also known for their ease of installation and maintenance.
Vinyl liners are available in different colors and patterns, allowing you to customize the look of your shower. They come in various thicknesses, typically ranging from 4 to 8 mils. While they may not be as thick as PVC liners, they still provide reliable protection against leaks.
Fabric Shower Liners\
If you’re looking for a shower liner that offers a soft and luxurious feel, fabric shower liners are an excellent choice. Made from polyester or nylon, these liners are often used in combination with a decorative shower curtain.
Fabric shower liners are known for their breathability, which helps prevent the buildup of moisture and reduces the risk of mold and mildew growth. They are also machine washable, making it easy to keep them clean and fresh.
Before purchasing a fabric shower liner, make sure to check if it has a waterproof backing. This additional layer provides extra protection against water leakage.
Now that you’re familiar with the different types of shower liners – PVC liners, vinyl liners, and fabric shower liners – you can choose the one that best suits your needs and preferences. Whether you prioritize durability, affordability, or aesthetics, there’s a shower liner out there that will meet your requirements. So, go ahead and install a high-quality liner to transform your shower into a functional and stylish space.\
Remove Existing Shower Curtain Or Liner
When it’s time to update your shower and install a new liner, the first step is to remove the existing shower curtain or liner. This process may seem straightforward, but it’s essential to ensure a clean and seamless installation of your new liner. Follow the steps outlined below to properly detach and dispose of the old shower curtain or liner.
Properly detach and dispose of the old shower curtain or liner
To begin, remove any hooks, rings, or attachments securing the old shower curtain or liner to the rod. If there are any clips or fasteners used to hold it in place, gently unhook or slide them off the rod.
Next, carefully detach the curtain or liner from the rod, making sure to avoid any unnecessary pulling or tugging. This will help prevent any damage to the rod or surrounding tile or walls.
Once detached, inspect the old curtain or liner for any signs of wear or damage. If it is still in good condition, consider donating it to a local shelter or recycling it if possible. However, if it is torn, moldy, or no longer functional, it is best to dispose of it properly.
To dispose of the old shower curtain or liner, check with your local waste management guidelines. Place it in a plastic bag, tie it securely, and dispose of it in the designated waste bin for non-recyclable plastics.
Clean the shower area thoroughly
After removing the old shower curtain or liner, it’s crucial to clean the shower area thoroughly. This will ensure a fresh and hygienic starting point for your new liner installation. Follow the steps below to clean your shower area effectively.
- Begins by wetting the entire shower area with warm water.
- Apply a mild cleanser or soap to a sponge or brush.
- Scrub the walls, floor, and any other surfaces inside the shower to remove any soap scum, dirt, or residue.
- Rinse the entire area with warm water to remove any leftover cleanser or soap.
- Dry the shower area thoroughly with a clean towel or cloth to prevent any moisture buildup.
By following these steps, you’ll ensure a clean and fresh surface for your new shower liner installation. Now that you’ve successfully removed the old shower curtain or liner and cleaned the shower area, you’re ready to move on to the next steps of installing your new liner.
Measuring The Shower Area
Accurately measure the dimensions of your shower
If you’re planning to install a new liner in your shower, one of the most important steps is to accurately measure the dimensions of your shower area. This will ensure that your liner fits perfectly and prevents any water leakage in the future. When measuring your shower, you need to consider the height of the shower pan, walls, and any additional fixtures that may be present.
Here are some tips to help you accurately measure your shower:
- Use a measuring tape: Start by getting a good quality measuring tape that can measure both length and height. This will help you get precise measurements.
- Measure the length of the shower pan: Start by measuring the length of the shower pan from one end to the other. Take the measurements at the bottom, middle, and top of the pan to ensure accuracy. Note down the longest measurement as it will be used for the liner.
- Measure the height of the shower walls: Next, measure the height of the shower walls from the top of the shower pan to the ceiling. Again, take measurements at various points along the walls to ensure accuracy. Note down the longest measurement as it will be used for the liner.
- Consider additional fixtures: If you have any additional fixtures in your shower area, such as soap dishes or built-in shelves, measure the distance from the top of the shower pan or walls to the fixture. This will ensure that your liner fits properly around the fixtures without any gaps.
- Add a little extra: It’s always a good idea to add a few extra inches to your measurements to account for any cutting errors or adjustments that may be needed. This will ensure that your liner covers the entire shower area and provides ample protection against water leakage.
By following these steps and accurately measuring your shower area, you can ensure that your liner fits perfectly and provides long-lasting protection for your bathroom. Taking the time to measure carefully will save you from the hassle of dealing with a poorly fitting liner and potential water damage down the line.
Assessing The Condition Of The Shower Walls
Before installing a shower liner, it is crucial to assess the condition of the shower walls. This step ensures that any existing issues, such as mold, mildew, or damage, are addressed before proceeding. By thoroughly examining the walls, you can determine whether repairs are necessary to create a solid foundation for your shower liner.
Check for any signs of mold, mildew, or damage
The first step in assessing the condition of your shower walls is to carefully inspect them for any signs of mold, mildew, or damage. These issues can undermine the integrity of the liner installation and lead to further problems down the line. To check for mold or mildew, look for dark spots, discoloration, or a musty odor. If you notice any of these signs, it’s essential to address them first.
Damage to the shower walls can take many forms, such as cracks, chips, or loose tiles. These imperfections can compromise the waterproofing ability of the liner and cause leaks. Carefully run your hands over the walls to feel for any irregularities. Take note of any areas where the wall feels rough or where tiles are loose or missing.
Repair any cracks or gaps before installing the liner
Once you have identified any mold, mildew, or damage in your shower walls, it’s crucial to repair them before moving forward with the liner installation. Repairing these imperfections will ensure that your liner is installed on a sturdy, smooth surface, preventing any future problems.
If you discover any cracks or gaps in the walls, you can use a waterproof filler or caulk to seal them. Apply the filler or caulk using a caulk gun, smoothing it out with a putty knife or your finger. Ensure that the filler or caulk is completely dry before proceeding with the installation.
If you notice loose or missing tiles, you’ll need to replace or reattach them. Carefully remove any loose tiles and clean the area beneath them. Apply a tile adhesive to the back of the tile and press it firmly into place. Allow the adhesive to dry completely before continuing with the liner installation.
By taking the time to assess the condition of your shower walls and repairing any mold, mildew, or damage, you are setting the stage for a successful shower liner installation. This proactive approach not only ensures the longevity of your liner but also provides a safe and clean environment for your daily showers.
Gathering The Necessary Tools And Materials
Gathering the necessary tools and materials is an essential step when it comes to installing a liner in your shower. Having everything you need at hand will make the process smoother and more efficient.
Shower liner
The first item you’ll need is a quality shower liner. This is a waterproof barrier that prevents water from seeping into the walls or floor. Opt for a liner made of durable material such as PVC or vinyl. It should be thick enough to withstand daily use.
Scissors
Having a pair of sharp and sturdy scissors is crucial for trimming the shower liner to fit your shower perfectly. You’ll need to cut the liner to match the dimensions of your shower space and around any fixtures or drains.
Adhesive or caulk
To ensure a watertight seal, you’ll need adhesive or caulk. These products are used to secure the shower liner in place and to seal any gaps or seams. Choose an adhesive or caulk specifically designed for bathroom use to prevent mold and mildew growth.
Measuring tape
Accurate measurements are key to a successful shower liner installation. Use a measuring tape to measure the length, width, and height of your shower. Plus, keep it handy as you install the liner to check if it’s aligned properly.
By gathering these essential tools and materials, you’ll be well-prepared to install a shower liner that provides effective waterproofing and keeps your bathroom free from potential damage.
Cutting The Liner To Size
Lay the liner flat and trim it according to the measurements taken earlier
Once you have gathered all the necessary materials and tools for your shower liner installation, it’s time to move on to the next step: cutting the liner to size. This step is crucial to ensure a proper fit and a professional-looking outcome.
To begin, lay the liner flat on a clean and dry surface. This will allow you to get an accurate measurement and make precise cuts. Use a measuring tape to measure the dimensions of your shower area. Take measurements from the top of the shower curb or sill, all the way to the top, and from wall to wall. Note down these measurements to reference as you cut the liner.
Next, you will want to transfer these measurements onto the liner. Start by marking the top edge of the liner with a pencil or a marker. Use a straightedge or a level to make a straight line across the liner based on the measurements you recorded. This line will serve as a guide for cutting.
When cutting the liner, it’s important to use a sharp utility knife or a pair of sharp scissors. Slowly and carefully cut along the marked line, applying even pressure to ensure clean and straight cuts. Take your time with this step to avoid tearing or damaging the liner.
Leave allowance for overlap and adjustments
When cutting the liner to size, it’s essential to leave a small allowance for overlap and adjustments. This will allow for a better fit and make it easier to install the liner around corners and edges. The amount of overlap you need will depend on the specific instructions provided by the shower liner manufacturer.
Typically, a 1-2 inch overlap is recommended. This means that when cutting the liner to size, you should add an extra inch or two to the measurements you took earlier. This will ensure that the liner covers the entire shower area, including any corners and edges.
Remember to take into account any fixtures or protrusions that might affect the fit of the liner. If you anticipate any adjustments or modifications, it’s better to leave a larger allowance to accommodate these changes.
By leaving an allowance for overlap and adjustments, you can ensure that the liner will fit snugly and securely in your shower, providing a watertight barrier and preventing any leaks or water damage.
Positioning The Liner
Properly positioning the liner in your shower is essential for a watertight seal and long-lasting functionality. By following these steps, you’ll ensure that your liner fits securely and covers the entire surface of the shower pan.
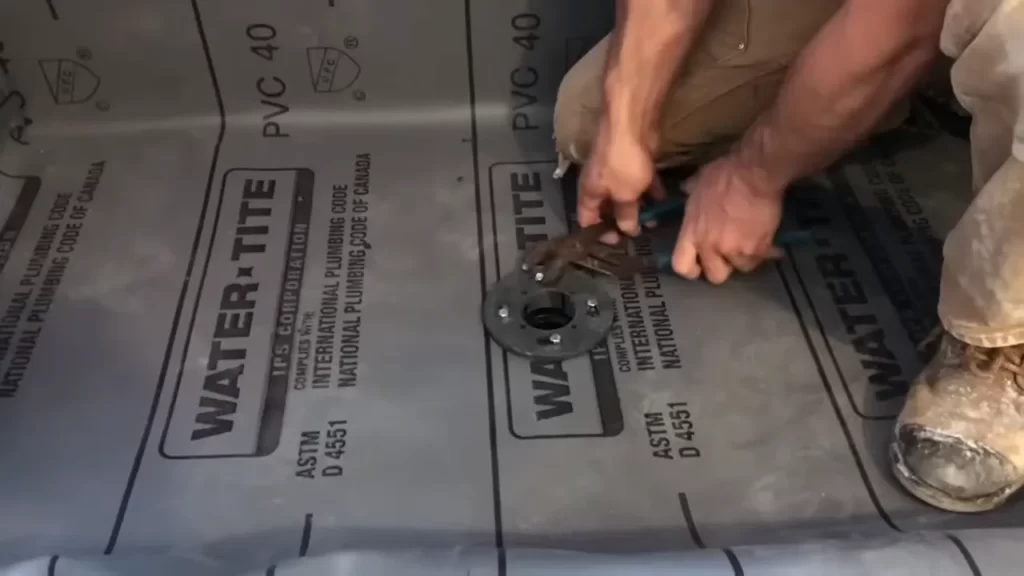
Start by placing the liner at the bottom of the shower pan, ensuring it covers the entire surface
Begin by unrolling the liner and placing it flat at the bottom of the shower pan. Make sure the liner is large enough to cover the entire surface, with no gaps or exposed areas. This will prevent any leaks or water damage.
When positioning the liner in the shower pan, it’s important to smooth out any wrinkles or folds to ensure a proper fit. If necessary, you can use a silicone caulk or adhesive to secure the liner to the pan, providing an extra layer of protection against water.
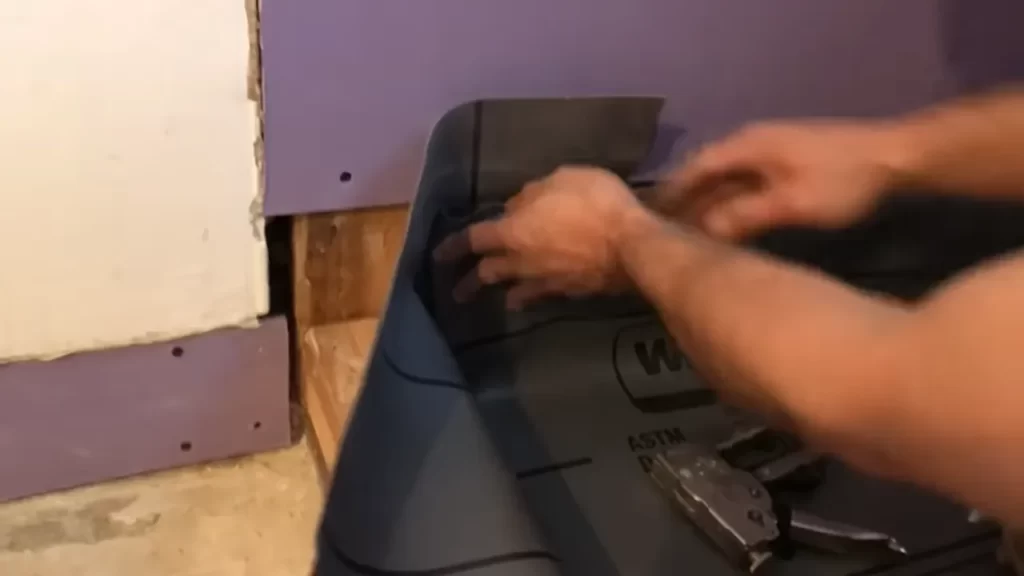
Carefully push the liner against the walls, following the contours
Once the liner is secure at the bottom of the shower pan, begin to carefully push it against the walls. This step requires attention to detail, as you want to ensure that the liner follows the contours of the shower walls.
By following the natural curves and angles of the shower walls, you’ll create a seamless and aesthetically pleasing look. The liner should fit snugly against the walls, with no gaps or areas where water can seep through.
To assist in this process, you can gently heat the liner using a hairdryer or heat gun. This will make the material more pliable and easier to manipulate, allowing you to adhere it to the walls more effectively.
Once the liner is in position, use your hands or a smooth tool to press it firmly against the walls. This will ensure that it adheres securely and forms a tight seal. Take your time during this step to avoid any mistakes or misalignments.
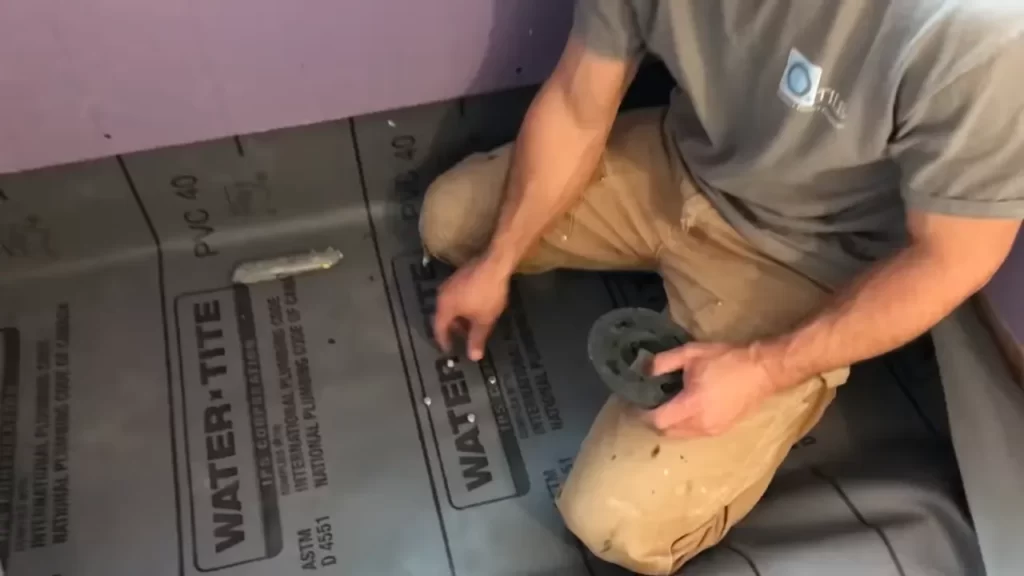
Securing The Liner
Once you have properly positioned the liner in your shower, it is time to secure it in place. Securing the liner is an essential step to ensure a watertight seal and prevent any leakage. Here are a few crucial steps to follow when securing the liner in your shower:
Apply adhesive or caulk to the corners and edges of the shower walls
One of the first steps in securing the liner is to apply adhesive or caulk to the corners and edges of the shower walls. This will help create a tight seal and prevent any water from seeping through. To do this, follow these steps:
- Clean the corners and edges of the shower walls thoroughly to remove any dirt or debris.
- Apply a generous amount of adhesive or caulk to the corners and edges using a caulking gun or a trowel.
- Smooth out the adhesive or caulk with a putty knife or your finger to ensure an even and consistent application.
Smooth out any wrinkles or bubbles in the liner
After applying adhesive or caulk to the corners and edges of the shower walls, it is important to smooth out any wrinkles or bubbles in the liner. This will help ensure a flat and seamless surface for your shower. Here is how you can do it:
- Start from the center of the shower and work your way towards the edges.
- Press down on the liner gently with your hand, smoothing out any wrinkles or bubbles as you go.
- If you encounter any stubborn wrinkles or bubbles, you can use a flat tool, such as a putty knife, to push them towards the edges.
Remember, it is crucial to take your time and be thorough when securing the liner. Any gaps or uneven surfaces can compromise the integrity of the installation.
Trimming Excess Liner
Once you have successfully installed the liner in your shower, it’s time to tackle the process of trimming any excess liner that may be protruding from the edges of the shower pan. This step is crucial as it ensures a neat and precise fit, completing the installation and enhancing both the functionality and aesthetics of your shower.
Remove any excess liner protruding from the edges of the shower pan
To begin, carefully inspect the edges of your shower pan to identify any areas where the liner may be extending beyond the surface. This excess liner can not only interfere with the proper fitting of your shower enclosure but also compromise its waterproofing integrity. Boldly marked and uneven edges are definitely an eyesore.
To remove the excess liner, start by using a sharp utility knife or a pair of sharp scissors. Gently score along the edge of the shower pan, making sure to follow a straight line. This will create a guide for your cut and prevent any unnecessary damage to the liner.
Next, applying steady pressure, carefully cut along the previously scored line. Take your time and ensure that you are cutting through the excess liner only, being cautious not to damage or cut into the original liner that is properly installed within the shower pan.
If the excess liner is particularly thick or difficult to cut through, you may want to consider using a pair of tin snips or aviation shears. These tools are designed specifically to cut through tough materials, such as heavy-duty shower liners, with precision and ease.
Once you have trimmed away the excess liner, take a moment to inspect the newly cut edge. Ensure that it is clean and free of any jagged or uneven sections that may interfere with the fitting of your shower enclosure. If necessary, use sandpaper or a file to smooth out any rough edges.
Now that you have successfully trimmed the excess liner from the edges of your shower pan, you can proceed with confidence knowing that your installation is not only secure but also visually appealing. Remember, the key to a professional-looking shower enclosure lies in the details, and taking the time to trim and tidy up any excess liner is a crucial step in achieving that desired result.
Regular Cleaning Routine
Maintaining a regular cleaning routine for your shower liner is essential to ensure it stays in pristine condition. By following a few simple steps, you can easily keep your liner looking and feeling fresh.
Wipe Down the Liner with a Mild Cleaning Solution Regularly
One of the easiest ways to keep your shower liner clean is to regularly wipe it down with a mild cleaning solution. This helps to remove any soap scum, dirt, or grime that may have accumulated over time. To do this, simply mix a solution of warm water and a few drops of mild liquid soap.
| Step 1: |
Prepare the cleaning solution by combining warm water and a few drops of mild liquid soap in a bucket or spray bottle. |
| Step 2: |
Dampen a soft sponge or cloth with the cleaning solution. |
| Step 3: |
Gently wipe down the entire surface of the shower liner using the sponge or cloth. Pay extra attention to areas that may be prone to buildup, such as corners and bottom edges. |
| Step 4: |
Rinse the liner thoroughly with warm water to remove any soap residue. Ensure the liner is well-dried before using the shower. |
Remove Any Stains or Mildew Promptly
Stains and mildew can be unsightly and difficult to remove if left unattended. By promptly addressing these issues, you can prevent them from becoming permanent and keep your shower liner looking like new.
Removing Stains:
- Mix a paste of baking soda and water to form a thick consistency.
- Apply the paste to the stained area and let it sit for a few minutes.
- Gently scrub the stain using a soft brush or sponge.
- Rinse the area thoroughly and dry it completely.
Dealing with Mildew:
- Make a solution of equal parts water and white vinegar.
- Apply the solution to the affected area and let it sit for about 10 minutes.
- Scrub the mildew using a brush or sponge.
- Rinse the area with warm water and ensure it is completely dry.
Preventing Mold And Mildew
Avoid leaving damp towels or clothing in the shower
Mold and mildew thrive in damp, dark environments, making your shower the perfect breeding ground. To prevent these unwanted guests from taking up residency, it’s important to eliminate any sources of excess moisture. One common culprit is leaving damp towels or clothing in the shower area.
Whether you’ve just enjoyed a refreshing shower or used your shower to hang up wet items, it’s crucial to remove them promptly. Moisture trapped in towels or clothing can seep into the shower liner, creating an ideal environment for mold and mildew to grow. To prevent this, develop a habit of hanging your towels or clothing outside the shower or in a well-ventilated area to ensure they dry completely.
Use a squeegee to remove excess water after each use
Excess water left on the shower liner is a recipe for mold and mildew growth. After each use, take a moment to remove the water using a squeegee. This simple tool will quickly remove any lingering moisture, ensuring that your shower stays dry and mold-free.
To squeegee effectively, start at the top of the liner and work your way down, using firm and consistent strokes. Be sure to cover the entire surface, including corners and crevices where water may accumulate. By incorporating this quick step into your shower routine, you’ll significantly reduce the chances of mold and mildew taking hold.
Remember, prevention is key when it comes to combating mold and mildew in your shower. By avoiding leaving damp towels or clothing in the shower and incorporating the use of a squeegee after each use, you’ll create an environment that is inhospitable to these pesky invaders. Keep your shower clean, dry, and mold-free with these simple steps.
Replacing The Liner
Monitor the condition of the liner over time
When it comes to maintaining the cleanliness and longevity of your shower, it is crucial to monitor the condition of the liner over time. The liner serves as a protective barrier against water damage, preventing leaks and ensuring a watertight seal. By regularly inspecting the liner, you can detect any signs of wear and tear before they become major issues.
To effectively monitor the condition of the liner, pay close attention to the following:
- Visible cracks or tears: Examine the liner for any visible cracks or tears. These can occur over time due to constant exposure to water and harsh cleaning chemicals. If you notice any damage, it is essential to address it promptly to prevent further deterioration.
- Mold or mildew growth: Inspect the liner for any signs of mold or mildew growth. These fungal organisms thrive in moist environments and can cause health issues. If you spot any mold or mildew, take immediate action to eliminate the source of moisture and clean the affected areas thoroughly.
- Stains or discoloration: Check for any stains or discoloration on the liner’s surface. These could be indicative of underlying water leakage. Investigate the source of the stains and address the issue to prevent further damage to the shower walls or surrounding areas.
- Liner elasticity: Assess the elasticity of the liner by gently pulling on it. The liner should remain flexible and spring back into shape without any signs of brittleness. If the liner feels stiff or shows signs of cracking when stretched, it may be time to consider replacing it.
Replace the liner if it becomes worn, torn, or damaged
If you notice any of the aforementioned signs of wear, tear, or damage, it is crucial to replace the liner promptly. Continuing to use a compromised liner can lead to water leakage, which can cause extensive damage to the shower walls, flooring, and underlying structures.
To replace the liner, follow these steps:
- Remove the old liner: Start by removing the old liner. Carefully peel off the liner from the shower walls and floor, taking care not to damage the surrounding surfaces. Dispose of the old liner properly.
- Clean and prepare the shower: Thoroughly clean the shower walls and floor, removing any adhesive residue or debris left behind by the old liner. Ensure the surface is smooth and dry before proceeding.
- Measure and cut the new liner: Measure the dimensions of your shower and cut the new liner to fit. Allow for a slight overlap on the walls and floor to ensure a watertight seal.
- Install the new liner: Starting from one wall, carefully position the new liner onto the shower walls and floor, smoothing out any wrinkles or air bubbles as you go. Press the liner firmly against the surfaces to create a proper bond.
- Secure the edges: Use adhesive or caulk to secure the edges of the liner, ensuring a tight seal against the walls and floor. Pay special attention to the corners and seams where water can easily penetrate.
By regularly monitoring the condition of your shower liner and replacing it as needed, you can maintain a clean and leak-free shower environment. Investing a little time and effort in liner maintenance will ultimately save you from costly repairs down the road.
Frequently Asked Questions
How Do You Secure A Shower Liner To The Wall?
Secure a shower liner to the wall by using adhesive or caulk specifically designed for bathrooms. Apply the adhesive or caulk along the edges of the liner and press it firmly against the wall. Use a squeegee or a smooth tool to remove any air bubbles.
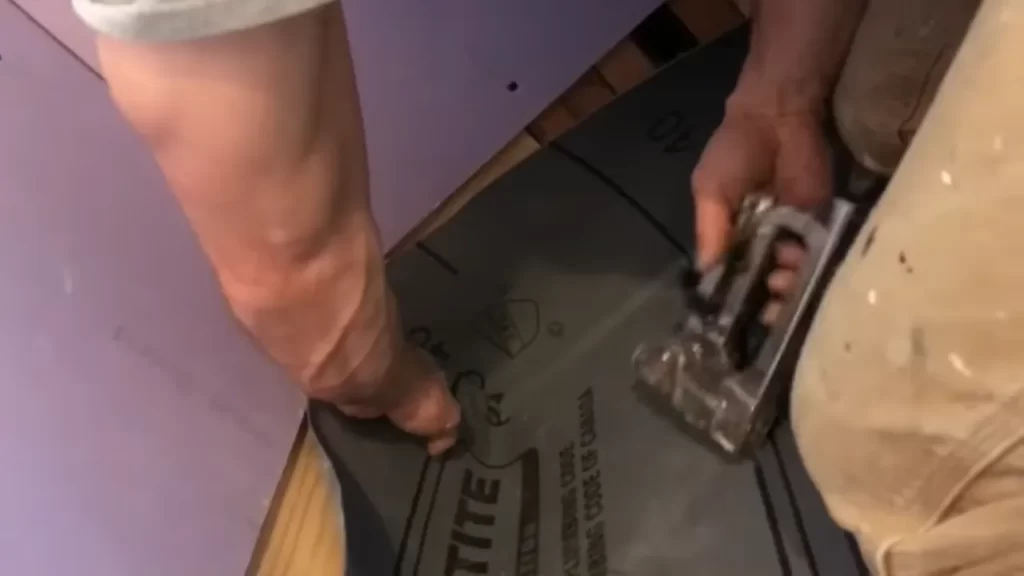
How Do You Fasten A Shower Liner?
To fasten a shower liner, follow these steps: 1. Clean the surface of the shower area. 2. Attach the liner to the wall with adhesive or tape. 3. Ensure the liner is smooth and wrinkle-free. 4. Use nails or screws to secure the liner at the top edge.
5. Trim any excess liner and seal the edges for added durability.
What Do You Use To Glue A Shower Liner?
The adhesive typically used to glue a shower liner is a waterproof construction adhesive. It provides a strong, durable bond to ensure the liner stays in place and prevents water leakage. Be sure to follow the manufacturer’s instructions for application and drying time.
Can You Tile Directly Over Shower Liner?
Yes, you can tile directly over a shower liner. It provides a waterproof barrier and a smooth surface for tiling. Just make sure the liner is securely adhered and free of any damage or leaks before tiling. Take proper precautions to ensure a successful tile installation.
Conclusion
Properly installing a liner in your shower is essential to prevent water damage and maintain the integrity of your bathroom. By following the step-by-step guide provided in this blog post, you can ensure a seamless installation process. Remember to measure accurately, clean the surface, apply adhesive carefully, and allow sufficient drying time.
With these tips, your shower liner installation will be successful, keeping your bathroom protected for years to come.